
Testing, Slicer Settings, Heat and Bed Adhesion
TPU Action – Post Processing
Max Neo Upgrades: Post Process Part of the TPU Action Series
Now, let’s discuss the ‘post process’ or TPU Post Processing after completing the physical upgrade of the Max Neo 3D Printer.
Moving on to the exciting part, we will delve into the settings, the testing process post-upgrade, and the outcomes of our efforts. As a sneak peek, we will explore the new ‘refurbed Max Neo’ (second machine), including its unboxing, post-setup testing, and transition to PETG filament for creating ‘usable’ or functional parts. All of this and more will be covered in our next article. So, we have addressed the reason behind the upgrade, which is primarily to enhance quality. Improving the quality issues has been and continues to be the main motivation for this upgrade. Additionally, the parts we have acquired for the upgrades aim to increase our success rate when using TPU filaments. Now, let’s get into the testing process.
Downloads: Firmware, Slicers, Web Apps and more:
Creality Links Suggestions (links removed if blocked, do a search for the following in that cause)
Creality Wiki
Ender 3 Max Neo: Product Firmware and Slicer
Sprite Pro Extruder: Sprite Extruder Pro
Creality Motherboard: Motherboard Firmware v4.2.7
Ecosystem – Sonic Pad: Creality Sonic Pad
Make Your Own Printables –
Creality Cloud (newer printers): Cloud 3d Printer Management
Tinkercad
Settings, Printables: Pre-made Royalty/Royalty-Free –
All3dp Slicer Settings: All 3DP Settings
All3dp Support: All 3DP Support Settings
printables.com/model
Thingiverse
Cults3d
Let’s Test, Power On The Machine and Go
Earlier we discussed the hardware upgrades and software required for the motherboard. Now, the real test begins… (drum roll please). Sharing the 40,000 foot view, we can cover slicer settings, quality improvements and how the machine is running TPU today. Ultimately, we will cover the TPU Post Processing steps at a higher level here, while providing detailed specifics in a stand alone feature article. Perhaps, we will cover each setting and how it affects print quality overall. So, we have completed the teardown, upgrade, and rebuild activities. Ready the machine, perform pre-launch checks, ensure all connections are properly seated, motor connectors and belts are connected and plug it in. Toggle the power switch ‘on’ and start making stuff. TPU Post Processing is a go!
Starting with PLA first, after upgrades, the out-of-the-box settings are fairly accurate. A generous e-step setting (e-step refers to the distance the direct drive will push the material into the extruder heating element is recommended. Lesson one learned: a tight fit, or concise grouping of slicer, motherboard/motherboard software and direct drive extruder can improve the quality of TPU prints.
Creality Ecosystem and TPU Processing
Keep in mind, the ‘ecosystem’ described above, works to apply the correct pressure, volume of materials, heat and adhesion for TPU filament as it passes through the direct drive extruder. Continuing on, each subsequent print and setting tweak can improve the target goals forming a quality print. Beare in mind, we are looking for improvement round-over-round of testing, inching us closer to a seamless print. PLA is fairly easy to work with and can run OOB (out-of-box) with OOB settings. Despite mismatched hardware flaws from previous builds, this new hardware runs the latest firmware logics, producing orderly prints. Additionally, with each print, make sure the printer has been leveled, aligned and bed plate cleaned. The goal is high quality TPU prints, creating that ‘happy path’.
Logically speaking, when moving through baseline testing, it is important to reduce flaws and misprints. In our case, this involves establishing a new baseline measurement of quality. The baseline serves as a guide for what to expect when using an out-of-the-box (OOTB) solution for PLA manufacturing or hobby printing. The goal is to eliminate flaws, blips and globs that can occur during the printing process. This article assumes that the machine purchased is shipped with necessary parts and that these parts are properly installed either installed either by the retailer or supply house.
Take a breather, you deserve it. it’s a nice feeling to complete the build. The easy part, for all intense and purposes is now over.
Build On Upgrade Successes
Generally speaking, machines come with a MicroSD card with some preinstalled printables, in our case Boaty and Bunny. These test prints will help test pre-sliced builds, slicer tests (more calibration tests) such as adhesion, temperature, flowrate, etc. The timeframe for testing effort covers more than 2 weeks (time-lapsed, of course) of work. In between coding and other work, that ‘happy path’ quickly moved us from basic PLA calibration and testing to minimal adhesion issues. PLA blips were corrected with filament flow changes, an increase in temperature at the extruder tip and reduction of heat at the bed. Note, turn fans off. Fans or cooling filament, TPU and PETG require high temps for optimal extrusion and bed adhesion. Bed plate temps vary depending on filament type, but note that cooling the filament is out of scope. It’s more of a hassle and does more harm than good.
If I haven’t explicitly state this in my previous articles, simply removing the fans or programmatically turning them off at the slicer helps maintain higher quality prints day over day. During the Bowden to Direct Drive conversion, the fans were removed for the formal TPU run. They were also nerf’ed for this build, as the quality print quality over consecutive prints is not sufficient for an ideal manufacturing process with 10 or more prints. A better solution to note here, reduce fan power (or turn them off) as TPU and PETG are finicky filaments.
Reduced Filament Heat, Not Good For Business
Simply reducing heat is not enough, the cooling process can actually lead to poor bed adhesion issues, which we will address. However, our main focus is on eliminating any shipping or physical/hardware issues that may arise during the startup process and initial PLA prints. When it comes to PLA testing, we need to answer the following questions: Did we install the parts correctly? Does the filament passthrough the extruder smoothly? Are any anomalies in the prints due to hardware or software issues or are they the new norm? In simple terms, does the machine and all it’s parts function as expected? The answer should be yes! Below, we have outlined the steps to ensure everything is working properly. Additional text and images will be included to provide further clarification for those who need visual aids, so stay tuned!
Post Upgrades, PLA Settings and Prints
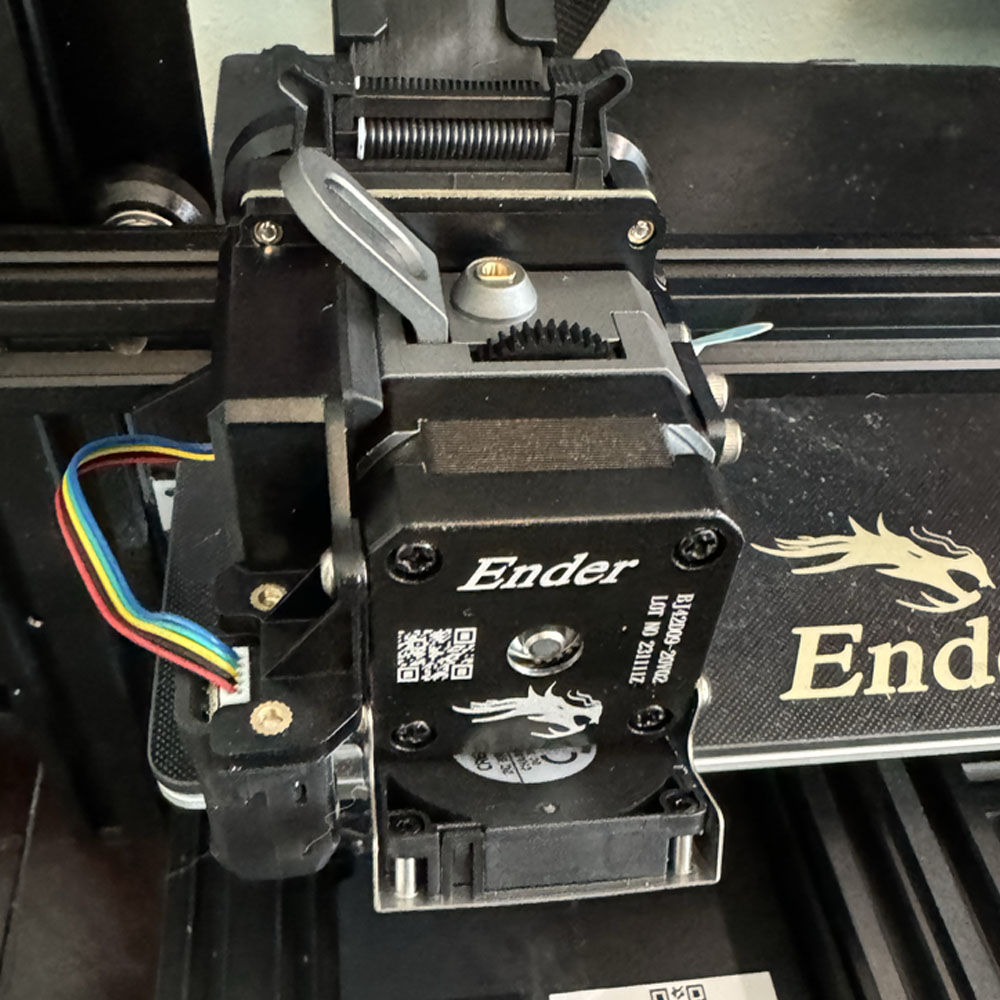
At Rest

First Print
Cylinder Test
Case Test
Camera (Webcam)
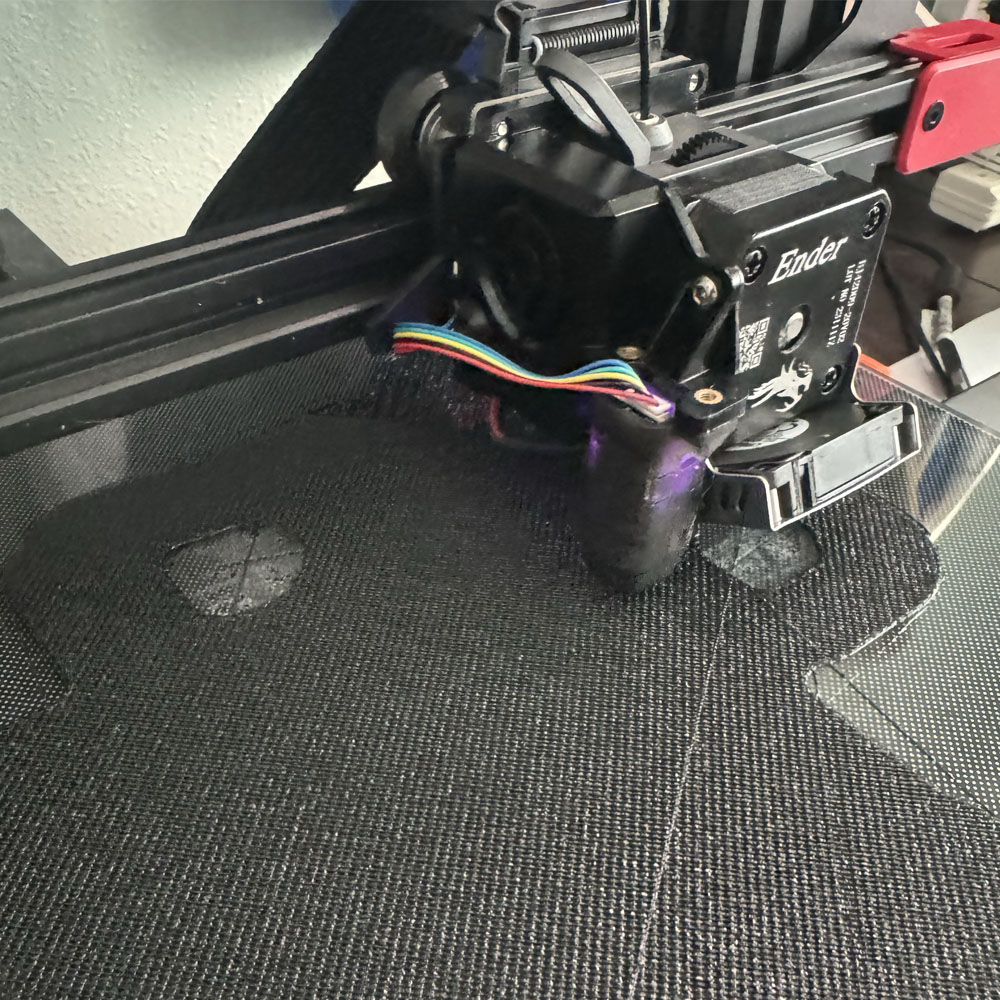
TPU Print
TPU Print Second View
Clean Up
Adhesion Problems
Filament Weight
Midnight Run
Smart Pad Crash
Sticking with moderate sized prints for larger sizes, the Max Neo is the largest bed plate available, quality, clean up effort and repeatability are all key factors in successful 3D printing. As they say, all’s well that ends well. Initially, PLA filaments ran smoothly, but bed adhesion issues arose when transitioning to TPU filaments, becoming a sore spot. It seems that all good things must come to an end (but we carry on). Work is ongoing, with bed adhesion remaining a concern. Test are ongoing as we search for the optimal TPU printing environment including machine settings, bed adhesion plates, temperatures, printing speed, e-steps, etc.
What has helped here is assuming users are using quality TPU filaments and a quality bed plate (textured or smooth) glass. Simple school glues, spray adhesives, and/or painter’s tape can quickly correct adhesion issues. Later on, we switched to using the Creality PEI bed plate and school glue for TPU and PETG prints, eliminating the need additional adhesives and their associated costs. Below, you will find a few of our successful prints, as well as some disasters, including late-night smartphone case print cycles and the decision to incorporate the new PEI bed surface.
Bed Adhesion, Sonic Pad Swap, TPU Settings Rollout
Duramic Run
Skewed Results
Stop The Press
TPU Run
Prep Surface
Peel PEI Surface
Bed Film Placed
Bed Ready
Adhesion crisis averted, we can now delve into the new Creality V4.6 Slicer. Download it now if you can or choose to do so. The slicer comes packed full of new mix settings and reliable ‘custom’ settings that we use during the transition from PLA to TPU. Custom filament tweaks on the slicer get the job done. These settings serve as the gate approval system, easily covering baseline testing and PLA-to-TPU mashups. It’s important to note that the slicer is crucial, along with the other hardware and software elements included in this build.
Ultimately, upon reflection, I believe this is where the success of this build truly shines. The success of TPU Post Processing depends on the slicer, its customization and support settings. Moving forward, despite previous builds having only moderate success, the new Slicer is excellent and quite serviceable. I must mention the failures of the Sonic Pad here – we have decided to forgo the Sonic Pad for now and instead opt for the Wifi 2.0 boxes or manual printing using the Max Neo MicroSD and LCD interfaces at the machine. Honestly, it’s the build ecosystem the firmware, slicer, motherboard, and Sprite Pro extruder that has allowed us to achieve a level of quality that we were unable to attain in the previous builds. More on this will be discussed in another article.
Accessories, Bed Adhesion and Latest Settings
Moving on from the slicer settings and Sonic Pad issues, I decided to use the Wifi Box 2.0, with latest firmware to improve creature comfort while printing. This allows me to print from a seated position at my desk eliminating the need to constantly go back and forth between my desk and the printer for tasks like creation, slicing, MicroSD management, and selecting print. Additionally, I added a camera to work as a webcam, enabling me to print untethered or engage in hobby-level production. This upgrade can be likened to a ‘power up’ in Super Mario Bros. providing enhanced functionality. The upgraded webcam allows for seamless printing from the slicer to the printer using the Wifi Box.
We will address the challenges of using a Wyze webcam in a separate article. This article will provide a step-by-step guide for converting your camera. We will also include videos and the best guides to follow when converting your Wyze camera to a webcam. In conclusion, Wyze offers an affordable alternative to other webcams on the market. By using a simple fix, developer-built code, and easy button combinations, you can easily convert your Wyze camera into a webcam. Now, let’s move on to TPU prints.
Various TPU Filaments, Smartphone Case Tests, Clean Up
Grey Duramic
Grey Case
Parts At Once
Creality TPU
TPU Objects
TPU Container
Tertiary Case
TPU Cleanup
Legacy Case
Legacy Case
Cleaned Up
TPU Comparison
Production Variation
Thirdly, let’s discuss adhesion. As as we progress through TPU testing or post processing, PLA and TPU prints have ‘adhesion issues such as peeling or damage that appears to be caused by severe temperature changes. This is a good opportunity to address adhesion settings. Balancing bed temp and extrusion temperature is an ongoing testing process that you will become very familiar with when working with 3D print production. Think of it as a blend of art and science when working with 3D printers, printables and open source or custom designs.
Overall, if you don’t pay attention to adhesion and temperatures, things can quickly become difficult, especially with production variations using TPU filaments and even more so with PETG filaments. It’s important to maintain control, and a small amount of adhesive can make a big difference. With the upgraded motherboard, extruder, PEI build plate, and proper adhesion using school glue, you can have better control. Pay attention to settings, especially when it comes to support (use a generous amount for support at the plate) and bed plate adhesion like using the raft selection.
Temperature Improvements and Optimal Settings
Ideal or optimal slicer settings work to complement a brim/auto brim or raft adhesion type. With the addition of what has been tested to be the best bed adhesion type… temps at 250 degrees, bed at 0 degrees, (fan at 0) and speed at 50%. Three products were tested: heavy strength spray adhesive, painters tape and simple school glue. Testing suggestions, again, not required, but more as a release agent. Now, the opposite can be said for PETG, which we will cover in another article. Those settings are still being worked out. As you can imagine, working through the TPU settings took about ~2 weeks of effort, PETG has a much longer testing effort.
Today, we have gathered and processed with what may be the optimal TPU Slicer settings. A new camera position, guided by fewer misprints in our testing efforts, has been implemented to reduce production flaws like blips, or globs, traveling over the print. We have managed to nail down or complete what feels like the final tweaks for TPU printables. Therefore, before we introduce PETG (which can be challenging on its own), we have minimized difficulties and ensured high quality. Before we transition away from TPU, I would like to highlight both the successes and failures in achieving quality. We are gradually transitioning from hardware/software upgrades to different filament types such as PLA, TPU, and now PETG. We are exploring factors such as heat, bed temperature, support and bed adhesion methods.
Wrap up and Conclusion
PETG filaments introduce a range of new adhesion issues, making clean up a nightmare. Additionally, while the quality of prints has improved in terms of smoothness and clarity, all prints require some form of ‘final processing’ or deburring. To build on the success of TPU printing, we have invested in additional tools such as Klein Tools Flush Cutters and AFA Deburring Tool Set. These purchases aim to enhance post-print output, with the goal of significantly improving final production or shippable pieces with typical manufacturing process (design, construction, production, shipping).
Finally, at the end here, we touched on the TPU Post Processing setup. Let’s share some more images for those who enjoy visuals, think of it as a snapshot of ‘where we are today’… one click printing, high quality prints, replicable from PLA to PETG, camera, and wifi box 2.0. Let’s cover the initial PLA testing, the TPU filament torture test (array), and final print slicer/WiFi Box settings on the next episode of TPU Action!
Slicer Tweaks, Latest Prints
Web Cam
Test Builds
New TPU Filament
Matching Tool Station
WiFi 2.0 Box
Matching WiFi Box
Full Setup
Revisit previous posts in this series which cover the new filament spool upgrade, upgradable parts such as hardware, accessories, filament and current pricing. All of these items can be found on the Shopping List. Alternatively, you can read about the upgrade process and the successes achieved along the way.