Tech | Tools – Highlighting, promoting and sharing the technology and tools (both digital and physical) used through the problem solving process. In some cases, learn from our testing efforts, as there might be items in this category you may want to avoid. So, treat this as an experience, an experience when using such tools or technology.

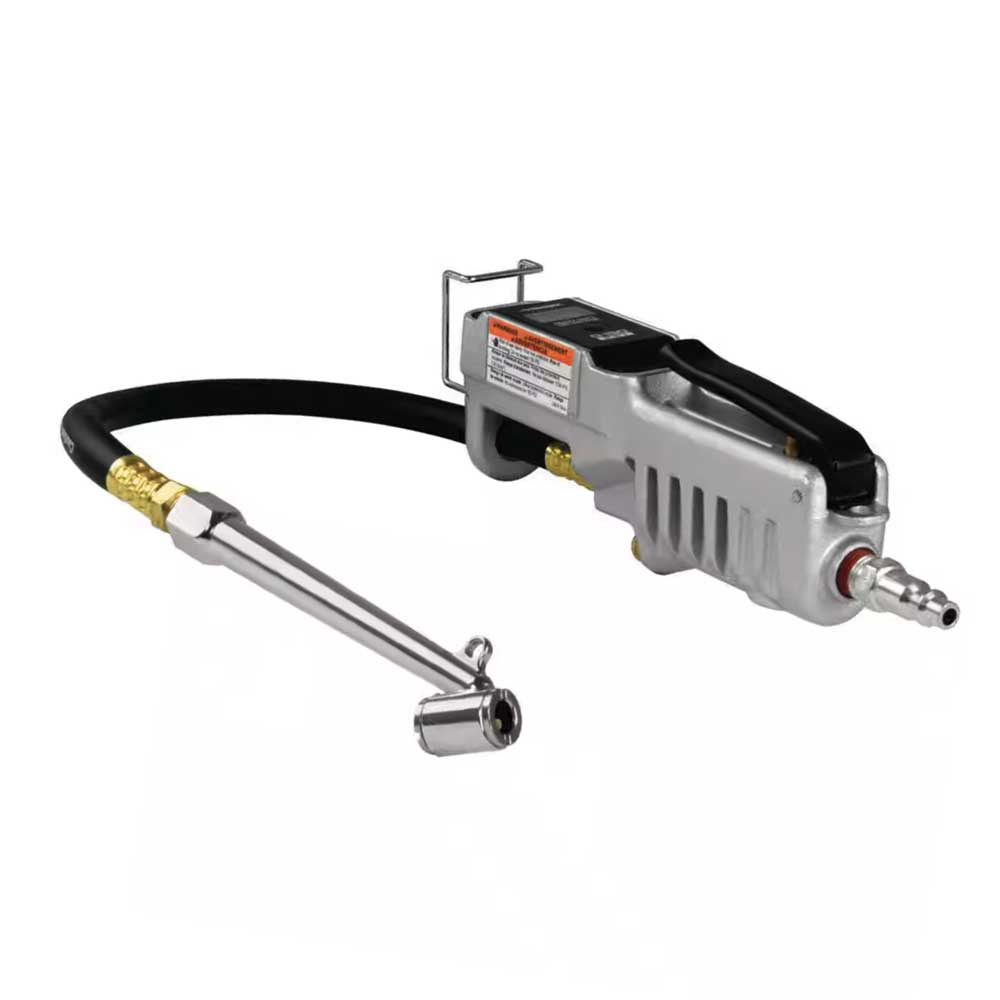
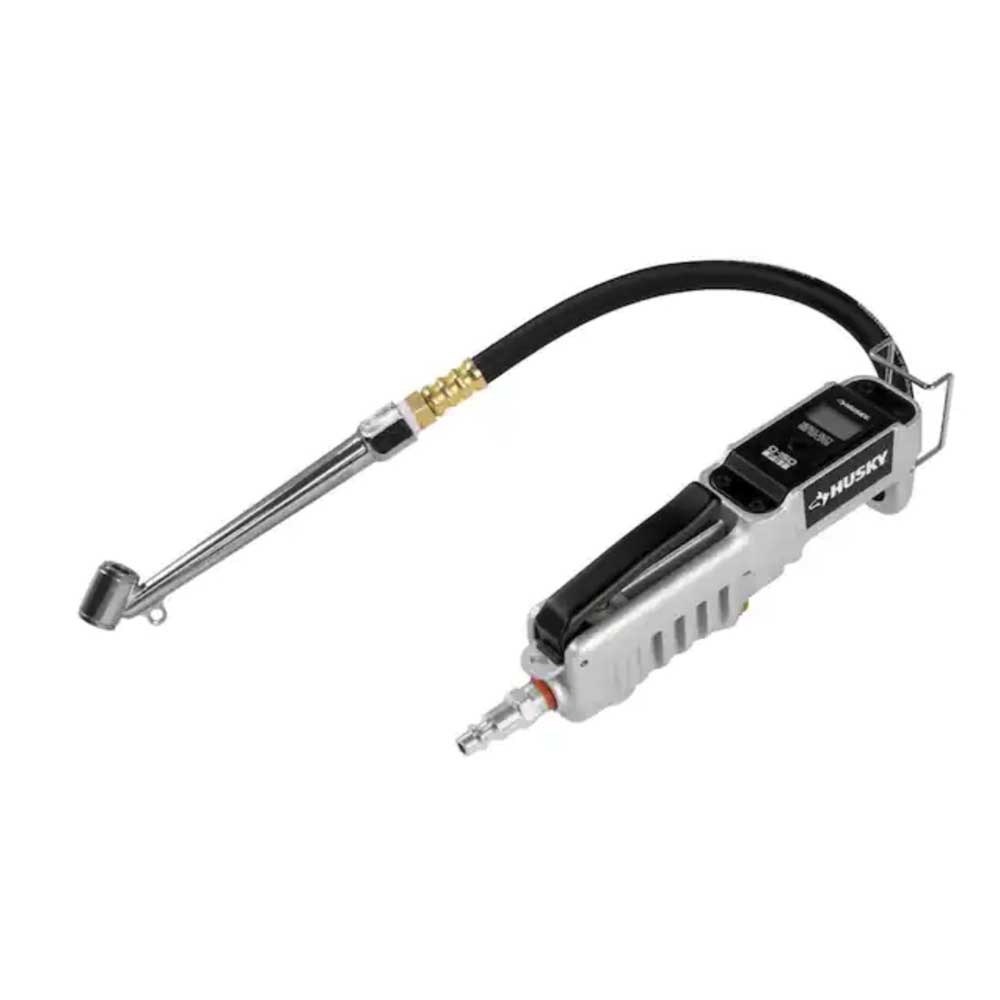
Husky Heavy Duty Inflator

Husky Brand Air Tools

Husky Heavy Duty Inflator and Tire Pressure Gauge

Brown Widow

Tech | Tools – Air Compressor Inflator

The Husky Heavy Duty Digital Inflator

I am not very familiar with the Husky brand or line, but I picked this up at the store. The recent weather change triggered the TPMS notification requesting air. This is not unusual, as following the summer months or just at the peak of winter, automotive tires require regular maintenance. As mentioned in our more recent posts – Kreg Measuring Tools, calipers, backlog post and gadget update, we’ve got some more air tool coverage coming your way. We’ll be picking up nailers and air wrenches next. This article will focus in on more air tools and the compressor we use around the shop. The same goes for trucks, farm and yard equipment. You can never go wrong with a tire gauge and an air inflation system. In any case, I wanted to give this a try over the next couple of months to see what kind of life we can get out of the Husky Tire Inflator.

Inflator and Compressor

I bought this one specifically because of the digital gauge. Most others are manual or have tire pressure dial-style gauge. There is nothing wrong with those, just wanted to see if the money was worth spending for digital read out. As far as an inflator, the tool has all the power and air it needs. Here are the tool specifics:

  • Multi-purpose, tire pressure gauge and inflation with variable PSI output
  • Suitable for cars, trucks, ATVs, golf carts, and motorcycles
  • Requires 2 AAA batteries (included)
  • Temperature Range -20°F to 120°F
As a side note, I bought the inflator to go with the DeWalt 2.5 Gallon Portable Electric Air Compressor (find this at your local hardware or big box hardware stores). It is a handy light weight compressor with 90 PSI, a 2.5 Gallon Tank, and a max PSI rating of 200. It is easy to use, with dual quick connectors, ball valve drain, etc.  A great compressor to have around the shop for light duty work.

Anyhow, look for an update or two over the next few weeks. We are looking for longevity, wear and tear. Check back for more.

Highlights and Takeaways

Need some air? A TPMS alert? Are my tires under inflated due to a weather change, or something worse like a puncture or complete failure?

Air Compressor Tool – Tire Gauge and Inflator

Gauge And Inflator

blank

Digital Display

DeWalt Air Compressor

2.5 Air Compressor

DeWalt Compressor

Quick Connectors

Takeaway

Keep your tires inflated, and stay safe on the road. Regular testing, regular cleaning and maintenance will help prolong the life of your tires. Also consider picking up the Husky Heavy Duty Air Inflator, or DeWalt Portable Air Compressor at your local retailer. Let us know your experience or share the brand/system you use in your shop or maker space.

Interested in other tool articles, reviews or commentary? Check out the reviews on our newest hand tools as we update our tool kit. You’ve gotta love handy tools and equipment that work; tools that just work. Anyhow, give these articles a read, more to come.

Matrix Bench Power Supply

Variable DC Bench DC Power Supply

Supply, Control, Test and Power

Matrix Bench Power Supply

Tech | Tools – Matrix DC Power Supply

The Matrix DC Power Supply – This Power Supply is variable, adjustable Bench DC Power Supply, used for testing, maintenance and more

If you need more power on the bench, power more than the supplied battery or charging cord. If you have not lost or damaged the manufacturer supplied leads and cables. consider getting yourself a Matrix Bench Power Supply. It’s easy to use, portable, compact, self-regulating and lightweight. Adding a new bench supply to your lab, maker-space or home office can be beneficial.

We highly recommend Matrix Power Supplies, and are excited to try out the new Matrix MPS-3210. An affiliate link will be posted on our Shop Page – under electronics.

If you already have a bench power supply and would like to share your own commentary or recommendations, feel free to drop them in the comments section below. We always enjoy learning about others’ experiences and appreciate healthy product competition. If you do not have a bench supply, consider checking out Matrix Power Supply to see if there’s a Matrix model that fits your needs.

Kreg Measuring Tool

Multi-Mark Multi-Purpose Marking and Measuring Tool

Carpentry Tools & Accessories

Kreg Tool

Tech | Tools – Measure, Mark, Prep Tool

The Kreg Measuring Tool – Measure, Mark; Multi-use metal, 3d printing, wood or carpentry.

Whether you’re at home, around the office, or in the shop. You’ll need something like the Kreg Measuring and Marking tool. One tool for measuring angles and mark up wood or metal. The Kreg Measuring Tool is a versatile and usful tool for finding angles. This tool is perfect for measuring right angles on-the-go, making layouts easily repeatable and ensuring accuracy while working int he field or on various projects. I personally own one now and I find it incredibly easy to use, handy for setting standard angles like 90 and 45 degrees, or manually adjusting the slide as needed. The Kreg is truly unbeatable in my opinion, for marking, designing, measuring and leveling in the field.

Mark & Design
Measure

Measure

Mark

Mark

Angles

Angles

Multi-Purpose

Multi-Purpose

I recommend Kreg Tools,  for all tasks, marking-to-measuring. I have also used both the pocket-hole jig set… Other, new hand tools (coming soon, out by the time you read this and same for the new calipers), calipers. These tools go wellw with the theme of this post, measuring tools are usful for my 3D prints and I will soon be writing up an article on the pocket-hole set.  Be sure to check out the Kreg multi-purpose tool and other Kreg tools on our Shop Page – tools.

Hand Tools

More Tools Around The Shop

Flush Cutters, Manual Sharpeners/Quick Edge Tools, and The Wen Bench Grinder

Klein Tool Diagonal Cutting Pliers

Uncover new tools, cutters, sharpeners and bench grinders!

Discover new hand tools like the Klein Tool flush cutters, Speedy Sharp burr tool, Smith’s and Benchmade sharpeners. For those big jobs, consider the Wen Bench Grinder. Need to cut something quickly and confidently? Utilize the Klein Tool Diagonal Cutting Pliers. If you have dull knives and carving tools, shop our favorite tools, measuring tools – Kreg mark and measure, calipers and learn more about the Benchmade and Smith Manual Field Sharpeners. For tough outdoor steel, rely on the Wen grinder.

Flush Cutters and Speedy Sharp
Cutters

Klein Flush Cutters

Sharpeners by Speedy Sharp

Speedy Sharp

Hopping into the more refined tools that are essential to have in the shop, those that aid in working more efficiently. Let’s begin with the Klein Tools flush cut pliers, perfect for cutting without leaving any rough edges. Say goodbye to dull carving tools or chisels. Get your hands on a variety of manual sharpeners, progressing from the Benchmade Field Sharpener, to the Speedy Sharp to remove and define that burr.

While you’re out in the field the guided Smith’s pocket sharpener is ideal for hooks and quick edge work. Additionally, for tools that require fine sharpening and extra power when steel is necessary for outdoor tasks such as cutting grass, wood chisels, hand tools and scissors that need some special attention, the Wen Bench Grinder.

Generally speaking, the official name for flush cutters is diagonal cutting pliers with precision, or wire ‘snips’ in layman’s terms! Previous posts have covered deburring tools, like the AFA Deburring set or the Klein Tools screwdrivers. While those tools have been discussed in previous posts, today we are focusing on flush cutters. Surprisingly, flush cutters are used daily in the shop, garage and yard. I use these cutters all the time, with an easy-to-use ‘squeeze’ and firm handle setup, sometimes spending hours cleaning up prints or cutting zip-ties. It’s helpful to have a comfortable set of cutters around the office.

Additionally, flush cutters, as implied by the name, leave zip ties and copper wires clean and snag-free. Maintenance is easy – simply spray lubricant on them every so often, towel dry, and then run them through a sharpener for clean, flush cuts as intended. All you #makers out there, make sure to have a sharp pair of cutting pliers (snips) for any delicate wire work or clean-up effort.
Cut A New Edge, Forming An Edge (Burr)

Moving on, those of you who use hand tools  such as carving knives, whittling knives or field knives, it is important to keep a proper edge on them. Who can forget about the Speedy Sharp sharpeners? When a new edge is needed, turn to Speedy Sharp for a quick repair or to fix a damaged blade or broken edge. Simply run the diamond cutter across the damaged area quickly to create a new, fresh edge that is perfect for our next step. Hone and clean up the edges with the Smith’s pocket sharpener, which allows for coarse to fine edge work. By doing so, we are one step closer to achieving a fine edge.

Smith’s Pocket Sharpener, Benchmade Field Sharpener
Sharpener by Smith

Smiths Pocket Sharpener

Sharpener by Benchmade WorkSharp

Benchmade WorkSharp

Tools & Sharpeners

Tools & Sharpeners

Sharpeners for small tools

Sharp Tools

Introducing the Benchmade Field Sharpener designed specifically for knives and other hand tools such as scissors or fishing lures. This compact field sharpener is perfect for fine-turning edges while out in the field, creating a precise 20-degree edge angle for most pocket knives and carving tools.  Finish off your sharpening process with the ceramic edge for an incredibly sharp finish, and use the strop on the other end for a polished touch. This handy field sharpener is a must-have for any workshop Stay tuned for our upcoming article on sharpening stones, going up-to 8000 grit!

Tool Variety, Applications and Wen Bench Grinder

Let’s dive into the world of cutters, sharpeners, and bench grinders as we wrap up with the Wen Bench Grinder. Do you have an old worn out scythe, pruners, axes or tree trimming knives? Are you a farmer in the field who needs a high-quality bench grinder to fix your field tools? Whether you need to fix warped edges or hone those stubborn cutting edges on old, tough tool steel the Wen Bench Grinder is the perfect choice.

All-In-One Bench Grinder
Bench Grinder by Wen

Wen Bench Grinder

Power when you need it, unlike hand tools, this grinder has variable speeds to help grind away rust, age, work blemishes, fractures and dents. You can’t go wrong with the wheel options, which include both an 80/36 grit wheel option, a light and guards/rest so that a sharpened edge may emerge. Perfect for bigger jobs, providing power when you need it.

More tools you say? Check out the following: , or may be you need something bigger, bolder… lightning! how about the Lincoln Electric 140 Welder? How about what’s on the Gadget Backlog – ? Working on that car again I see, pick up a telescoping magnetic picker… fan favorite by the way! Same for the Calipers, I like our updated caliper set by Mitutoyo, an upgrade from the Neiko set. All relative to the post and to have around any shop, office or garage space.

So far,  we’ve covered the best guided, field hand sharpeners, flush cutters and bench grinder for our #makers space. Leave a comment below for other suggestions, hand tools or sharpeners to have around the shop.

Part 2 – Latest Drawing Tools

Moleskin Pads, Staedtler Instruments, Princeton, Liquitex and More

Part 2 – Pencils, Pads, Tools and More

Moleskin Art Album

Part 2 – Latest Drawing Tools,  ‘Tools of The Trade, Markers, Pencils, Precision Tools, Erasers, Brushes, Paint Markers and More’ series

Need supplies quickly? In Part 2 – Drawing Tools, we will discuss supplies that are running low and those that have been used around the shop for the longest time. Some of these supplies have been with me for 15 years, and others for over 20 years. In previous post, we talked about the Amazon Affiliate direction. For continuity and to prepare for upcoming posts in early to mid-June about our 3D print upgrades, it’s important to have the right parts. So, let’s share the latest list of art supplies. Check out part two of our to-do list on the producer’s product page. 

Part 2, Continues

In Part2 – Latest Drawing Tools we will focus less on the items mentioned above, as they are already essential in my drawing kit. However, we will discuss easels, additional brushes, and Moleskin albums or pads. The list of supplies goes on, including math sets (squares, compass, angles), sharpeners, on-the-go pads or albums, paints, paint markers, and drawing tools (mechanical) to keep on hand.

Recent Purchases, Recommendations

Moleskin – Art Watercolor Album 3.5×5.5 inch, (1 pad, 60 sheets)
Staedtler 4H Pencils – Mars Lumograph Pencils 4H (12)
Staedtler Instrument Math Set – Writing Instrument Math Set (14)
Staedler Mechanical Pencils* – Mechanical Pencils (3)
Strathmore – Sketch Pad, 8.5×11 inch, 1 pad (100 sheets)
Luxi – Sketch Book, Top Spiral, 9×12 inch, 1 pad (100 sheets)

Princeton* – Aspen Series Paint Synthetic Brushes, Acyrlic and Oil (5)
Liquitex – Marker set – Liquitex Professional Paint Marker Set, Monochromes (3)
Liquitex Markers – *Individual – Professional Paint Marker, Carbon Black (1)
Acrylic Paint BASICS Acrylic Paint Set, Tube Set (48)

More Recommendations

First, easels are a tough, rare breed of ‘kit’ to have around the shop. I’ve used desktop easels, metal easels and composites of some kind, only to come back to the Studio H. The Studio H can be found on Blick, specifically the Blick Studio Heavy-Duty H-Frame Easel, which is more importantly on wheels! I’m going to brag on this H-frame easel for a moment.  While other easels can be found on Dick Blick or Utrecht, this easel is tough, agile and easy to put together.  It has a nice shelf for convenient storage, where you can store additional tools, rulers, or markers, especially nice to have when using those Liquitex paint markers mentioned above. It’s easy to clean, accommodates oversized work,  and sits on wheels, so maneuverability and the ‘space’ the easel consumes around the shop can be kept to a minimum.

Brushes

Next, let’s talk brushes, specifically the Princeton Catalyst Series brushes and *Golden/Utrecht acrylic paints. Occasionally, I will buy second-hand or slightly flawed brushes so that I always have the right brush for any situation. Therefore, the Princeton Catalyst and Aspen series are my go-to brushes for acrylics. I also want to mention that I consistently use Liquitex Basics-to-Advanced viscosities of paint. I stock up on Basics for commonly used colors, while opting for high-density, firm acrylics for filling, highlighting, or shadowing. It has been quite some time since I changed my paint selection, approximately 27 years ago. Regardless, easels, paints and brushes can all be found on our shopping list page. Feel free to browse those items in the cart, as they have been purchased multiple times.

In closing, we highly recommend the items listed on the shopping list, as they have been purchased more than three times over. In certain cases, such as the Liquitex paints, they have been purchased for over 27 years. Supply consumption varies, as supplies come and go. A never-ending cycle.  Therefore, I like to occasionally add new items to test, place on the bench, and experiment with. It’s always important to test new supplies, versus those that are necessary for immediate purchase. Discover the supplies that best suit your needs and circumstances. Enjoy and good luck with your creative endeavors. Refer to Part One for more information.

Lastly, Keep Building Your List

Let’s end with an old saying ‘No pain, no gain’. I would venture to say. While building your supply list can be daunting and suppliers change, solving the problem of the list is the fun part. Sometimes things work out, while others should remain in the trash receptacle (or, on the never buy list).  It’s part of being a consumer, which involves consumption, right? In all honesty, this part can be fun, so make it enjoyable! Turn it into a game if you choose, wheel and deal.

Before we move off of the new supplies. I don’t want to forget a few other upgrades around the office to share such as the GTRacing Mesh Back Chair a new upgrade here in the office… long awaited change, and time for the older model to be replaced with a new mesh back gaming chair. The Fisher Space Pen for you outer space fans… posted back in January 2021. Awesome pen, I use it on the road for any and all writing needs! Check back in a few weeks for updates. Items to look out for on the list include Moleskin pads or albums, and a few other goodies. Spoiler alert: there are additional 3D print upgrades, parts, and a new series just around the corner… less than a week away!
 

Latest Drawing Tools

SHARPIE, Sakura, Ohuhu, Prismacolor and More

Illustration Kit – Pencils, Pads, Tools and More

Ohuhu Marker Set

Latest Drawing Tools, Tools of The Trade

What will it be? Markers, pencils/coloring pencils, precision liners, erasers, brushes, paint markers; need more? Come shop online with me. We can look for refills, thin-liners, chiseled markers and new additions like the Ohuhu Alcohol Markers to expand our toolkit.

Amazon Affiliate Shopping List

Let’s talk about the Amazon Affiliate Shopping list. Recently, I’ve included the option to share Amazon products as an affiliate. This allows me to share products and recommendations for items I personally purchase for the shop. In this instance, we will discuss thin-liners, markers, and line tools, in order to provide our thoughts on products you may be interested in purchasing. 

Even better, think of it  as a reference guide with recommendations for items that have yet to be purchased. For those who have already made selections, a bookmark could be useful to have around your work area, especially if you aspire to be a hobbyist or professional designer.  Regardless, this post serves  as a vehicle to promote Amazon Affiliate products via Amazon, among others. As you may have noticed, we do not heavily promote our content on social media, so the content in this first part is an effort to share our experiences with products in the market or perhaps just an exercise in futility.

In the coming weeks, I will be delving into each post, updating product links, and reposting links to products as *an affiliate  to assist shoppers like you in purchasing goods and services that we recommend. The shopping list, or ‘shop with us page‘ is now available here. This is particularly important for new posts, links, and future posts to share, add value or share our experiences with the products and services we use.

TPU Action

Moving forward, let’s consider the items mentioned in our early June posts regarding ‘TPU Action‘. A list of parts has been provided for you to browse and purchase for your shop! Take note of my mistakes (they could save you money) or simply think of it as putting money back in your pocket. Additionally, for those of you who are able to buy supplies through Amazon, or Prime, I will be sharing discount codes at a later date (not toady, as I’m currently working to find deals and affiliate links). I will also be mentioning specific days and time periods when Amazon offers special promotions. Speaking of, Prime Day 16th & 17th is approaching quickly. Hopefully, the purchaser page will be a helpful too, providing an easier way to recommend products and services through Amazon. 

Latest Suppling List

Let’s cover the art supplies in two part series, pens, markers, and erasers. Secondly, sharpeners, on-to-go pads, paints, paint markers and drawing (mechanical) tools to have around…

Sharpie – Markers – Variety Pack (6)
Sakura Pigma – Pro Brush Pens (6)
Sakura Pigma Micron – SAKURA Pigma Micron Pens, select sizes and colors (1)
Ohuhu – Ohuhu Alcohol Brush Markers (168)
Ohuhu – Ohuhu Alcohol Blenders (6)
TFIVE – Acrylic Marker Pens (2)

Prismacolor – Markers, Pencils and Tools
Marker Set Fine/Chisel – Prismacolor – Premier Double-ended Markers (24)
Marker Set Fine/Brush – Prismacolor – Premier Double-ended Markers (12)
Erasers – Prismacolor – Premier Magic Erasers (12)
Colored Pencils – Prismacolor – Premier Eraseble Colored Pencils (24)
Pencil Set – Prismacolor Premier Graphite Pencils With Erasers & Sharpeners

Wrap up

Finally, all items on our shopping list can be purchased above or on our shopping list. These items have been purchased within the last 4 months.  Typically, they are considered must-haves, essential for use in and around the office. For example, it is useful to have various types of Sharpies – thin-liners, regular barrel type (more common size with a fine tip), and heavy-duty chiseled tips. Sharpies are almost required in the #markers space for marking bed plates and prints. There are areas of opportunity when it comes to nibs, nobs, and globs. For those in desperate need, they provide a simple way to write on most surfaces. See Part Two.

Part Two for your convenience. If you are going into art school, are a hobbyist, or need a school art supply list, please bookmark this series. It will help you maintain and improve your supplies list. It serves as a convenienct reminder of products we have recommended in the recent past.

Lastly, keep your supplies fresh, stocked up and within reach. Keeping office art supplies stocked can be a huge task, with dried paint tubes, markers, and broken tips. As the post mentioned, it can sometimes fee like an exercise in futility.

Weller 70w

Soldering Kit by Weller

Weller 70w Solder Kit

Weller Soldering Kit

Weller Tools

Needs must be had, time for a new Weller Soldering iron… with that in mind, the Weller 70w Solder Kit did just the trick. The Weller 70w Solider Kit.

Weller 70 Kit
Weller 70

Weller 70

Ready To Solder

Ready To Solder

Unboxing

Unboxing

Weller Features

Weller Features

What’s in the kit? The kit includes the soldering iron, power unit, cord, tips, sponge and iron holder. It is a handy soldering kit to have in and around the office. Recently, there have been a need for more consistent power, temperatures, and overall better performance when comparing it to the original solidering iron/wood burning kit in the shop. Although the Weller 30w kit purchased many years ago has been helpful, its wood-burning capabilities have not been necessary.

For a hobby kit, that includes wood-burning and soldering tools, it is a useful tool to have around. Recently, there has been a need for ‘more power’ and ‘precise temperatures’ for a few items in the shop. For those following the 3D printer build, the Weller 70w was put to the test rewiring and replacing thermistor wires, fan wires and the hot end. I also tested the Weller 70w unit on an old hack, the 9V cell battery hack, and some car audio system wire for good measure. We will be soldering new wires into the guitar rebuild, including new wires, connectors, and more. Stay tuned for the guitar rebuild!

More On The Weller 70w

First impressions of the Weller 70W soldering iron are positive; it heats up quickly, is responsive, has a convenient housing, and comes with spare tips for small jobs. The responsiveness of the iron is impressive, and the tips are easy to clean. The digitized interface allows for precise soldering temps, and the housing coil protects the heating element. It is easy to use and gets the job done efficiently. 

When comparing the soldering kits I have used, Weller has consistently been my brand of choice. While i don’t use a soldering iron frequently, when I do I trust Weller to deliver. The original Weller 30W Wood Burning or Hobby Soldering Kit has met all my needs. I have used it for vaious tasks such as repairing vintage train parts, fixing drone boards and fans, and working on home audio speakers, and soldering car audio wires like battery wires, guitar wires, head unit power wires, and remote wires. The Weller 30w hobby kit was great, not ideal, but got the job done.

Rebuild In Progress, Part 2

Pre-Assembly, Rebuild In Progress

Assembly & Direct Drive Rebuild, 2

Ender Part 2 Direct Drive

Lab Work – Rebuild In Progress, Part 2

A few steps forward now, we pick up with the bold on extruder assembly and assembly backplate here in part 2. So, we continue the rebuild in progress, part 2

Focus, Removal Of Bowden Drive
Fully Assembled

Fully Assembled

Remove Housing

Remove Housing

Extruder

Extruder

Remove Fans

Remove Fans

Remove Extruder

Remove Extruder

Disassembly

Disassembly

Hot End<

Hot End

Clip Tubing

Clip Tubing

DD To Extruder

DD To Extruder

DD Tubing

DD Tubing

Motor Clips

Motor Clips

Motor Control

Motor Control

We continue with the Rebuild In Progress, Part 2, following on from the previous article in the series, Rebuild part 1. We are discarding the original backplate and incorporating new assembly hardware (correction, new back plate needed see that update here). Unfortunately, the new OEM plate was not compatible with my setup, so I will salvage the new wheels, screws, tightening washers, bolts, and spacers where possible. I quickly performed a dry-fit of all the components, including the screws, spacers, wheels brackets, probe (a black, narrow plastic piece with a probe), side fans (with yellow and blue wires), and heating element (comprised of a heater, heat sink and extruder).

For the final step, make sure to tighten the wheel screws, fan, drive belts, and extruder before installing the heating element. The order in which you do this is important, just like when removing the Bowden drive, brackets and extruder tube. We will reuse some of the old tube to guide TPU filament into the new direct drive extruder. Next, install the extruder fan (red and black wires). Now,  you can unscrew the two top wheels and install the new direct drive platform, secure it, and snap on the carriage case (note: the hot side should be on top).

Next, attach the direct drive by clipping it onto the tube provided tube, then  snip the tube after a fitting or two. Ensure, the fit is correct. Screw in the direct drive platform from the backside of the plate, which should be installed on the last step. After securing it, connect the direct drive motor to the main line by passing the frame platform where the old extruder motor was located (refer to the last couple of images) and place the harvested tube for the filament.

Easy, right? Part 3 will be coming shortly. We will cover that tomorrow. We need to replace the heating plate, power on the machine and change the step movement.

WiFi For Legacy Creality Devices

Bring Bluetooth and Wifi Connectivity to Legacy 3d Printers

Creality WiFi Box

Creality WiFi Box

Tech | Tools – Creality WiFi Box 2

Need a boost, WiFi or Bluetooth connection for your Creality printer? How about the Creality WiFi Cloud Box 2.0?

For those of you who are using using WiFi or Bluetooth connectivity, especially the older 3D printers, the concept of  ‘Apple AirPrint’ or printing over WiFi is now a luxury. Unless, of course, you want to take advantage of Air Print or prefer to print from your desk chair by connecting to a WiFi/Bluetooth ready 3d printer. It’s simple if the hardware and software are installed or onboard, as is often the case. You can easily sit down, go through your sketch or drawing export, and then send those slices directly to a printer via WiFi/Bluetooth. Finally, you can kick off the print job using WiFi/Bluetooth slicer software.

Creality Wifi Box

Before I discuss the best-case scenario and the benefits of WiFi for legacy Creality devices, let’s first talk about the old-school models. For those of us who still use old printers, MicroSD cards, USB 2 cords, and swap nano SD cards and USB sticks, this information will be relevant. If you’re tired of constantly switching USB dongles and nano cards and dealing with manual process, then this if for you. It may be old school, but it work.

Please note that I have not yet set up the Creality WiFi Box so there is no Wifi available for the legacy Creality devices  I own. We will get something up here shortly, once the rebuild is complete which should take about a week or two to wrap up. 

Rebuild pt 1 – involves installing a new drive, assembling, and finding the back plate. Currently, we are reconnecting the new assembly housing, heating element, etc. rebuild part 2* did start the today this article was posted. *Article was updated, so that we could share a link to the second article.

Finally, we will cover Creality solutions for older 3D printers such as the Creality Ender 3 Neo Max.

Board and Slicer Downloads

Downloads, Boards, Slicers & More

Creality – Ender 3 Max Neo, Halot Sky & Prusa

Creality v4.2.2 Board

Tech | Tools – Software Support

Board and Slicer Downloads – For future use, especially those of you who are using a Creality Ender 3 Max Neo 3D Printer. If you who have Creality products, and are printing with the Ender series, you may require the following software, which has already been used in different stages of the rebuilding process: Ender Build articles, Series 2, Ender TPU Upgrade.

Here is the list Board and Slicer Downloads:
Creality Halot Sky – Firmware or Slicing (bottom) – https://www.creality.com/pages/download-halot-sky?spm=..page_1934481.products_display_1.1&spm_prev=..index.header_1.1
Ender 3 – Neo Max – Firmware – https://www.creality.com/pages/download-ender-3-max-neo?spm=..product_3b7a3c8a-7861-4186-9818-614e8eb14170.nav_link_store_1.1&spm_prev=..page_1967279.products_display_1.1 or Slicing (bottom) – https://www.creality.com/pages/download-ender-3-max-neo?spm=..product_3b7a3c8a-7861-4186-9818-614e8eb14170.nav_link_store_1.1&spm_prev=..page_1967279.products_display_1.1.

Also, included:
Prusa I3 MK3S+ Kit – Firmware, Drivers and more