Performance is one of two, one, the act of or playing and the other is the action and/or process accomplishing a task or function.

M1 Screen & Keys

Teardown And Rebuild

M1 Teardown – Screen & Keys
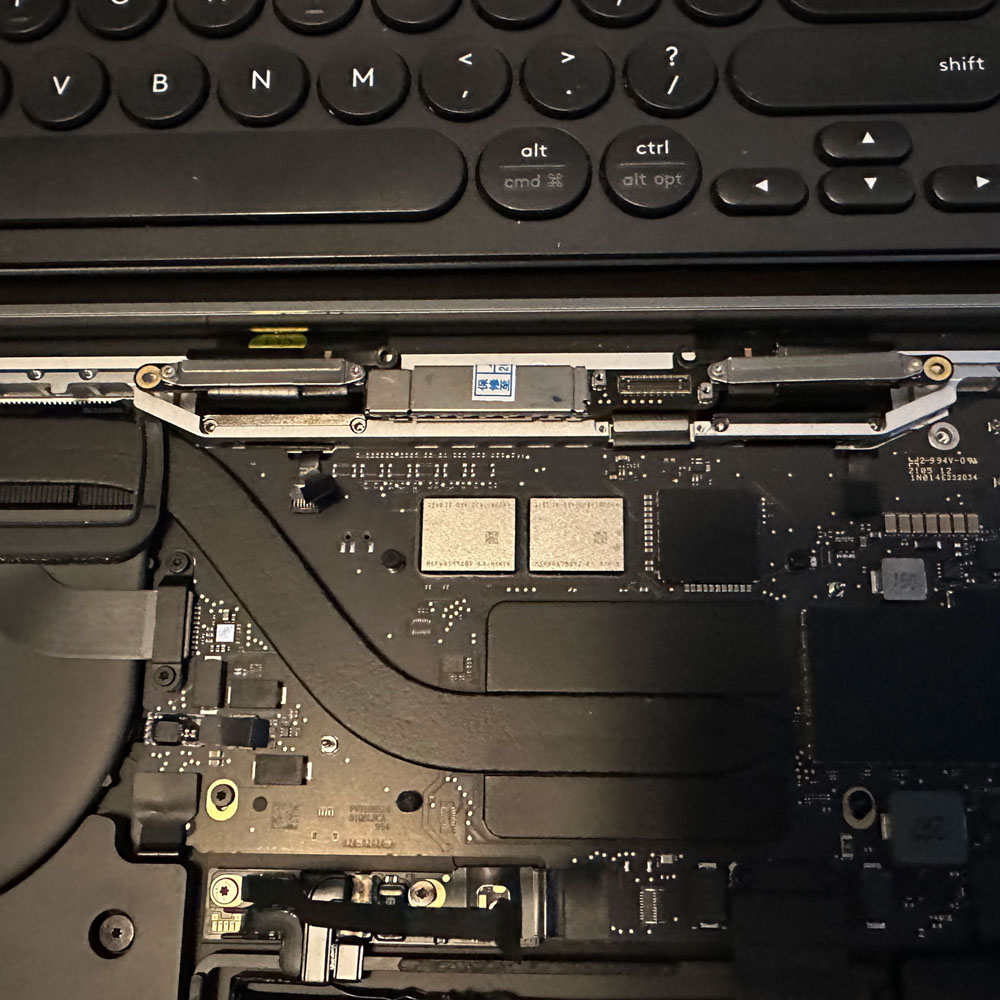
M1 Screen and Keys

M1 Arrow Key, LCD

LCD and keys, can be tedious, be careful and be aware of the process; ‘teardown’ process.

Visual Inspection, Keys

Starting with the easiest part of the refurbishment process – what is the easiest part of the build? The keys. Keys, Screen/LCD and then the touch bar. Please note, the refurbishment process required two teardowns, so to speak. First, let’s verify the working parts and inspect the touch bar on it’s own. The process, you could say, is a one-step job. However, I did this job in two parts for the sake of my own sanity.

The key here, is this: I know that if I could get the screen working, we would be in good shape. Cost aside, I was trying to avoid purchasing the M1 upper case which holds all parts associated with the computer. So, in other words, it’s a no-brainer,  keys on the keyboard, LCD screen, then touch bar.

Teardown
Screws and Bottom Case

Screws and Bottom Case

Apply Suction

Apply Suction

Visual Inspection

Visual Inspection

Battery Cable

Battery Cable

Remove Cable

Remove Cable

Board Screw

Board Screw

A Closer Look

A Closer Look

Screw Removed

Screw Removed

Hinge Covers

Hinge Covers

Cover Screws

Cover Screws

Left Main Hinge

Left Main Hinge

Right Main Hinge

Right Main Hinge

Internal Repair, Replace LCD

Start the teardown bell! We’ve completed our inspection and are beginning with the easiest of the three R/R (remove and replace) parts in this teardown. Keys can sometimes be tricky, so if you are familiar with them, please refer to the video below. If keys are a confusing concept to you, just focus on the left arrow key. There are several online resources available for reference, with Snazzy providing a helpful video walkthrough of the process. We breeze through the key change with ease.

For more detailed information, you can also  check out Snazzy Labs, quick video on how to replace keys. It’s important to note – that there may be some differences between models, especially the M1. That’s why the video is so helpful! The key takeaway is that quick snap keys convenient but can tricky if you are not familiar with how scissor clips work. I recommend purchasing new keys (up, down, left and right) – make sure to get the ‘left arrow’ key) for a simple slide an click installation process. It’s as easy as pie.

Moving On To The Display

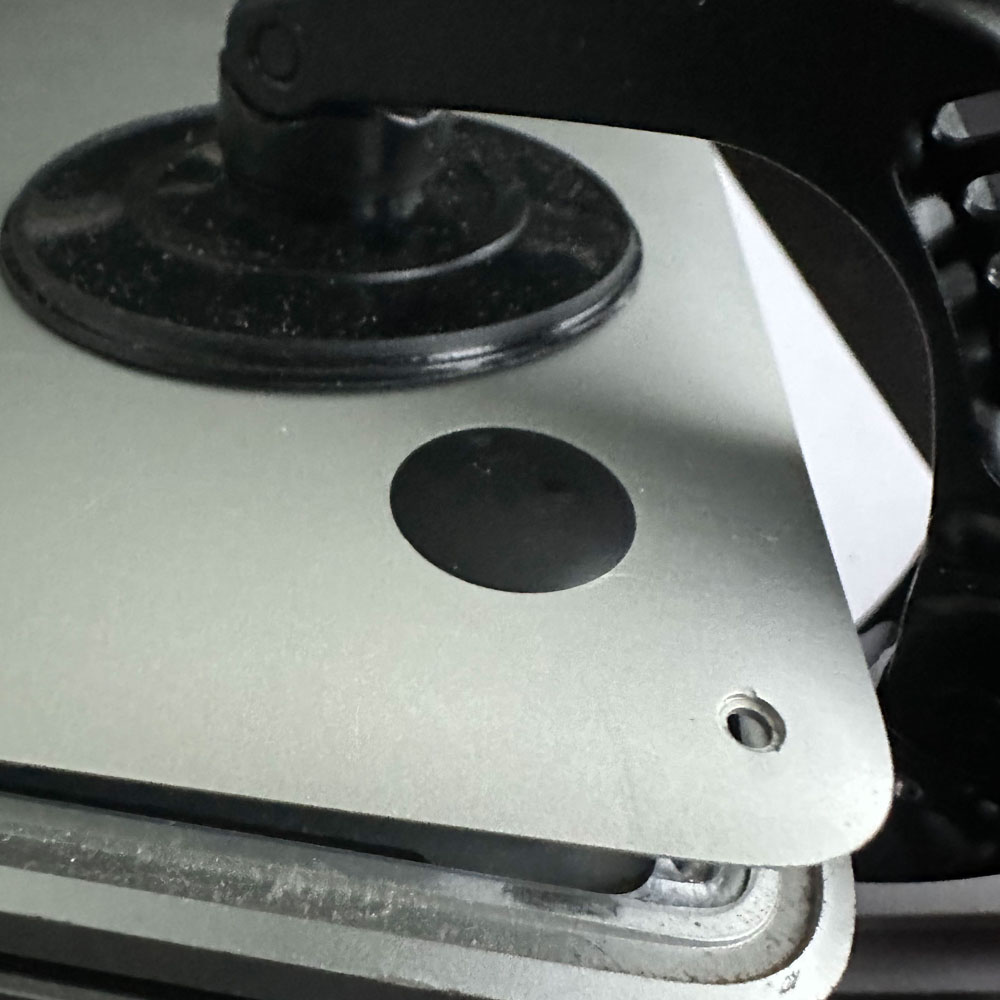
So, the cracked screen… We used a clamp tool and suction cups to get under the bottom case. A recommendation: iFixit has a variety of tools and parts for fixing things. We’ll talk more about them later, but we have bought a few items for them. You will also need adhesive remover, can you guess where we got ours? This is not a paid advertisement, but they have some great tools if you don’t have anything in your electric/technical toolbox.

We start by removing the bottom case when replacing the screen. Beginning with the batter cable for the M1 Screen & Key’s fix, it’s important to be carful as cables and parts are delicate and can easily break. So, remove the cable cover, battery cable, and screws. The most nerve-wracking part is dealing with the different sizes of screws, types of drivers, and prying tools required for the job (TORX, pryer(s), spudgers, tweezers etc). Once the battery cables and screws are removed, we can unscrew the hinge covers and move onto the antennas. It can be challenging to see the screws on the antennas, so good luck!

Teardown Upper, Goal LCD Removal
Locate Antennae Bay

Locate Antennae Bay

Remove Cables

Remove Cable(s)

Remove Cables

Remove Cable(s)

Antennae Screw(s)

Antennae Screw(s)

Antennae Screw(s)

Remove Screw(s)

Antennae Screw(s)

Antennae Screw(s)

LCD Removal and Replace

The antenna will need additional cables, screws and bars leading down to the antenna and LCD springs. After installing those items, we will once again remove the antenna wire cover and detach the wires. It is important to exercise caution and be mindful of leaving the piece in better condition than when we found it. When removing covers, do so gently to keep glued area clean and free of debris (we had to address some glass bits). 

Teardown Continues With the Antennae and Cables
Prep Antennae

Prep Antennae

Antennae Screws

Antennae Screw(s)

Antennae Cables

Remove Cable Connectors

Antennae Cables

Antennae Cable(s) Removed

Hinge(s)

Hinge(s)

Antennae Cleared

Antennae Cleared

Once, the antenna bar is clear, the LCD hinge screws will need to be removed, along with the springs and mounting hardware. Voila, the LCD has been detached.

Antennae, Hinges and Test LCD
Remove Display

Remove Display

LCD Hinges

LCD Hinges

Reattach LCD

Reattach LCD

M1 Screen & Keys Wrap Up

This concludes the M1 Screen & Keys section of the refurbishment process. As mentioned earlier, we will now proceed to the touch bar. We went back, replaced all screws and cables to confirm that the LCD swap and key are working as expected, and we found that the touch bar was not working. We verified all parts (sans the touch bar) continued with wiping and cleaning in the following post. If you missed the first three articles, you can find those here: 1. Self Repair, 2. Refurb, and 3. Visual Inspection, Teardown. Cheers.

Clean Up URLs

Own Your Own Links, We Clean Up URLs

URLs Shortener, the Move To Tinurl, Cleanup Up URLs

Tech | Tools – Shortening URLs

Confirmed, URLs out…

Time to clean up URLs, rid your site of extended URLs and make them cleaner. An update on URLs (shortener): for the sake of time, we have purge our self-hosted url shortener. We’ve officially dropped the stand alone code from production. Try Tinurl, if you want to use such a service. Use something like the Tinyurl app/website… click here to learn more.

The apps has been around for awhile. Those of who you share links, swap links, etc., know that most companies have some form of URL ‘shortener’. Whether it is Amazon, YouTube or TinyURL themselves. Clean up URLs. Check out this short code via Amazon in this scenario. Scenario: College Kid is looking for a tablet, finds one and would like to share the find with someone – a.co/d/dBwmxaK, a pretty handy link… This is just a small example of short of the short code game, with a massive eCommerce site like Amazon. The same goes for YouTube share links… Anyhow, at some point, we will circle back to this topic and see if there is something worth investing in.

Before you leave, make sure to check off whatever is next on your to-do list. I’ll share one more tip with you. Hopefully, you are in the mood to clean up or declutter. Try using justdeleteme – “a directory of direct links to delete your account from web services”. You can learn more about it and the benefits of a great purge,   justdeleteme article. We regularly purge old accounts and social sites as often as we can, and you can do the same. I personally delete and close out old account annually. It’s a great resource getting rid of unused services.

Other Means of Support

While were fixing things today, let’s share a few other helpful tips. Such as finding new domain name ideas, GoDaddy Bounceback services, email deliverability, knowing when to clear the cache, and how to Flush DNS on a Mac/Apple. Additionally,ipconfig /flushdns for Windows, and sudo systemd-resolve --flush-caches on Linux.

We’ll also cover how to maintain your digital footprint i.e. activity on the web and what to do when the interwebs are completely down; really down. Choose down detection. These tips are super handy when starting a new website from scratch because eventually, you will come across these issues in one way or another. It’s bound to happen.

GoDaddy Bounceback Services

Rolling With A Bounceback Services

Let’sLet’sReport Your Findings, A Bounceback Option

Bounceback Services vis CheckSpam

Tech | Tools – Email Support

Report A Bounceback Error

For those of you using Godaddy for hosting, consider trying GoDaddy Bounceback Services. Visit the Report A Bouncebak Error site for more information. If you need to investigate a rejected or bounceback message, or require more details from your hosting provide, this mini site can be useful, especially when troubleshooting returned emails. The same goes for Hostgator users – HostGator Bounceback Support is available as well.

If you are experiencing email issues, such as emails bouncing back, we encourage you to address the bounceback messages independently. However, proceed with caution and be mindful of the steps and actions you take. The tool requires raw data (source messages data) to function correctly. Moreover, understanding diagnostics, diagnostic system errors, and spam rejections may require some time. Stay patient and persistent.

To do this, open your local mail client suck as Outlook, Apple Mail or Gmail. The mail client app will offer a ‘view’ or ‘view message’ option. Choose to ‘view’ header data on a transmission, including both successful and unsuccessful sends.

If you find yourself in a hypothetical scenario, you may need to review a message that was likely transmitted correctly. This will be beneficial for future troubleshooting, as your familiarity with the interface will be useful. For instance, for those of you using MacOS, follow these steps: Open Mail => Find and Click Mail in Question, with the mail highlighted => Go to View => Scroll Down to Message => Chose either All Headers or Raw Source depending on the service that is requesting it . DIYers can also find online resources to troubleshoot on their own before contacting their hosting affiliate.

Report A Bouneback Error

The GoDaddy Bounceback Services website, also known as the Report A Bounceback Error site, will ask for .EML files from you. Once you have the message headers or raw sources, you will need to provide them to the  bounceback tool. Save these files locally, and ensure they are saved in a readable format. Simply rename the files with the requested file type.

Simple right? If you can reach get to this point, most Tier 2 or support centers can investigate the email in question in greater detail. Although there is no standard SLA (Service Level Agreement) the typical timeframe is 12-24 hours depending on the order of magnitude; most will respond within a few days, some within a week, assuming limited or non-paid tech support.

FLUSH – DNS Cache

Flush System DNS CACHE, IP Address Wisdom And More

DNS Flush

Tech | Tools – More Reference Than Tool, MacOS Flush DNS Cache

A few things to note: from time to time, you may need to flush your DNS cache, understand how your IP address is acting and how to dump, secure, or authorize computer code to start fresh.

Flush DNS Cache – MacOS
  • Plain text: sudo dscacheutil -flushcache; sudo killall -HUP mDNSResponder; say cache flushed
  • Or
  • 1. Command  + Spacebar
  • 2. Type Terminal, strike enter
  • 3. Select to Open ‘Mac Terminal Application’
  • 4. Type sudo dscacheutil -flushcache; sudo killall -HUP mDNSResponder; say cache flushed, strike enter
  • 5. Terminal will request “Sudo” password, enter Sudo password, and strike enter
  • 6. Assuming the password given is correct, the system will state “Cache Flushed as indicated in the terminal command
  • 7. Command  + W to close Terminal window
  • 8. Strike Enter to close out window
Flush DNS Cache – Windows
  • 1. Ctrl + R Run Windows Terminal
  • 2. ipconfig /all directing the system to flush all. For more information, you can look up more information by inputting ipconfig?
  • 3. Assuming no superuser credentials needed, strike enter
  • 4. Terminal will confirm, all released and renewed
  • 5. Ctrl + W to close Terminal window

Although this post may seem basic basic, at it’s core, it is. The command has been available since the dawn of the internet allowing users to reset the system as needed. This post will focus on the process of flushing the MacOS DNS Cache. I have included a snippet/script for resolving connection issues, tailored for both MacOS and Windows users who may come across this post. 

Experiencing lag? Before we proceed, please note that these terminal commands have been used for a while with limited changes over time. The only differences might be MacOS specific, directing the system to ‘speak aloud – Cache flushed’ when the command has been completed, among other actions. Flushing the DNS cache might just be the trick for your Mac. What exactly is this DNS flushing business? It involves skipping the process of physically deleting your local cache (not internet cache/cookies etc). I’ll also post something about that.

So, we are talking about flushing the DNS? Let’s begin with a brief explanation of DNS – Domain Name Server. If you need more information on DNS, you can check out Cloudflare’s Definition of DNS to understand how it works, and so on.  Essentially, the DNS translates domain names into  IP addresses, which are essential for navigating the internet. Without DNS, web browsers wouldn’t be able to load websites. For a more in-depth look, I recommend reading the  Cloudflare article for more details.

In a day or two, I will follow up with a post on WhatIsMyIPAddress about deleting ‘local user cache’ files on your Mac. It will make more sense in a few days if you haven’t a chance to troubleshoot your own computer issues related to internet speed, lag, and connections.

AirMap by DroneUp

Take Flight, AirMap by DroneUp

AirMap for Drones, Setup and Flight App

Airmaps - Drone Flight App

Tech | Tools – Fly With Confidence – Airmaps

Get FAA approval to fly with AirMap by DroneUp… Are you looking for FAA compliant drone flight apps? Airmap makes flying easy  and understandable. Fly with confidence while staying within legal requirements and having the knowledge to fly approved. 

From installation to usage, AirMap by DroneUp for iOS or Airmap – for Android will help you understand what is happening in the airspace above you, how to fly with approved FAA flight status, log your flights, and more.

Airmaps iOS And Android
TFR

TFR

Welcome

Welcome

Connect

Connect

FAA Plan

FAA Plan

Airmaps Zones

Zones

Airmaps Search

Search

Airmaps Restrictions

Restrictions

Brevard County

Brevard County

Log In

Log In

From t’s & c’s, to maps, flight logs and FAA approval to fly safely, make sure th get approved with FAA-approved flight requests. Check Kennedy Space Center to learn about the airspace above and around Kennedy. Familiarize yourself with the warnings and requirements, as well as the maps and flight restriction in and around the areas within your airspace.

Need more flight apps, or drone apps for flight approval? Leave us a comment below and we will find some additional drone apps for you. While you’re here take  a look at other FAA related articles, FAA Hurricane Update from 10/1 and FAA Drone Safety from 4/19. Although these articles are now archived, it’s important to remember that drone flight rules are drone rules. Most importantly, make sure to stay compliant and safe while flying. 


Ham Radio Study

Get Licensed – Ham Radio Technician License – Use The HamRadioExam App

Ham Radio Exam

Materials – Ham Study

HamRadioExam – Technicians License. For those of you seeking Ham Radio study guides, licensing questions, study help, etc. look no further. Give Roy W.’s app HamRadioExam a try.

Although time seems to fly by, it is important to find time to study, take the test, and pass this exam. Like most secondary actions or things you might ‘want’ to do, do not continue to put off the testing… Try the Ham Radio Exam App – Technician’s License for yourself. With a swipe of a finger, you can test your knowledge, take practice tests and practice quizzes on the side. Clash of Clans, Conflict of Nations WW3 aside… most of our time has been spent practicing for this exam. Overkill? Maybe, but like many certifications, and  licenses there are times when you just need to know the basics. In this case, Ham Radio operators have to take greater responsibility with their hobby, so to speak. Why? The FCC fines…

Let’s being by considering ARRL membership, which is not necessary, but it’s worth checking out before you delve into the  FCC licensing. Continuing with your testing is worthwhile, as it may take days, weeks, or even a few months to fully grasp the knowledge needed to pass your exam through HamRadioExam – Technician License now. Just took a peak at the local exam schedule provided by ARRL (Amateur Radio Association) for our own testing time. More importantly, if you have not started the process yet, being here on the ARRL site, learn why you should obtain your Ham Radio License.

As usual leave a comment below, let us know what you’re thinking?

FAA Hurricane Update

Hurricane Ian Alerts Update

FAA Hurricane Alerts

Materials – FAA Hurricane Update

Know What To Do Pre/Post Hurricane Ian – Before you fly, understand the current conditions in the sky above you… FAA Hurricane Update. Remember, the drone industry is constantly evolving, growing and maturing.

Drone enthusiasts will always want to fly, so be sure to prioritize safety. This year, the FAA has organized a safety awareness day for drone pilots, federal representatives, educators, drone hobbyists and more… On June 18, 2022, join your fellow drone pilots for FAA Drone Safety Day. To participate – look for ‘about drone day’, support, or host an event. This message is in reference to FAA notice number” NOTC2405. For those seeking more information or a drone piloting app, consider trying Airmaps.

For those of you who are interested in learning more about open FAA communications, licensed drone updates etc. feel free to reach out to us or leave a comment below.

S215G

Galaxy Update

Samsung Galaxy S215G

SG21 5g

Lab Work – Samsung S vs. iPhone Series Hardware

Our S21* Experience – More performance, less pain to privacy with optional dualSIM card capability. Choose wisely young Skywalker; Pain-to-Privacy, Cost-to-Performance, our take on the matter.

U-Turn Ahead

Update* The decision was changed, while we chose the S215G over iPhone11/iPhone12/S22 and the idea worked in theory… The reality here is dual SIM cards are a ‘go’ on S10 and S22, not on the S20. Quick U Turn here as the S20 swap takes place, swapped out for the S21. Ultimately, the choice is the standard size, S22+ or Ultra not an ideal size for our needs. Again, the device is not the latest, nor the greatest; it’s the best for our needs.

Galaxy Series 22 | 22+, here is the comparison page that’s nice to start with –
S Model Comparison – 22 Ultra, 22+ and S21

A Move Toward S21

After many, many, many months of testing. retesting, and learning more about eSims or (electronic SIM cards), we were able to maintain ownership of the latest software and hardware. After evaluating performance and cost, we ultimately decided on the S21.

The S21 coasts better battery life than the S10 with a dualSIM option or hybrid sim option allowing for multiple numbers on a single device. It also offers 5G cellular service, and upgrades to the hardware, display, camera, when compared to other S models.

Compared to other Samsung models like the Flip or fold, as well as devices from Pixel (Google), Xperia (Sony) and iPhone, the S Model remains affordable in a touch device-saturated market. It is top of its class in terms of usability, user experience, control, privacy*, and bloatware.

Comparables

When considering ROI, it is important to look at comparable ROI in the market in terms of price and performance. An emphasis is placed on privacy, with the goal being to maintain and secure the device without having to depend on Samsung, Google, or other third-party hacks for security. While this may require a lot of effort, the benefits in terms of privacy make it worth the pain. The balance between pain and privacy is becoming increasingly important and cannot be ignored.

Anyhow, check out comments, do you research… iOS 16 is out now, good luck!

HRCC – Ham Study

Ham Study? Choose HRCC

The Ham Radio Crash Course Get Licensed Today

HRCC Ham Courses

Materials – Ham Study

“Want to Get Your Ham Radio License?” HRCC- Ham Study, learn on your time, when you want and how you want. Give HRCC – Ham Radio Crash Course a look-over.

Choose HRCC – Ham Study, let’s get started! I wanted to tee up another mini-series or online study tool. In this case, we will focus on HRCC – Ham Radio Crash Course, – a study tool/series for those interested in learning about ham radios, their operation, and the fundamentals needed to obtain a ham license.

From an outsider’s perspective, this seems like the way to go. I have never used a ham radio before, and I don’t have anyone to guide me through the process. I believe this is a good starting point, a launching pad into the world of ham radio. For those interested in out lab work, we have included this in our ‘materials’ category for future reference, study. Once again, we are recommending this HRCC – Ham Study, specifically the  HRCC – Ham Radio Crash Course is the best option, give it a try.

As usual leave a comment below, let us know what you’re thinking?

Puget Systems Video

Puget Systems Video

The Best, Puget Systems

Tech | Tools – Puget Systems Video

We choose Puget. From a far, we can’t wait to get our hands on one of these machines… Saving up for our own custom Puget.

Puget Systems brand computers… seriously, if you haven’t heard about these guys… this is not a paid advert, just a recommendation to check out them out. If money were no object per se, I’d have a top-of-the-line Puget desktop. Maxed out with the latest hardware. I’ve been following these guys for awhile, and they were also featured on a science channel… specifically discussing hardware specifications, customization and hardware potential. Which is great marketing in the social or content creator space on YouTube.

Anyhow, $6000-10000 and you’ve got yourself a heck of a machine. I don’t want to go into great detail here as I’m hoping you will check them out yourselves. For those of you running hot and needing extra power, speed, performance etc., these guys build, test and tune every component to match your needs. It’s truly incredible.

Look up Puget Systems in your free time… if you’re looking for a fully custom machine build. The specs. are eyeopening. Thanks.