Personal and professional growth, benefits of identifying positive and negative transformation or next steps forward. Take a swing, small steps.

Max Neo Back Plate

Wrong Parts, Wrong Parts Received

Back Plate and Rail Wheels

Old Rail Cart

Lab Work – Working Through The Challenges Associated With 3d Printers, Printing, Upgrades and More

Relieved my Max Neo Back Plate, the long awaited parts are on the truck this morning

Quick update, all the parts needed to update the Ender 3 Neo Max to run TPU filament through the new, upgraded parts are in. They are within arm’s reach and ready to be installed to complete the initial TPU build.

Unfortunately, I want to go on record and share a warning. I will post the tear down at some-point. So, the essence of the warning is to be careful what you order. Makes sense, right? Cross reference and cross-check OEM parts, refer t your 3D build, and ensure fit and compatibility.
 
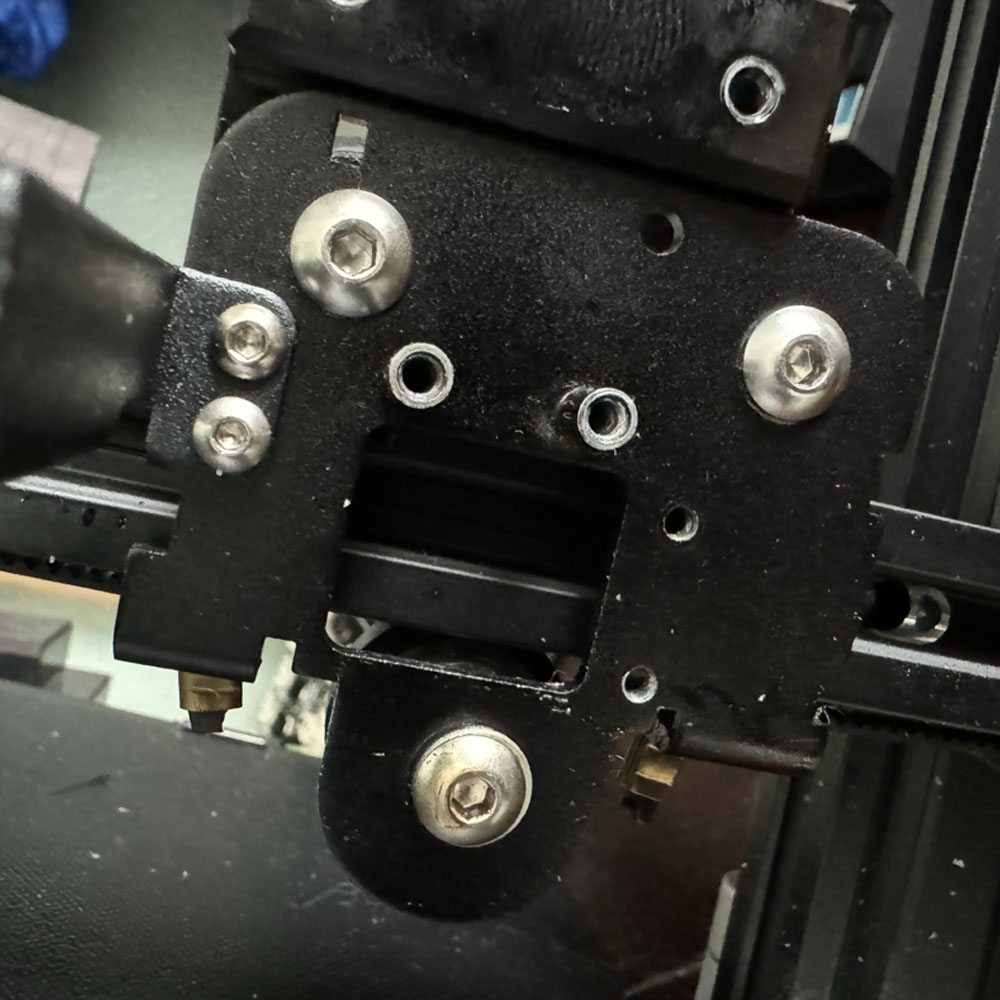
Build progress has stopped because we have the wrong assembly cart, ideally we should have the Max Neo Back Plate, or back plate. The plate configuration (proper mounting holes, size, shape) is off. If you’re new to the site, check out the Max Neo challenges in the Output archives… For those who just want to see the TPU rebuild go here, but understand his – we had a few prints that went sideways. By sideways, I mean the extruder was found buried in filament, grinding away at the build plate.
 
What’s Next
Ultimately causing a meltdown, and plate parts found elsewhere etc. Prior to the blow out, we have a few successful TPU test builds are in hand, but are error pron. More like the standard build (Ender 3 Neo Max Bowden Extruder setup, standard build from the factory) minus the upgrade, if you can believe that. Please note that sometimes you have to ‘break’ things to truly figure out the right path or change paths, so to speak.
 
Anyhow, not to belabor the point here, but, we have all the necessary parts to start rebuilding this machine with the correct parts and extruder. This will allow us to build more ‘things’ with an array of filaments.

Gadget Backlog

Gadget Backlog Includes Items Shipping Soon

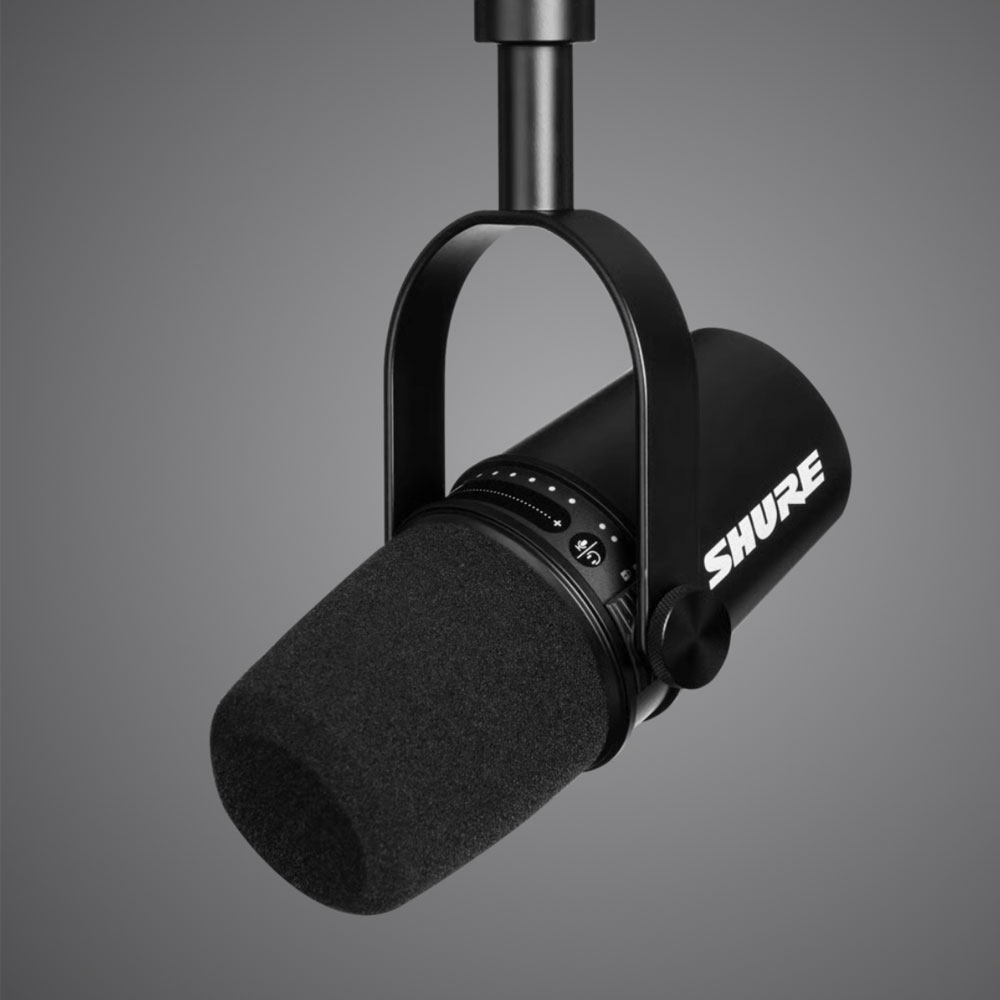
Magnet Switches, Extra (Shop) Batteries, Bodum Whisk, SHURE MV7 Mic, Aupus Air Duster, Klein Tools Precision Screwdriver Set, and Med. D’Addario Celluloid Guitar Picks.

SHURE Mic 

Gear – More Gear On The Chopping Block

What’s that in the box, ((shake)) ((shake)) what might that be? A new shipment, what is in ‘the box’ and on the bench.

Let’s start by sharing this on the big Gadget Backlog, is currently in progress, as space is somewhat limited at the moment. More information on that will be coming soon. As for batteries, I have a few Optima Red Tops ready to go, along with some outback welding where necessary. It’s fitting to mention magnetic tools and switches in this context. Yes, super strong magnets that can be switched on and off with a swift turn of the hand or a switch-type mechanism. This is a very cool item to have around the house, shop, or off-road adventures.

Angle Clamps, Mag  switches and More Welding Tools

I’m curious to know if the welding community has a preference for welding square/angle holders, clamps, plunger/light switch types, magnetic holders etc., perhaps at no cost. Obviously, if you’re out on the trail, off-roading, doing trail break-fixes, integrity and rigidity might take precedence over OEM specs on angles or manufacturer measurements. When it’s time to getting your off-road rig off the trail, would something like this help to bring your efforts in line with those manufacture specs per say. Anyhow, these switch magnets might be handy to have around the shop. Various types – Angle Clamps, Magswitch Clamp, Stackable Magnets or Adjustable Angle Magnetic Welding Squares.

So, let’s discuss cover what has been unboxed… the Bloom Frother. As you know, the hand mixer needed some adjustments. A few screws, new batteries, some isopropyl alcohol… and we are back in action. You all know I’m a big coffee and tea enthusiast, but if not, that’s okay too. I like my coffee and tea with a few pinches of Sugar in the Raw, and depending on the time of day, I may add some half-and-half to adjust the temperature.

There are a few handheld frothers out there in various color and materials… the Bloom is now revived, with new batteries and ready to mix. So, I am please with the purchase for now. I will provide an update on the long-term usage of the Bloom fix. I must admin, an alternative option might be the Bodum Schimuna Whisk, which has a piqued my interest. For those of you in the market for a micro whisk/frother, the Bodum Schimuna might make a great client gift at some point.

SHURE and Aupus

Next on the Gadget Backlog, we have the SHURE MV7 USB mic! Initial thoughts – great sound, crisp dynamic tones and easy to use. Another step forward towards audio/video experiences. The microphone includes a desktop friendly microphone stand. MacOS users will need to download the SHURE Application to mix and control the external accessory. There is a bit more work involved in getting around the need to purchase additional cables, XLR adapters or fittings. Look for a deep dive, and pictures to accompany the post.

Moving on, let’s talk about ditching the air duster can for a powerful, corded air duster like the Aupus APAD15BL Air Duster. Air cans have served their purpose for many years, especially when paired with electrical-friendly wipes. While we are on the topic of air gadgets, we have more air tools coming your way – Inflators, Air Compressors, Nailers and more.  The air compressor even comes with a hand air blower tool for outdoor jobs. Like the air blower,  this plug-and-play air cannon offers variable speeds, cleaning tools, and filters. This small, office-friendly tool is handy to have in and around the shop as well. While we are discussing gadgets and tools for the shop/office, we are enhancing the Makey tech tool set by adding a set of Torx screwdrivers (T3 – T10) – Tekprem Torx Screwdrivers.

One downfall I’d like to mention is the integrity of the star and Torx bits. Torx and star bits are delicate and can easily get damaged. A word of caution you have to be careful with nano screws and give it time. Consider replacing the bits or the entire set with a set like these. What I’m observing is that screw lock… can be more beneficial here, but it does take a toll on the micro-bits used to drive in our unwind electronic screws. I’ll provide more feedback and comments on the Torx set and air cannon as we use those items on the bench.

D’Addario celluloid

Finally, last on our big Gadget Backlog list, we picked up a new guitar pick. Most are similar, with smooth or textured surfaces. The main problem I’m having is grip. After a few minutes, grip becomes an issue… it might be the ‘player’, but slippage is a problem. Sweat seems to be the culprit. Odd, huh? So, I’ve added a mixed bag of D’Addario Celluloid picks to the mix. The goal was to switch it up a bit and try something new. I still have a few Fender Celluloid Medium picks and Dunlop Max-Grip variety.
TPU Direct Drive Support

TPU Is The Goal, TPU Direct Drive Support Build

New Assembly, Drive Drive Extruder, Support Back Plate and Rail Wheels

Lab Work – Building and Buying Parts On The Supply List

…A few more days folks, and we can start working on the TPU Direct Drive Support build. A new extruder support plate for the Ender 3 Neo Max is on its way. Not on back order, but waiting the last piece before the rebuild can begin.

Before we proceed with installing the new parts, we discovered an issue with the back support plate (including wheels and bolts) being misaligned. After the printer ‘meltdown’ a few months ago, you can see the results of that print here. The final piece needed for the rebuild is this support back plate. There is too much play and space between the assembly and guide rails. I don’t recall there being any movement between the parts. I would expect there to be little to no wiggle room in those items. However, I can almost light off the assembly housing, extruder, and back plate from the guide rails under tension. This  was a clear sign that it was time to replace the guide rails under tension. think there is no or very little ‘wiggle room’/tolerance in those items. However, I can almost lift off the assembly housing, extruder, and back plate from the guide rails under tension. This was a clear sign that it was time to replace the support plate, bolts, and wheels to ensure an improved upgrade and fix.

New Build

Anyhow, all the pieces and parts have been removed from the initial purchase. We will proceed with the TPU Direct Drive Support build. So, for picture sake, we’ve got the frame, base, and guide rails and that’s it. All parts have been removed for the moment. ~It’s been about 3 weeks now, awaiting the OEM support plate. Ultimately, we are looking at a clean rebuild using OEM parts with a few upgrades (direct drive, replacing the Bowden extruder) to allow for TPU, Wood/Bamboo, Carbon, Metal, Organics and more.

System upgrades might come later, with the goal being more power to compensate for the downforces on the extruder head in the direct drive case. Caution, there are differences between the Direct-drive and Bowden extruders, obviously advantages and disadvantages for both… maintenance and care being the most complex for the direct-drive variety.

More Filament Types

The goal with the direct-drive ‘pivot’ is to improve heat, extrusion pressure, retraction and expand the range of filament materials. For the sake of this article, I will focus on the updated advantages and disadvantages. The comparison is between more materials, heat, pressure, and variety versus maintenance which can be a lot. I personally use the break/fix method, as parts are less expensive to replace in the printer ecosystem. It may not always be the wised choice, but sometimes breaking something is necessary to understand the machine or engineering behind it. In conclusion, having spare parts on hand is helpful. Build yourself a parts bin and consider parting out used or gently used components to reduce out-of-pocket expenses. Learn how to maintain and reuse your gadgets. Remember to fail fast when working on such equipment. Short-term expenses for break-fix situations can save money in the long run when dealing with 3D printers, drones, computers, and more

Final thoughts: Parts can help you build yourself a parts bin. Need updates, board firmware, and Slicers? Download those items here for Creality Software Support.  Part out used and gently used parts to cut down on out-of-pocket expenses. Learn how to maintain and reuse your gadgets. Don’t forget to fail fast, when working on such equipment. Short-term break fix expenses go along way when dealing with 3D printers, drones, computers and more.

Disposal Problem

Food and Debris Stuck, Fix A Disposal Problem

No Grind, Time For A New Disposal

Disposal - Internals

Lab Work – Emergency Fix

A few weeks ago, had a minor issue with the sink disposal. The picture here is speaks volumes about the problem we encountered. 

Once the problem was identified, it was clear that we needed to replace the disposal unit. Upon closer inspection, we found that rust had caused significant damage internally. I had to remove the seal and screws to crack open the top of the disposal unit. Honestly, I  was surprised by how worn out the unit was. It was definitely time for a replacement, and were fortunate to have discovered the issue when we did.

Disposal Parts and Install
New Install

New Disposal Install

Debris Filter

Debris Filter

Clean Teeth

Clean Teeth

Interior View

Interior View

Next, the title, “Disposal Problem ‘no grind’, time to replace it a new title. Unfortunately, the 1/2 replacement had a short in the wiring. Being a conscientious consumer, I decided to upgrade to the new InSinkErator 3/4 hp, which you can see here. It was a smart choice as it was the same brand and fit perfectly in the cabinet space. You can see the final installation below. These disposal units are usually plug and play, assuming that piping and plugs are readily available and identical. For this reason, I stuck with the same brand, hoping for seamless setup.

Next, I didn’t want to hack away at the existing piping, cabinetry etc, just want to maintain and in this case boost the output. You’ll see a slight increase in HP, a plastic outer case/shell and a sparkly new (newly cleaned) lower cabinet for it’s foreseeable future. What a mess. Moving along, fix in place, watch what you put down the sink etc. Remember to check the sealant between the disposal and connector. We had a little leakage that has now been remedied. Not bad, virtually the same machine, replaced, tools – pliers, pipe wrench, flathead, pipe tape and a small bin in case of water leaks or intrusion in the future.

Like the quick fix format? Check out other quick fix content here such as this disposal problems fix. Learn how to descale your coffee equipment – pots and machines, fix a toilet float, clean and fixpool filter housing and filter problem or try a cell phone charging hack… Check them out!

Finally, hopefully (fingers-crossed), you can learn a thing or two. Be sure to unplug disposals, have some extra ‘shop’ towels to mop up excess water or worse, sink goo. Make sure local power outlets are off and to be safe, turn off water where applicable.

TPU Update

TPU Upgrades and Updates

New Assembly and Drive Drive Extruder

Creality Extruder, Full Assembly

Lab Work – Bolt On Upgrades

We are updating the extruder – TPU Update. Adding a bolt-on direct drive upgrade and replacing the Series 3 full assembly body.

The TPU update is a go. First, PLA is great. TPU is better for certain applications. However, we start with PLA. If you need flexibility over rigidity it is assumed that you want to test TPU filament. First, we will replace the existing assembly body on the MAX NEO and bolt on the new extruder to address the TPU issues*. TPU requires more force to drive the flexible filament through the assembly and out the nozzle. The direct drive will help with ‘refinement’ and focusing on pushing and pulling the filament more accurately and precisely.

Creality Accessories
Unboxing

Unboxing

Drive Motor

Drive Motor

Assembly

Assembly

Remove Extruder

Remove Extruder

Unscrew The Fans

Unscrew the Fans

Assembly

Assembly

Again, in terms of next steps and the TPU Update, the update is not a *requirement,. However, after seeing enough test prints, it’s time to make the switch. Here is the bolt on solution from Creality for the Ender 3-Series, MAX NEO. Moreover, what do I mean by ‘requirement’ above? In my opinion, it would be extremely difficult to print TPU printables using a Bowden drive. I’ve tried, and it doesn’t work well. Finally, the Bowden drive doesn’t provide enough filament force and direct force to the filament through the hot end, hence the need for a direct drive motor. So, I want to emphasize that there’s no need to buy a new machine for TPU printing. Simply, do the swap and you can print both TPU and other high-temperature filaments as well.

Quick update: since this post was shared, we have received the parts for the TPU updates, allows us to begin the direct drive build. TPU filaments and prints can now be done without the necessary upgrades. Let’s get into the build and upgrade action! Side note, before we move off the direct drive action, I’d like to share other Halot updates including the Halot LCD fix and other break-fixes when adding a resin printer to your arsenal.

Stay tuned for additional photos and mini-clips covering the installation soon. In the meantime, here is a brief unboxing and assembly tear-down. Thanks!

DELETE

Delete Yourself via Just Delete Me

Just Delete Me

Tech | Tools – JUST DELETE ME

Need to delete an account, permanently? Could be difficult, for some, the process might be virtually impossible.

Close accounts, Sure, try Just Delete Me. I’m not sure how long the sites has been around, but I’ve used it numerous times, especially in late 2012 and late 2018. Sometimes you just need to purge your accounts, to gain some sanity online. Have you ever thought about how often you sign up for an account that goes dormant indefinitely? And what about when you download a game  like Candy Crush or Crash Of Clans and want to completely wipe the data, account and interaction with that company? Just start with Just Delete Me. Although, there are many ways to perform this task, JustDeleteMe helps with all of them! Notice the color palette (Difficulty Scale), the ability to perform the ‘deletion’, and the help pages provided by your selected account or entity to purge. Give it a shot and get rid of your accounts! It’s a great time to purge your accounts.

For the purpose of this post, we decided to try out the site ourselves, aiming for account freedom and liberation from Basecamp. Enjoy!

Just Deleted Me, Delete Your Accounts online Just Deleted Me, Delete Your Accounts online Select an account 2 Just Deleted Me, Delete Your Accounts online once an account has been selected 3

FLUSH – DNS Cache

Flush System DNS CACHE, IP Address Wisdom And More

DNS Flush

Tech | Tools – More Reference Than Tool, MacOS Flush DNS Cache

A few things to note: from time to time, you may need to flush your DNS cache, understand how your IP address is acting and how to dump, secure, or authorize computer code to start fresh.

Flush DNS Cache – MacOS
  • Plain text: sudo dscacheutil -flushcache; sudo killall -HUP mDNSResponder; say cache flushed
  • Or
  • 1. Command  + Spacebar
  • 2. Type Terminal, strike enter
  • 3. Select to Open ‘Mac Terminal Application’
  • 4. Type sudo dscacheutil -flushcache; sudo killall -HUP mDNSResponder; say cache flushed, strike enter
  • 5. Terminal will request “Sudo” password, enter Sudo password, and strike enter
  • 6. Assuming the password given is correct, the system will state “Cache Flushed as indicated in the terminal command
  • 7. Command  + W to close Terminal window
  • 8. Strike Enter to close out window
Flush DNS Cache – Windows
  • 1. Ctrl + R Run Windows Terminal
  • 2. ipconfig /all directing the system to flush all. For more information, you can look up more information by inputting ipconfig?
  • 3. Assuming no superuser credentials needed, strike enter
  • 4. Terminal will confirm, all released and renewed
  • 5. Ctrl + W to close Terminal window

Although this post may seem basic basic, at it’s core, it is. The command has been available since the dawn of the internet allowing users to reset the system as needed. This post will focus on the process of flushing the MacOS DNS Cache. I have included a snippet/script for resolving connection issues, tailored for both MacOS and Windows users who may come across this post. 

Experiencing lag? Before we proceed, please note that these terminal commands have been used for a while with limited changes over time. The only differences might be MacOS specific, directing the system to ‘speak aloud – Cache flushed’ when the command has been completed, among other actions. Flushing the DNS cache might just be the trick for your Mac. What exactly is this DNS flushing business? It involves skipping the process of physically deleting your local cache (not internet cache/cookies etc). I’ll also post something about that.

So, we are talking about flushing the DNS? Let’s begin with a brief explanation of DNS – Domain Name Server. If you need more information on DNS, you can check out Cloudflare’s Definition of DNS to understand how it works, and so on.  Essentially, the DNS translates domain names into  IP addresses, which are essential for navigating the internet. Without DNS, web browsers wouldn’t be able to load websites. For a more in-depth look, I recommend reading the  Cloudflare article for more details.

In a day or two, I will follow up with a post on WhatIsMyIPAddress about deleting ‘local user cache’ files on your Mac. It will make more sense in a few days if you haven’t a chance to troubleshoot your own computer issues related to internet speed, lag, and connections.

Ender Upgrade Adhesion Issue

Adhesion Issues, Bed Temp

Latest Ender Chaos

Ender Issue 26

Lab Work – Humor Is The Only Way Sometimes

The Lead, 6 hour+ print chaos; let’s address and tackle these Ender Upgrade Adhesion Issues. We will put the Halot Sky Resin vat cover issue, on hold and focus on the Ender 3 Neo Max bed adhesion problems. It has taken over 5 hours to troubleshoot, with fans running and a cooling bed plate. There are numerous issues to tackle!

Let’s Troubleshoot
Extruder Pressed Down

Extruder Pressed Down

Bed Inspection

Bed Inspection

Extruder Removed

Extruder Removed

Sensor Globule

Sensor Globule

blank

Heating Element

blank

Close Up

Track Bands Off

Track Bands Off

Missing Tension Knobs

Missing Tension Knobs

Extruder Into Plate

Extruder Pushing Plate

Current Status, Visual Check

Secondly, we are missing hand-tension screws and tension belts. There is a literal mess of PLA covering 60% or more of the printer, extrusion head, bed and assembly. Fortunately, I walked in post-print as a tension belt was in the process of removing itself from the printer head.

That concludes the visual inspection portion of the Ender Upgrade Adhesion Issue. Moving forward, we have the printer head back together, PLA cleaned off, tension belts applied. Next and not captured below, replace adhesion plate, tension screws, and restart the machine for calibration. Look for update posts here in the next day or two.

What is the purpose of the print? I wanted to put a cover on the Halot Sky (V1) Resin vat, but I am not sure where the original cover might have gone – it could have been misplaced, broken, scrapped or lost. More importantly, the print itself was lost. From the perspective of the ‘pressman’, the printable seems to have failed to adhere to the build plate. After checking the settings, it was discovered that the ironing was off, and the printer head was buried into the print plate. This is not good for the printer or its parts. Additionally, there was a concerning sound of tension belts releasing and printer head/plate friction. However, the print fix is currently being fixed, and we will provide an update at a later date or time.

Finally, we replace build plate, hand screws, springs, restart/update firmware and calibration.

Ender Filament and Adhesion Issues

Filament Challenges and More

Print Plate Surface Adhesion and Heating Issues

3D Printer Adhesion Issues with PLA and TPU

Lab Work – Ender Issues Defined

A few more weeks of Ender issues…

Ender Filament and Adhesion Issues, are causing a delay in the TPU Neo Max upgrade progress. I will be sharing more Ender ‘lite’ issues, as we continue the TPU trial and face filament challenges. The filament change was primarily for lab work on bait designs and future locking mechanisms where TPU will be more appropriate. Despite this tangent, core printing has not ceased, I am still facing challenges with PLA.

Ender Filament and Adhesion Issues

There are countless issues that seem infinite at the moment. Everything from  Creality Software to Ultimaker Cura, Sonic Pad issues, filament running temp, and new surface temperature problems… we have a lot of cover. I will break these down into 2 or 3 new posts over the next week. We will also revisit surface adhesion. Surface adhesion and surface temperature seem to be causing most of the issues on the Ender Max Neo. I must admit, tinkering doesn’t always result in perfect prints, even 60% to 80% of the time. I won’t argue, I’ll just focus on testing… the more runs, the better chance we have of increasing that 60% likelihood of successful prints.

Pictures will follow,  as they say, a picture is worth a thousand words. The pictures will be shared to specifically cover thickness, fragility and test prints. Let’s get to printing!

Ender 3 Max Neo Filament

Printer Base Stabilization, Adhesion and Print Heights

Ender 3 Max Neo Filament Solutions

Filament Everywhere

Lab Work – TPU Speed and Cycle Times

For this article on the Ender 3 Max Neo Filament, a typical print cycle might run between 2-5 hours, possibly more. While the standard range has been 2-5 hours, we are now looking at 12 – 16 hours. Recently, we have extended the top maximum run times to just under 12 hours for our test models. Surprisingly, both print tests resulted in the a mess.

For the record, a paper towel holder caused this issue twice. Upon initial observation, as the prints moved vertically (up the y-axis), the printing quality deteriorated. Somewhere between the 4″ and 5″ mark, both test prints went awry. 

I’m starting to think there is shaking issue with the table or even a stabilization issue where the printer. is located. Both issues might be addressed by printing the base slices, holder ends, screws, rods, and washers in a single print. These items should be printed separately to attach the towel roll and the rod. The rod that is slung between the holders can be printed in a secondary or tertiary step, This is mitigation issue number one, or we could address the stabilization directly. The printers are currently positioned where they stand, so there is not much I can do to move them around.

Once I received the new filament, we will print the rod. If it works, great. If not, then step two will be more tedious. The issue is mostly a space problem in the office. The filament should arrive later today, and I will post a quick summary once I finish printing the rod slice, assuming it is successful.

Ironically, a similar issue was occurring when I ran TPU through the machine. So we can conclude the Ender 3 Max Neo Filament post with this. Although I don’t think they are related, adhesion was the issue with TPU. Which we will address in a future post once we determine the correct nozzle temps, print speed, and adhesion setup. I have heard/read about using adhesion spray or glue stick. Another day, we will tackle those 3d printer issues/phantom printing phenomenon.