Lab Work – Perhaps, the best way to show ‘work’ or work in progress; in most cases, the purpose is to highlight the struggle to find a solution, the test effort and the learning that takes place when fixing stuff. Or another way to share various phases of the problem solving process – hypothesize: test, learn and apply.

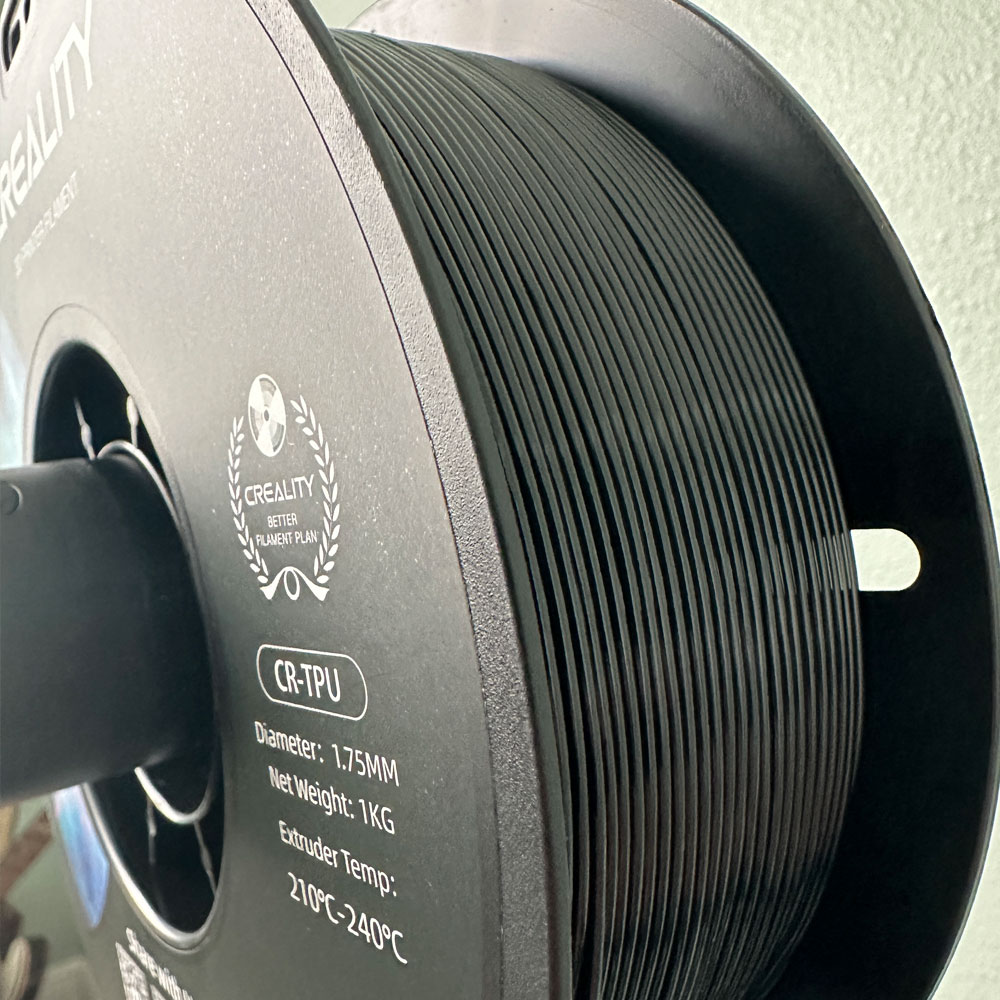
Creality TPU

TPU Filament, Challenges and Wins

OEM TPU
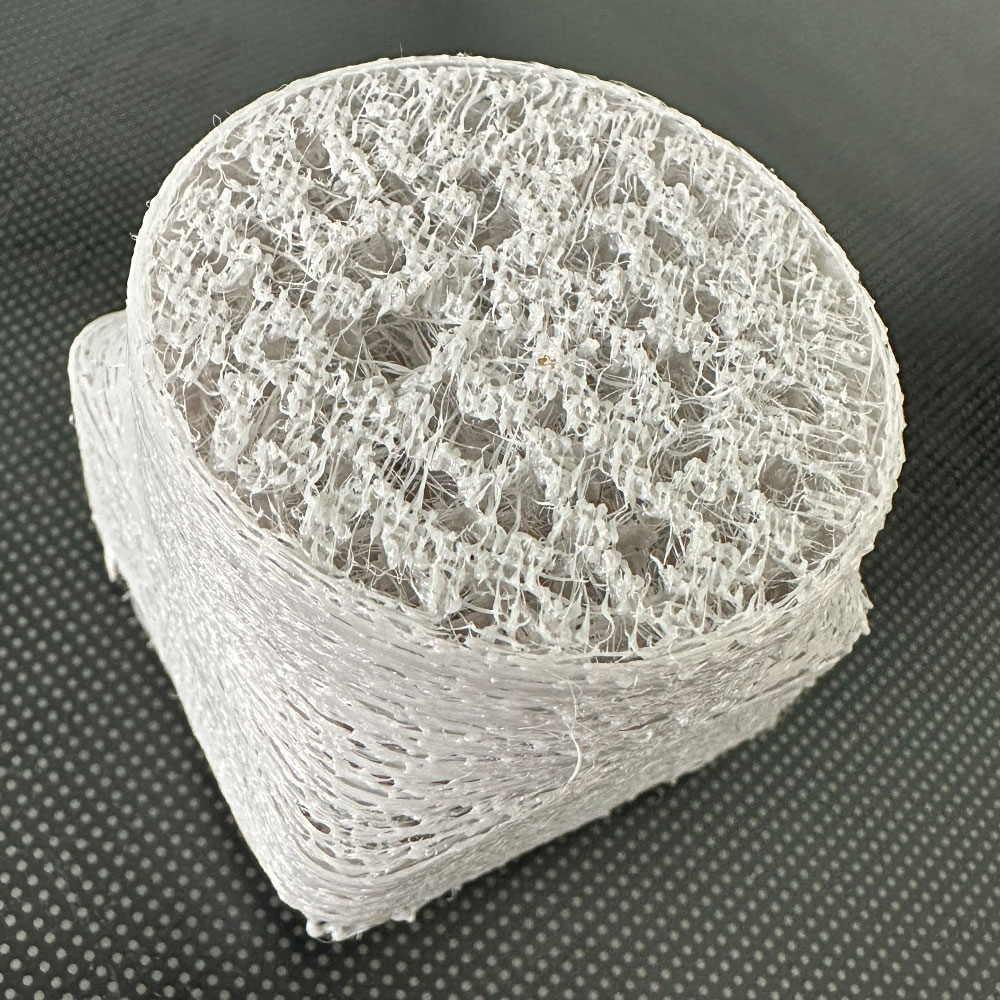
Duramic 3d - Post Upgrade

Lab Work – Various Filaments

Filament types, such as Creality TPU and various brands, can be a nightmare of a problem to have. Which filament should you purchase? What works best on the 3D printer I own? What should I do when I’m just starting out?

Cut to the point: purchase anduse what you can in context. However, when push comes to shove, the Ender Series, Prusa, and Makerbot all great choices for novices or beginners. Starting with an eBay ‘parts’ printer, might help cut down costs or consider a refurbished one.

Regardless of the  product make or structure, the fine-tuning the nozzles, stability of the machine, drive system, adhesion, and filament are important. Filament might be the easiest to swap out, follower by the nozzle (noting various nozzle sizes, with most default sizes being .4mm). For hobbyists, the drive mechanism, bed/build plates, etc. may also need attention. Filament might just be an easy swap with a catch.

Like most things, filament comes with it’s own issues – additional research is required, fine tuning and testing depending on the choice of 3D printer. Let’s talk shop, about filaments, retraction (more on this in a future post). Listen, if purchasing power is a problem, meaning if you have limited funds, start by buying what you can afford, especially for those starting out in the 3D printing hobby. Do what you can to make ‘it work’. Making it work means being able to test, test, and retest. It’s a process of elimination, gradually solving problems over time. Better filaments lead to better results.

Let’s have a look

There have been many times when testing, in fact, I might venture to say, problems are related to the cost of filament and the length of time it takes the user to move from the cheaper options to the final working filament. At least in my experience of finding the right filament through testing, more than not, filament testing became a costly lesson in what not to do. So, yes, a healthy dose of testing is needed, including failure.

That said, I would be remiss not to highlight the value of this article, which is to help you save money on filaments, pieces, parts, and printing costs. The key takeaway is to buy and match OEM (Original Equipment Manufacturing) filaments. For example, since I have Creality printers (3 Creality printers in total), thus, I use Creality filaments like Creality TPU (Thermoplastic Polyurethane) Filament.

Lately, we’ve been looking branch out a bit, as we’ve recently added the Prusa’s i3 MK3S+ 3D Printer kit to the mix. Again, there are many options, printers, upgrades, filaments… choose wisely.

Learn More via MatterHackers

Let’s focus on what works, finding something that works for your current printer or future printer. As a hobbyist, I have stuck to the ‘happy path’ being less adventurous and mainly using PLA’s (Polylactic Acid) and TPU’s.  MatterHackers does an excellent job of providing information on what’s available on the market, including types of filament, sizes, brands, and colors.

Dive in! Or maybe, expansion is on your mind, and you want to setup your own print farm – @ShopNation might be a great research to check out. Have options, which might be the biggest take away beyond testing or OEM/OEM filaments. Hey, as a hobbyist, saving some cash is good thing, there are thousands of upgrades on the market, same for the number of printers, filaments, parts, boards etc.

Through various testing methods, settings, set ups, printers and more, I have discovered that what matters most is what works. That is defined as success rate or success metric. Consistency, fit/finish, quality over flash and speed over quantity are key factor. For example Duramic 3D TPU is just not working in the Ender 3 Neo Max rebuild. After tearing it down, rebuilding with all updates, and getting the same result, it is clear that it is time to make a switch. 

OEM Filaments and More

The switch I’m referring to here, moving from generics to OEM, worked on the PLA side of the equation. It may be a correlation perhaps, and not causation. I believe that’s the value here. A handy lesson might be to continue testing where it makes sense. Remember, “correlation does not imply or mean causation,” via Mr. Glickman. Learn more about his work via his personal website or faculty website. Or, click here – Mark Glickman – Senior Lecturer in Statistics, Director of Masters Study.

If you want to learn more about filaments, do your research. Please do look into – MatterHackers, All3dp – Filament Finds and/or @ShopNation

I’ll leave you with this, try what you can afford, what you can afford to discard. Test and work to fine-tune your printer. Words of encouragement ‘leave no product stone unturned’. The goal is to produce high quality, consistent, and clean prints.

Find something that works 80% of the time, the old 80/20 rule. PLA is difficult bear to tweak and maintain, as is TPU and the ~approximately 14 other materials including metals, carbon fiber, wood, and nylon. The applications are endless, ranging from starter to full forge, high-strength, commercial production. The focus should be on settings, adhesion, extrusion temp, nozzle temp, surface tension, and drives – pushers… And so on, testing is our motto/mantra, testing has become a constant. Key is to find  something that works well overall, so test them all. Checkin from time to time, as new posts are created daily. We will cover the Prusa tests, Creality TPU, Polycarbonate and PVA (Polyvinyl Alcohol).

Have fun, cheers

Drone Accessories
Creality TPU

Creality TPU

TPU Weight

TPU Weight

Duramic 3D

Duramic 3D

Ender Teardown

Let’s Kickoff the Rebuild With A Teardown

Ender Teardown, Rebuild – Start

Unpack - Ender Internals

Lab Work – Teardown Part 1

A few steps into the Ender Teardown – follow these steps to open the 3D printer housing or bottom hatch. Replace extruder wires, internal fan wires, jumpers etc. Check out the timeline below presented in editorial form.

Step One
Motherboard

Motherboard

Old Wires

Old Wires

Remove Hot Glue

Remove Hot Glue

Fan Ports

Fan Port

Rewrap

Rewrap

Reattach

Reattach

Power On

Power On

Next Steps, Step 2

Voila! The first phase (teardown) is complete, and  we are moving onto Rebuild Part 2, which will be more challenging. This part of the build will involve swapping the extruders from Bowden to Direct Drive and potentially replacing the back plate depending on the hardware and tools required. It’s important to note that the back plates are not identical and will need some adjustments. We plan to proceed with the swap and salvage the old plate. It shouldn’t be too difficult, especially now that we have completed part 1. Removing the hot glue can be tricky, but once you get past that and the screw, everything should go smoothly.

This seems like a good place to end. I will post another update on the tool set we used to complete the Ender Teardown. I have recently added a Klein driver set, a handy multitool to complement the new Tekprem Torx set. Check back soon for more updates in round two!

Street Fighter Returns

Any Street Fighter Fans Out There, Capcom or SNK?

Street Fighter 6(XBox/PC)

SF 30th Anniversary

Lab Work – Steam, XBox, VM Software, Street Fighter And More

It’s time… it’s time we embark on a new adventure, Street Fighter returns…

Systems Check: Parallels (checked), Windows 11 (checked), Steam (checked), Street Fighter… Street Fighter is up and running, first boot, and ready to go come Monday or Tuesday. It’s been about 20 years since my last play… Emulation and Steam are necessary now. Back in the day, I believe it was  Street Fighter – Capcom vs SNK during my undergrad years. I believe we are anticipating Street Fighter 6… I’m certain it will be fantastic. We will be playing the game on Xbox/PC (Asus Mini or MacOS Parallels {Win11 or Linux distribution}). Whichever runs better than the other or vice versa.

Drone Accessories
Steam Install

Steam Install

Steam Download

Steam Download

Street Fighter Load

Street Fighter Load

StreetFighter FLavors

Street Fighter Flavors

xBox Controllers

xBox Controllers

The point here is that I’ll get to it. Street Fighter Returns. It’s been over 20 years since I played my favorite game of all time. The first few were of the ‘all-time variety’. I started as a button smasher, then progressed to novice, and eventually became a skilled player. I’m not sure if I would call myself a gamer, but for the purposes of this post, I was the closest thing to the ‘idea Street Fighter gamer’… Perhaps it’s more nostalgia than practicality that gives it its legendary status.

Anyhow, I think we will tune up the Asus mini, and give it a go over the next few days or weeks. We have guitar, printer, and ‘on the bench’ fixes coming soon… Why not add a college favorite to the mix? We can also cover the Asus mini, MacOS Parallels (running Win11 and Linux) while we are at it.

Solitaire Wins Vs. Tosses

Play Solitaire

Wins (Standar/Vegas Style) vs Tosses (Losses)

Hoyle/Bicycle Variety

Lab Work – Solitaire

Wins Vs. Tosses, Vegas or Standard, Solitaire is a great game to cover.

We will cover this topic in depth in a future post. However, for now, I wanted to provide a sneak peek. I have recorded 4 weeks or more of Solitaire games, noting the number of tosses and wins. In some upcoming sessions, I will compare Vegas (3 card draw/flip) to standard (single card draw/flip). Solitaire. The results are interesting so far, with the numbers are starting to even out. Currently, wins are +2 over tosses.

I have a collection of cards, which are typical convenient store card packs. I have a total of 5 packs, 4 standard Bicycle decks, in poker size and one set that is waterproof (you can find Hoyle Waterproof cards). These are handy for the various places I tend to play, such as out by the pool, on a coffee-stained cutting mat, or on any number of other flat surfaces like the kitchen table. It’s especially helpful to have the waterproof deck in a pinch.

Wins Vs Tosses
Shuffle

Shuffle

Ruffle

Ruffle

5th Game

5th Game

Water Proof

Water Proof

Yes, I call it, Solitaire Wins Vs. Tosses. Yes, the tosses are losses… The point is to speed up the game, switch decks, and increase the number of shuffles – to 3 to 7, with closer to 7 shuffles yielding better results. I also want to note that I reset the card deck after a certain number of tosses. These numbers might be added in a future post as well.

Good luck, don’t forget, tosses over losses, wins over tosses.

Not a fan of Solitaire? No problem, let’s explore some other options before we finish up. Puzzles? How about the Candy Crush game series? Or maybe you’re up for a game of World War 3 play with friends like we did here, or take on the challenge of conquering the world alone. Not into ‘Risk-like’ games? How about trying out D&D? Check out Dungeon Boss – Revised. Still not interested? What about Clash of Clans?

Max Neo Back Plate

Wrong Parts, Wrong Parts Received

Back Plate and Rail Wheels

Old Rail Cart

Lab Work – Working Through The Challenges Associated With 3d Printers, Printing, Upgrades and More

Relieved my Max Neo Back Plate, the long awaited parts are on the truck this morning

Quick update, all the parts needed to update the Ender 3 Neo Max to run TPU filament through the new, upgraded parts are in. They are within arm’s reach and ready to be installed to complete the initial TPU build.

Unfortunately, I want to go on record and share a warning. I will post the tear down at some-point. So, the essence of the warning is to be careful what you order. Makes sense, right? Cross reference and cross-check OEM parts, refer t your 3D build, and ensure fit and compatibility.
 
Build progress has stopped because we have the wrong assembly cart, ideally we should have the Max Neo Back Plate, or back plate. The plate configuration (proper mounting holes, size, shape) is off. If you’re new to the site, check out the Max Neo challenges in the Output archives… For those who just want to see the TPU rebuild go here, but understand his – we had a few prints that went sideways. By sideways, I mean the extruder was found buried in filament, grinding away at the build plate.
 
What’s Next
Ultimately causing a meltdown, and plate parts found elsewhere etc. Prior to the blow out, we have a few successful TPU test builds are in hand, but are error pron. More like the standard build (Ender 3 Neo Max Bowden Extruder setup, standard build from the factory) minus the upgrade, if you can believe that. Please note that sometimes you have to ‘break’ things to truly figure out the right path or change paths, so to speak.
 
Anyhow, not to belabor the point here, but, we have all the necessary parts to start rebuilding this machine with the correct parts and extruder. This will allow us to build more ‘things’ with an array of filaments.

20 Mins A Day

Learn How To Play The Guitar, In Just 20 mins

Nose To The Grind – 20mins A Day

Lab Work – Grinding Out Practice Time, Self-Improvement

Today, I added strumming the guitar ‘guitar grind’ back in the mix. Grind you say?

Yes, the grind. I’ve never been musically inclined, nor formally taught, trained or had a significant amount of time to dedicate to the craft. So, in order to chip away at this theory of the ‘grind’… today, I’ve found 20 – 30 minutes (per day) to pick up the guitar and learn something; anything. Whether it be lessons, chord progression, song practice, music theory, finger position, scales, strumming and more. Like I said, just trying to chip away at the rust, if there was any rust built up over the years.

Check out my recent post on the D’Addario medium celluloid picks. I’ve found them to be useful when dealing with finger slippage, mostly due to sweat. I also added Vincent’s post on 50+ Easy Guitar Songs for Every Beginner. As a beginner, novice I am. Not horrible might be away to describe the journey.

Online Resources, Content Creators

The lessons and songs plays nicely in the sandbox, guitar in hand, for 20 – 30 minutes. They cover “I Wanna Be There” by Blessed Union Of Souls, “Three Little Birds” by Bob Marley, “3am” by Matchbox 20, “Learning To Fly” by Tom Petty and “Comfortably Numb” by Pink Floyd. I wouldn’t say this was easy for me as a struggling novice. Additionally, Vincent’s collection includes other online talent with distinction – a quick search, and you too can play along with @Guitar Zoom – for Chord Work via Steve Stine, @MartyMusic – for the “3am” lesson by Marty Swartz, and “The Secret to Strumming Learning To Fly” by Tom Petty, via @Lauren Bateman.

So, what am I getting at here? What’s the catch? I’ll leave you with this: Whether it’s learning the guitar outright, formal music lessons, finger positions etc. from a music perspective, or general reading, try it for 20/30 mins a day. Dedicate the time to developing this habit, a new habit. Good habits are hard to find, and that’s the value in what we’re targeting in this post. Yes, this post is specific to guitar learning, and may be more about ‘writing’ for me, writers block or fatigue. I’m a firm believer in finding new skills, making new connections and pushing myself further than the day prior. Final note, I’ve had access to a guitar since college, over 20 years ago. It’s time to pick it up, tune it, and start learning today.

Good luck with your own activity to start today, grind away

TPU Direct Drive Support

TPU Is The Goal, TPU Direct Drive Support Build

New Assembly, Drive Drive Extruder, Support Back Plate and Rail Wheels

Lab Work – Building and Buying Parts On The Supply List

…A few more days folks, and we can start working on the TPU Direct Drive Support build. A new extruder support plate for the Ender 3 Neo Max is on its way. Not on back order, but waiting the last piece before the rebuild can begin.

Before we proceed with installing the new parts, we discovered an issue with the back support plate (including wheels and bolts) being misaligned. After the printer ‘meltdown’ a few months ago, you can see the results of that print here. The final piece needed for the rebuild is this support back plate. There is too much play and space between the assembly and guide rails. I don’t recall there being any movement between the parts. I would expect there to be little to no wiggle room in those items. However, I can almost light off the assembly housing, extruder, and back plate from the guide rails under tension. This  was a clear sign that it was time to replace the guide rails under tension. think there is no or very little ‘wiggle room’/tolerance in those items. However, I can almost lift off the assembly housing, extruder, and back plate from the guide rails under tension. This was a clear sign that it was time to replace the support plate, bolts, and wheels to ensure an improved upgrade and fix.

New Build

Anyhow, all the pieces and parts have been removed from the initial purchase. We will proceed with the TPU Direct Drive Support build. So, for picture sake, we’ve got the frame, base, and guide rails and that’s it. All parts have been removed for the moment. ~It’s been about 3 weeks now, awaiting the OEM support plate. Ultimately, we are looking at a clean rebuild using OEM parts with a few upgrades (direct drive, replacing the Bowden extruder) to allow for TPU, Wood/Bamboo, Carbon, Metal, Organics and more.

System upgrades might come later, with the goal being more power to compensate for the downforces on the extruder head in the direct drive case. Caution, there are differences between the Direct-drive and Bowden extruders, obviously advantages and disadvantages for both… maintenance and care being the most complex for the direct-drive variety.

More Filament Types

The goal with the direct-drive ‘pivot’ is to improve heat, extrusion pressure, retraction and expand the range of filament materials. For the sake of this article, I will focus on the updated advantages and disadvantages. The comparison is between more materials, heat, pressure, and variety versus maintenance which can be a lot. I personally use the break/fix method, as parts are less expensive to replace in the printer ecosystem. It may not always be the wised choice, but sometimes breaking something is necessary to understand the machine or engineering behind it. In conclusion, having spare parts on hand is helpful. Build yourself a parts bin and consider parting out used or gently used components to reduce out-of-pocket expenses. Learn how to maintain and reuse your gadgets. Remember to fail fast when working on such equipment. Short-term expenses for break-fix situations can save money in the long run when dealing with 3D printers, drones, computers, and more

Final thoughts: Parts can help you build yourself a parts bin. Need updates, board firmware, and Slicers? Download those items here for Creality Software Support.  Part out used and gently used parts to cut down on out-of-pocket expenses. Learn how to maintain and reuse your gadgets. Don’t forget to fail fast, when working on such equipment. Short-term break fix expenses go along way when dealing with 3D printers, drones, computers and more.

Disposal Problem

Food and Debris Stuck, Fix A Disposal Problem

No Grind, Time For A New Disposal

Disposal - Internals

Lab Work – Emergency Fix

A few weeks ago, had a minor issue with the sink disposal. The picture here is speaks volumes about the problem we encountered. 

Once the problem was identified, it was clear that we needed to replace the disposal unit. Upon closer inspection, we found that rust had caused significant damage internally. I had to remove the seal and screws to crack open the top of the disposal unit. Honestly, I  was surprised by how worn out the unit was. It was definitely time for a replacement, and were fortunate to have discovered the issue when we did.

Disposal Parts and Install
New Install

New Disposal Install

Debris Filter

Debris Filter

Clean Teeth

Clean Teeth

Interior View

Interior View

Next, the title, “Disposal Problem ‘no grind’, time to replace it a new title. Unfortunately, the 1/2 replacement had a short in the wiring. Being a conscientious consumer, I decided to upgrade to the new InSinkErator 3/4 hp, which you can see here. It was a smart choice as it was the same brand and fit perfectly in the cabinet space. You can see the final installation below. These disposal units are usually plug and play, assuming that piping and plugs are readily available and identical. For this reason, I stuck with the same brand, hoping for seamless setup.

Next, I didn’t want to hack away at the existing piping, cabinetry etc, just want to maintain and in this case boost the output. You’ll see a slight increase in HP, a plastic outer case/shell and a sparkly new (newly cleaned) lower cabinet for it’s foreseeable future. What a mess. Moving along, fix in place, watch what you put down the sink etc. Remember to check the sealant between the disposal and connector. We had a little leakage that has now been remedied. Not bad, virtually the same machine, replaced, tools – pliers, pipe wrench, flathead, pipe tape and a small bin in case of water leaks or intrusion in the future.

Like the quick fix format? Check out other quick fix content here such as this disposal problems fix. Learn how to descale your coffee equipment – pots and machines, fix a toilet float, clean and fixpool filter housing and filter problem or try a cell phone charging hack… Check them out!

Finally, hopefully (fingers-crossed), you can learn a thing or two. Be sure to unplug disposals, have some extra ‘shop’ towels to mop up excess water or worse, sink goo. Make sure local power outlets are off and to be safe, turn off water where applicable.

TPU Update

TPU Upgrades and Updates

New Assembly and Drive Drive Extruder

Creality Extruder, Full Assembly

Lab Work – Bolt On Upgrades

We are updating the extruder – TPU Update. Adding a bolt-on direct drive upgrade and replacing the Series 3 full assembly body.

The TPU update is a go. First, PLA is great. TPU is better for certain applications. However, we start with PLA. If you need flexibility over rigidity it is assumed that you want to test TPU filament. First, we will replace the existing assembly body on the MAX NEO and bolt on the new extruder to address the TPU issues*. TPU requires more force to drive the flexible filament through the assembly and out the nozzle. The direct drive will help with ‘refinement’ and focusing on pushing and pulling the filament more accurately and precisely.

Creality Accessories
Unboxing

Unboxing

Drive Motor

Drive Motor

Assembly

Assembly

Remove Extruder

Remove Extruder

Unscrew The Fans

Unscrew the Fans

Assembly

Assembly

Again, in terms of next steps and the TPU Update, the update is not a *requirement,. However, after seeing enough test prints, it’s time to make the switch. Here is the bolt on solution from Creality for the Ender 3-Series, MAX NEO. Moreover, what do I mean by ‘requirement’ above? In my opinion, it would be extremely difficult to print TPU printables using a Bowden drive. I’ve tried, and it doesn’t work well. Finally, the Bowden drive doesn’t provide enough filament force and direct force to the filament through the hot end, hence the need for a direct drive motor. So, I want to emphasize that there’s no need to buy a new machine for TPU printing. Simply, do the swap and you can print both TPU and other high-temperature filaments as well.

Quick update: since this post was shared, we have received the parts for the TPU updates, allows us to begin the direct drive build. TPU filaments and prints can now be done without the necessary upgrades. Let’s get into the build and upgrade action! Side note, before we move off the direct drive action, I’d like to share other Halot updates including the Halot LCD fix and other break-fixes when adding a resin printer to your arsenal.

Stay tuned for additional photos and mini-clips covering the installation soon. In the meantime, here is a brief unboxing and assembly tear-down. Thanks!

NES Ice Climber

A Mighty Climb To The Top

Climb’n Ice

Retro Gamer presents Ice Climber

Lab Work – Play Ice Climber Now

NES – Ice Climber, Famous Titles and more. Let’s cover NES titles, walk-throughs, play-throughs and even a little 80’s NES Lore

Do you remember Kong Fan? Rampage? Gyromite? How about Ice Climber? Play Ice Climber online now! I remember the pain of never being good at the game. The games were epic for ’85/’86 and I recall it like it was yesterday. My childhood friend owned the game console with a few games, including Ice Climber. We had the NES console, which it was epic. I think we had the following game cartridges, Super Mario, Baseball, Excitebike, and Duck Hunt. The Legend of Zelda was a secondary purchase that I remember vividly, the golden cartridge was top-notch marketing.

NES Titles, Walk-throughs and Play-Throughs

If you want to watch more NES content, play-throughs and/or walk-throughs, my goto content creators for archived video content are @worldoflongplay, @lordkayoss, and @nintendoComplete. The point here is that content, video ‘gaming’ in my childhood was spars. the neighborhoods kid had very few games, which means time on the console/game was limited. This meant the main focus was single player or limited two player games, most of the time with extremely lopsided outcomes when it came to head-to-head competition or gaming.

Imagine passing controllers passed back-and-forth for another try.  I don’t think it would have made a difference anyway. The key was to rent, borrow, or  purchase the game of choice and earn your stripes. I was terrible at the game, but it was awesome, reminiscent of those games above, the Donkey Kong or Rampage, with bottom-up racing games. Races included ice, stone obstacles, bears, birds, and other creatures. Awesome!

Other NES Titles

Let’s continue with more NES titles, including both favorites and rarities. Ice Climber and Gyromite were part of the original series of around 17 games released on the US Nintendo Entertainment System. Don’t quote me on the total number of games released in the original US lineup, but here is what I’ve gathered – Duck Hunt*, Gyromite, 10-Yard Fight(a football, game I’ve never played), Baseball**, Clu CLu Land, Donkey Kong Jr., Excitebike**, Golf*, Hogan’s Alley, Ice Climber**, Kung Fu**, Mach Rider, Pinball, Stack Up, Tennis, Wild Gunman and Wrecking Crew. Some of my favorites are marked with an (*) or double asterisk  (**) based on my total playtime, enjoyment, and overall player experience. 

Again, take this as it is. It’s been along time (30 years or more) since this article was written and the original gameplay. Many of the games I don’t remember or only played for a few hours. The games are simply included in the original Nintendo US offering. To answer your question, Ice Climber was awesome, Excitebike and Kung Fu were also great.

Gyromite and ROB (Robot Operting Buddy)

Moreover, Gyromite was a fun but incredibly challenging for an adolescent. Gyromite is a side-view puzzle game, featuring a quirky old professor/scienctist who jumps around while avoiding pipes and critters. It’s worth noting that Gyromite also involved the R.O.B., a unique accessory for the NES. The US NES Console was released with Gyromite and R.O.B., an automated player accessory for cooperative play. This was an innovative move by Nintendo, although R.O.B. was short-lived as an accessory.  

For context, there was the NES Blaster/Zapper, Powerpad, Powerglove, and game-specific controllers like the laser scope and Max pad. For more information on those accessories,  Gaming History101 does a much better job covering them. Kudos to them, as I was only familiar with about 60% of the items listed – U-Force, Laser-Scope and R.O.B. being the most notable.  Returning to Gyromite/R.O.B., the game was linear, morning right-to-left and up-and-down, with a cool robot accessory called R.O.B. that could help open pipes in the case of Gyromite.

The Wrap Up

Duck Hunt was unique. It came with a blaster, officially called the Zapper (I remember it being grey), which was a cool idea. Clu Clu Land was tough from what I remember, similar to Alex The Kidd (a Sega Console game, if I recall correctly. If not, please look it up for context).

Anyhow, getting back on track, let’s conclude the article with Ice Climber. Ice Climber was a fantastic game, one of the original titles on the NES console. Players control characters who jump, climb, and use a mallet to make their way to the top of vertical boards. They must fight off bears, bee-like bugs, Yeti (bigfoot-like creatures), birds, and more. In my opinion, out of the 17 original games on the NES console, Ice Climber was one of the best, offering 2-player fun and a challenging difficulty level, especially for young players in 1985-86. In future posts, I will discuss Nintendo controllers and accessories such as the  Power Glove, Power Mat, Game Genie, R.O.B, NES Light Gun and more. Cheers.