Search
Close this search box.
Sallee Technology Logo

Part 5

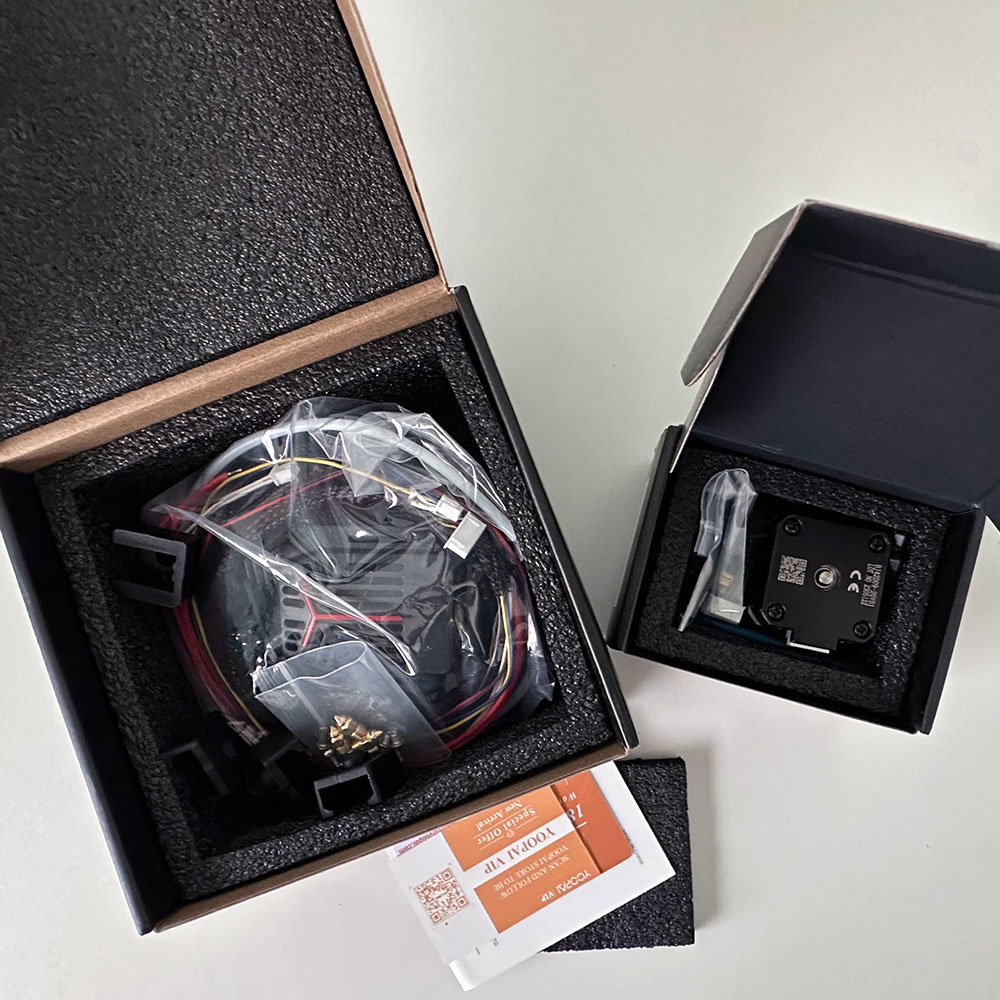
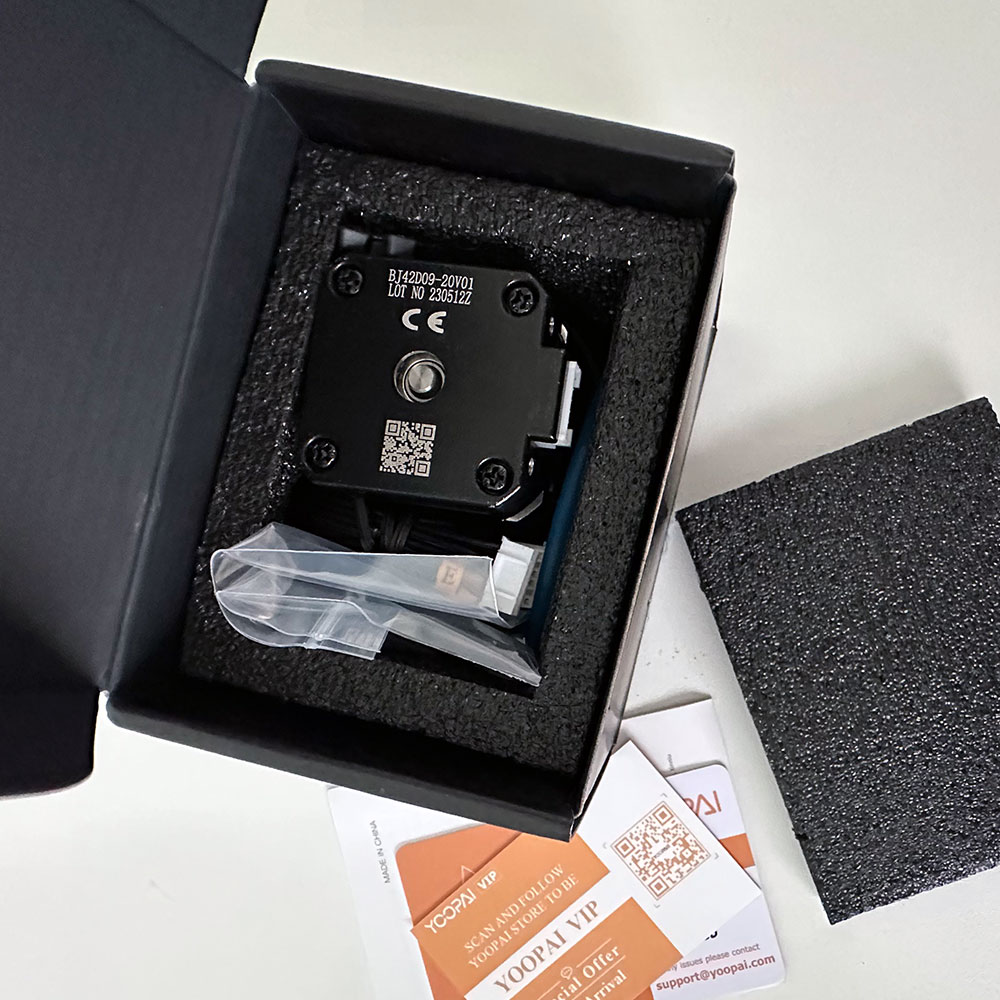
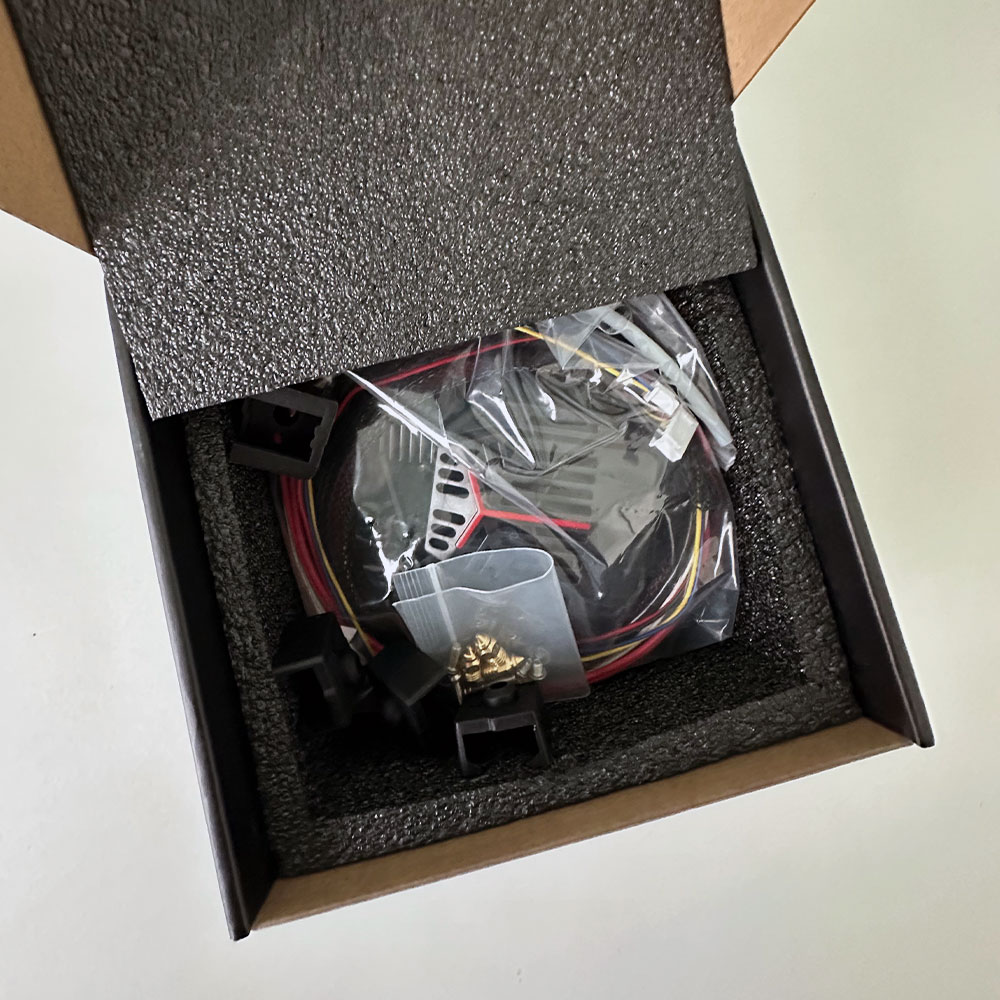
Rebuild(s), Sonic Pad Adjustments, Assembly, Part 5

Part 5 Inputs/Outputs

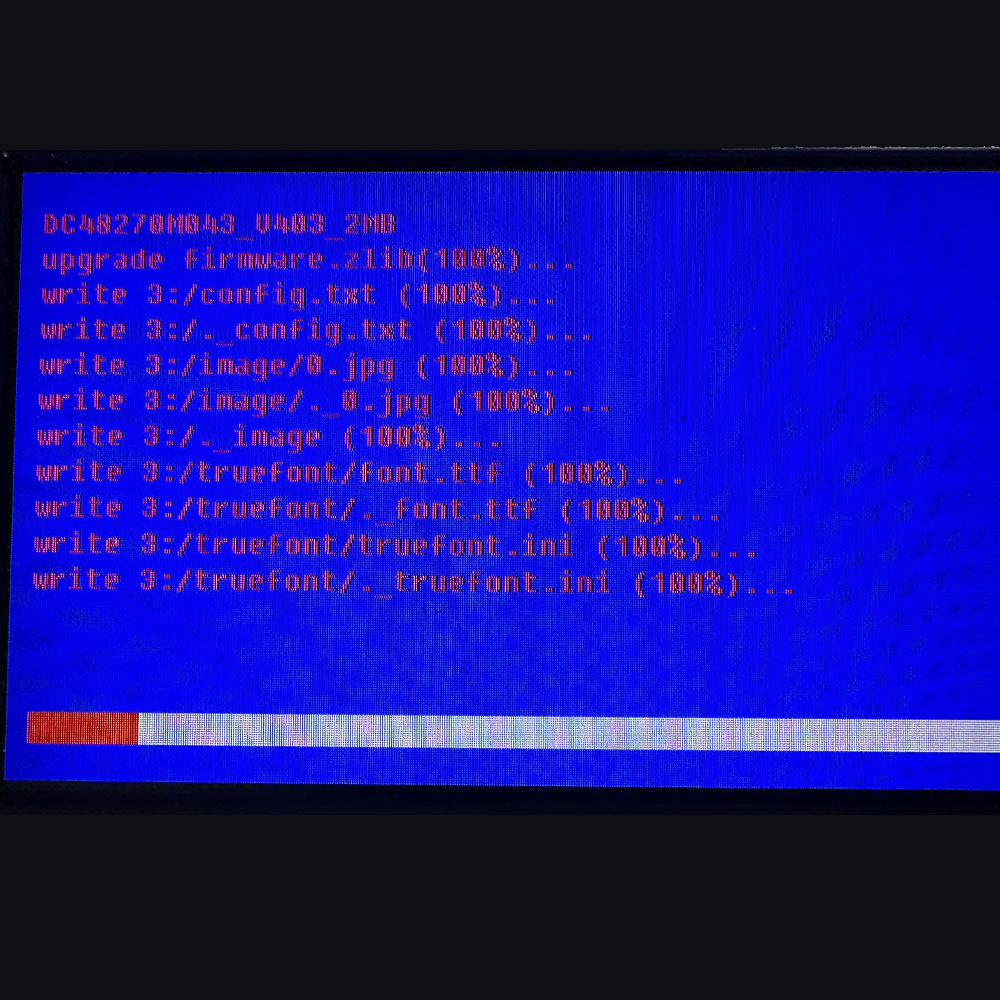
Labwork – Upgrade Part 5

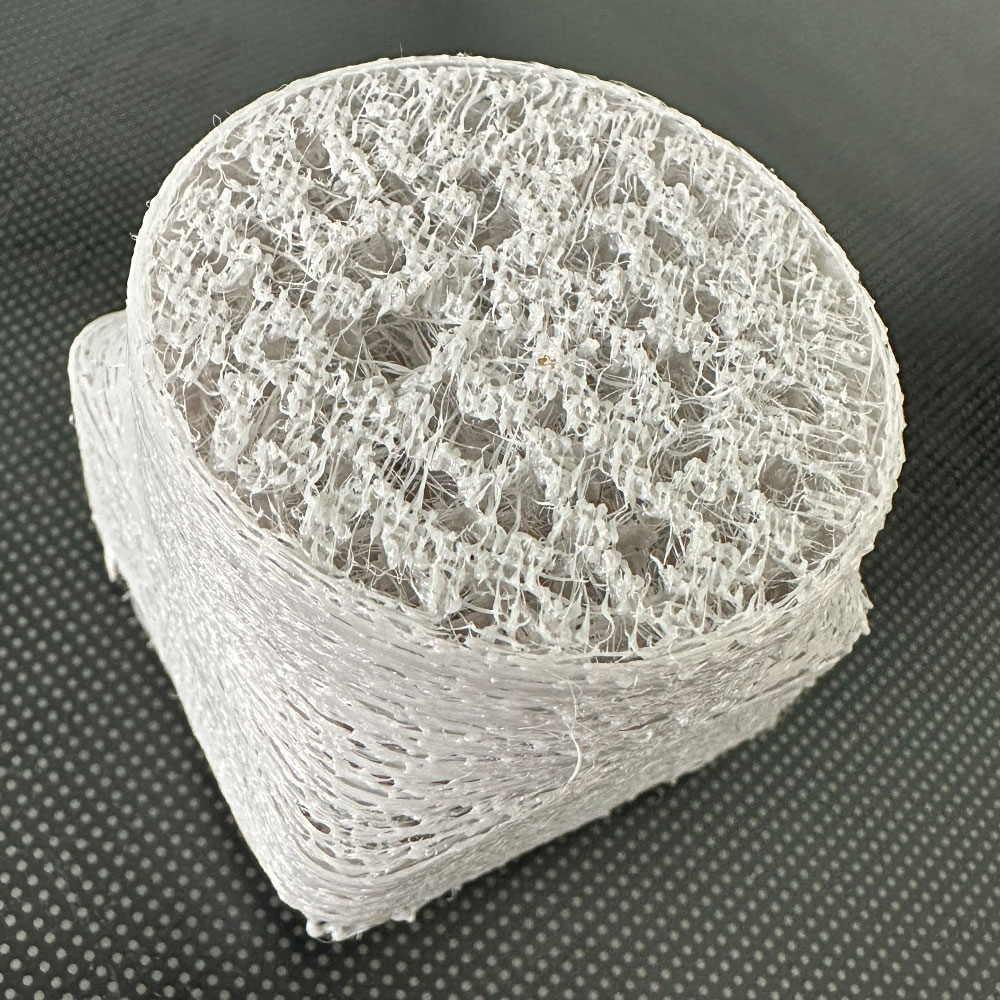
Finally, a moment to enjoy, a moment to enjoy success, what we’ve all been waiting for… a full print – Ender 3 Max Neo, Sonic Pad, Creality TPU. Full print, sans a dreaded motherboard upgrade.

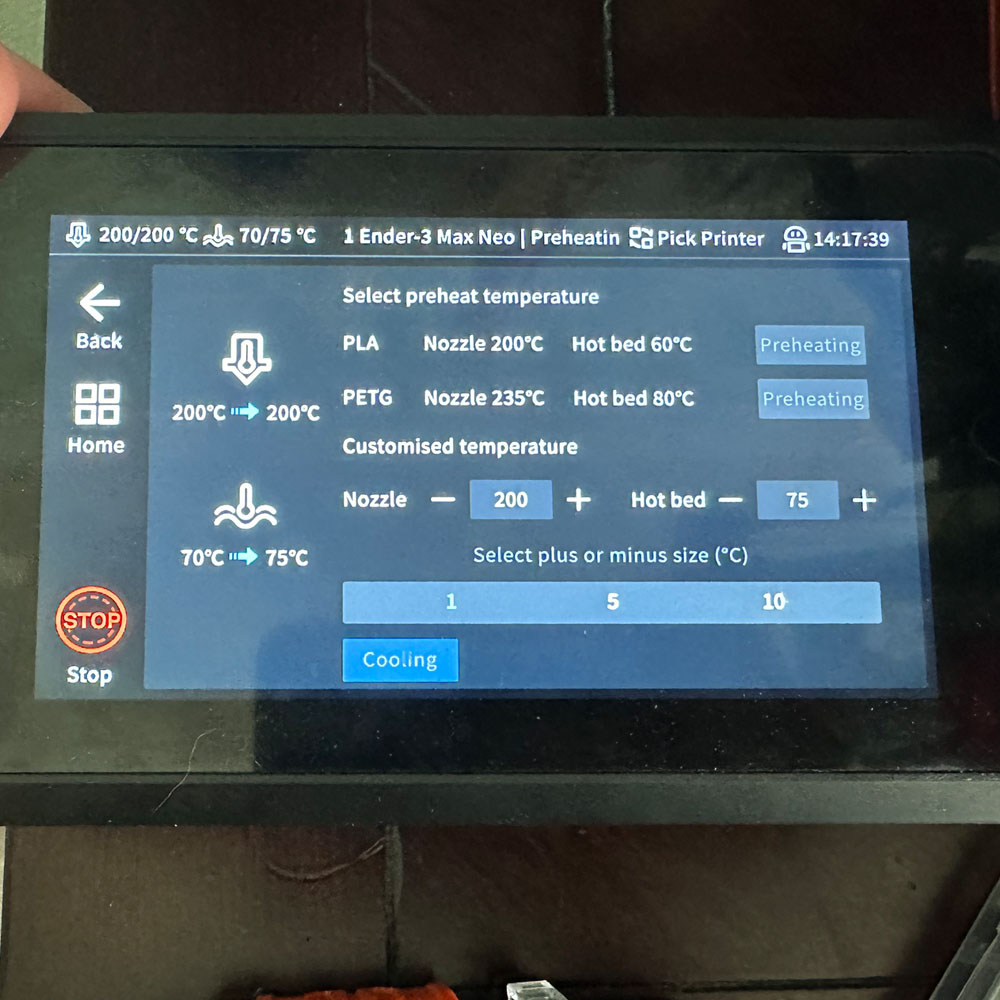
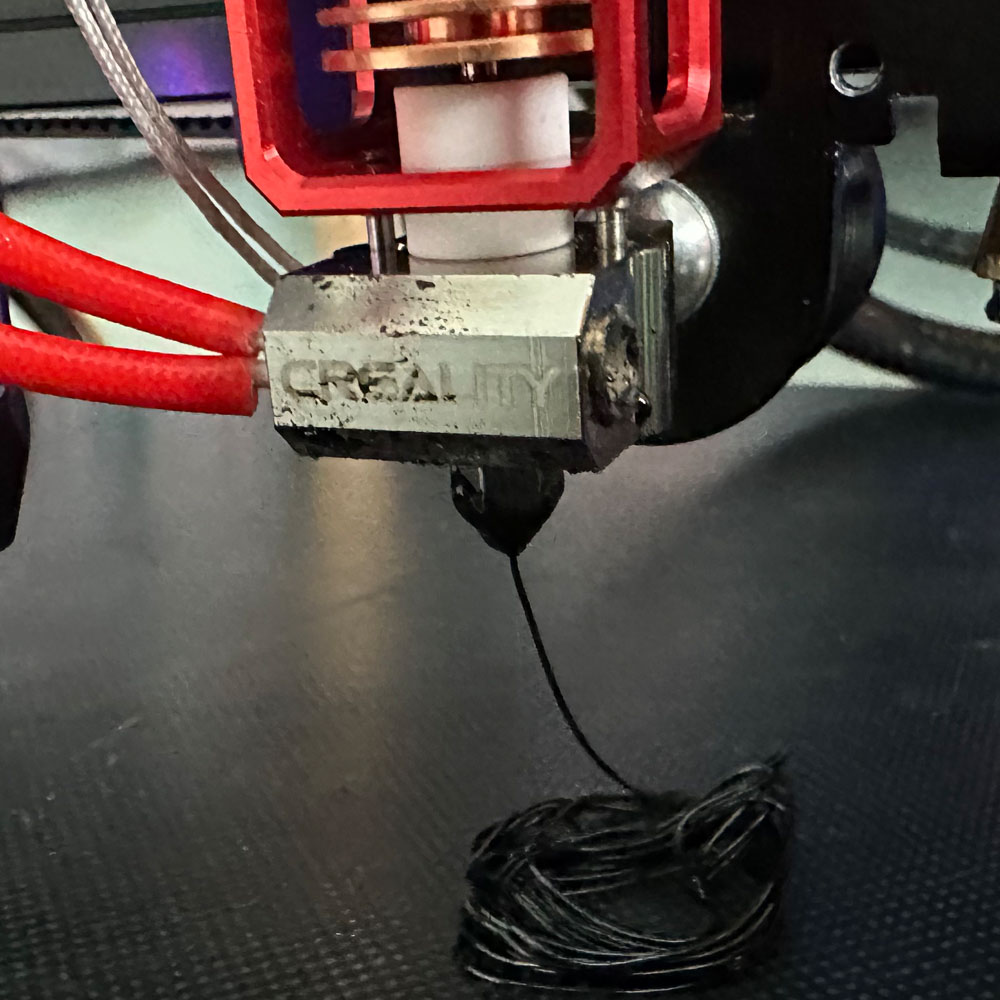
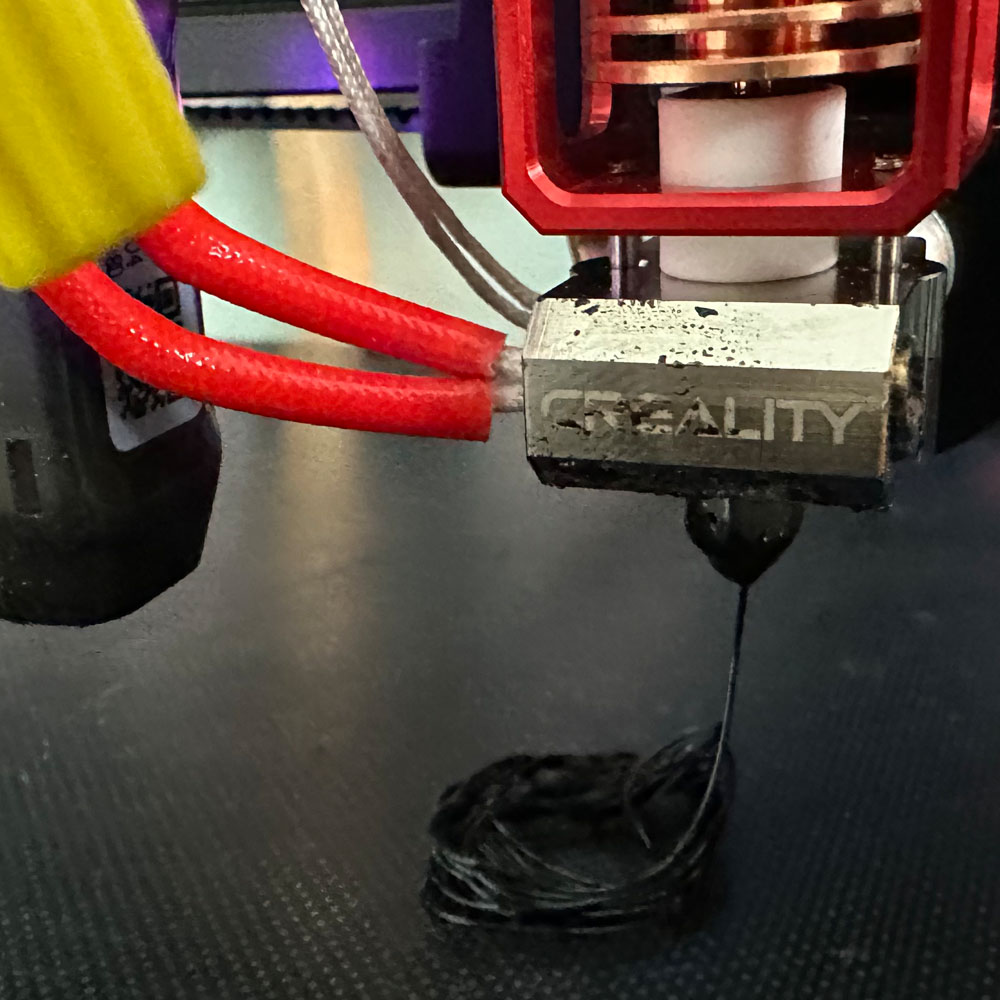
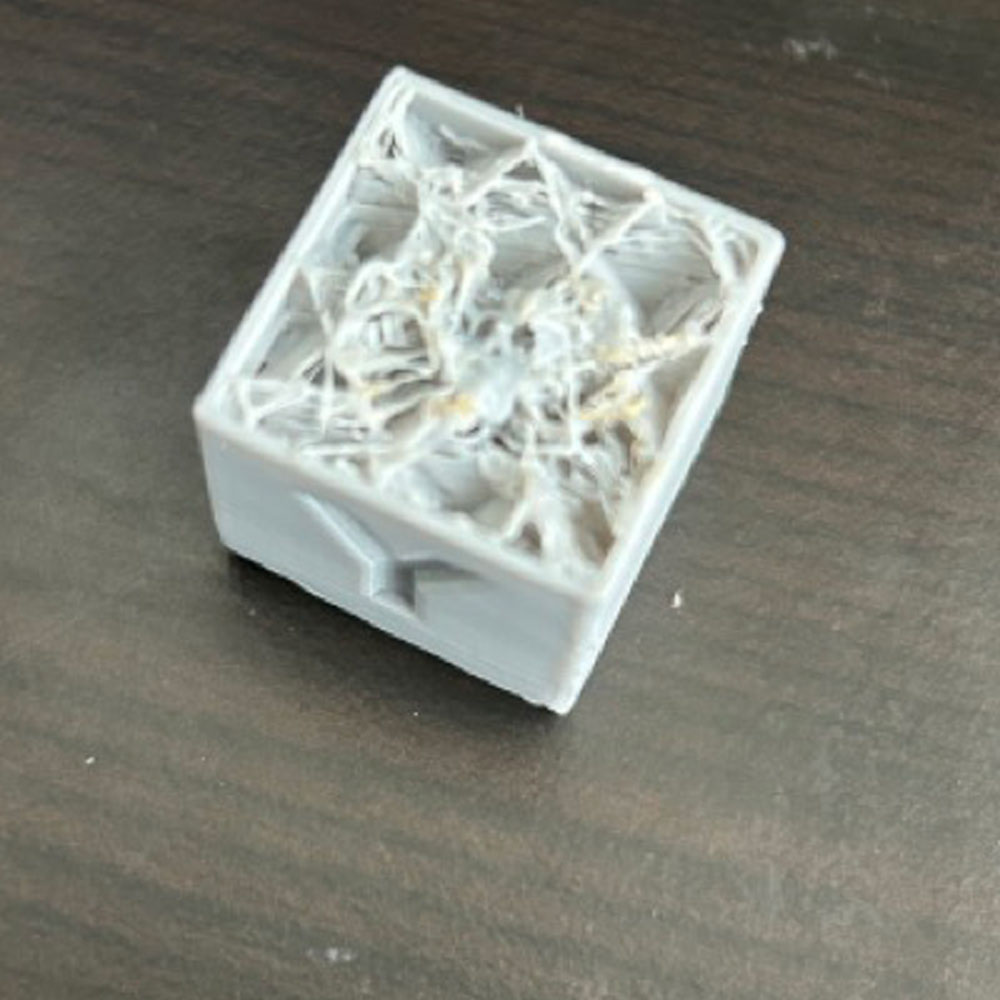
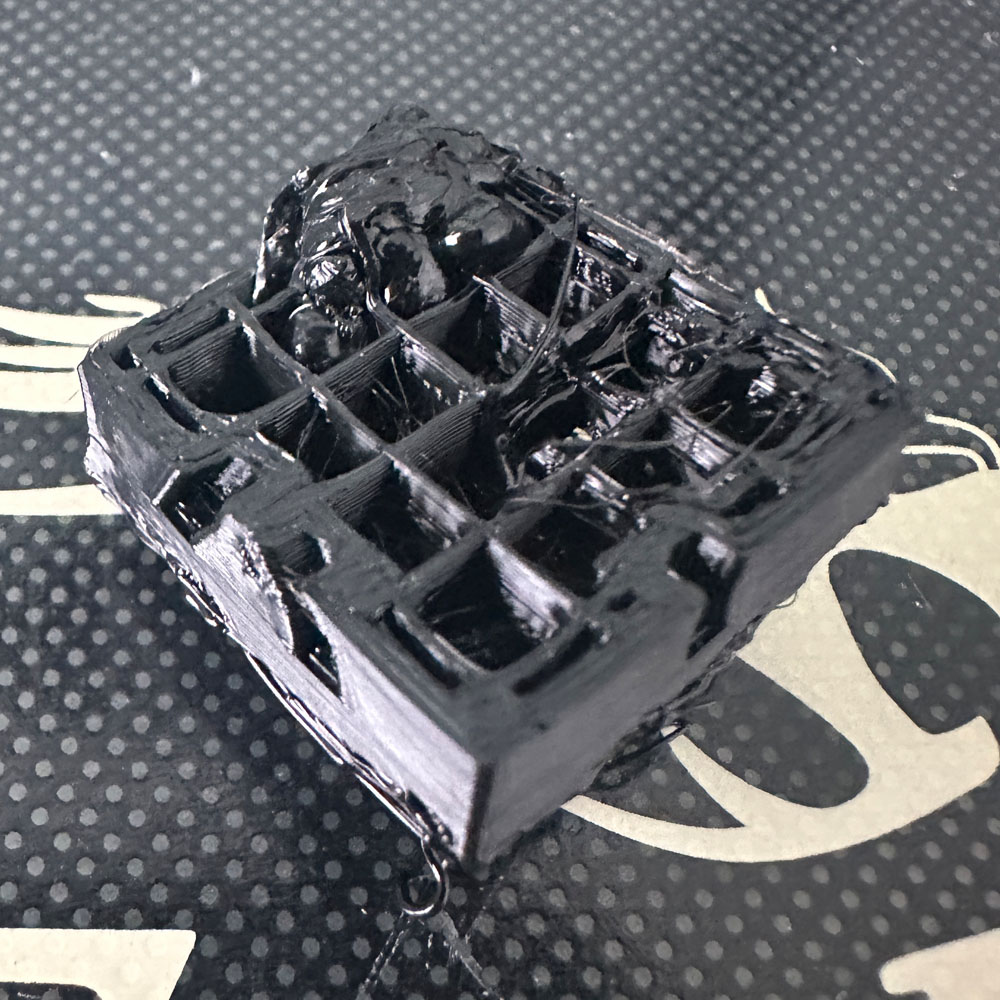
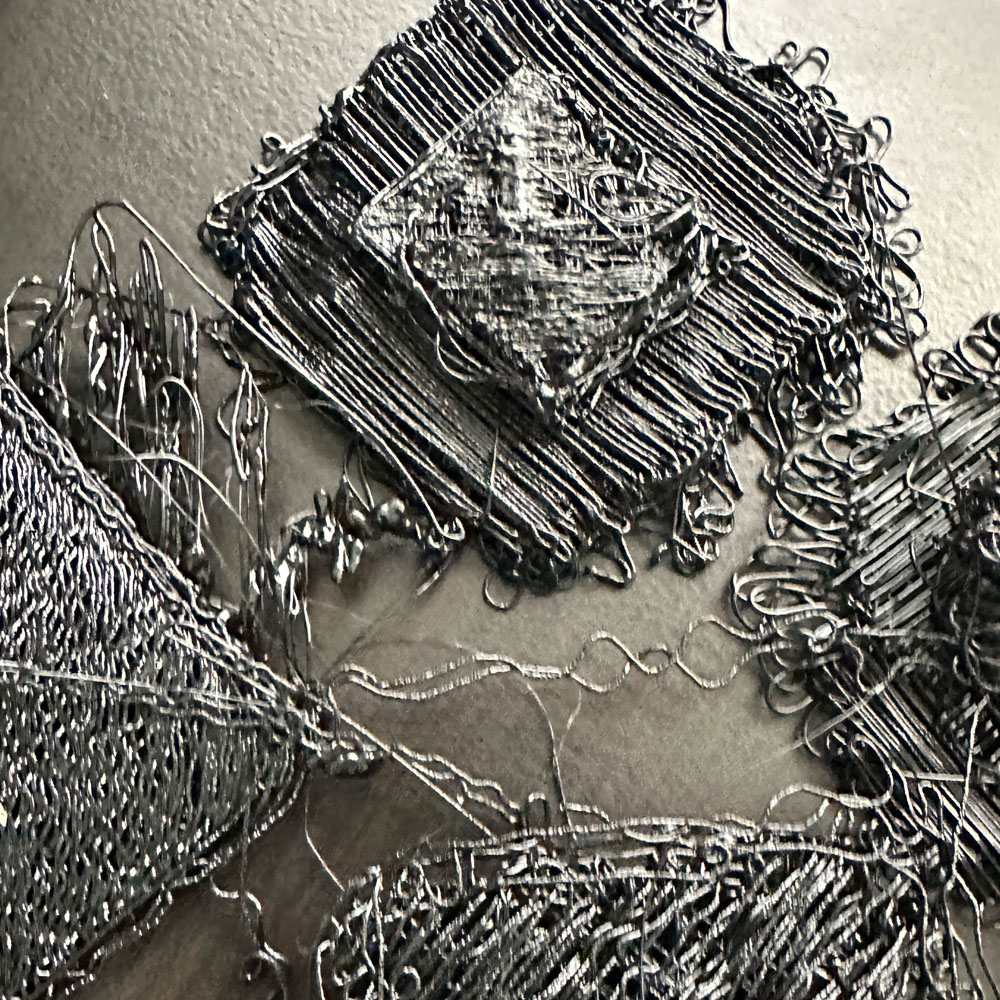
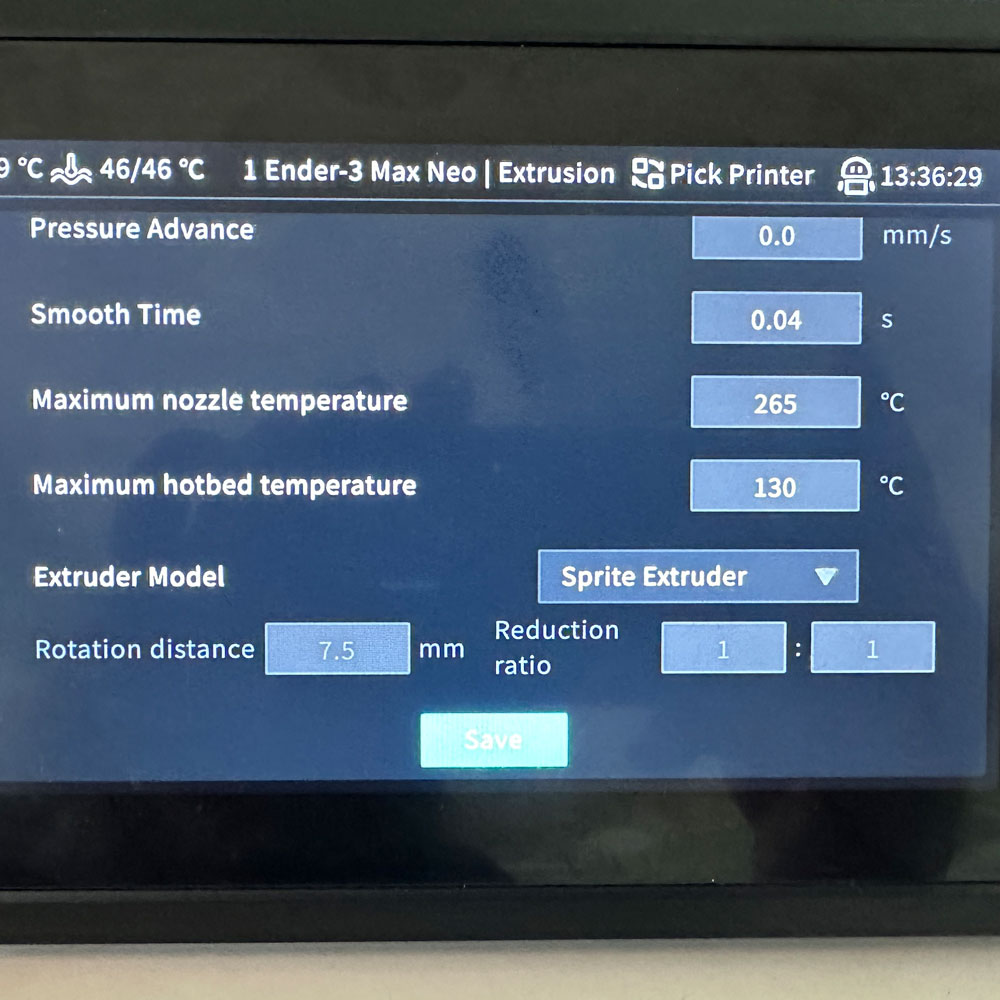
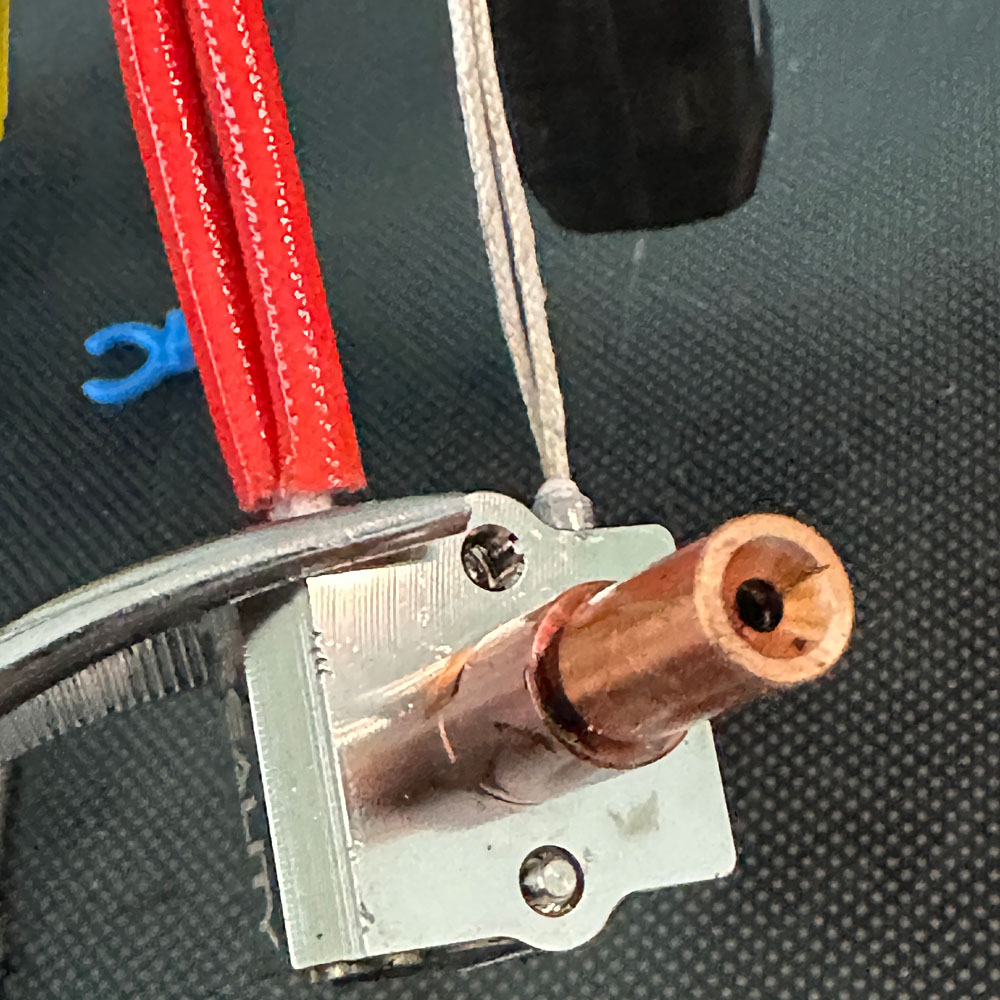
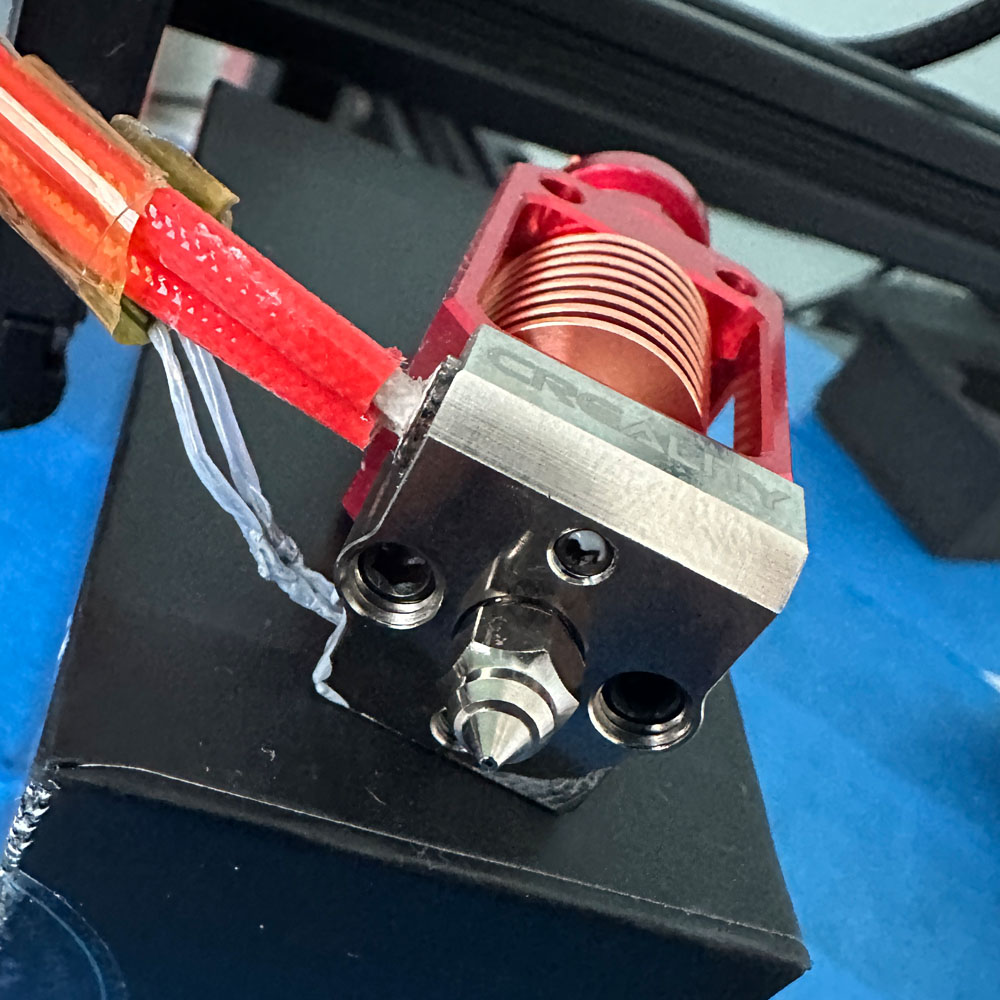
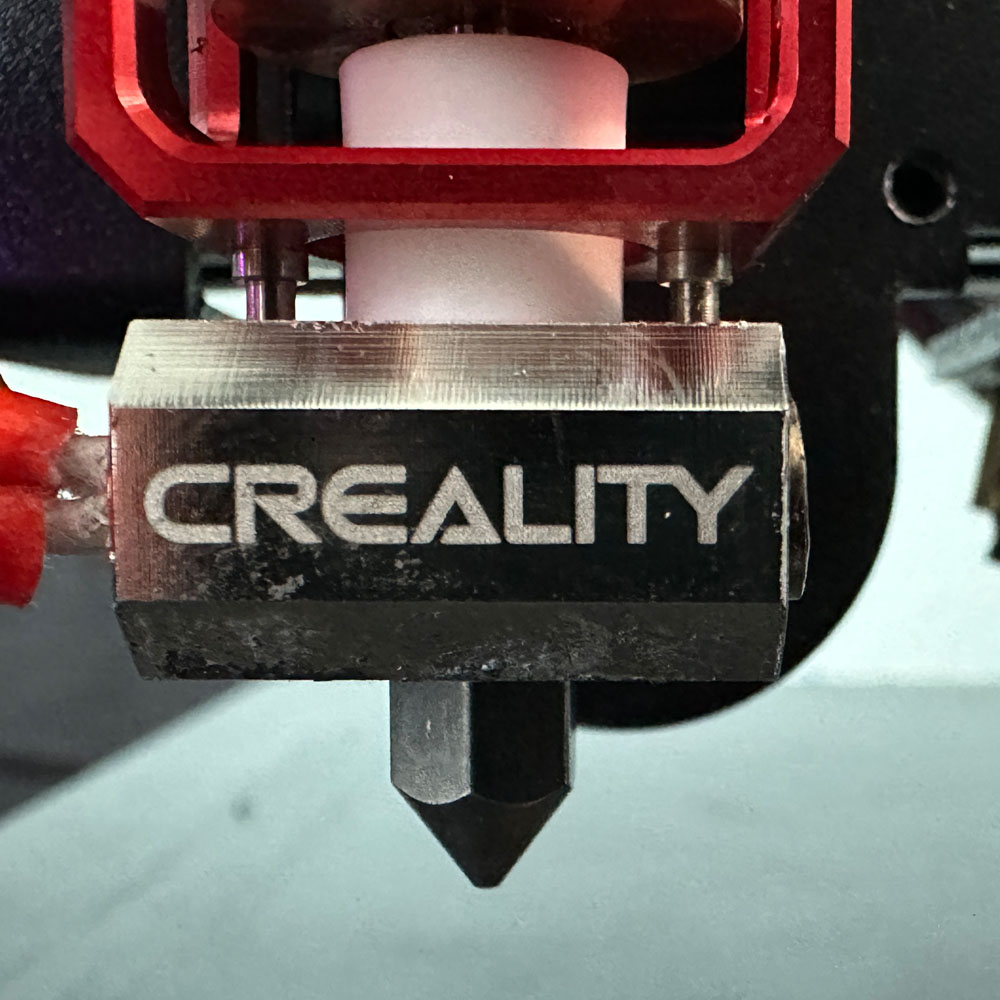
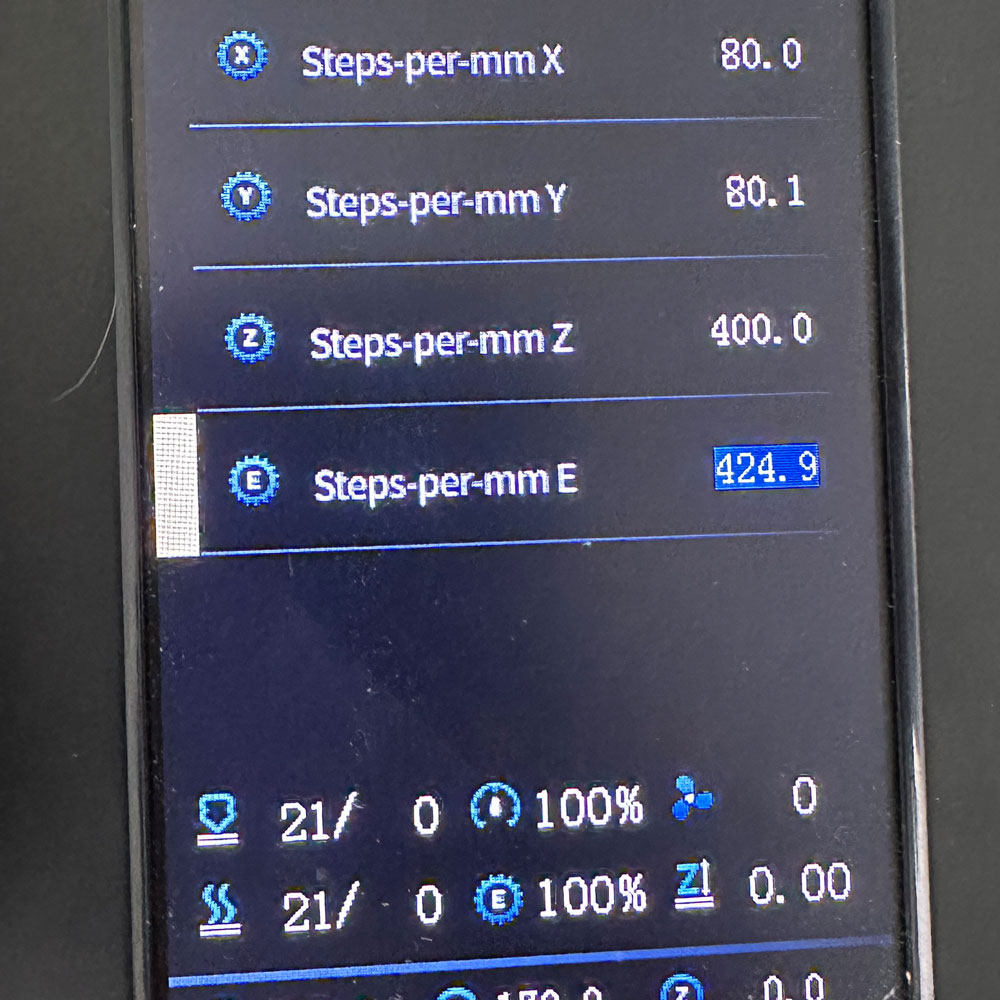
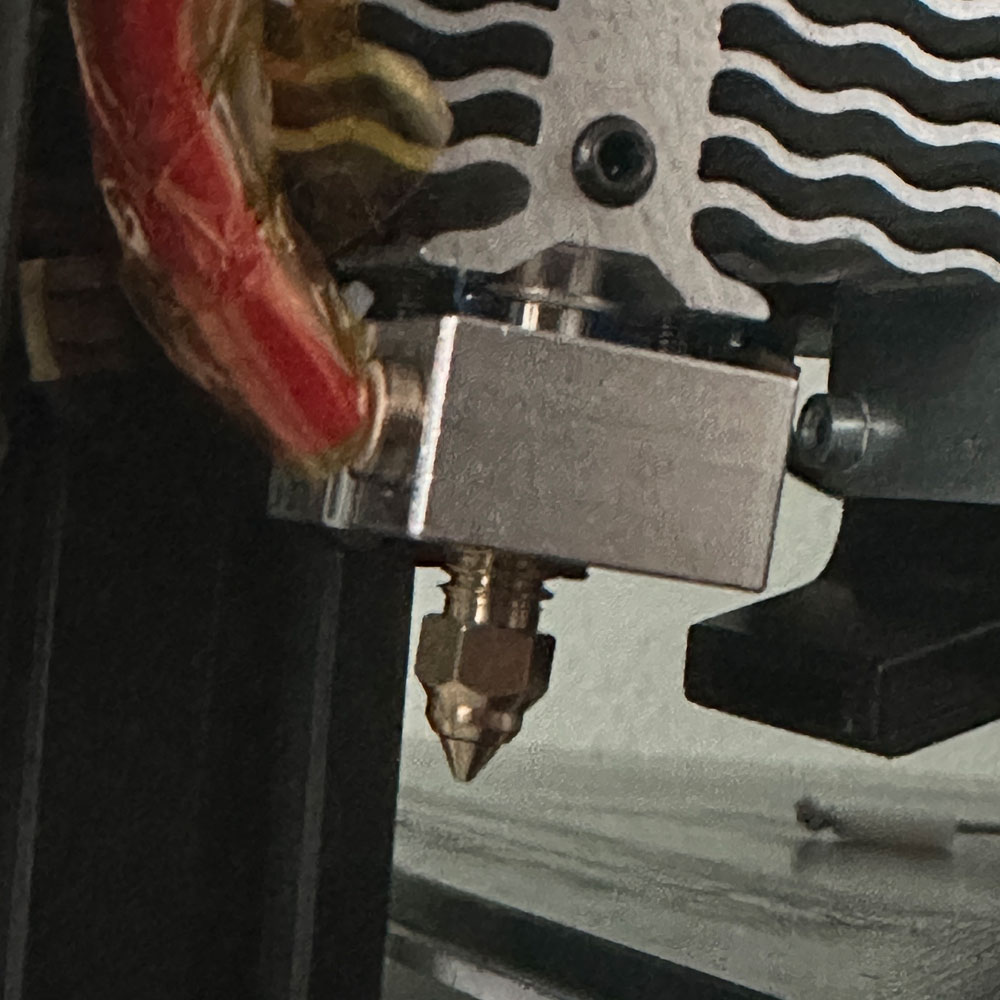
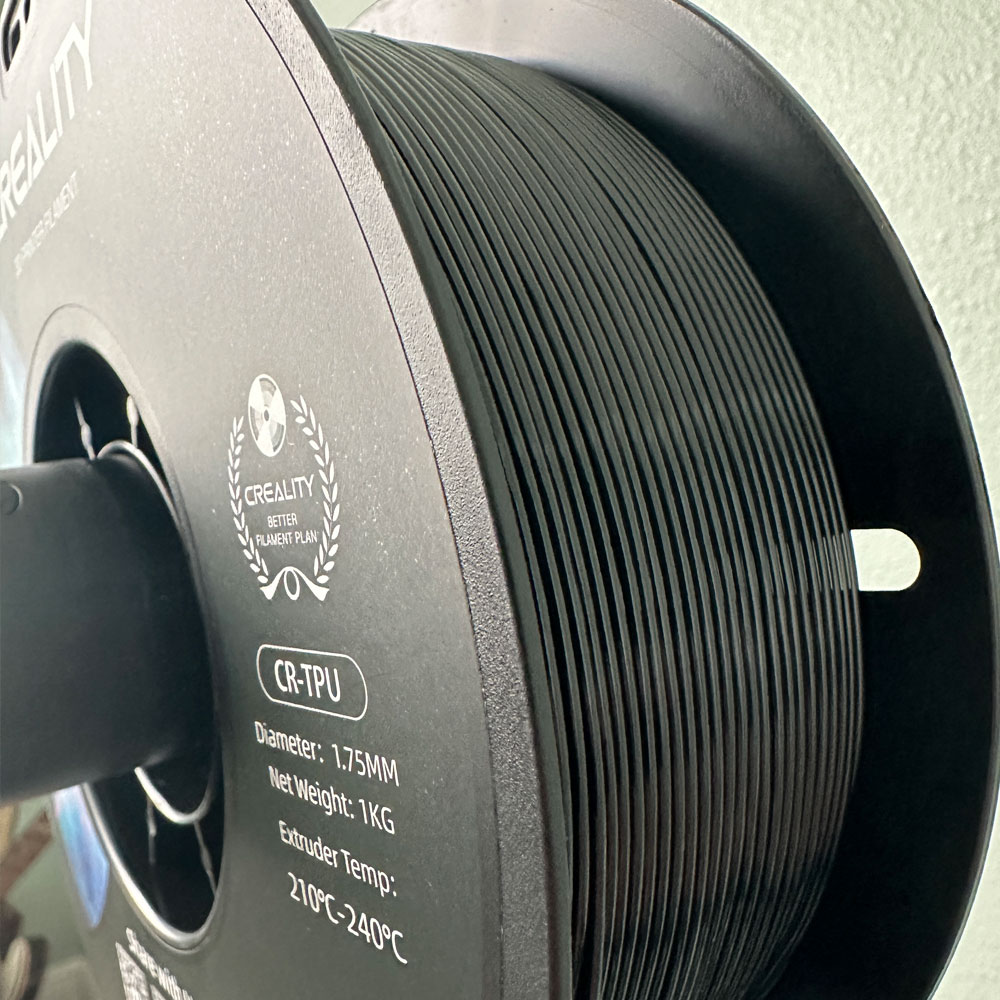
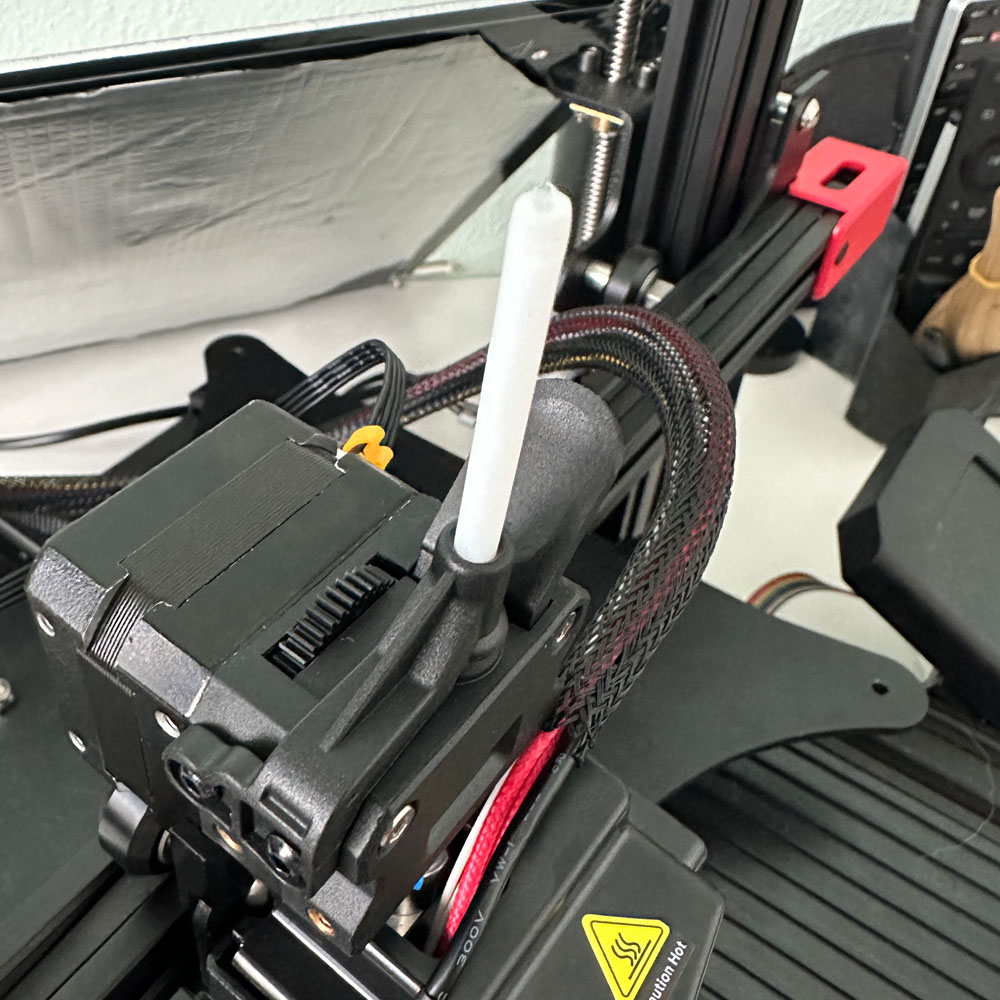
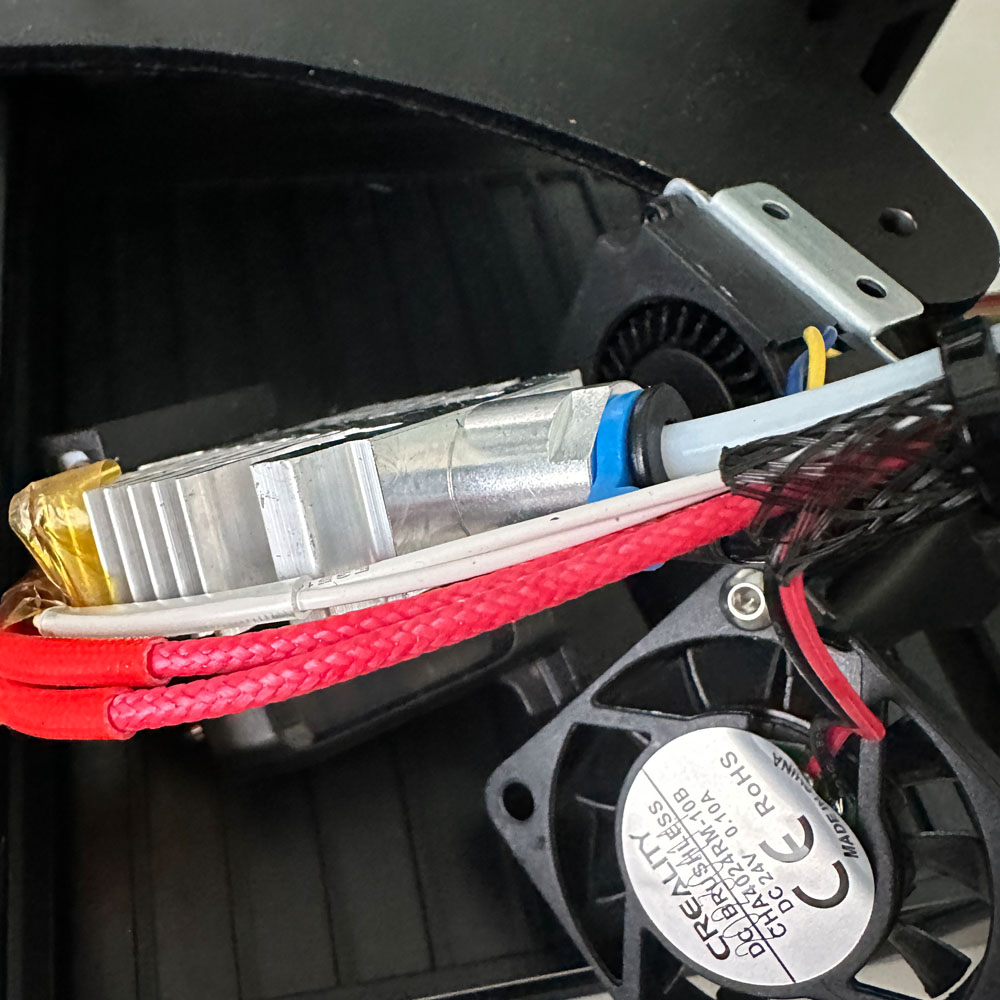
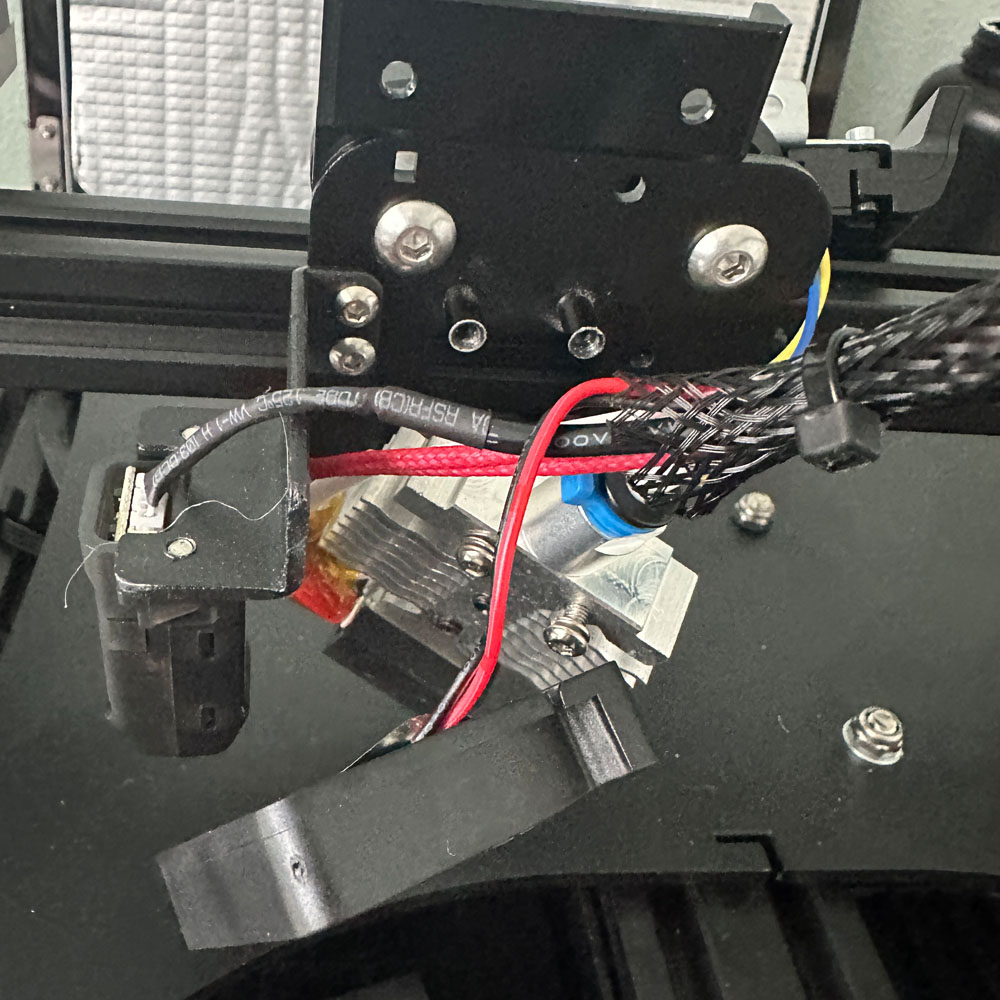
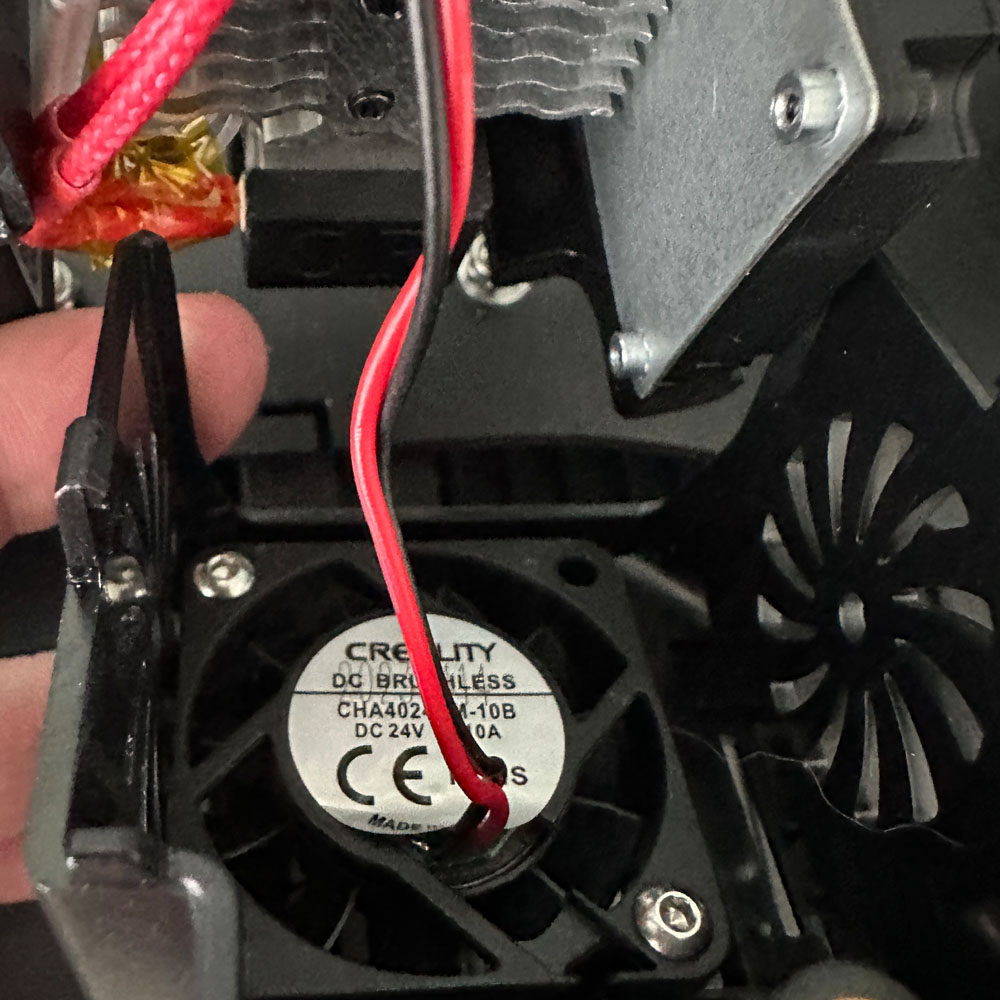
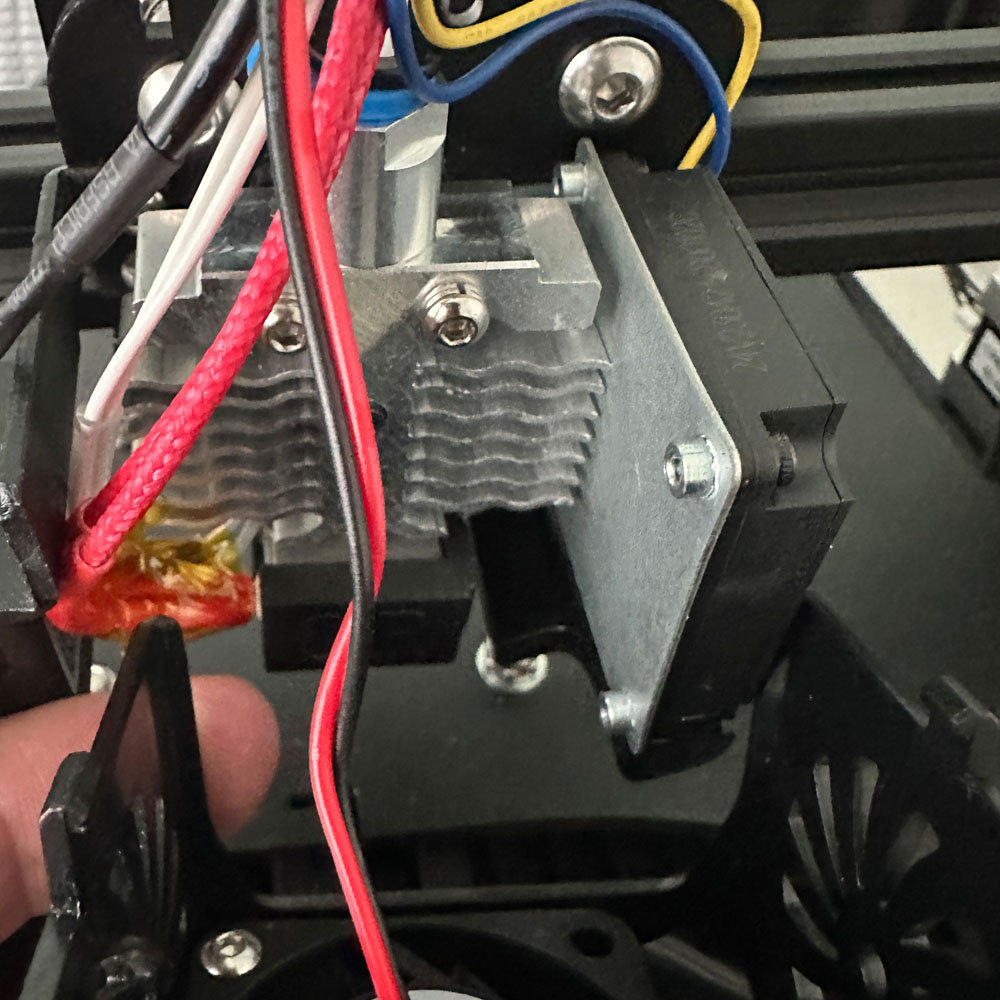
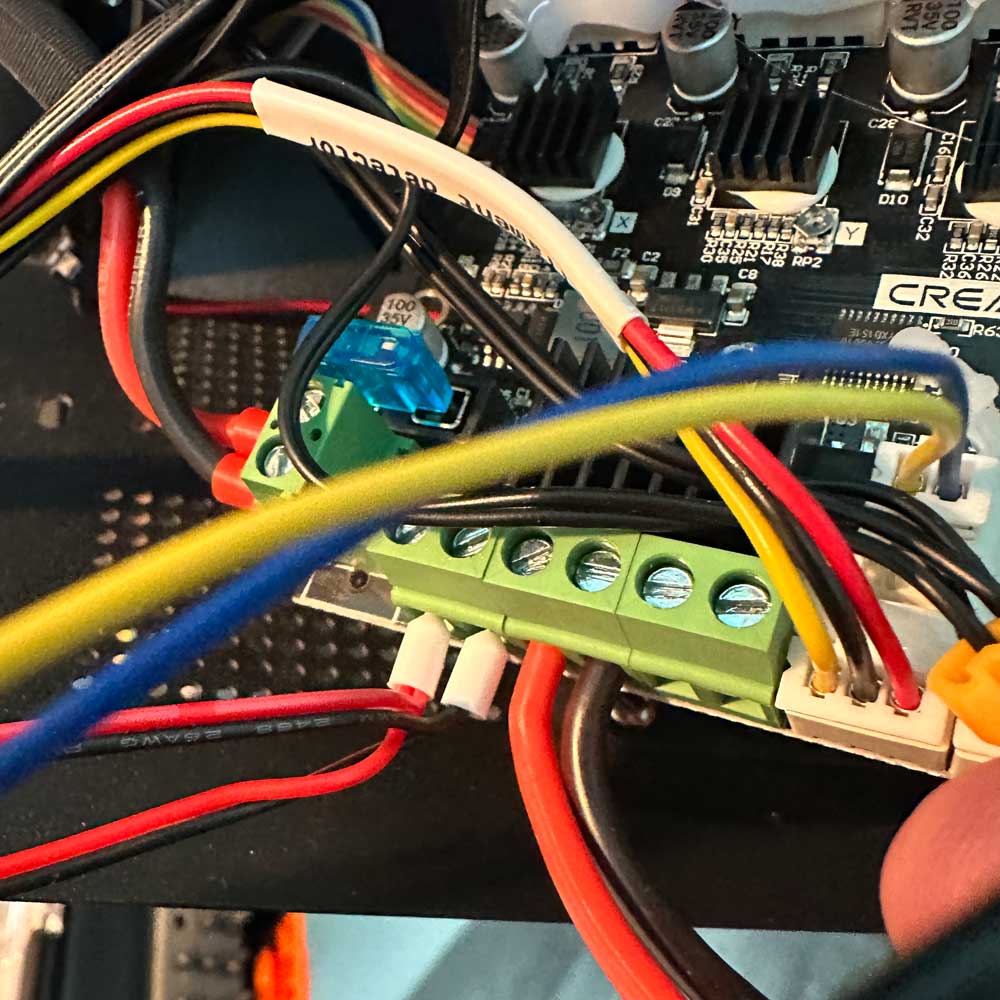
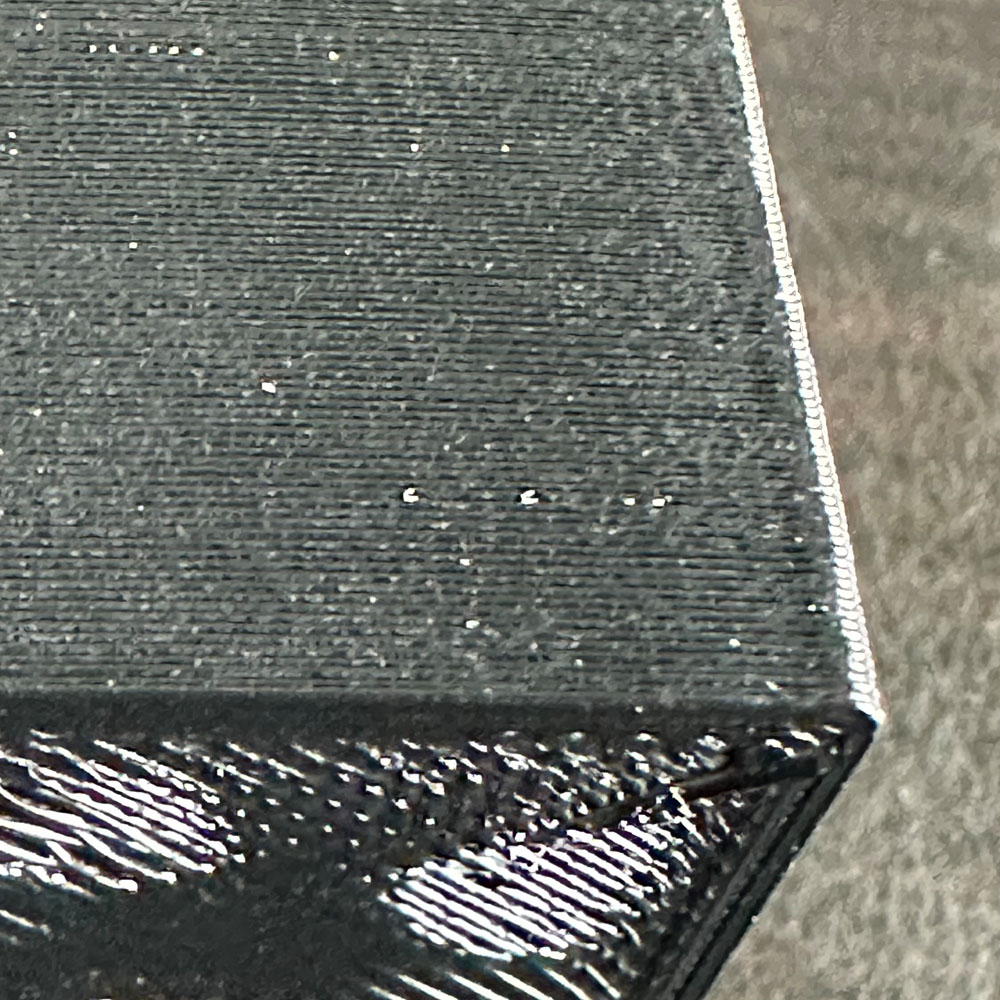
No motherboard upgrade needed at this time! Just need some more time to print and tweak; print and tweak. Success! A fresh print, an end-to-end cube test print… just look at the ironing, ‘it’s alive, it’s alive’. Perhaps some perspective, a small win, yes but it’s a win. The config/console looks correct, no supruses, I’m looking into a few more tweaks in the end. Let’s point out a few things, I wanted to get an update up on the site specifcally celebrating the print test win. After a very early start this morning (the pictures are included below) we’ve got the Ender 3 Max Neo kicking out TPU test prints with minimum blips/blurps, zits, stringing etc. All good things. Key takeaway, delta is extrusion settings… this controls the direct drive pressure on the filament, can be found -> advanced settings -> extrusion settings. Reminder, we are using the Creality Sonic Pad interface, those of you using the onboard interface, you’ll need to look at something called – steps or look to control the stepper. Which in laymans terms is the ‘pressure in steps’ to again push filament throught he extruder.

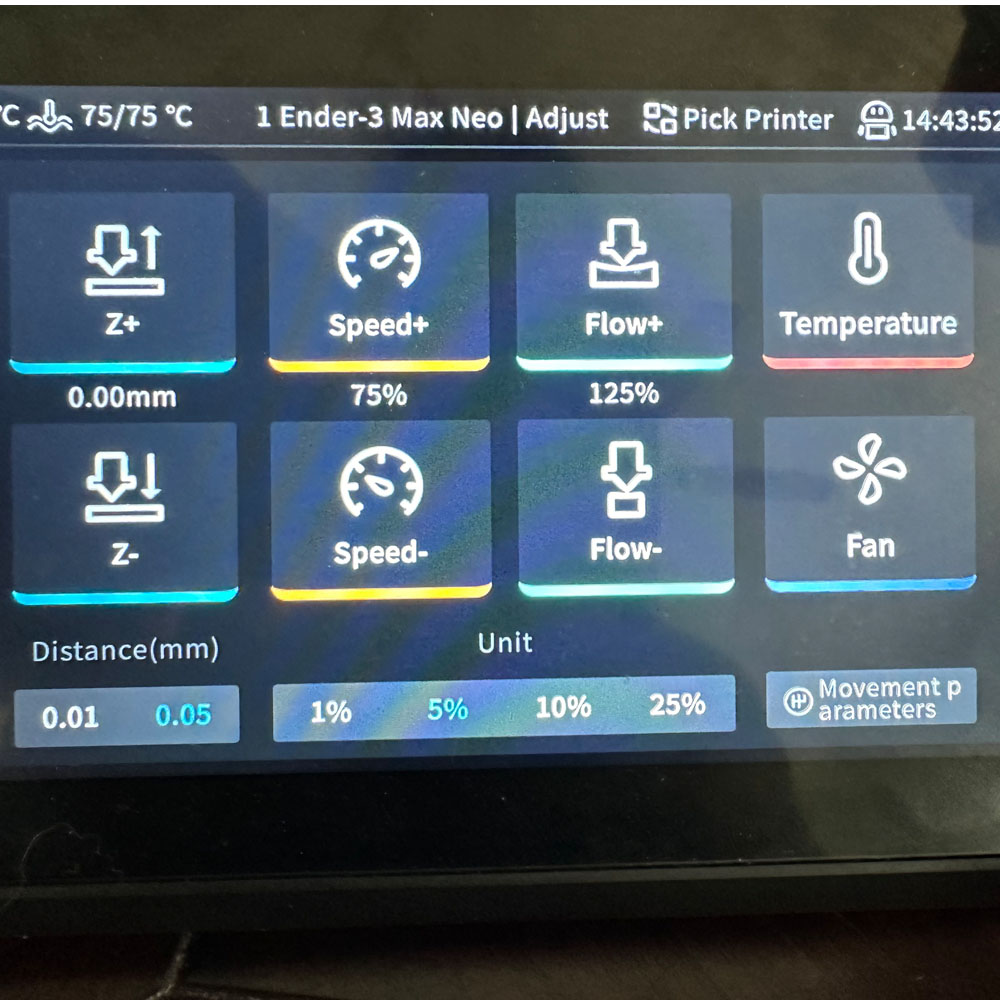
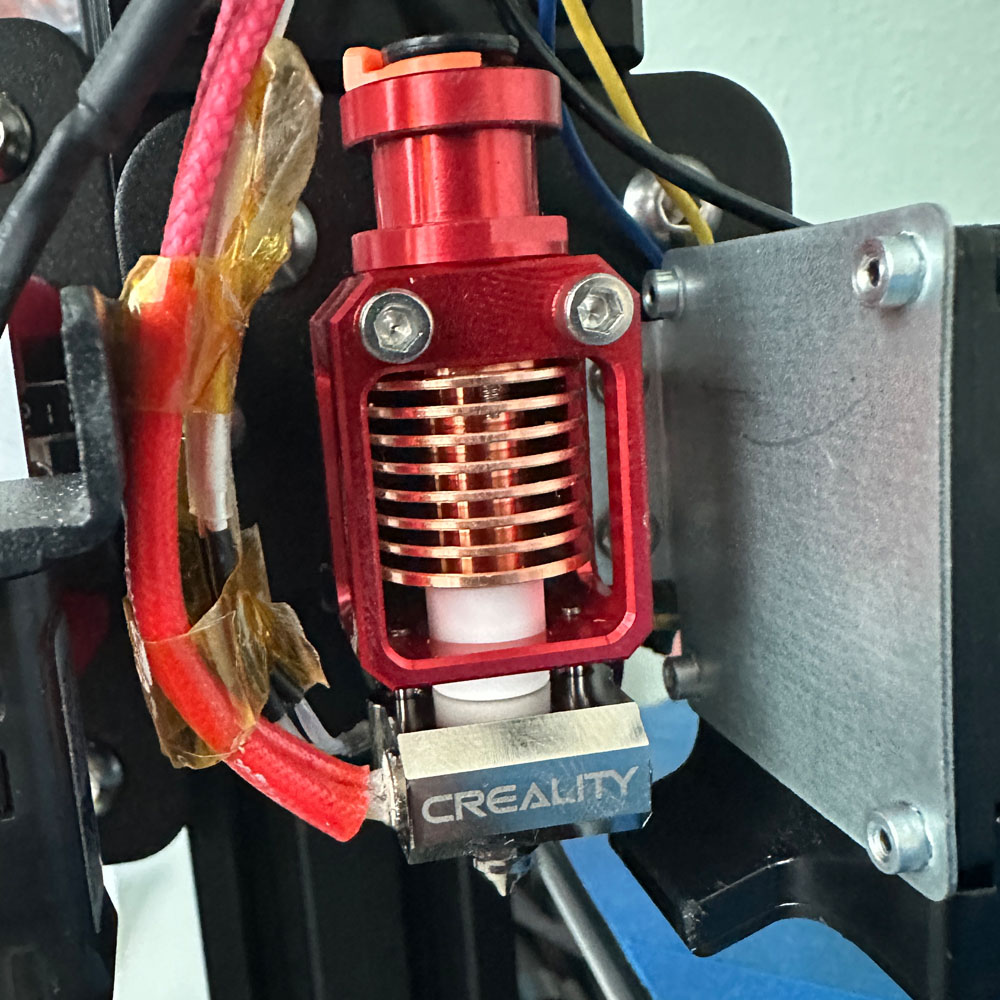
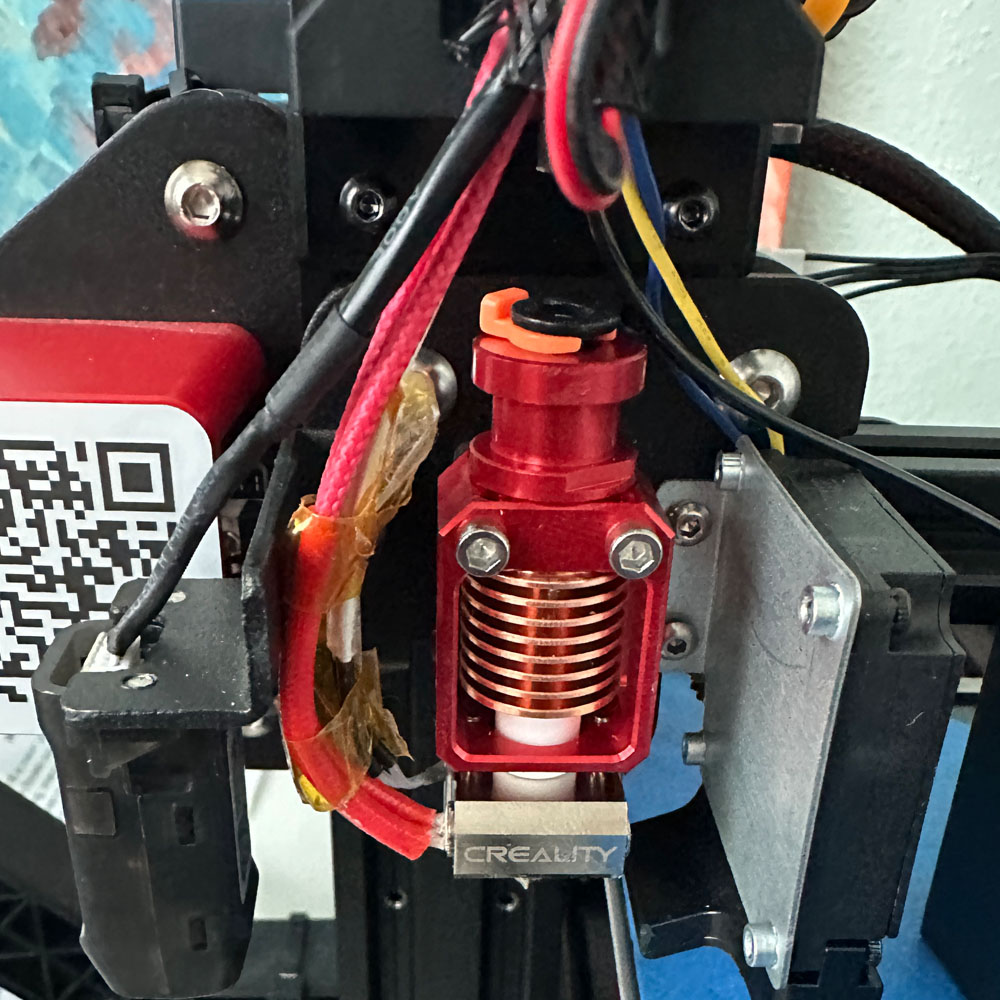
Two, while we highlight the exutrusion win, matching other minor tweaks such as heat at the tip, bed for adhesion, speed etc. in the effort to match the Sprite Extrusion settings. A few print temps do work, and we wil work through those 220 – 240 C, depending on filament type – Duramic or Creality TPU. A few other hightlights, we did increase the flow an additional 25%, bringing the flow rate to 125%, and knocked down the speed 25%, to ~75%. So -> 220C – 240C Nozzle – 75C Bed – 75% Speed – 125% Flow Rate – Sprite Extrusion Settings Enabled.

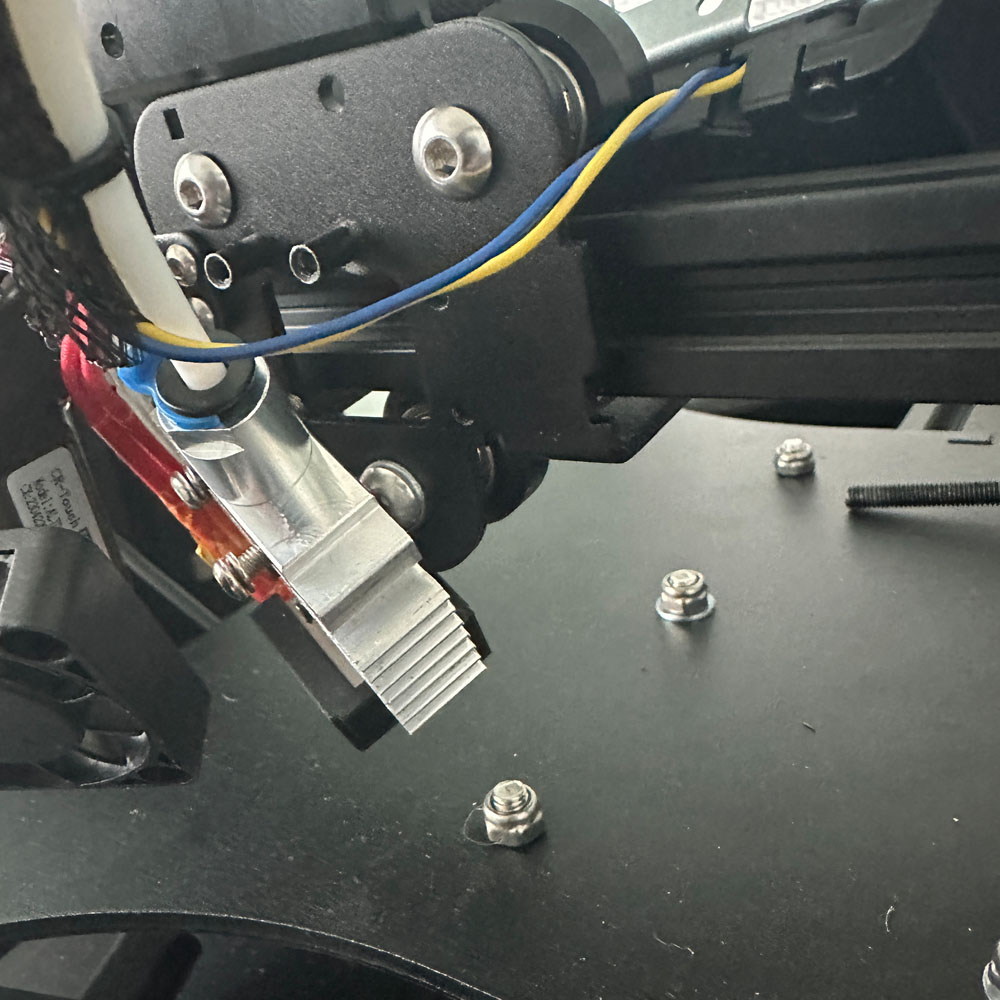
At the moment, a few more tweaks are being applied to movement settings, the Z height seems to need a few n/mm’s here and there, no idea why. Might be start layers vs those layers that follow the starting layers. 3d printers allow controls to be manipulated over three phases of print – start, middle and end.

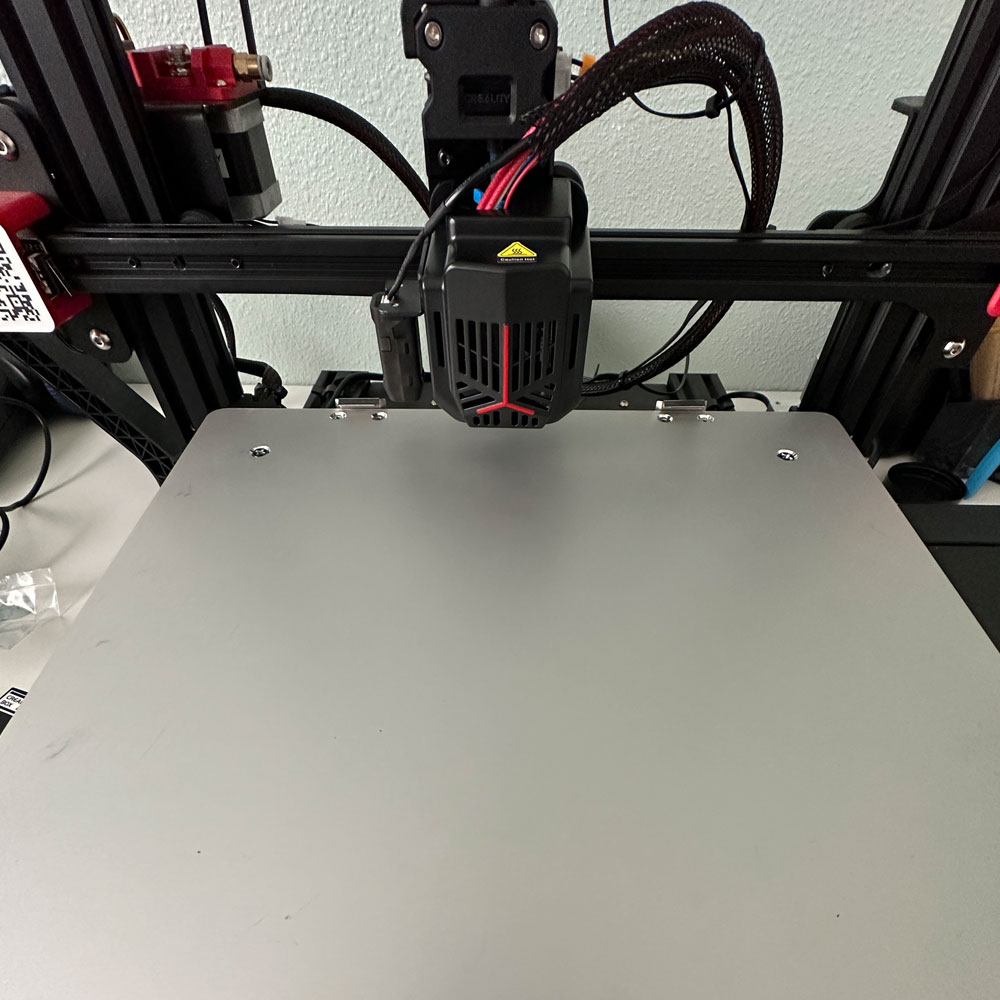
One other item to note, I failed to mention this in my previous post, Part 4… bed adhesion remains an issue, could be the dark horse of issues in the mix, bed adhesion quick fix… For now, alcohol and paper towels to keep that adhesion plate clear and clean! Really get after it, scrub away any and all oil residue, filament, blips, dust, stringing, dog hair (Zeus), all the left-behind filament and whatever else might collect on the build plate in an average office environment. I don’t recall that it made a difference to keep the plate clean, cleaning the bed per say, but we’ve tried a few things – a clean bed, a taped bed (Blue Painters Tape), sprayed adhesive bed, all in the name of finding an alternative solution for prints shifting this way and that on the bed surface plate. We will post a few of build plate tests as well, working toward spray adhesives next. Might that be the answer?

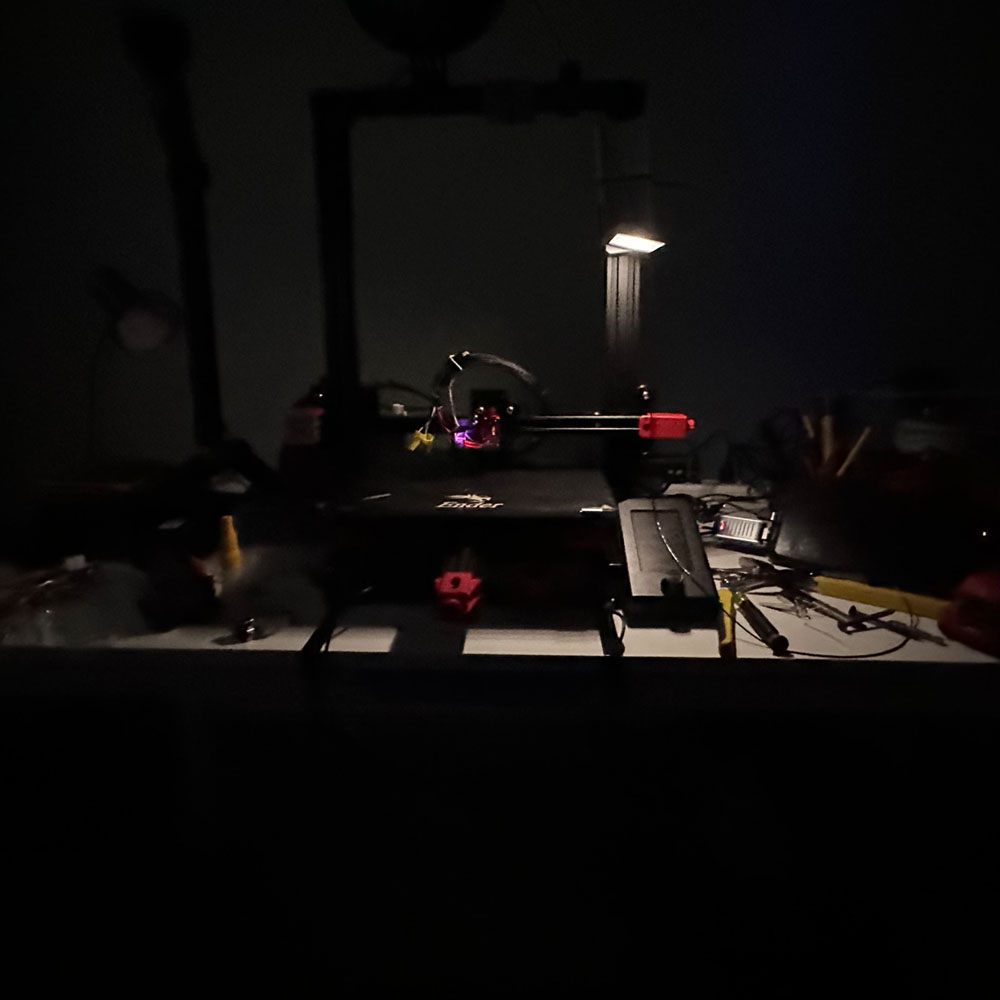
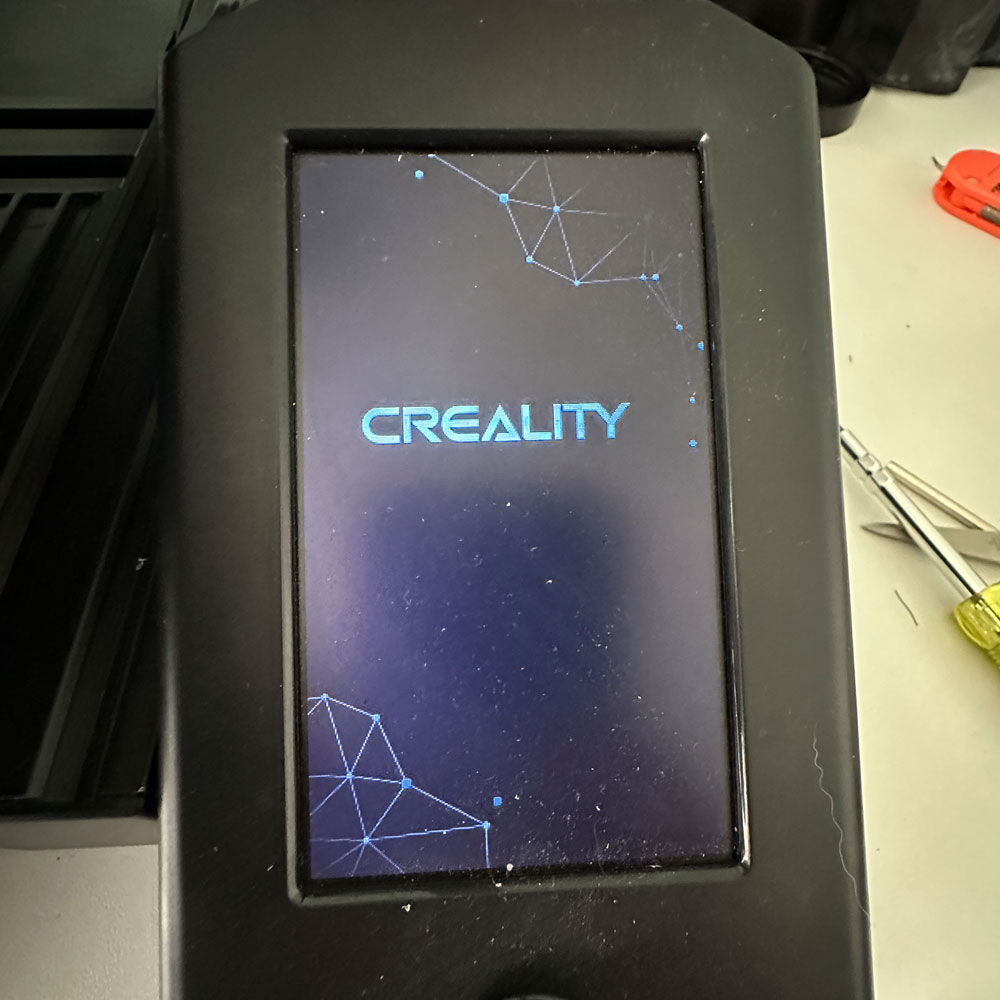
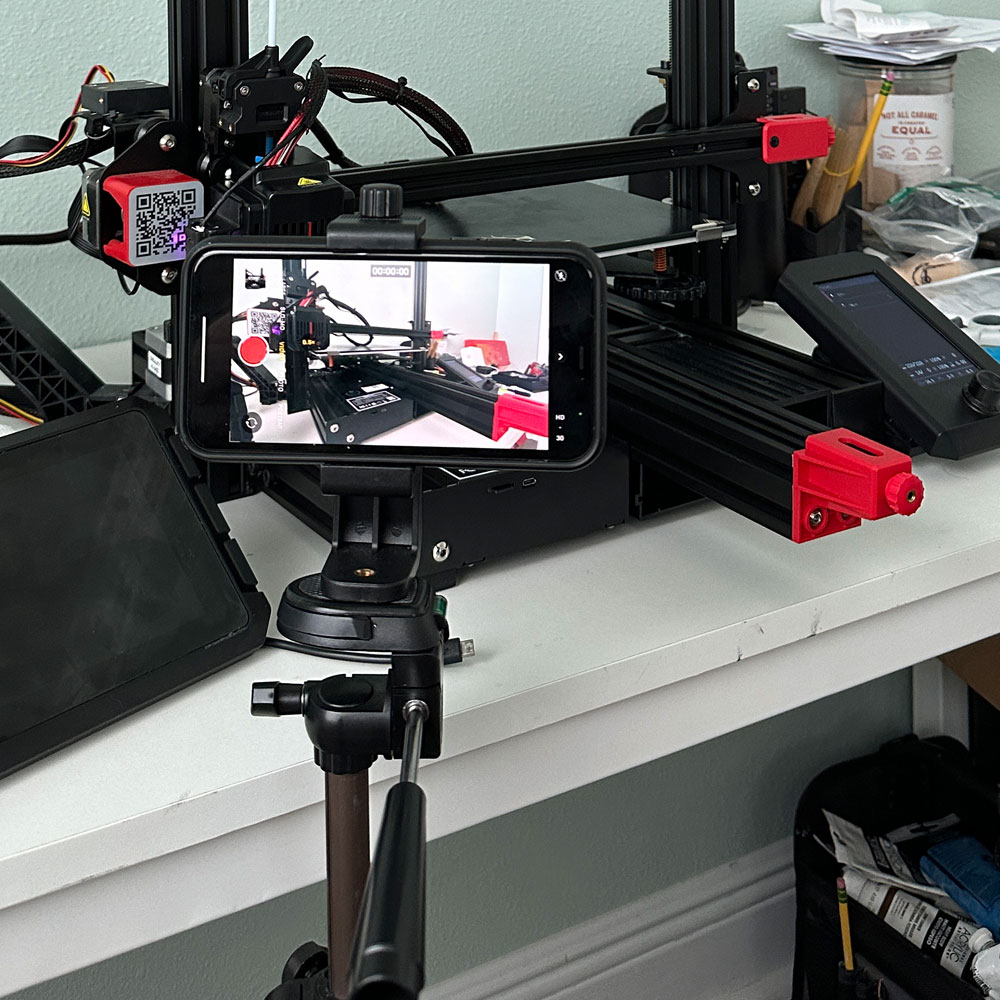
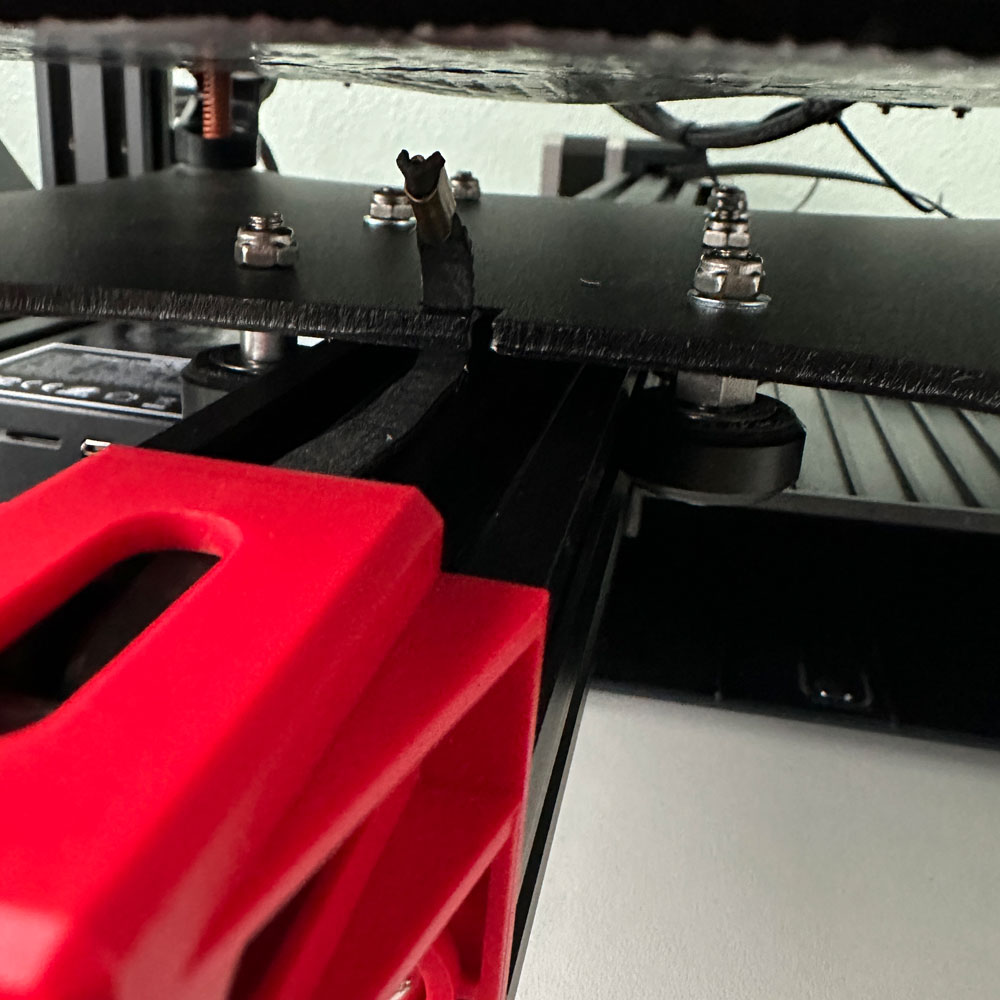
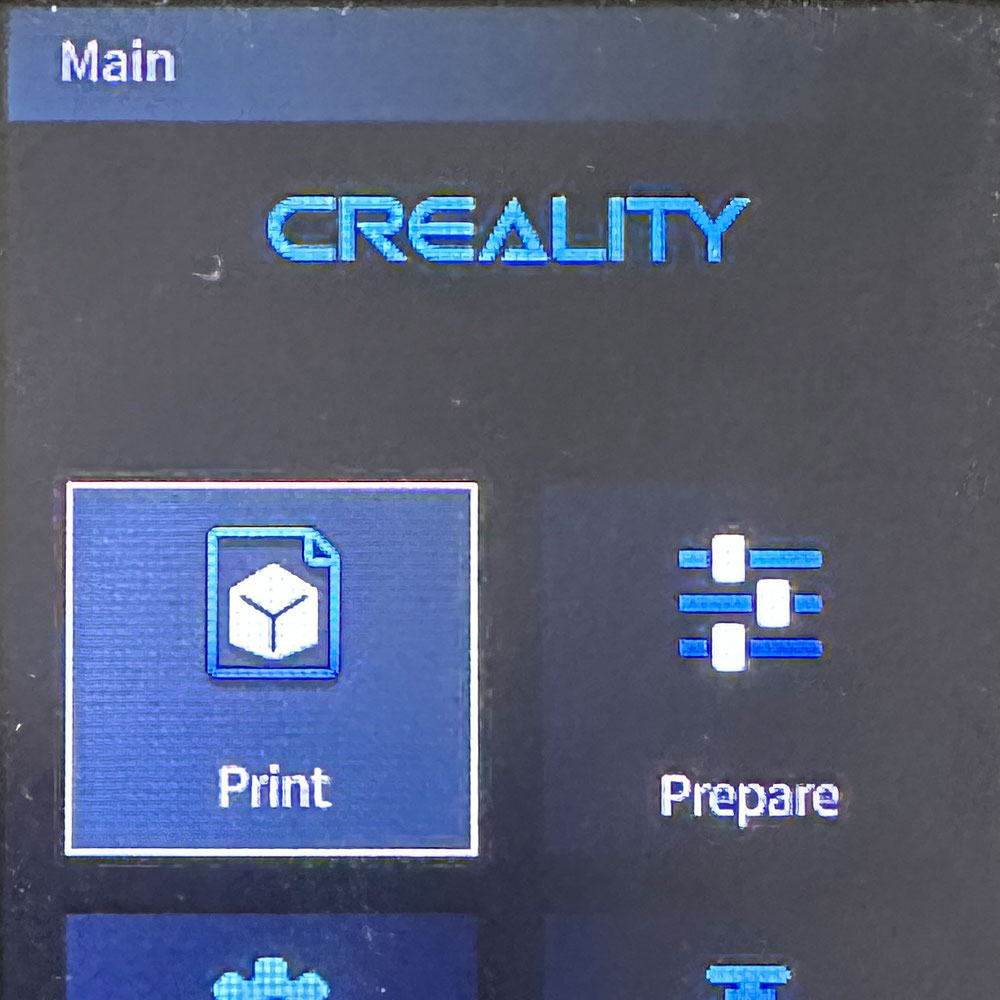
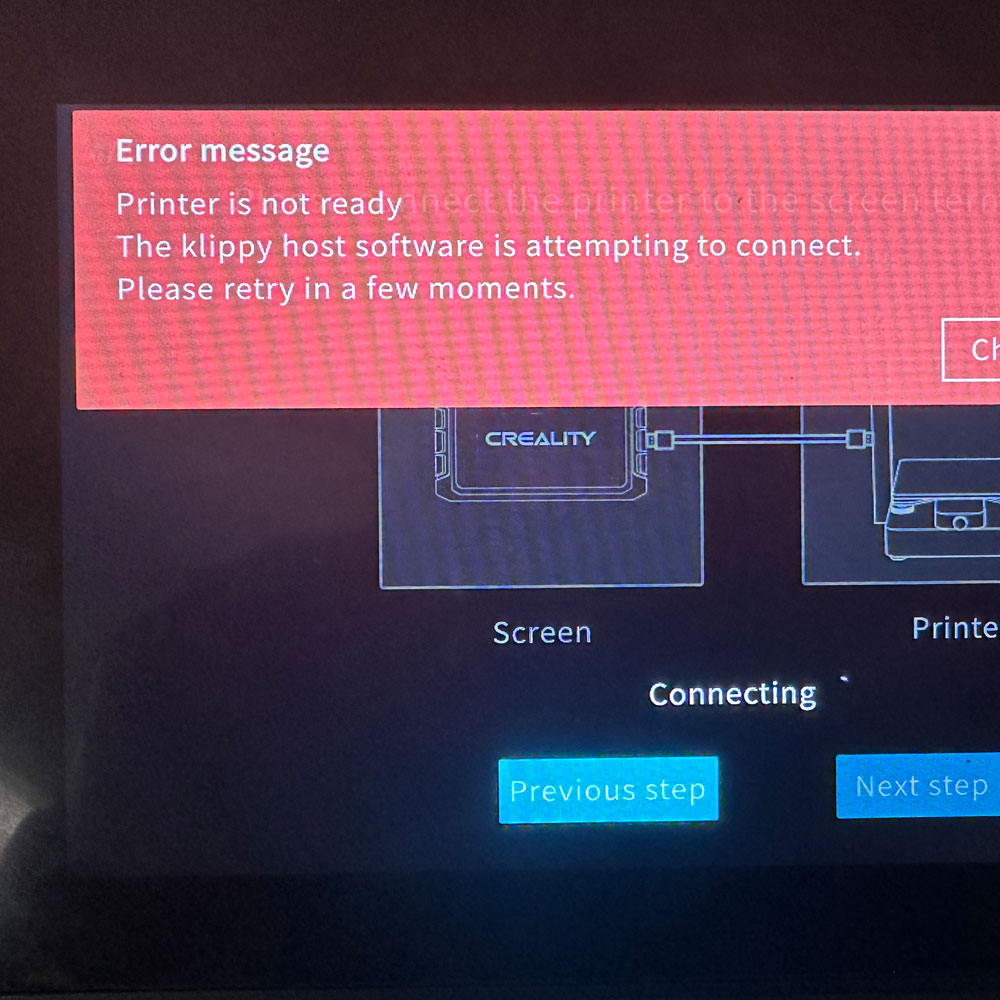
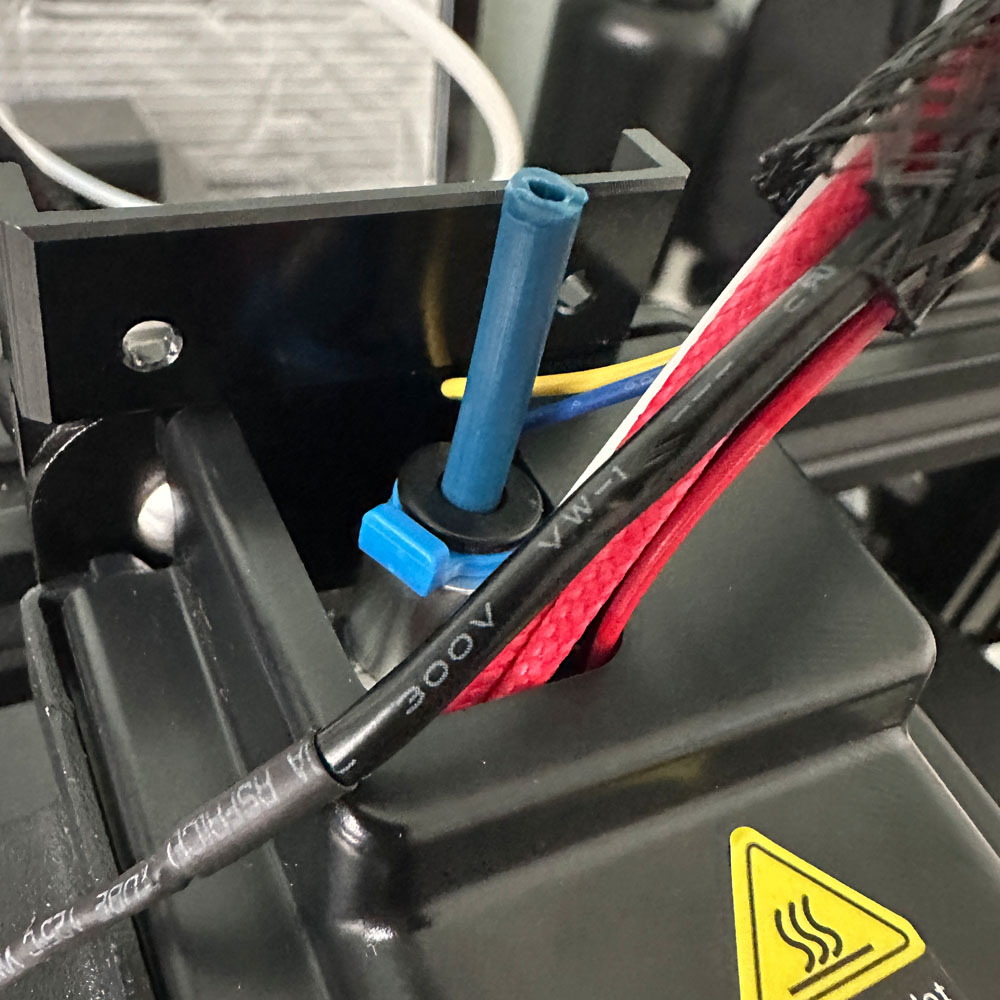
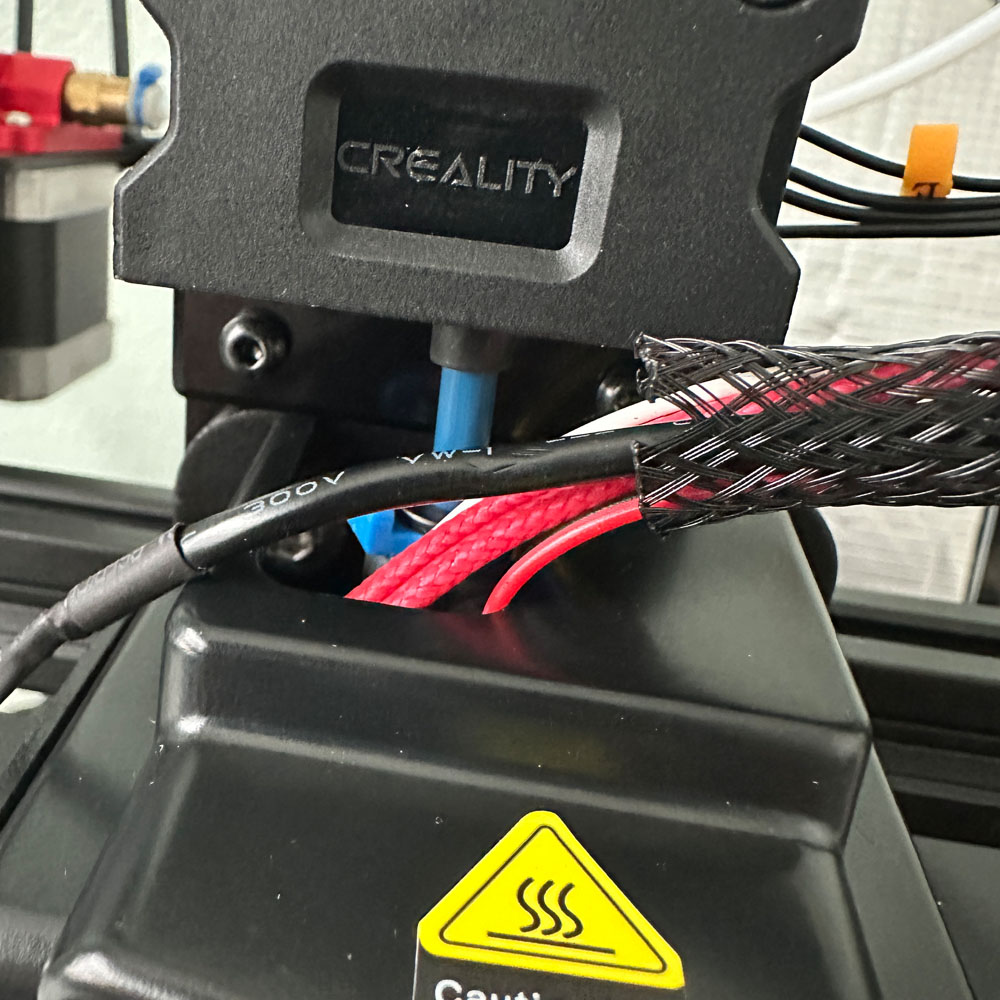
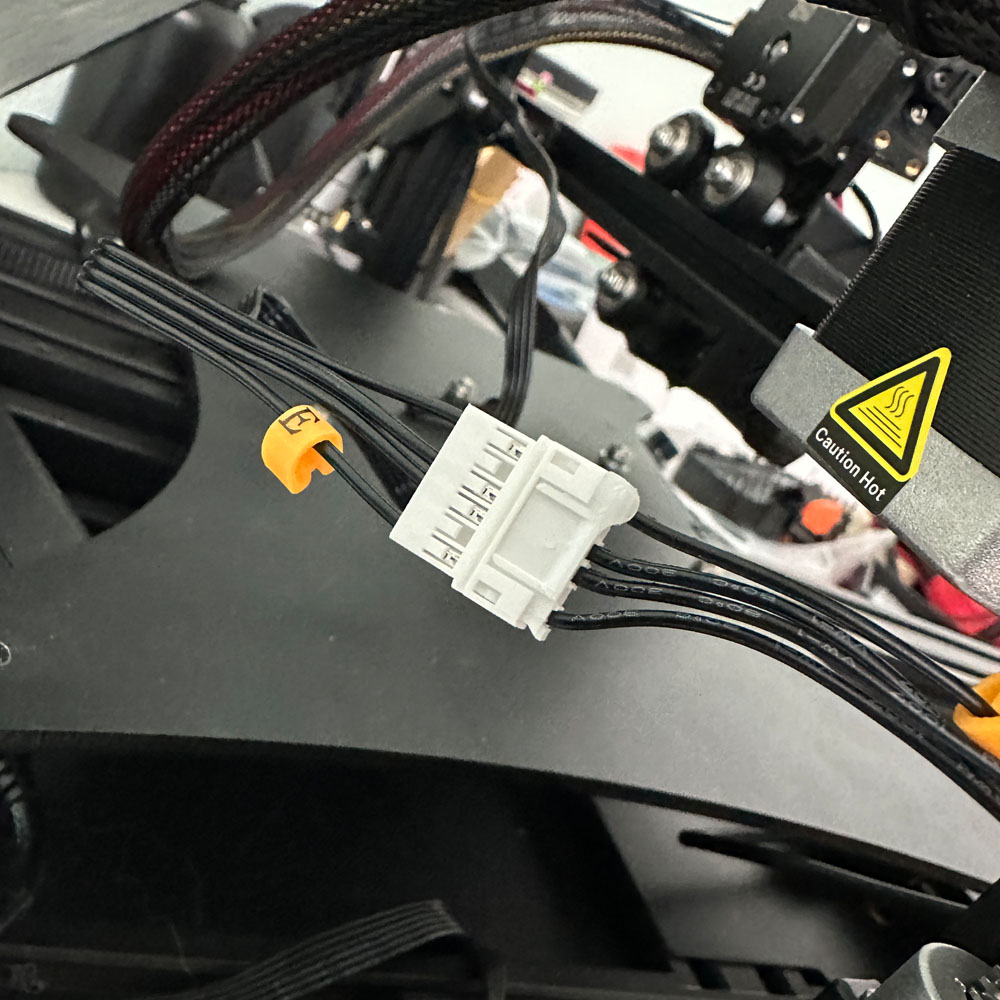
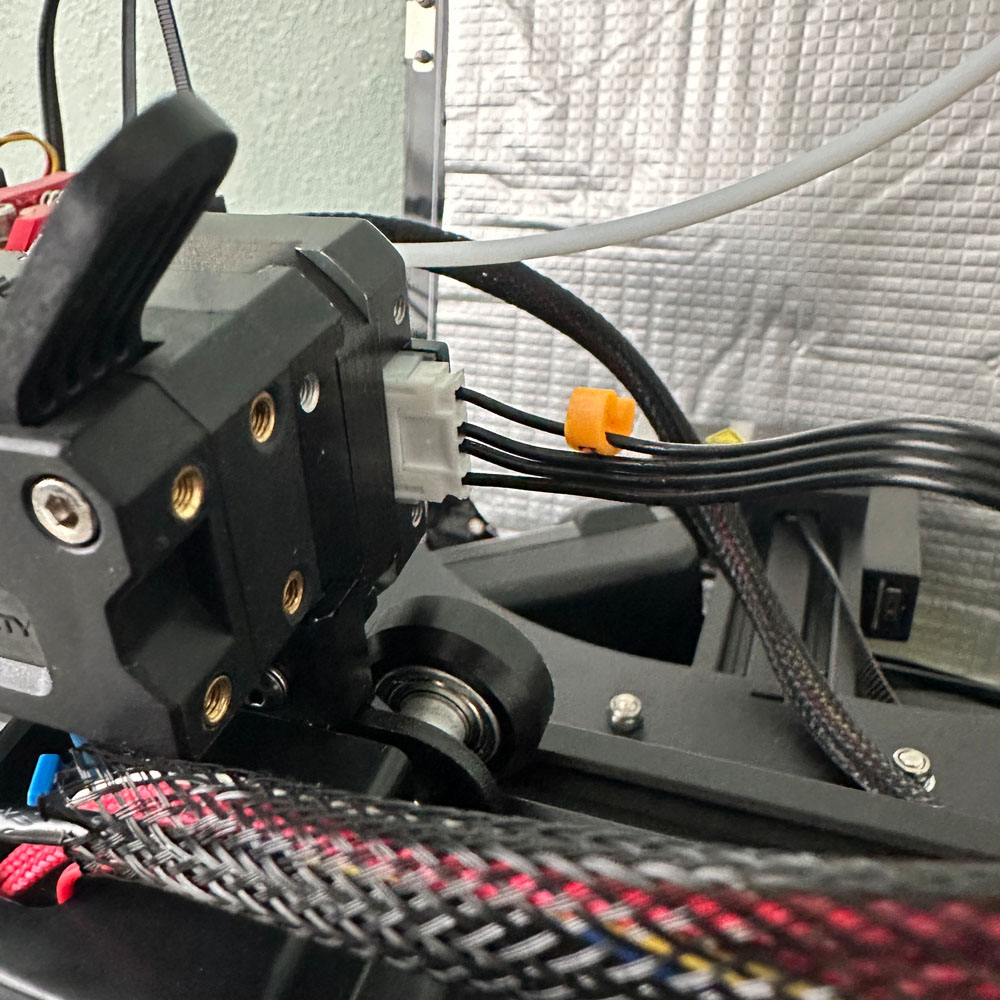
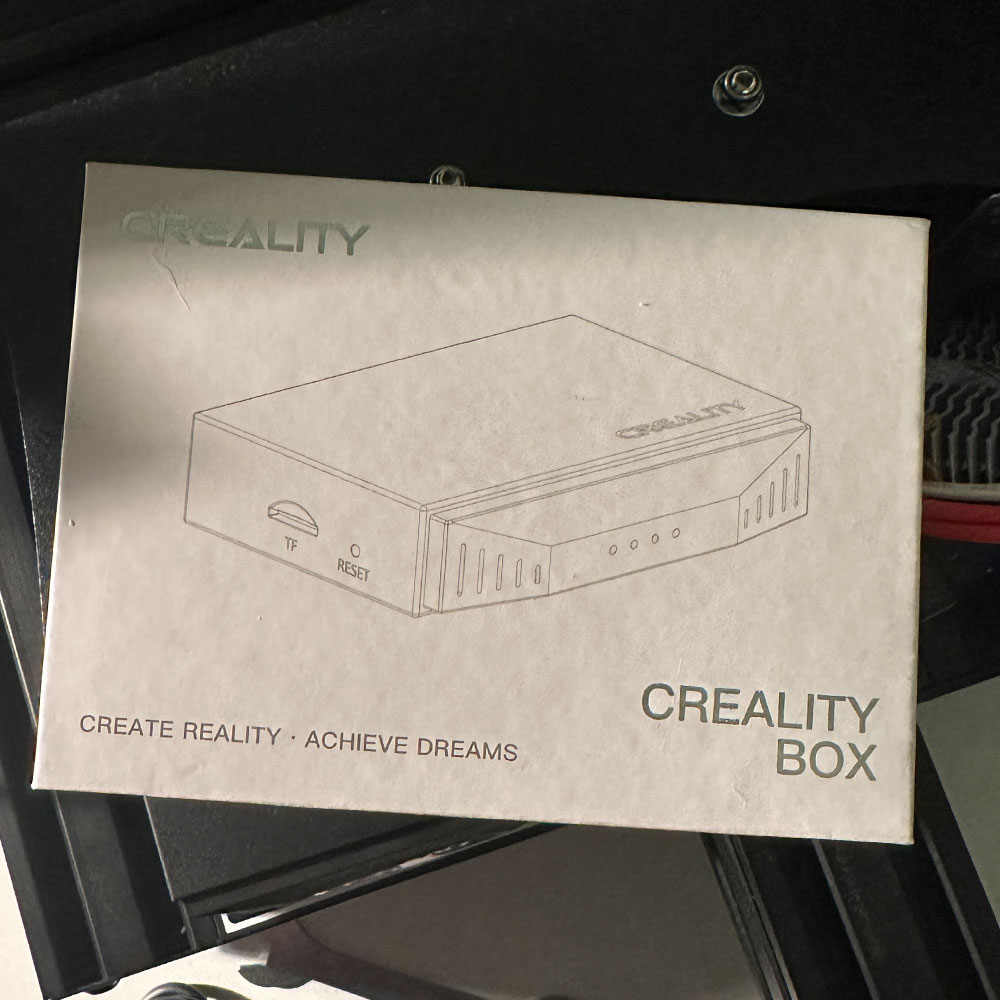
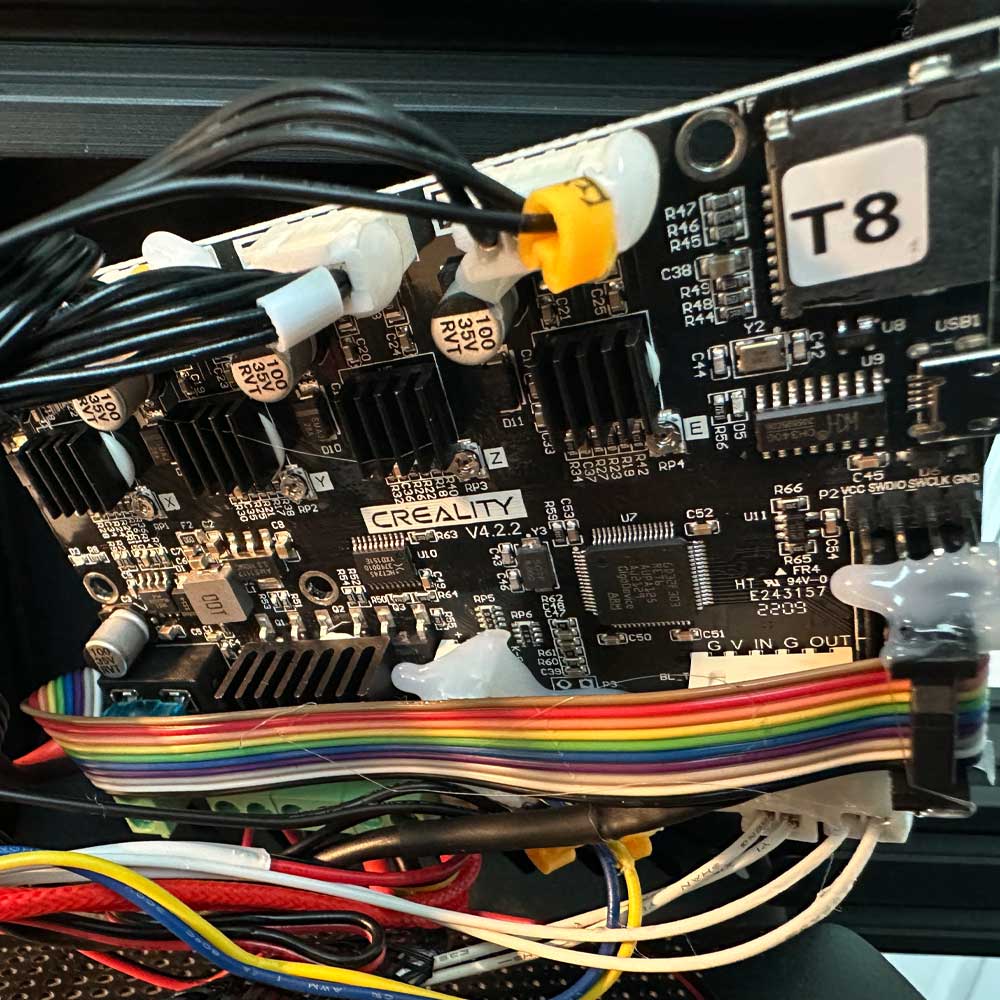
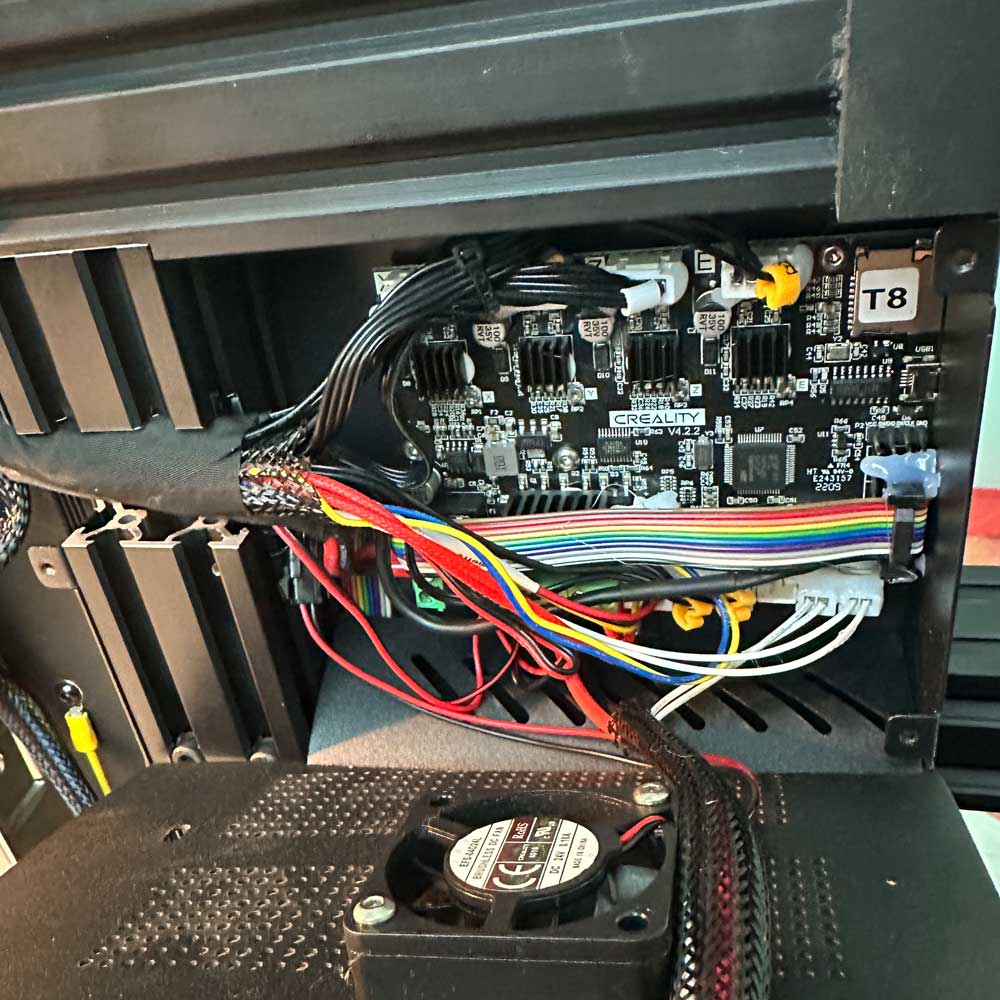
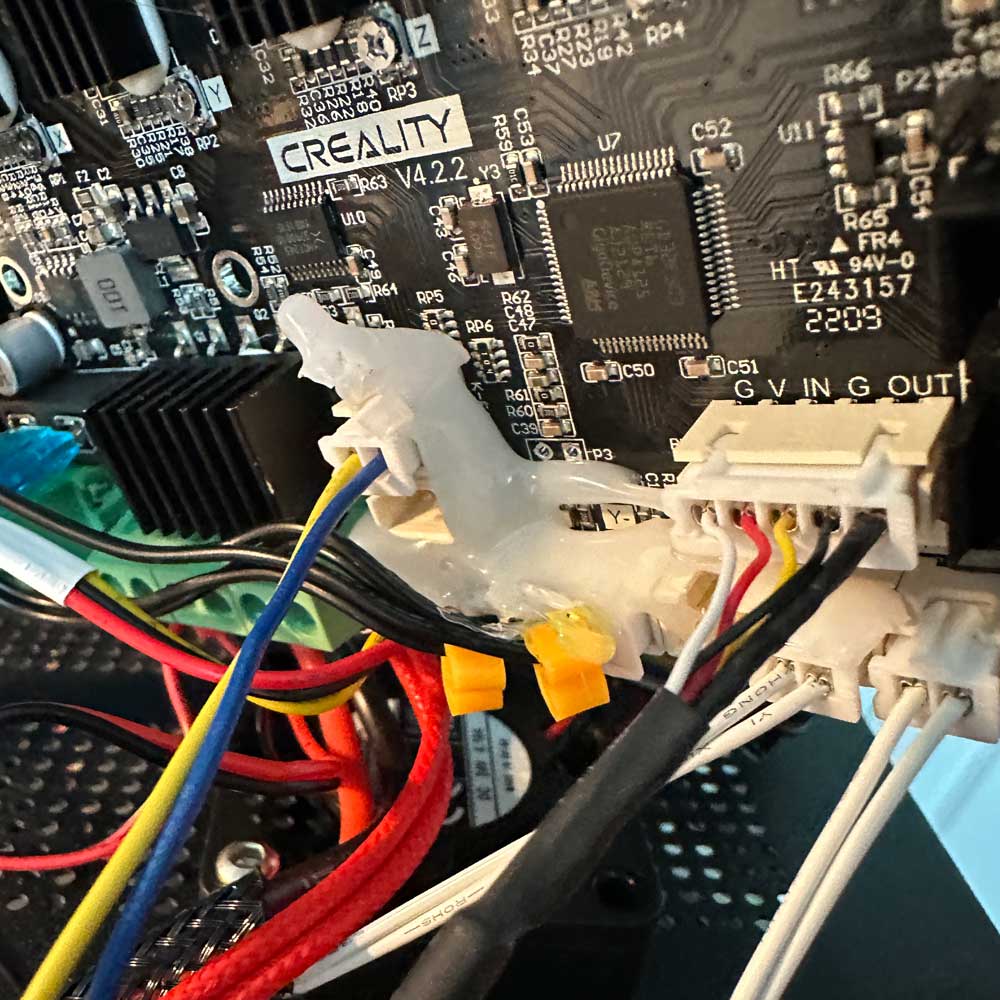
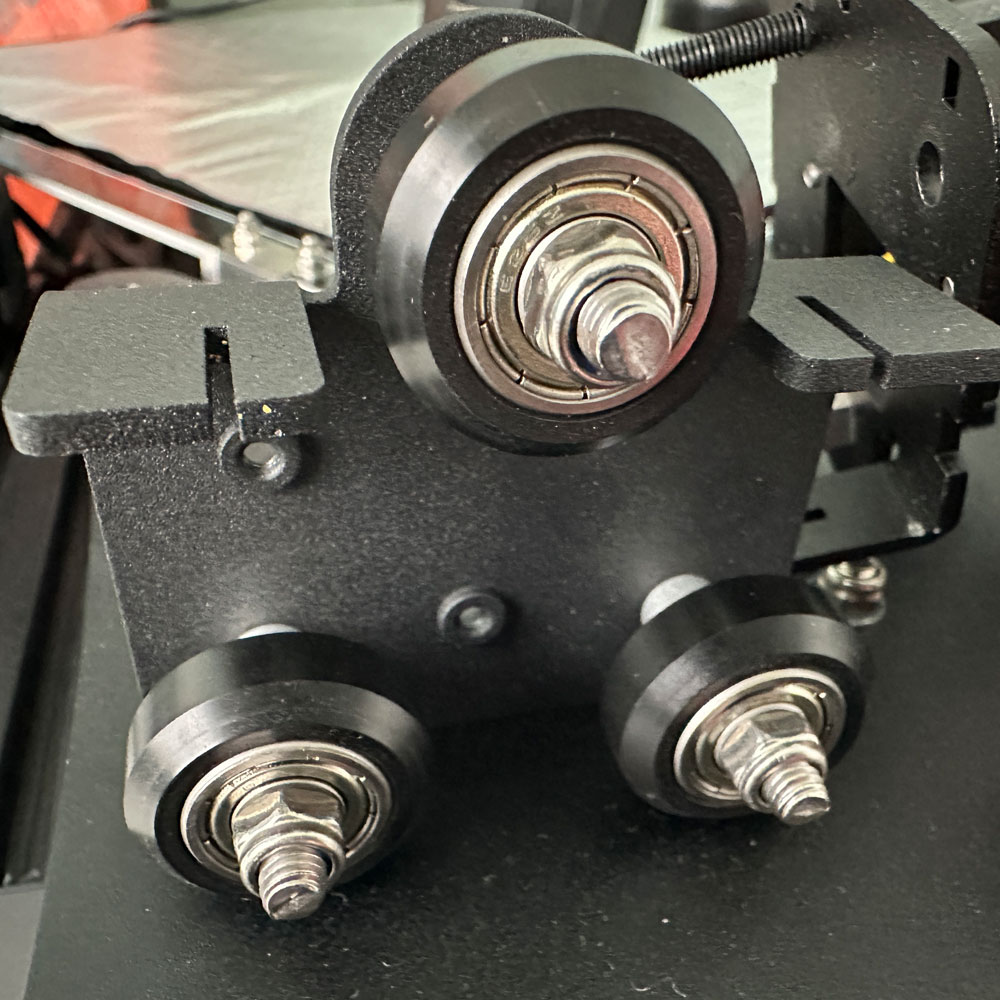
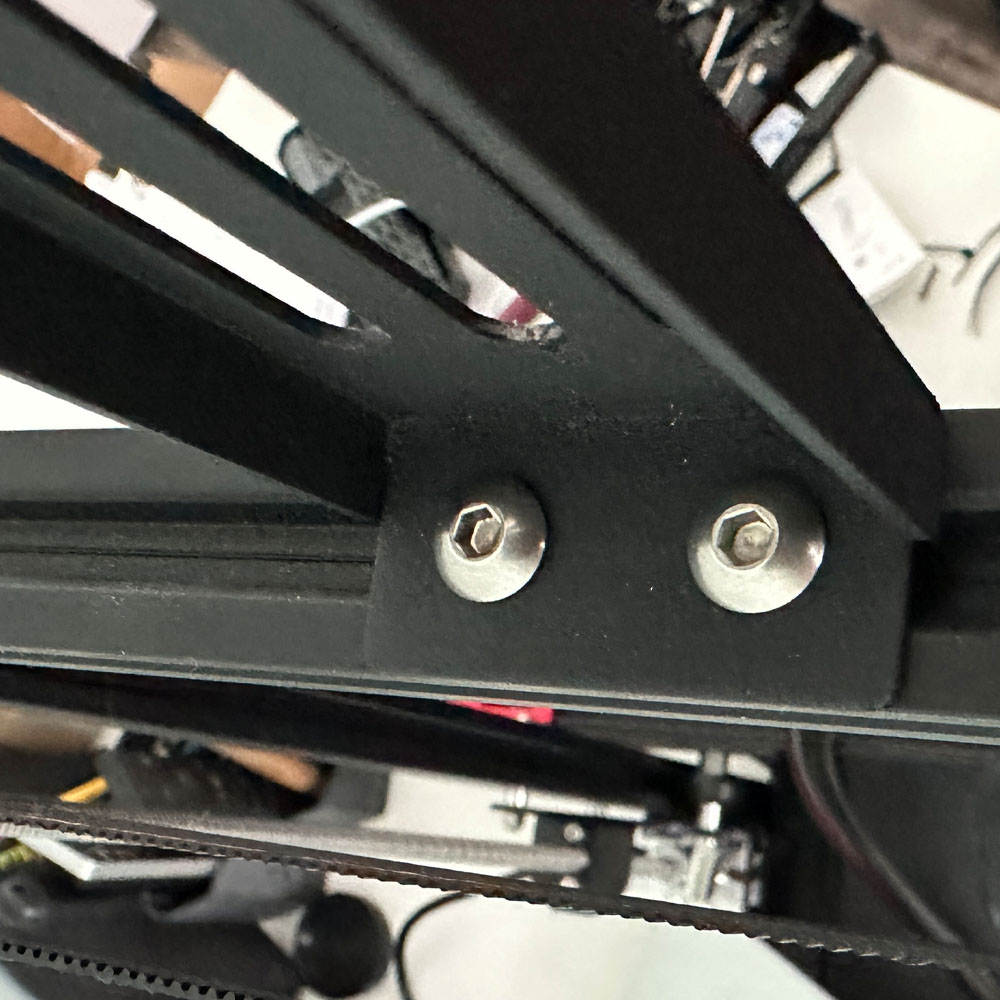
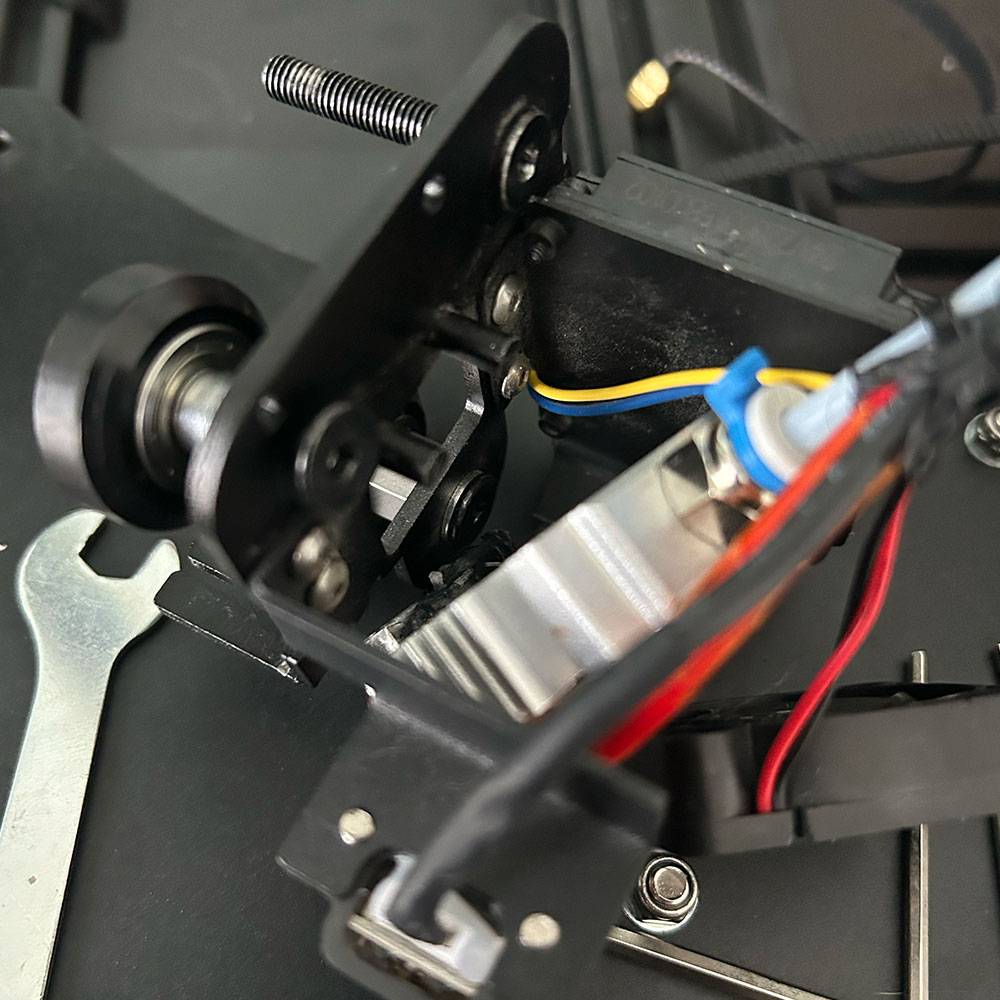
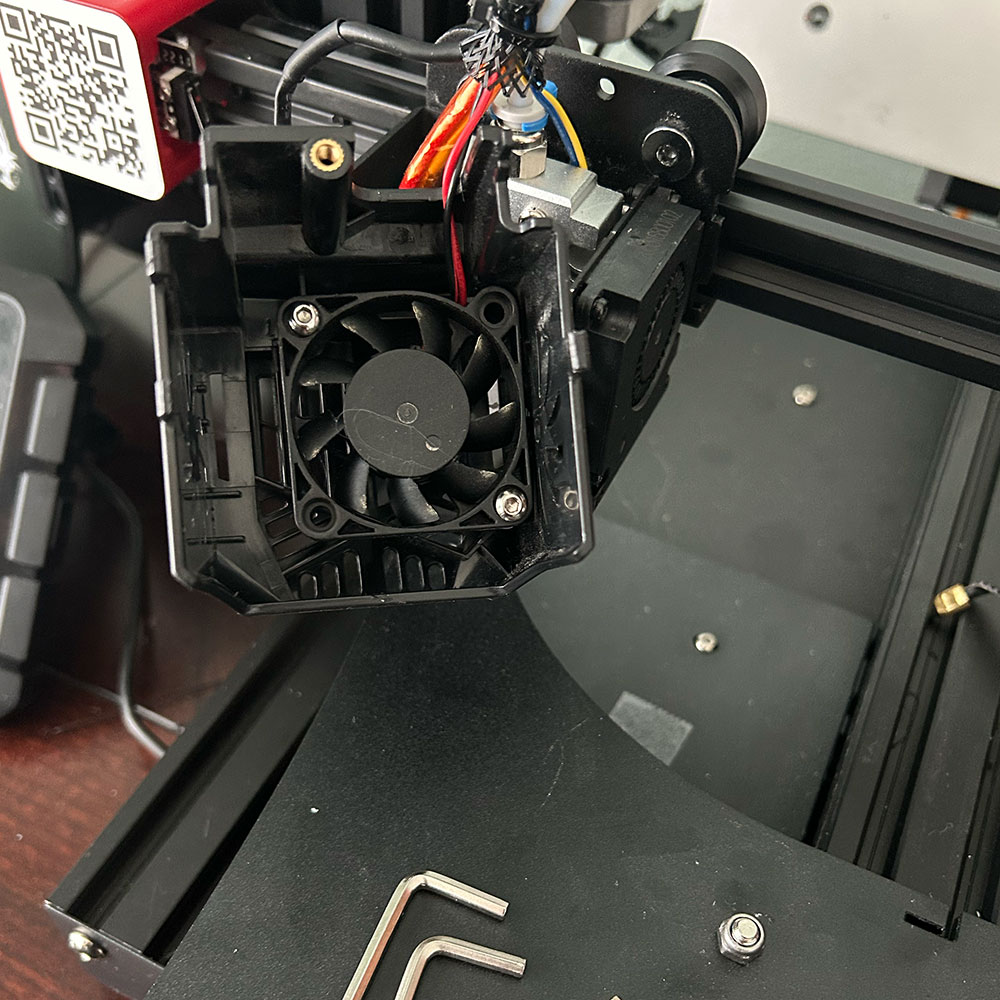
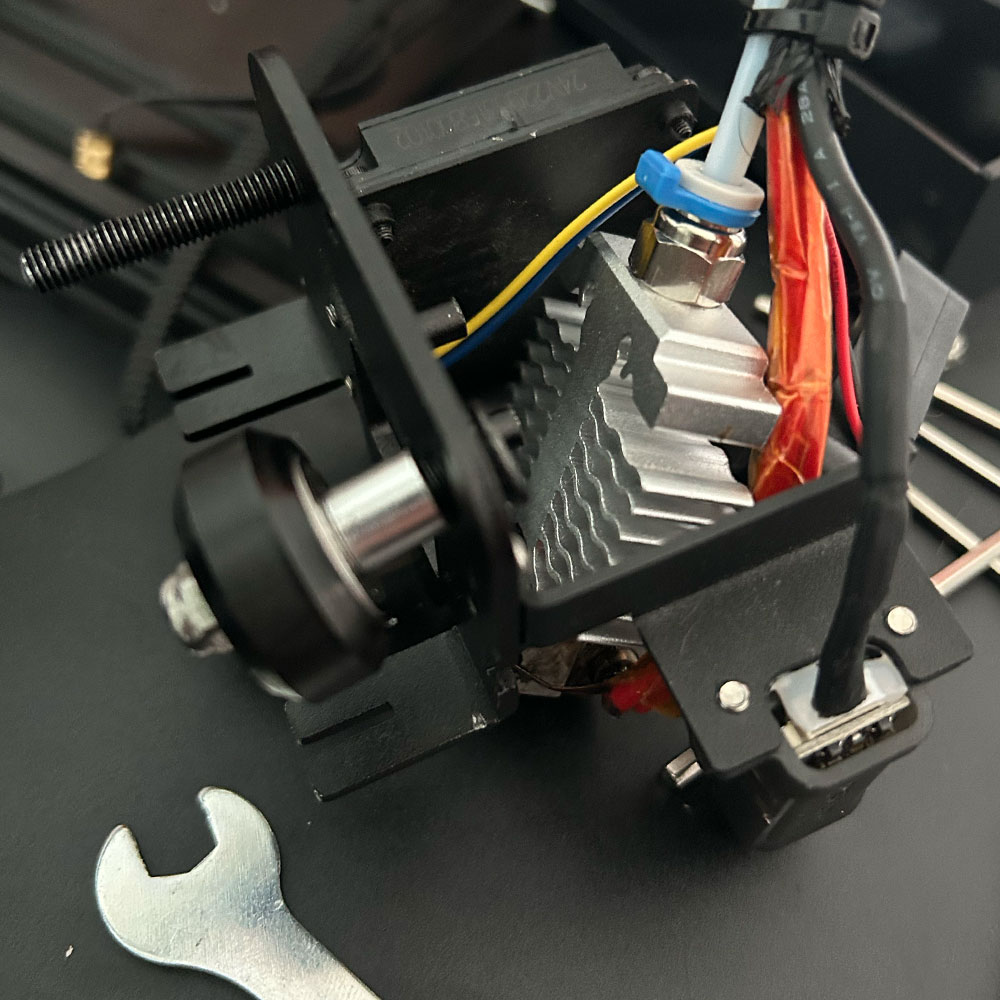
A few tweaks of the Hex (Allen) keys, reset the rail wheels and we’ve got gold! In hindsight, not sure the build plate needed a scrub down in between PLA prints. I’ll have you notice in the picture, if you can, the Creality Sonic Pad is up and running as intended. Honestly, not sure I would have stuck with the generic screen that comes with the machine. Wifi, Cloud Printing/Slicing, direct printing and settings all main reasons to stick with the Sonic Pad. One item to note, on the flip-side, we have yet to get the Wifi Box 2.0 to work in the upgraded sandbox. More over, for now atleast, we will skip the Wifi Box 2.0 and keep that item aside until we can gain some clarity on the optimal print settings and adhesion consistency. Positivity, all within target, as we move to spin up a few larger format prints, including a few Tinkercad projects for a true test. Also of note, we moved the printer off the ‘bench’, the work ‘bench’/tabletop doesn’t provide the needed stability, ideally the shaking, vibration and the back-and-forth motions of the printer assembly.

All in all, it’s a win today, for the week/weeks we’ve had the printer on the bench. Upswing, new parts, new break-fix settings, slicing settings and a new place-setting for the 3d printer to live and work. For those of you who are interested in the what’s to come (next prints), I’ve got a backlog of TPU Max Neo parts – specifically a TPU threader, some technology ‘covers’, and one-off locking mechanism for a cooler/fish well, more on that later.

Part 5 Inputs/Outputs Part 5 Inputs/Outputs Part 5 Inputs/Outputs Part 5 Inputs/Outputs Part 5 Inputs/Outputs Part 5 Inputs/Outputs Part 5 Inputs/Outputs Part 5 Inputs/Outputs

Rebuild Part 4

Miss-Prints, eSteps/Stepper, Filaments and More Rebuild, 4

Part 4 Internals

Labwork – Rebuild Part 4

Fine tuning, break-fix, and reprints. Yes, break-fix steps continue, fine tuning/recalibration, config adjustments, steppers, test prints and more. Largely, considered a failure so far…

Failures, not to worry! We will get this fixed, upgrades and all. A couple cycles now, including – what I will call the ‘teardown-and-rebuild’ cycle – removal of most external upgrades such as the Creality Sonic Pad, Wifi Box 2.0, direct drive extruder, tubes and hot end… the key is to isolate issues with teardown and rebuild cycle, building up with neutral or known issues. Please note, the Sonic Pad interface, under the ‘advanced settings’, extrusion settings… the default extrusion type must be changed/modified to include the ‘sprite extruder’, this accounts for the upgrades and the most significant step forward.

Please note, there are four default settings – default, sprite, MK8 and manual or custom… although we quickly tested each extrusion type, here, we focused in on the sprite extruder settings. Also of note, we’ve not had a clean TPU print. The TPU prints have been bad to say the least, as you will see in the test photos, bad to worse in some cases. In addition to miss prints, under-printing has been a major factor (due to extrusion steps as mentioned above, check the Sonic Pad Settings -> Advanced Settings -> Custom Extrusion Settings – Spite Extrusion vs Onboard Interface ramping up eSteps ~ 500mm). Before we move on, we’ve had globules (just large drops of melted TPU, simiular in shape/size as the end of a q-tip) miss-prints, gummed up nozzles and so on.

Beyond this point, I’ve looked at a board swap, which will also be something to consider until the print issues can be ironed out. Yes, that would be mean an effort in futility, meaning a full swap which would be considered moot.. for those that might not understand, this would leave only the base hardware/structure unchanged, changing out all components; which is not the goal. If a required motherboard change is confirmed- Creality motherboard v 4.2.7 specifically, a new printer specifically used for TPU might be the answer. Not ideal, but necessary. Below, you will find new images have been posted, thought it would help to highlight the removal of the fans, changing out heating element and sensor and Sonic Pad configs. Furthermore, I feel we are close to a successful print. Before I forget, the PLA prints run with little error, printing test cubes with minor blips or over printing… Beware, slicer/printer controllers do vary, Utlimaker Cura, Creality Slicers etc have varing results, some no result at all as the print is shown outside the consoles ‘known print’ area. More on that later, we can share a few posts on slicer sucesses (failures in our case).

Next, let’s cover some of the activities taking place during the rebuild:

  • Hot End
  • Assembly
  • Backplate
  • Sprite Extruder
  • Filament Tube
  • Filaments
  • Bed level, Adhesion Spray Glue and Blue Tape
  • Software – firmware and slicers (Creality Cloud, Creality Slicer, Ultimaker Cura)
  • Wifi Box, MicroSD Cards, Sonic Pad, Onboard Interface
  • OS – MacOS/Linux
  • Lot’s of cleaning, grab yourself a brass brush
  • E-stepper
  • Nozzles
  • Temperatures – hot end, bed
  • Homing Issues
  • Extrusion Settings
  • Homing Issues

So, what’s next you ask? Nozzles, needles, upgraded plate screws, leveling, Capricorn tube, Spider 2.0/3.0 Pro hot end… motherboard? We will have a full swap on our hands shortly! Ugh. Listen, it might sound like a lot of work, it is… but that is part of 3d printing, don’t let that bog you down. The challenge, the challenge or build problem ‘is what I gravitate to’ the most, a good problem, finding solutions, and working around said challenges… testing, and failing. In this case, may be to many times. I’ll sure video at some point, but for now, pictures and commentary will have to do the job for now.

Moving on, I mentioned a few items on the ‘pending’ list, nozzles, I think something is going awry with the heating element, thermistor and nozzle – space issue, wrong temperature etc. Globules of filament collect on the heating element, nozzle and many times fail to find the build surface. E-Stepper will help with this, I’ve read 424.9 is the ideal. However for our build, it has yet to be determined as the hot-end and thermistor might be the culprit. We need to eliminate those as build factors first, more to come on that front. Next, we need to have a few needles around to keep the direct-drive and assembly filament path clear, the collection of burnt filament doesn’t help the situation. So that to will be addressed this week.

Motherboard upgrades, we’ll skip the motherboard update for now, as that would as I mentioned be a full swap with a new sprite/extruder assembly to bypass the extruder and sprtie upgrade purchased at the start of this build. If the printer would require a motherboard update – 4.2.7 specifically, again, not the happy path per say. We will stick to items above, new screws, metal tension knobs, cushions, tubing and hot end are next. Ideally, the win will come from a level and consistent bed/build plate temperature, a clean adhesion plate, consistent hot end temperatures to reduce ‘leaking’ and hot end ‘heat creep’ and a quality filament… hardware problems might recede, or at least that is the intention. Now, assuming the hardware and upgrade components work, software will be the final challenge… TPU seems to be more about testing and failing tests, more so than first expected. I was able to print a clean print with a filament swap using the old Bowden drive and PLA settings. This was a full step back, to make sure the base product still prints as expected. Honestly, the speed-to-market issue comes into play here (this assumes you are looking to print commerically or in some professional fashion), as we are down both the ability to print PLA, cost per print and TPU. We will get the problem solved here shortly, more to come.

Part of this process is just keeping a positive outlook, even when balls of filament build up on the hot end and nozzle for the ~40th test. I know we are close per say, but, as we eliminate or mitigate more pieces and parts, the solution is there. Honestly, I might just need a few more mins to find the right combination of parts and software. Frankly speaking, TPU has been a bit of a bear. TPU is not all that hard on newer machines, but we need to find a solution for the Ender platform… on the cheaper end, wallet friendly for some (or may be not) when comparing to other very expensive printers which provide an out-of-the-box solution for many types of fulfillment needs. I will say this, for those looking for an easy, out of the box 3d printer (crickets, crickets), time/budget will be major factors, if not the defining factor; make or break.

More in part 5…

Part 4 Internals Part 4 Internals Part 4 Internals Part 4 Internals Part 4 Internals Part 4 Internals Part 4 Internals Part 4 Internals Part 4 Internals Part 4 Internals Part 4 Internals Part 4 Internals Part 4 Internals

Rebuild, Continues 3

Final Assembly, Boot, Config and Print

Ender - Middle

Labwork – Rebuild Part 3

Hit a bit of snag, working through those challenges now. For the time being, see above/below for part 3 updates… We cover rebuild – x/y axis bands, plate, direct drive snafus, boot/reboot, reinstall printer drivers, slicers, nozzle change, a bit of troubleshooting on the extruder/heating element and the latest snag below, the onboard/external interface.

As noted in the previous build, part 2, we are probably a good 80%/90% complete at this point. We have some filament melting out, with a few hiccups here and there to mention. We will cover those in part 4. However, Part 2 was successful, Part 3, all parts are working as expected, boards boot as expected, and the new drive and extruder work in tandem as expected. The ‘snafu’ as I mentioned is between the Creality Sonic Pad, printer board and software to connect the two, unfortunately. Images will help clarify rebuild challenges, you’ll see manual updates performed on the printer screen, main board and where we are ‘stuck’ on the Sonic Pad. Two errors to note, Klippy, Sonic Pad physical connection failure and Filament recognition.

Next steps will include reinstall/rebuild Klippy, test/retest print config files, reattach Sonic Pad, replacing extruder tubes, nozzles, e-Steps, home position and more, while adding Wifi Box 2.0. Once we have all this in place, tested/retested, we will capture a quick video summary of the build and active print as those items are ‘ticked off our rebuild list’.

Got to love technology (or not), and office ‘helpers’ Zeus thought he would snooze a little while the troubleshooting session continued throughout the day/night. Same can be said for discovery and testing, no time like now. Some folks call it the ‘grind’… I’ll leave that there for you to imagine. Is it painstakingly difficult, no. Time always has an impact where speed-to-market might be a big deal. It’s always there, you have to be willing to work with what you have… Part 4 coming shortly, where we will cover fine tuning, steps, extrusion, adhesion and whatever else pops up in the meantime.

Internals Internals Internals Internals Internals Internals Internals Internals Internals Internals Internals Internals

Creality TPU

OEM TPU

Duramic 3d - Post Upgrade

Labwork – Various Filaments

Filament types, brands etc. a nightmare of a problem to have. Which filament to purchase, what works best on the 3d printer I own? What to do when you’re just starting out? Cut to the point, purchase, use what you can in context, however, when push comes to shove… Ender Series, Prusa, Makerbot all great choices for novices or beginners. Start with an eBay ‘parts’ printer, this might help cut down cost or refurb’ed. In time, as you learn the in’s and out’s of 3d printing, overcoming fine-tuning issues and filament extrusion/application will be key.

Regardless of product make/structure, the fine-tuning the nozzles, stability of the machine, drive system, adhesion and filament… Filament might be the easiest to swap out, may be the nozzle (noting various nozzle sizes, most default include .4mm) and for those hobbyist, the drive mechanism, bed/build plates etc. Filament might just be an easy swap with a catch.

Like most things, filament comes with it’s own issues – additional research is required, fine tuning and testing depending on choice of 3d printer. Let’s talk shop, filaments… retraction (later, future post). Listen, if purchase power is a problem, meaning if you have the money, first, buy what you can afford, especially those starting out in the 3d printing hobby… Do what you can to make ‘it work’. Making it work, meaning so that you can test, test, and retest. It’s a process of elimination, elimination of problems over time. Better filaments, better results. There have been many times when testing, in fact, I might venture to say, problems are related to cost of filament and the length of time it takes the user to move from the cheap ‘stuff’ to the final working filament. After all, at least in my filament finding (tersting) days, more often than not, filament testing became cost to throw-away, ‘what not to do’. So, yes, a healthy dose of testing is needed; failure as well. That said, I would be remise not to shine a spotlight on the value of the article; which is saving you money on filaments, pieces, parts and cost to print etc. The punchline, buy and match OEM (Original Equipment Manufacturing) filaments. I have a Creality ‘shop’, thus, I use Creality filaments – Creality TPU (Thermoplastic Polyurethane) Filament.

Lately, we’ve been looking branch out a bit, as we’ve recently added the Prusa’s i3 MK3S+ 3D Printer kit to the mix. Again, there are many options, printers, upgrades, filaments… choose wisely.

Let’s move onto what works, finding something that works for your printer, or future printer. I’ve maintained more of a ‘happy path’ as a hobbyist, less venturous and sticking to the PLA’s (Polylactic Acid) and TPU’s. Again, MatterHackers does a great job sharing what’s on the market – types of filament, sizes, brand, color. Dive in! Or maybe, expansion is on your mind, and you want to setup your own print farm – @ShopNation might be a great research to check out. Have options, which might be the biggest take away beyond testing or OEM/OEM filaments. Hey, as a hobbyist, saving some cash is good thing, there are thousands of upgrades on the market, same for the number of printers, filaments, parts, boards etc. What I’ve found through various testing methods, settings, set ups, printers and more, has been more about what works, the ‘success’ metric here. Consistency, fit/finish – quality over flash, speed – quantity. Take for example, and why perhaps I’m writing to you now, Duramic 3D TPU is just not working in the Ender 3 Neo Max rebuild. Teardown, rebuild all updated, same result, so, again, time to make a switch.

The switch, I’m referring to here (moving from generics to OEM) worked on the PLA side of the equation, may be a correlation perhaps, and not causation. I believe that’s the value here. A handy lesson here, might be to continue to test where it makes sense – remembering “correlation does not imply/mean causation” ((Shout Out)) Find more about Mr. Glickman on his personal website or faculty website, Mark Glickman – Senior Lecturer in Statistics, Director of Masters Study.

If you want to learn more about filaments, do your research, please do look into – MatterHackers, All3dp – Filament Finds and/or @ShopNation

I’ll leave you with this, try what you can afford… what you can afford to discard, test and worked to fine tune your printer. Words of encouragement ‘leave no product stone unturned’. The goal is to produce high quality, consistent and clean prints. Find something that works 80% of the time, the old 80/20 rule. PLA is a bear to tweak and maintain, so is TPU and the ~14 other materials including metals, carbon fiber, wood, nylon. The application is endless, from starter to full forge, high-strength, commercial production. Focus in on settings, adhesion, extrusion temp, nozzle temp, surface tension, drives – pushers… And so it goes, testing is our motto/mantra, testing has become a constant when finding something that works, good over bad outcomes… so, test them all. Checkin from time to time, new posts are created daily, we will cover the Prusa tests, Creality TPU, Polycarbonate and PVA (Polyvinyl Alcohol).

Have fun, cheers

Creality TPU Creality TPU Duramic 3D

Rebuild – In Progress, 2

Assembly & Direct Drive Rebuild, 2

Ender Part 2 Direct Drive

Labwork – Rebuild Part 2

A few steps forward now, we pick up with the bold on extruder assembly and assembly backplate here in part 2.

As noted in the previous build article, part 1, we pick up with the orginal backplate, reusing the backplate while adding in the new assembly hardware. Unfortunately, the new OEM plate was incompatible with the setup I have, so, we’ll harvest the new wheels, screws/tightening washers, bolts and spacers where I can. A quick fit, a dryfit of all the screws, spacers and wheels, placement of the bracket, probe (black, narrow plastic with probe), side fans (yellow and blue wires) and heating element (heater, heat sink and extruder).

The final fit, be sure to tighten down the wheel screws, fan, drive belts and extruder prior to placing the heating element. Order will matter here, same with the removal of the Bowden drive, brackets and extruder tube. We will harvest some of the old tube to help direct TPU filament into the new direct drive extruder. Finally, we place the extruder fan (red and black wires). At this point, you can unscrew the two top wheels in order to place the new direct drive platform, tighten down and snap in the carriage case (caution hot should be on top).

Next, the direct drive, clip on the tube provided, snip tube after a fitting or two. Do make sure, the fit is proper. The direct drive platform is screwed in from the backside of the plate, installed on the last step. Following a screw down action, you’ll need to connect the direct drive motor to the main ‘line’ by passing the frame platform where the old extruder motor lived (see last couple of images) and place the harvested tube for filament.

Easy right? Part 3 coming shortly, we will cover that tomorrow, we’ve got to replace the heating plate, power on the machine and change the step movement.

Internals Internals 1 Internals 2 Internals 3 Internals 4 Internals 5 Internals 6 Internals 7 Internals 8 Internals 9 Internals 10 Internals 11

WiFi For Legacy Creality Devices

Creality WiFi Box

Creality WiFi Box

Tech | Tools – Creality WiFi Box 2

Need a boost, WiFi or Bluetooth connection for your Creality printer? How about the Creality WiFi Cloud Box 2.0?

Those of you who might be use to the idea of ‘airprint’, or print-over-wifi or can print on a WiFi/Bluetooth ready 3d printer, know how easy it is. It’s easy to sit down, run through your sketch or drawing export, send the slices to a printer via WiFi/Bluetooth, kick off a print via wifi/bluetooth sketch and print.

Before I go into the best case scenario, let’s cover the old school models. Like me, those of you, who utilize old printers, nano sd cards, usb 2 cords and swap nano SD cards and usb sticks. Those of you who might want to skip ‘the chair slide back-and-forth, switching usb dongles and nano cards’… again, it’s old school, it works, manual; yes…

Please note, we haven’t set up the Creality WiFi Box just yet. We will get something up here shortly, once the rebuild is complete ~give or take a week or two to wrap up the build. Rebuild pt 1 – Rebuild, install new drive, assembly and back plate. can be found here. While we are currently reconnecting the new assembly housing, heating element etc. Rebuild pt 2. start today or tomorrow.

With that being said, we’ll cover the Creality solution for older 3d printers, more specifically the Creality WiFi Box with the Ender 3 Neo Max.

Rebuild – Start

Ender Teardown, Rebuild

Unpack - Ender Internals

Labwork – Teardown Part 1

A few steps to crack open the Ender housing, replace extruder wires, internal fan wires, jumpers etc.

Check out the timeline below, quick editorial: Case removal, wires, replace section by section… replace covers. Voila! Step 2, coming shortly, the more difficult portion of the build as we are swapping extruders Bowden to Direct Drive, and back plate swap. Back plates don’t match, we will proceed with a salvaged plate (existing), harvest the plate, add new hardware… shouldn’t be to difficult.

I’ll post another update on the tool set I’ve recently added, Klein driver set… handy multitool to go with the new-ish Tekprem Torx set. Check back shortly as there is more to come in round two!

Internals OEM Wires Jumpers and Terminals Case Fan Wrapped Up - Wires Finish Up Wiring Zip Up The Wires

Downloads – Boards, Slicing & More

Creality – Ender 3 Max Neo, Halot Sky & Prusa Boards, Slicing and More

Tech | Tools – Software Support

For future usage*, specifically those of you who are running an Creality Ender 3 Max Neo 3D Printer, you need the following software, yes, *already used in various parts of the rebuild effort.

Here is the list:
Creality Halot Sky – Firmware or Slicing (bottom)
Ender 3 – Neo Max – Firmware or Slicing (bottom).

Also, included:
Prusa I3 MK3S+ Kit – Firmware, Drivers and more

Assembly Plate

OEM Back Plate

OEM Assembly Back Plate

Tech | Tools – Back Plate

Back plate on the bench…

Quick update, assembly back plate is in hand… unfortunately, I had to push the build back a few days, OEM parts ‘the Achilles heal’. Look for an update this week/weekend as all parts/harvestable parts are in and on the bench. Let the rebuild begin! Questions, comments, may be a little encouragement… leave a comment below. Cheers

Filament Spool Update

Creality Digital Spool Rack

Spool Rack

Gear – Filament Rack

Needed an additional part/piece, this Creality Spool Rack.

Today, we should have our final, final piece* for the build… the last item being an overhead rack, specifically the Creality Digital Spool Rack which will sit upon the top brace/cross-bracket. The spool rack will allow for multiple filament types (PLA/ABS/Nylon/Wood/TPU), TPU specifically to unwind down from the top cross-brace, directly into to the new direct drive/extruder. Handy little rack, replacing the OEM side mounted rack, this one an OEM rack, has a digital scale and a great option while the printer is down. Otherwise, I’d print yourself a rack for the top brace… go with something you can create on your own. Note, I’ll still print up our own, once the printer comes back online and both the TPU, ABS, Nylon, Wood and/or PLA. All material come into scope once the direct drive is up and functioning as expected.

Spool Rack Spool Rack

Max Neo Back Plate

Back Plate and Rail Wheels

Lab Work – Working Through The Challenges Associated With 3d Printers, Printing, Upgrades and More

Long awaited parts are on the truck this morning, should get the final pieces by 2pm or so.

Quick update, all the parts to update the Ender 3 Neo Max to run TPU should be in hand by roughly ~2pm today. Ultimately, I’d like to get the rebuild out on the interwebs by the end of the week. I’ll post the tear down pics today, below. Just a few, to help you understand what needs to be removed, replaced and rebuilt. If for some reason the parts are delayed, Friday should still be a reasonable goal.

If you’re new to the site, check out the Max Neo challenges in the Output archives… for those who just want to see the rebuild, just understand this – we had a few prints that went sideways, by sideways, extruder was found buried in filament, grinding away at the build plate. Ultimately causing a meltdown, plate parts thrown out of the machine etc… prior to the blow out, we had a few successful TPU test builds go to term, however, the standard build (Ender 3 Neo Max Bowden Extruder setup, standard build from the factory) wasn’t working. Please note, sometimes you’ve got to ‘break’ things to truly figure out the right path; change paths per say. Anyhow, not to belabor the point here, but, we should have all the necessary parts to finally rebuild this machine with the correct parts and extruder to build more ‘things’ with an array of filaments.

TPU Driver, Assembly Support Plate and More

New Assembly, Drive Drive Extruder, Support Back Plate and Rail Wheels

Lab Work – Building and Buying Parts On The Supply List

… a few more days folks, a new extruder support plate for the Ender 3 Neo Max is on the way. Not on back order, but awaiting the last piece so the rebuild can commence.

Before the assembly and new direct drive can be upgraded, we found an ‘issue’ with the back support plate (including wheels and bolts) are out of whack. Following the printer ‘meltdown’ a few months back, check out the results of that print here… The final piece in the rebuild is this support back plate. There is to much play, movement, space between the assembly and guide rails. I’m not sure (I don’t recall the play or any movement between the assembly, support plate, wheels and rails). I would think there is no or very little ‘wiggle room’/tolerance in those items. That said, I can almost remove/lift off the assembly housing, extruder and back plate from the guide rails under tension. Third sign, in this case, it was time to replace the support plate, bolts and wheels to ensure an improved upgrade and/or fix.

Anyhow, all the pieces and parts have been removed from the initial purchase. So, for picture sake, we’ve got the frame, base, and guide rails and that’s it. All parts have been removed for the moment. ~3 weeks now, awaiting the OEM support plate. Ultimately, we are looking at a clean rebuild, OEM parts with a few upgrades (direct drive, replacing the Bowden extruder) to allow for TPU, Wood/Bamboo, Carbon, Metal, Organics and more. System upgrades might come later, the goal being more power to compensate for the downforces on the extruder head in the direct dirve case. Caution, there are differences between the Direct-drive and Bowden extruders, obviously advantages and disadvantages for both… maintenance and care being the most complex for the direct-drive variety. The goal with the direct-drive ‘pivot’ is the heat, extrusion pressure, retraction and a much broader range of filament materials. I will stick to the update advantages/disadvantages for the sake of this article. The opposite being the vs. advantages/disadvantages. One more time, more materials, heat, pressure, and variety vs maintenance (a lot of maintenance). I use the break/fix method – parts being less expensive in the printer ecosystem to replace. May not be wise, but sometimes you’ve got to break-it to understand the machine or engineering behind the magic.

Final thoughts, parts help, build yourself a parts bin, part out used and gently used parts to cut-down on out of pocket expenses, learn how to maintain and reuse your gadgets. Don’t forget to fail fast, when working on such equipment… short-term break fix expenses go along way when dealing with 3d printers, drones, computers and more.

TPU Update

New Assembly and Drive Drive Extruder

Creality Extruder, Full Assembly

Lab Work – Bolt On Upgrades

We are updating the extruder, bolt on direct drive upgrade and replacing the Series 3 full assembly body.

PLA is great, TPU might be better. Of course, if you need flexibility over rigidity… this assumes you want to test TPU filament. First, we replace the existing assembly body on the MAX NEO, and bolt on the new extruder to help with the TPU issues*. A little more on the issues, TPU requires*/needs more ‘umph’ to drive the flexible TPU filament through the assembly and out the nozzle. The direct drive helps will ‘refinement’ and focus on pushing and pulling the filament more accurately and more precise. Again, not something that is a *requirement, however, I’ve seen enough test prints now, it’s time to make the switch. So, here is the bolt on solution from Creality for the Ender 3-Series, MAX NEO.

Look for additional photos and mini-clips covering the install shortly. In the meantime, here is a brief unboxing and assembly tear-down. Thanks!

Extruder and Assembly Extruder Bolt On Assembly Body Assembly Body Assembly Body Assembly Body

Ender Print Issue Round 26: Vat Cover Print

Latest Ender Chaos

Ender Issue 26

Lab Work – Humor Is The Only Way Sometimes

The Lead, 6 hour+ print, print – a Halot Sky Resin vat cover via an Ender 3 Neo Max… 5+ hours post starting time, we ran into issues. Lot’s of issues!

From missing hand (tension) screws, belts, PLA matter covering 40% or more of the printer/extrusion head, print matter splayed out around adhesion plate, off plate and more. Walked in on tension belt removing itself from the printer head (oh snap). I’ll share pictures below, anyhow, we have the printer head back together, PLA cleaned off, tension belts applied… next and not captured below, replace adhesion plate, tension screws, and machine restart for calibration. Look for update posts here in the next day or two.

Purpose of the print? I wanted to get a cover on the Halot Sky (V1) Resin vat… not sure where the original cover might have been misplaced, broken, scrapped or lost. Moreover, the print was lost, looks like the print didn’t adhere to the plate, ironing is off, and printer head was found plowing the print plate. By the way, not a great sound, tension belts releasing and printer head/plate friction. Anyhow, the print fix is in process, we will post more at a later date/time.

Next replace plate, hand screws, springs, restart/update firmware and calibration.

Ender Project Ender Project Ender Project Ender Project Ender Project Ender Project Ender Project Ender Project Ender Project

Ender Filament and Adhesion Issues

Print Plate Surface Adhesion and Heating Issues. Filaments

3D Printer Adhesion Issues with PLA and TPU

Lab Work – Ender Issues Defined

A few more weeks of Ender issues…

I’ll be posting more Ender ‘lite’ issues, as the TPU trial continues so does the filament challenges. Although, the filament change was strictly lab work for the bait designs down the road… same for some locking mechanisms etc. where application of TPU will be more suitable; (excuse the tangent), core printing hasn’t stopped and the challenges continue with PLA. Anything from slicer issues – Creality Software to Ultimaker Cura, Sonic Pad issues, filament run temp, new surface temperature issues… we’ve got a lot to cover.

I’ll break these down into 2 or 3 new posts over the next week. We will cover surface adhesion again as well. Surface adhesion and surface temp seem to cause most of the issues on the Ender Max Neo. I will reserve the right, tinkering doesn’t always produce perfect prints even 60%, 80% of the time. I would argue, the more runs the better in order to increase that 60% likelihood of printing successes.

I shared this picture specifically to cover thickness, fragility and test prints. Get to printing!

3d Printer Usage

Best 3d Printers On the market ’23

Halot Sky

Lab Work – 3d Printers

See 3D Poll Below, take part in the ‘who’s who of 3D Printer Manufactures’.

The poll has since closed, what we discovered is interesting. The question was ‘What 3d printers have you used, any success’? We are looking for a TPU thermoplastic polyurethane (TPU) filament option printers when we can. Tests with the NEO Max have wavered, mostly unsuccessful, unless we are swapping out filaments. Interesting right?

Generally, we’ve stuck with Creality for sometime, maybe four years or more. Today, we are looking for the best TPU lite printer. Have a suggestion? Dremel we’ve used for cutting and sanding, typical Dremel tool applications… Prusa only in theory as some products we’ve purchased have been made via a Prusa lab or outsource printer. Anyhow, we are looking for feedback or comments, kindly leave your commentary below.

Please note, if you’re looking to swap out resin liners (if you can find the correct ones for CL-89, buy a number of them, cause they are hard to find when the global stock is low).

Let us know what you’re thinking?

New Halot Sky LCD

Creality Halot Sky Resin 8.9″ LCD Change Out

Halot Sky LCD Replacement

Lab Work – LCD Screen

…I know, we started the last post with “Before you start your own 3d printing…”; this post does follow suit. Looks like a bad LCD screen, lcd screen needs to be replaced, same for the film stretched over the resin vat or just some resin damage for that matter.

We swap out the mono LCD screen on the deck of the Halot Sky while we wait for a new FEP resin vat. Please note, if you’re looking to swap out resin liners (if you can find the correct ones for CL-89, buy a number of them, cause they are hard to find when the global stock is low).

Swapped LCD Screen

Swap details: deconstruct, remove all screws, cover and metal panels… careful to disconnect wire and ribbon cable for the touchscreen (just be careful). Replace screen ribbon in the quick connect, construct, careful to replace ribbon and black wire for the touchscreen.

Two, clean up any resin residue, pour over and/spillage now, I think this is where we went wrong. Spillage got under the screen as you can see in the featured image for the article. Have a bottle of alcohol available to make this clean up effort as effortless and easy as it can be. It took about 15-20 mins overall, like I said, lots of spillage. Anyhow, lastly, remove the ribbon tape surround and a few screws gets you access to the LCD screen. Just take your time, easy if you’re careful to not rip the LCD tape, or misplace a screw. You can always find new pieces for lost items, just check out the Spare Parts or our go to for parts over on the eBay Shop. We will have a link to our warez, it’s taking sometime, logistics issue as you can imagine. We sell our wares from time to time there as well. Check em out, we’ve got some Stephen King books up there now. Lastly, for those who just need the FEP release film, and for our future reference – FEP Release Film. A side note, FEP film is apparently hard to find these days, eBay might be your best bet to find spare parts, consumables and film. Cheers.

As usual leave a comment below, let us know what you’re thinking?

Halot Liner Before Change Out Halot Liner Before Change Out Halot Liner Before Change Out Halot Liner Before Change Out

Halot Sky Break-fix

Creality Halot Sky – Resin Liner Change Out

Halot Sky vat liner

Lab Work – Working Out The Bugs, Halot Sky Resin Printer

Before you start your own 3d printing, buying a 3d printer etc. Learn how to maintain, troubleshoot and work through printing issues… like misprints (lots), cleaning and scraping resin, swapping resin liners, cleaning resin drip after drip

Attached a few sneak peak video clips and photos of our latest test prints and demos. Got a few ‘real-world’ solutions coming out soon… We will put a few polls out regarding 3d software/applications – Tinkercad, Autodesk – Autocad, Creality (design) software, SolidWorks and more. We’ve started with Tinkercad and Autocad so that we can print prototypes to finish products within a few hours. Got any ideas? Need 3d prints? Leave us a comment, drop us a line on the Connect, please include: file type, filament, sizes etc. Let’s see what we can come up with.

As usual leave a comment below, let us know what you’re thinking?

Halot Liner Before Change Out Halot Z Position

New Creality Series

Creality 3d Printing – Ender 3 Neo Max & Halot Sky

Creality Series

Lab Work – Creality Settings

3d printing? Got a need, give us a call. We will be posting a bunch of new work in the weeks to come. From testing and prototyping, 3d model printing and extruding, resin printers vs PLA/TPU filament printers, trials and tribulations; i.e. issues we experienced when running our 3d printers.

Attached a few sneak peak video clips and photos of our latest test prints and demos. Got a few ‘real-world’ solutions coming out soon… We will put a few polls out regarding 3d software/applications – Tinkercad, Autocad, Creality (design) software, Solidworks and more. We’ve started with Tinkercad and Autocad so that we can print prototypes to finish products within a few hours. Got any ideas? Need 3d prints? Leave us a comment, drop us a line on the Connect, please include: file type, filament, sizes etc. Let’s see what we can come up with.

As usual leave a comment below, let us know what you’re thinking?

Creality Tablet Prototypes 3d Printers In the Lab

Creality – Ender, Halot (Resin) or Prusa 3d

3d Printers/Resin Printers – Creality or Prusa

Halot Sky Resin Printers

Gear – 3d Printers

With the holiday season in full swing, thought it might be worth while to do our research on a 3d printer… Extruded filament or resin? Which brand should we choose? Cost/Benefit?

We found one that fit our needs, more information once the device has been received, we’ll post an update on the device, 3d lab startup, first runs etc. Let me know in the comments below, do I go Prusa or Creality CR Series Ender series or Halot Series… There are a couple different models, filament types, series etc. to choose from; we are looking at the Ender 5 Plus, Halot Series (Resin) vs the Prusa I3 MK3S+. Perhaps some other tools to go with the printer as well, wash/cure, filament, bed, boxes/enclosures etc. Lot’s of etc etc. The point is we are looking for the best option for us, help us understand why and what might have been part of your decision to purchase a 3d printer. Should we choose something else? Dremel, MakerBot, Ultimaker, LulzBot… more out there, but we cut the list down to the two noted above.

As usual leave a comment below, let us know what you’re thinking?

Ender Series 3d Printers Prusa 3d Printers