M1 Refurb – Touch bar
M1 Update – Touch bar
I can’t stress this enough, take your time, there are some 50+ steps in this process; proper care is a MUST, otherwise use your discernment and seek a professional where applicable.
There are certainly easier ways, which cost more money, we’ve mentioned those prior… for example purchasing the corret make/model upper case where a touch bar must be removed and replaced. Finding the right parts on the other hand, aren’t as easy as you would think as this particular model is just coming out of warranty. You’ll find this is common when fixing newer or cutting edge electronics. Like I said, probably easier to purchase the upper, replace the parts from the existing machine and rebuild from there.
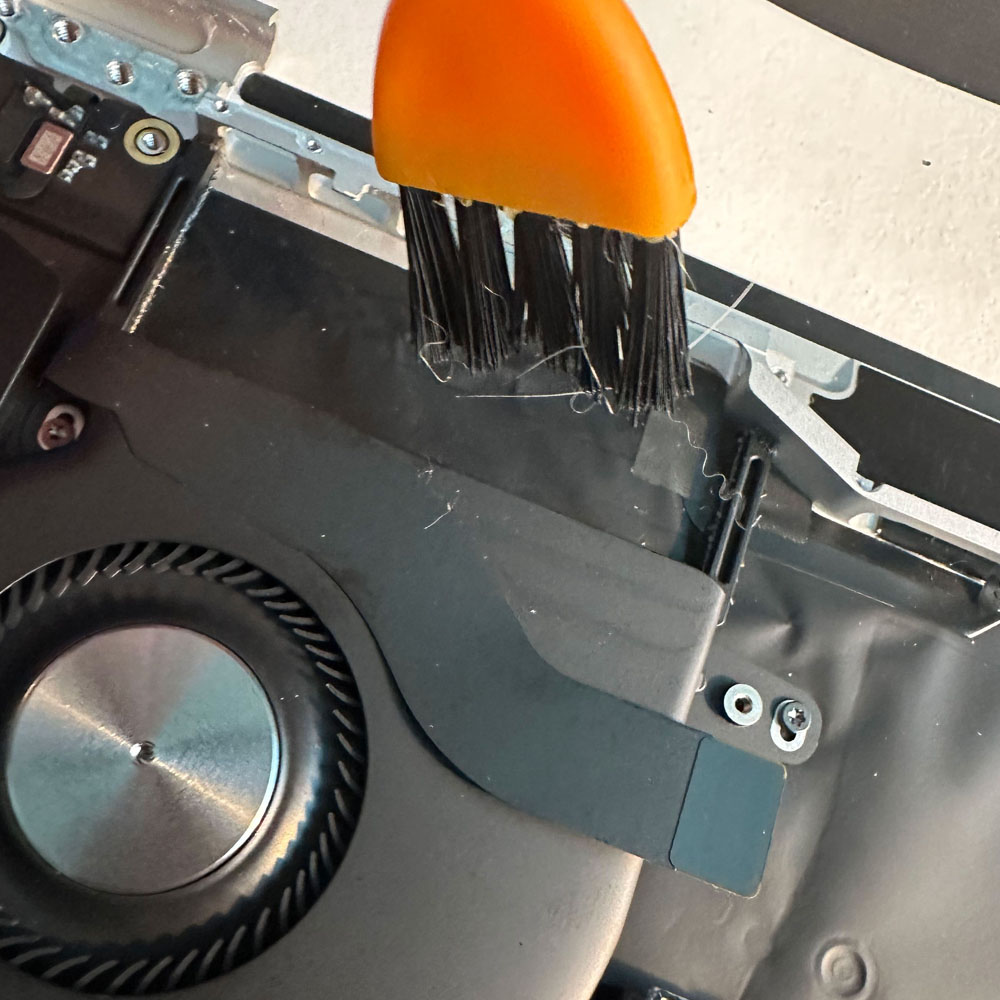
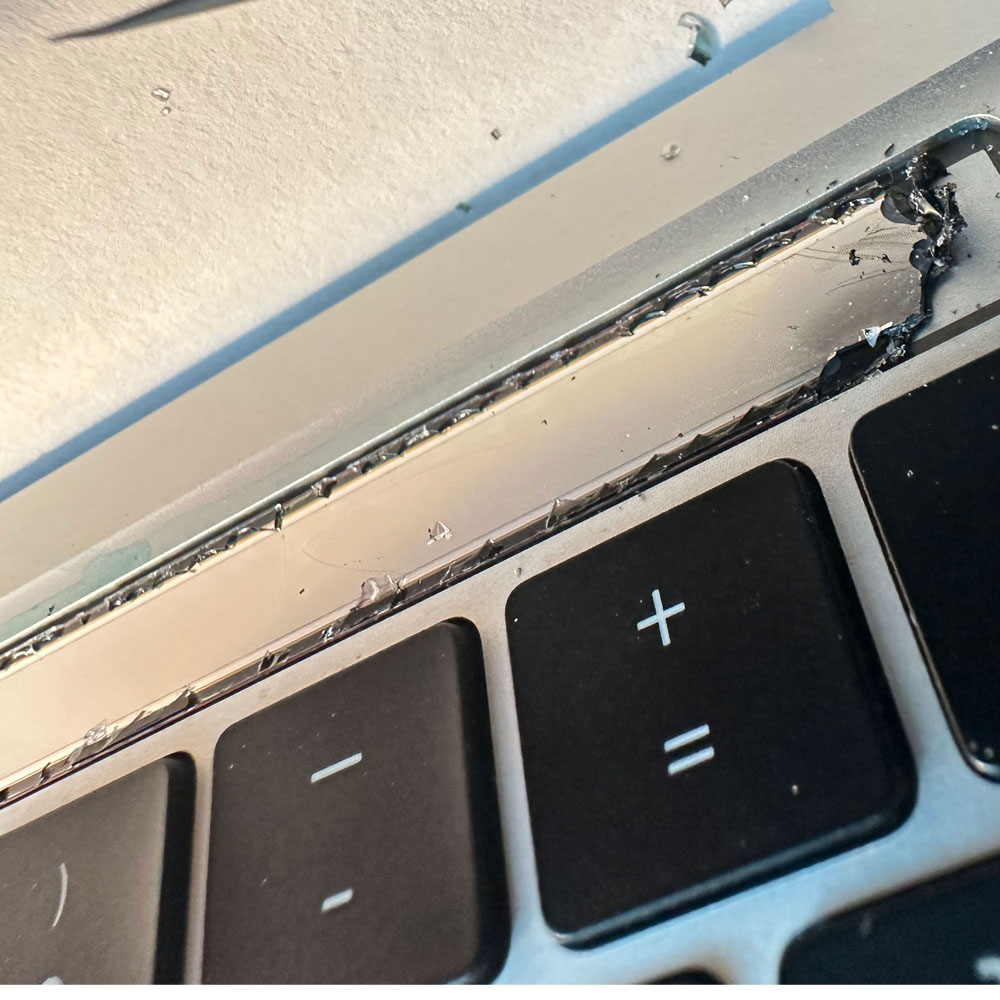
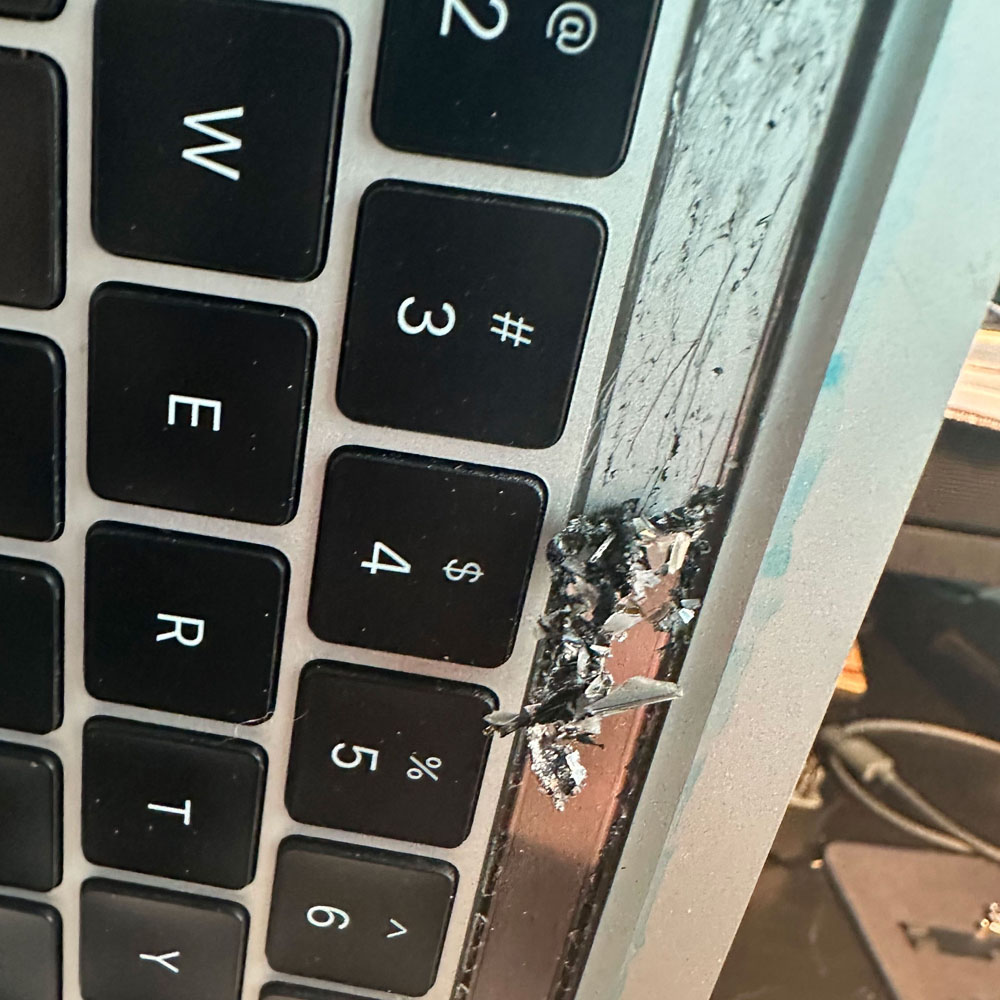
We clean as we go, there were glass fragments prior to, during and after this process. Handle with caution and care. Glass and debris (dirt, hair, fuzz etc.) must be cleaned as you go. Goal, leaving it better than the way you found it!
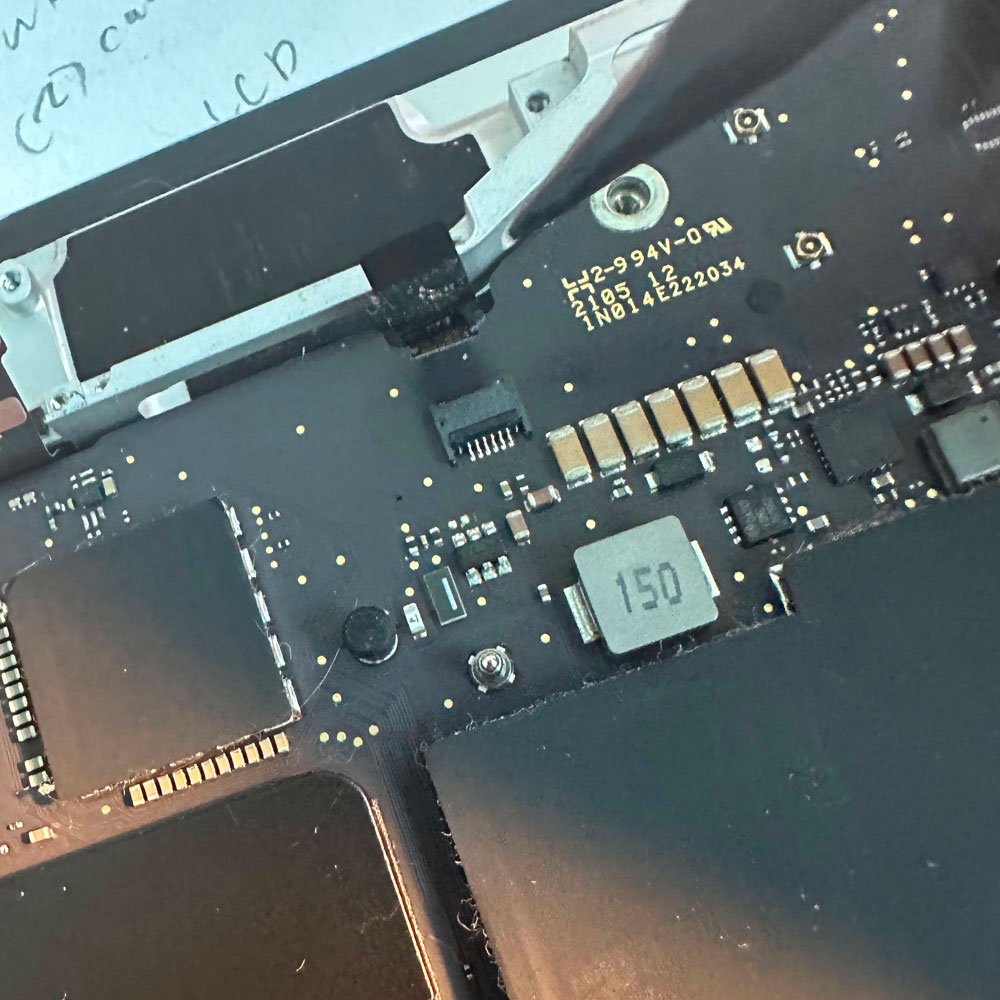
Ditto on Teardown for the battery, battery cable, main screw, hinges, lcd cables, display, display hinge covers, cables (springs), antennae cables and assembly, LCD, remove antennae, main hinge screws, remove LCD.
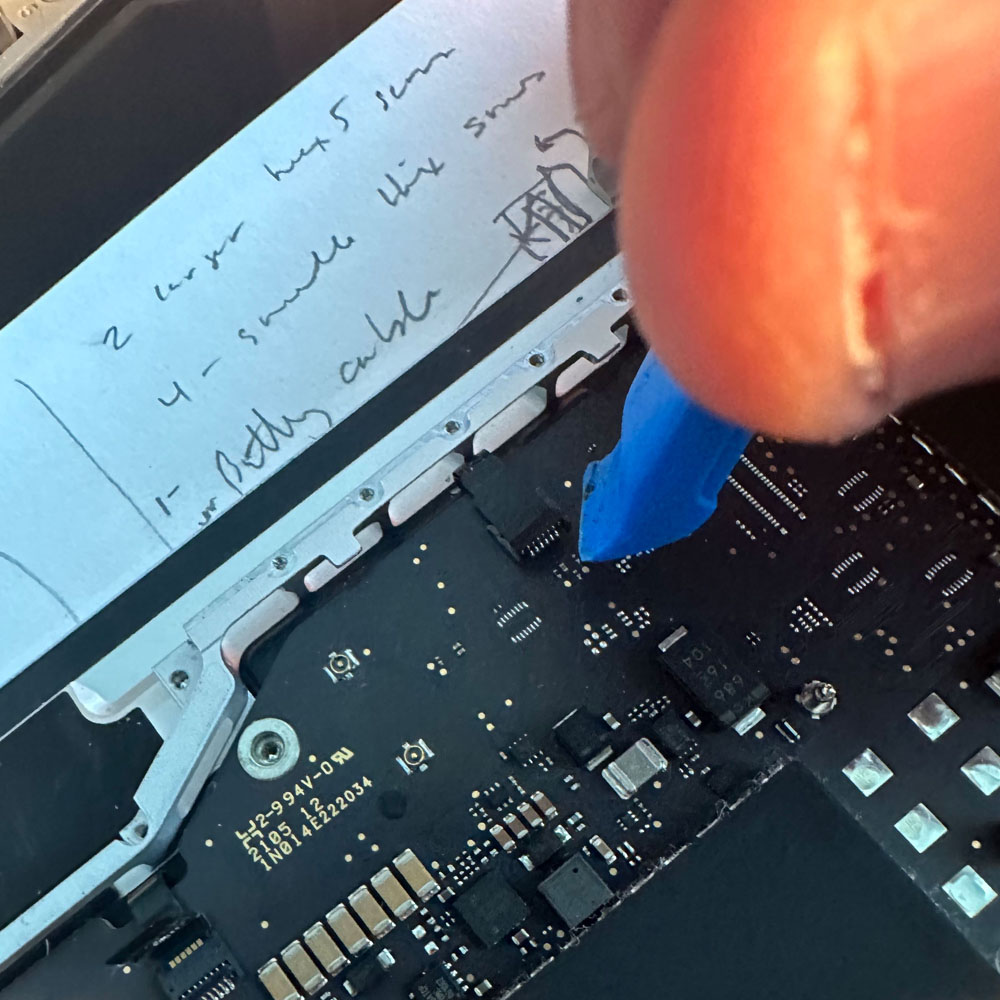
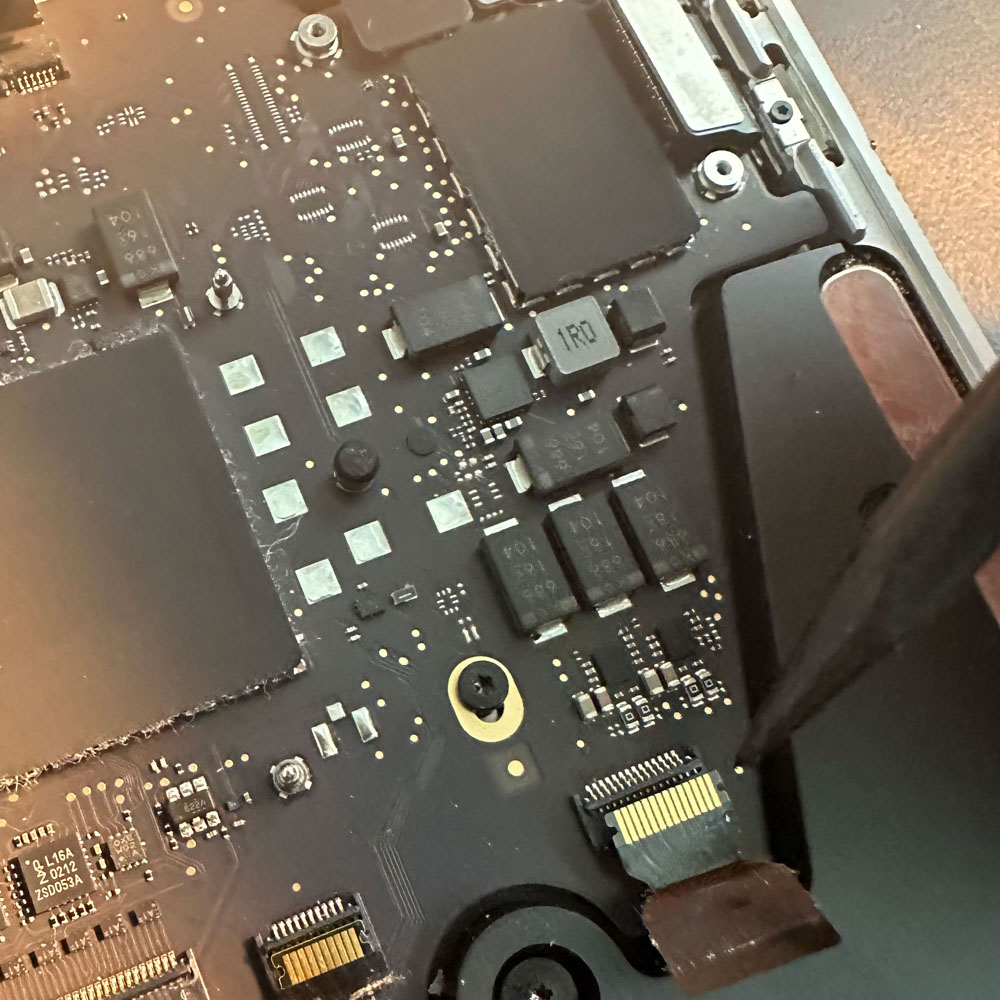
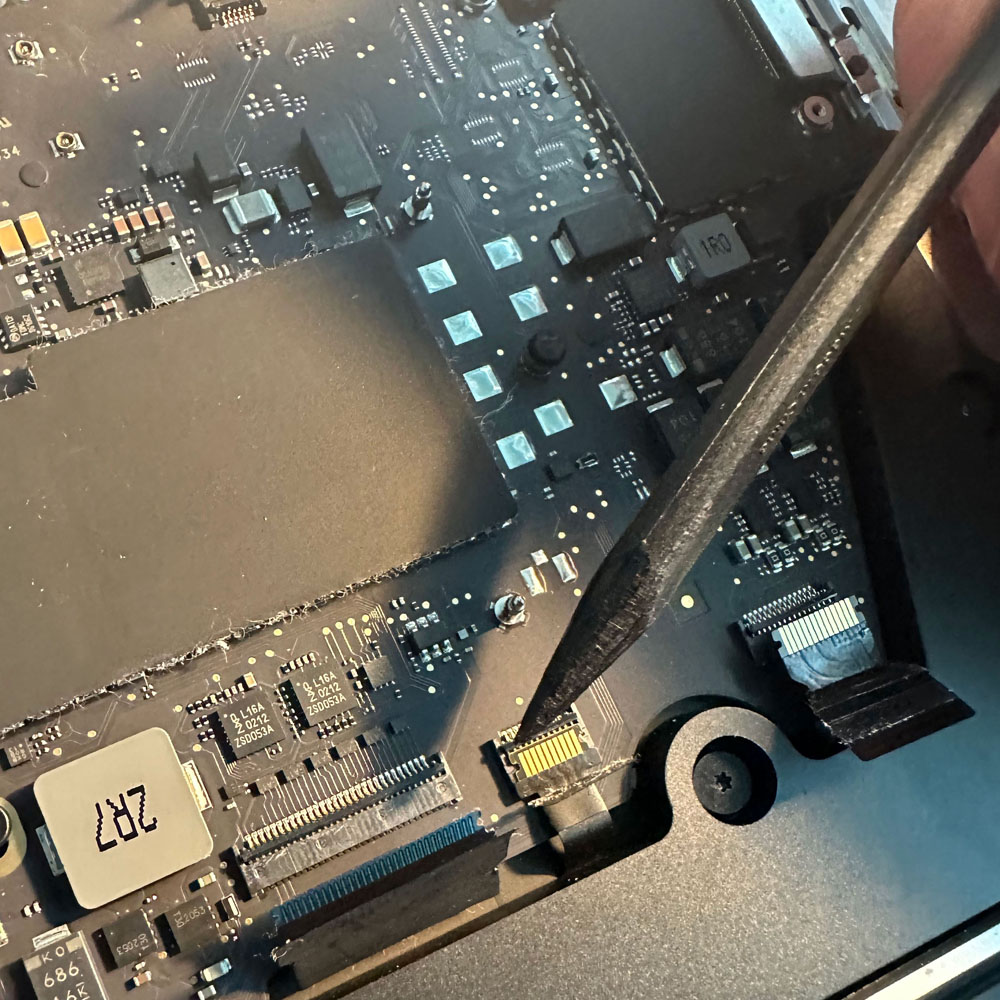
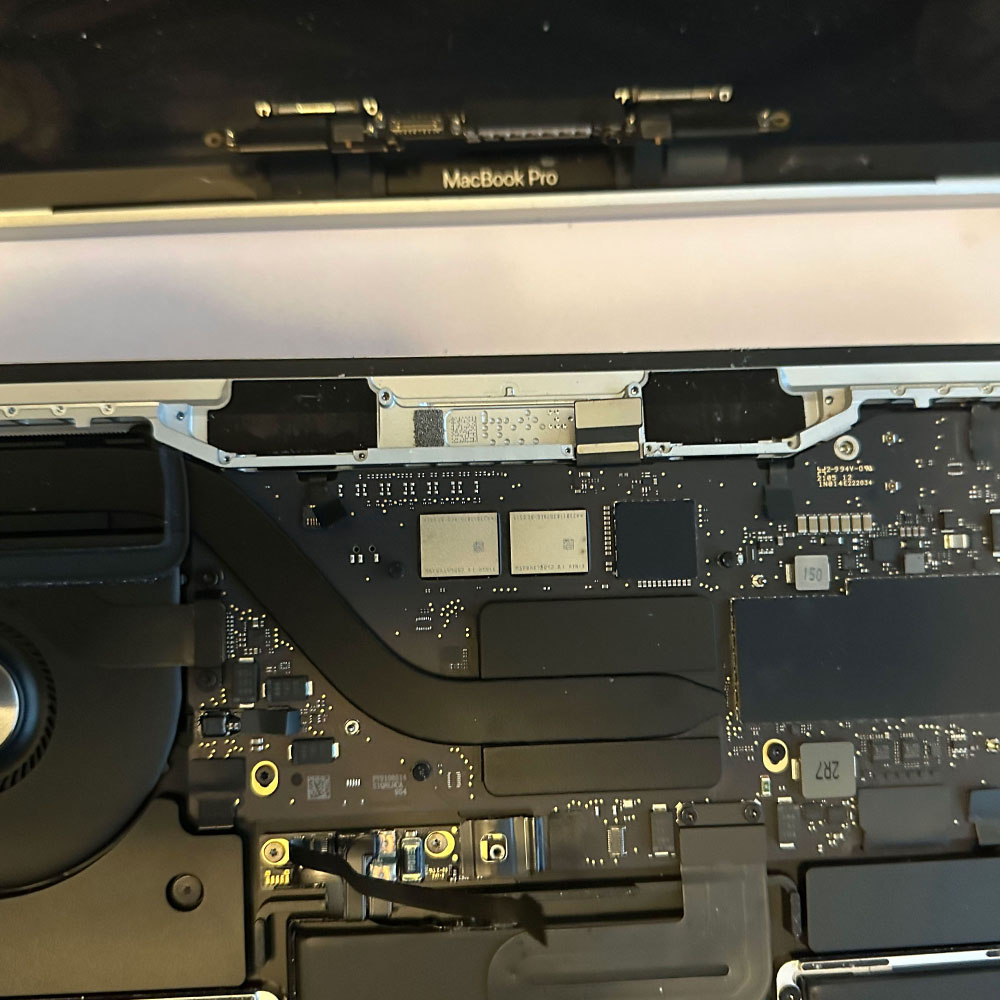
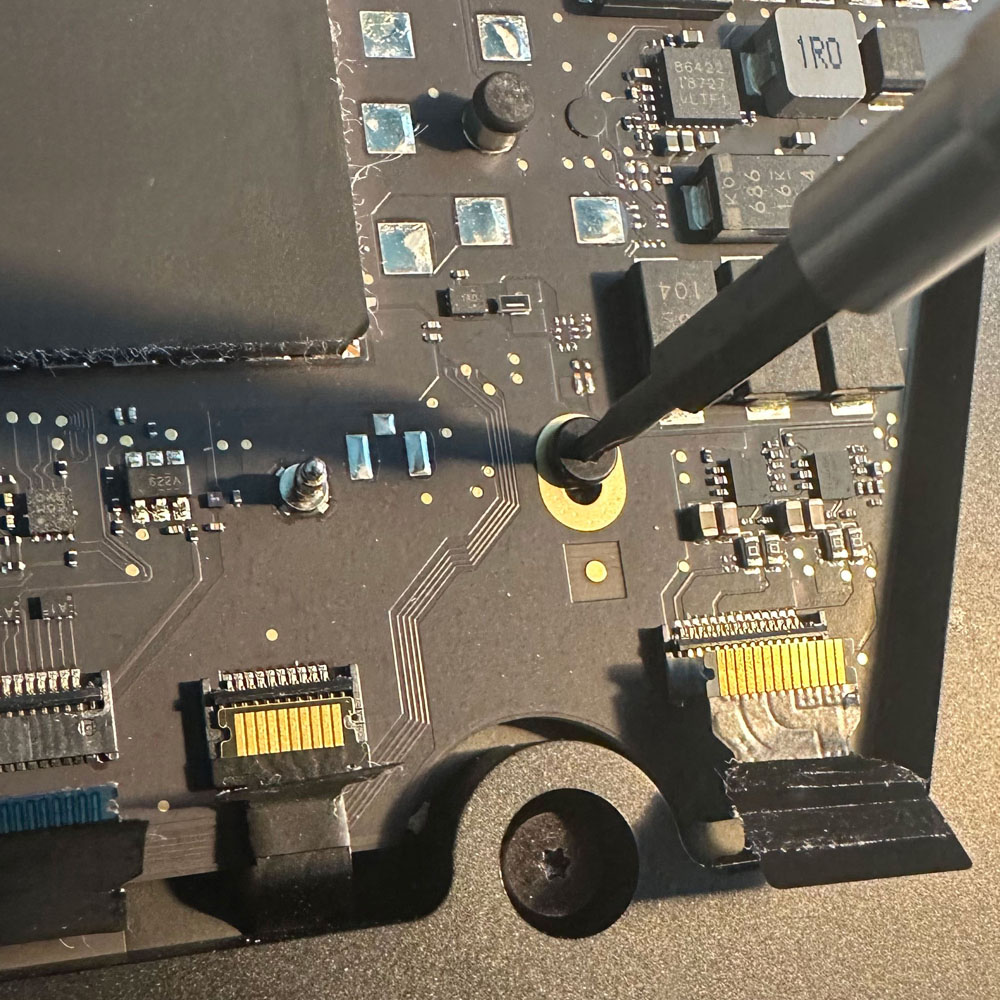
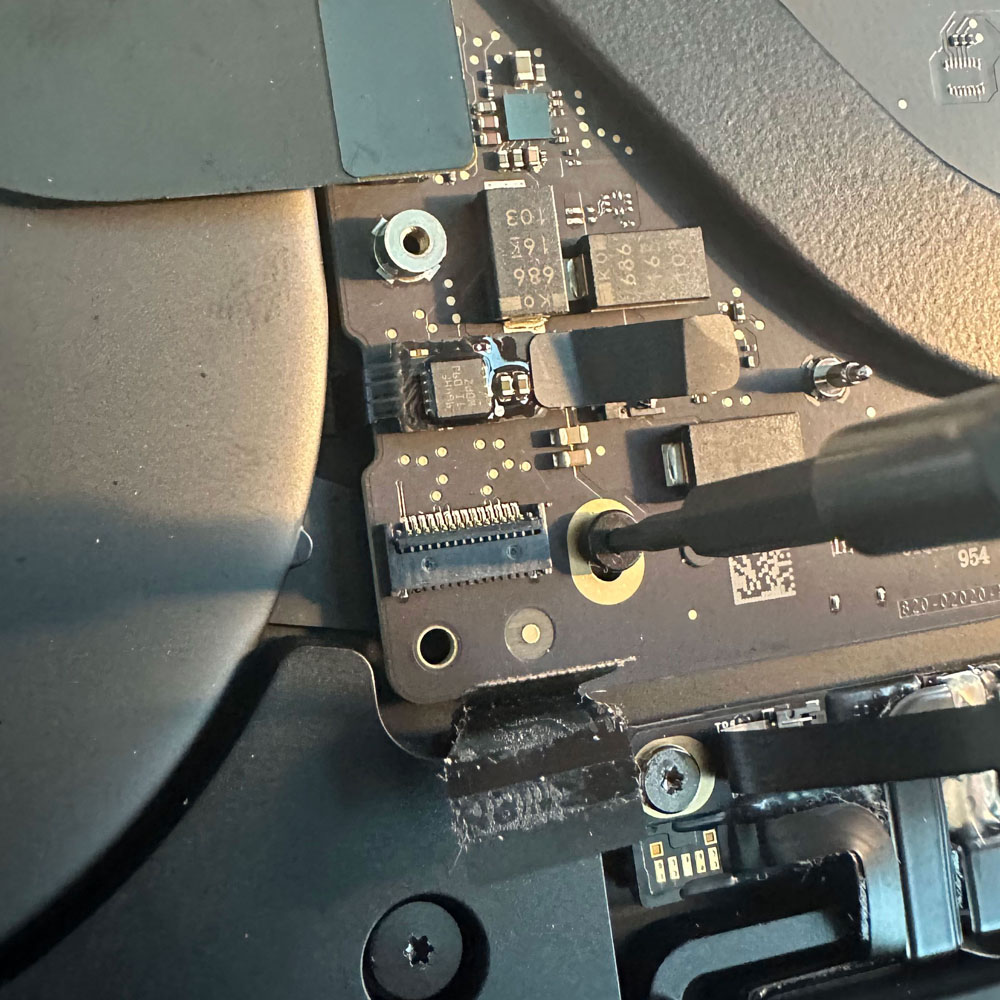
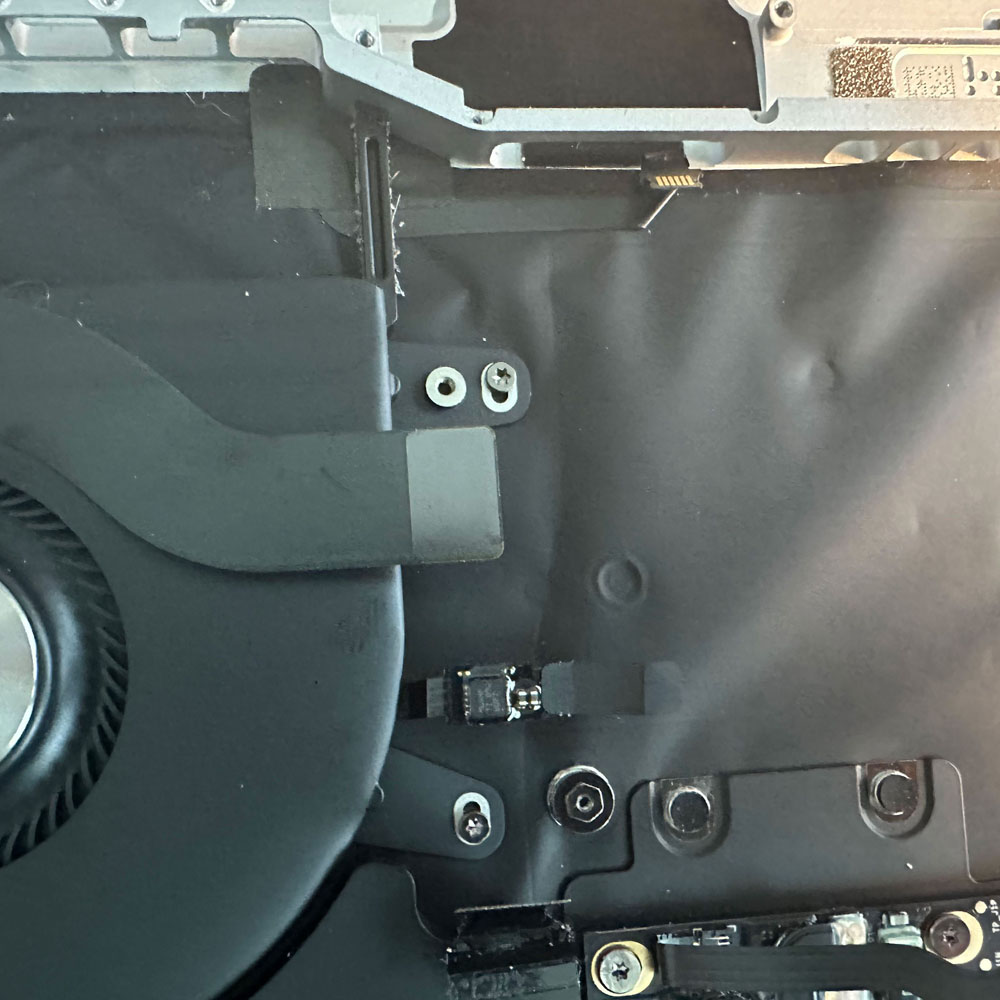
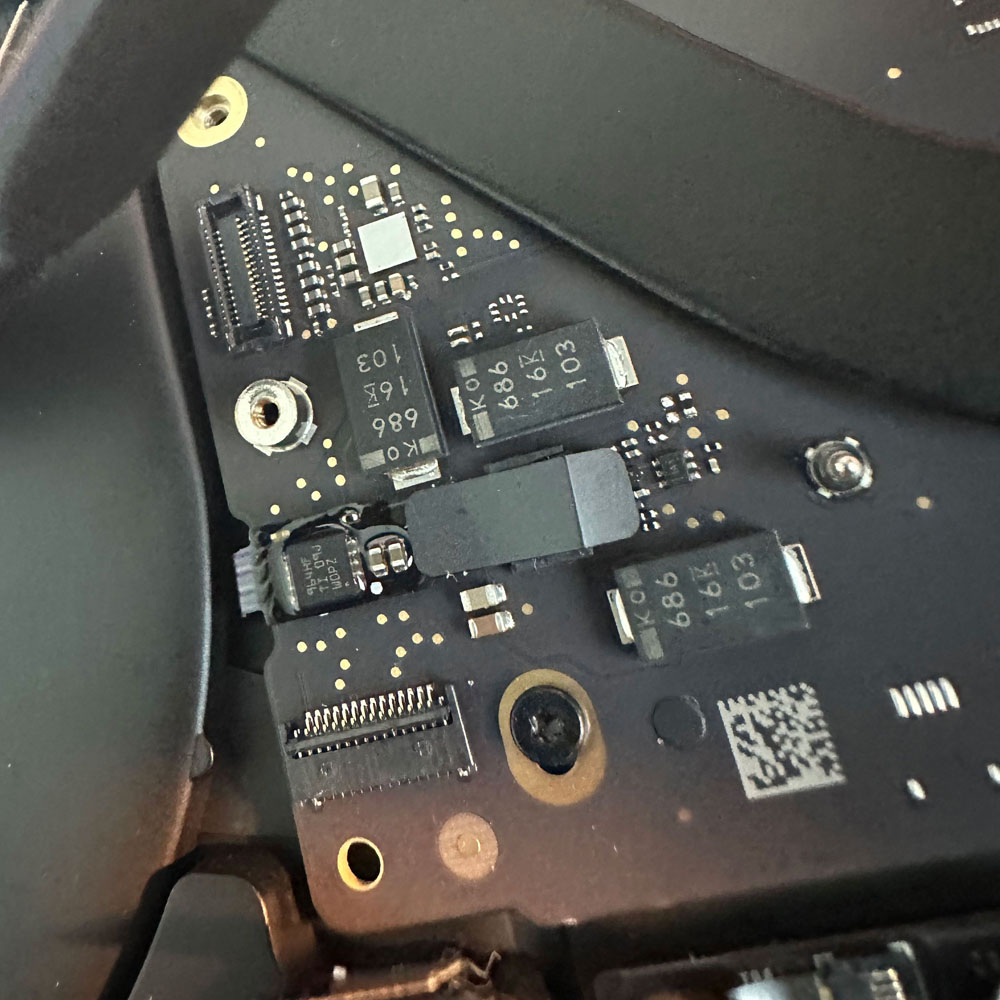
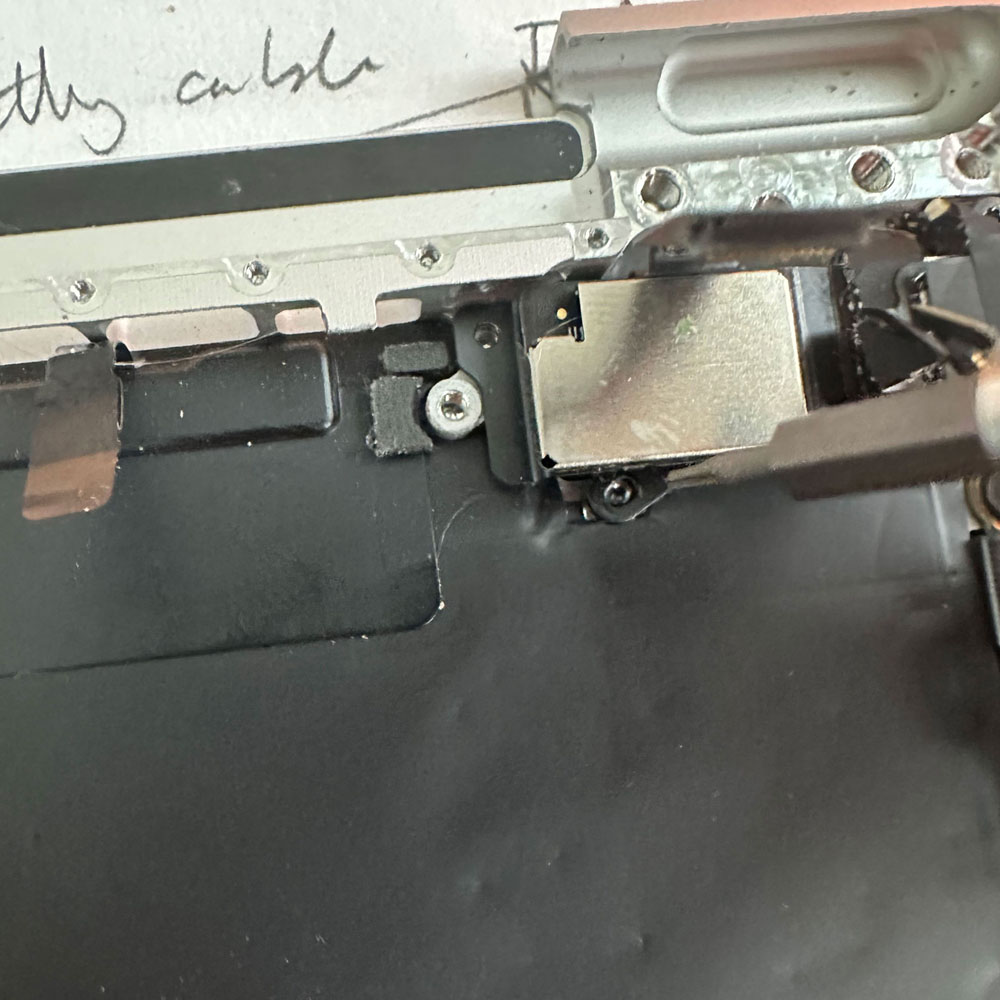
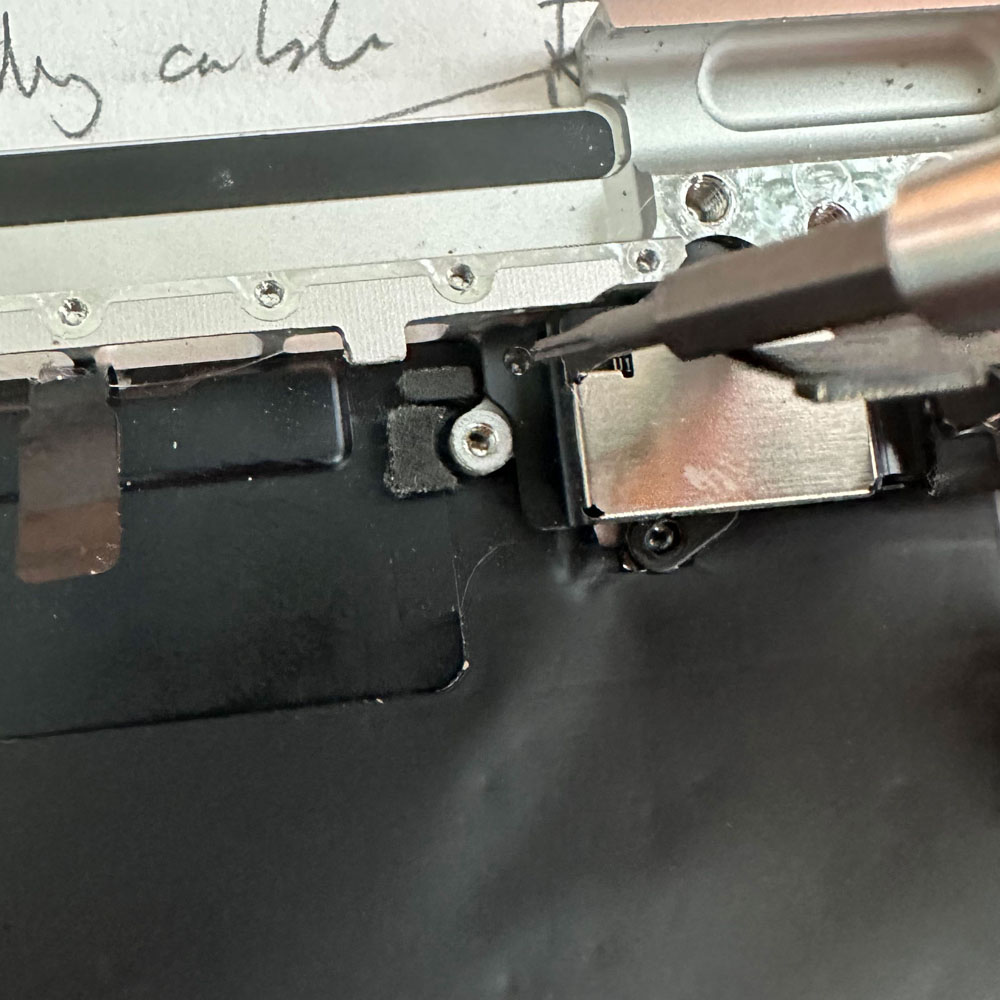
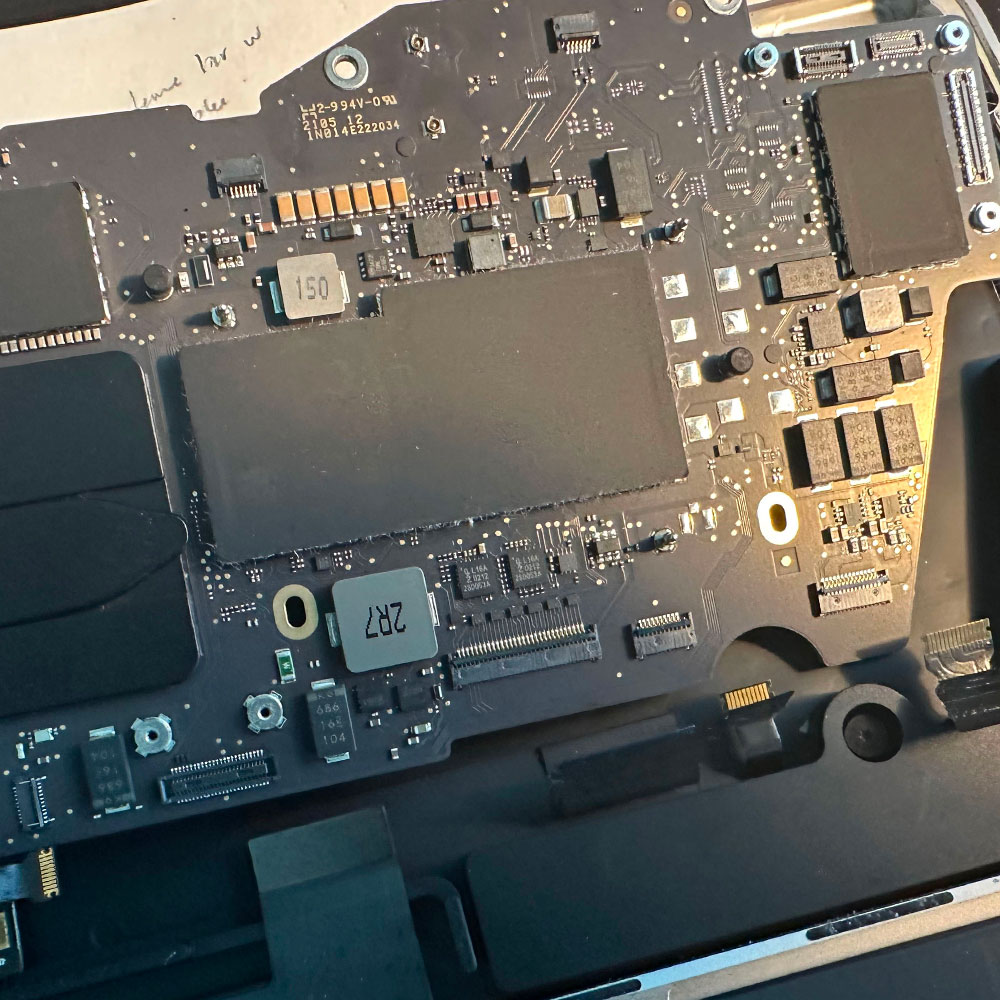
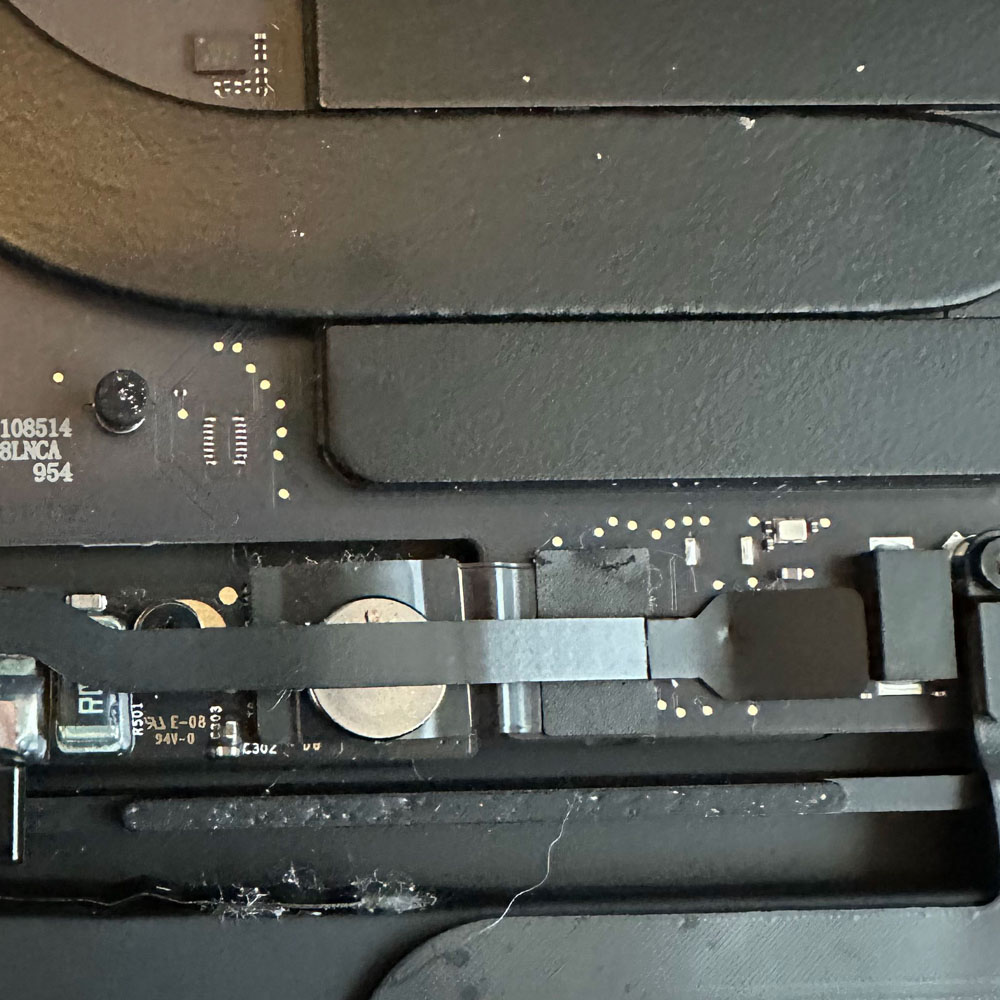
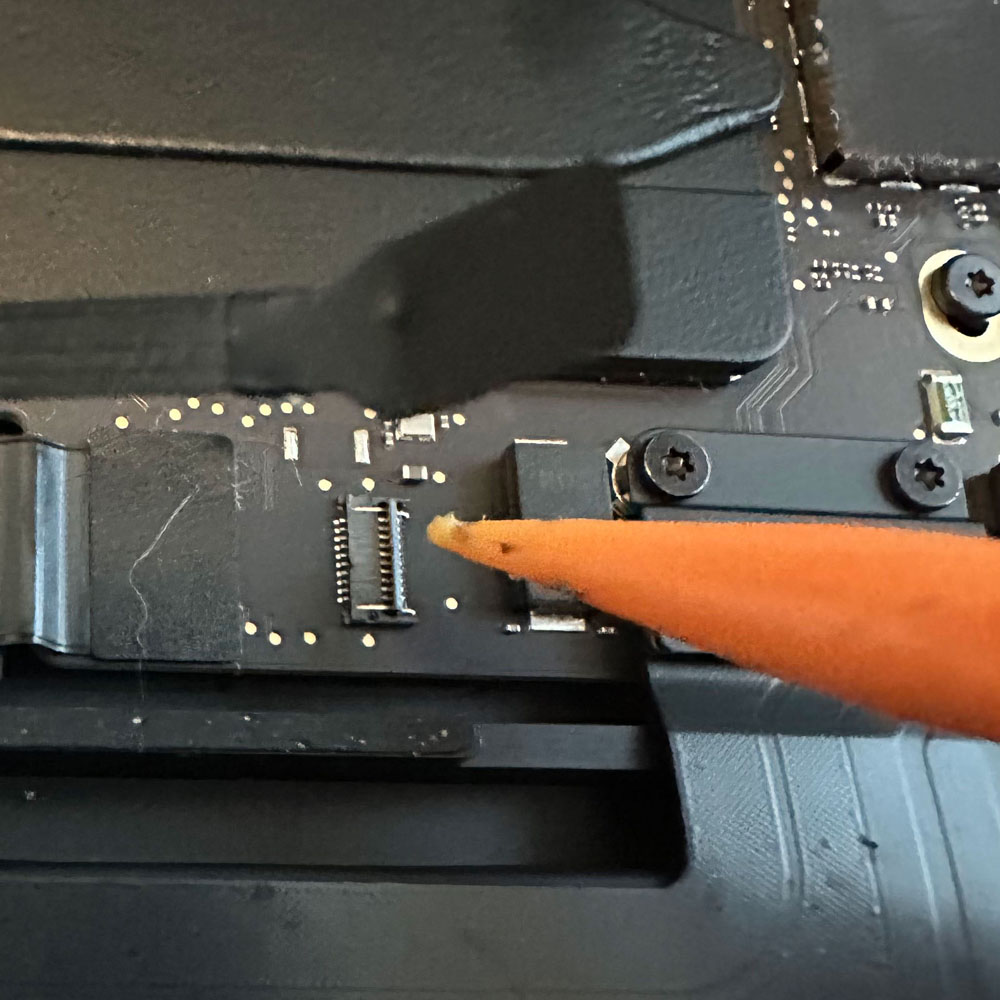
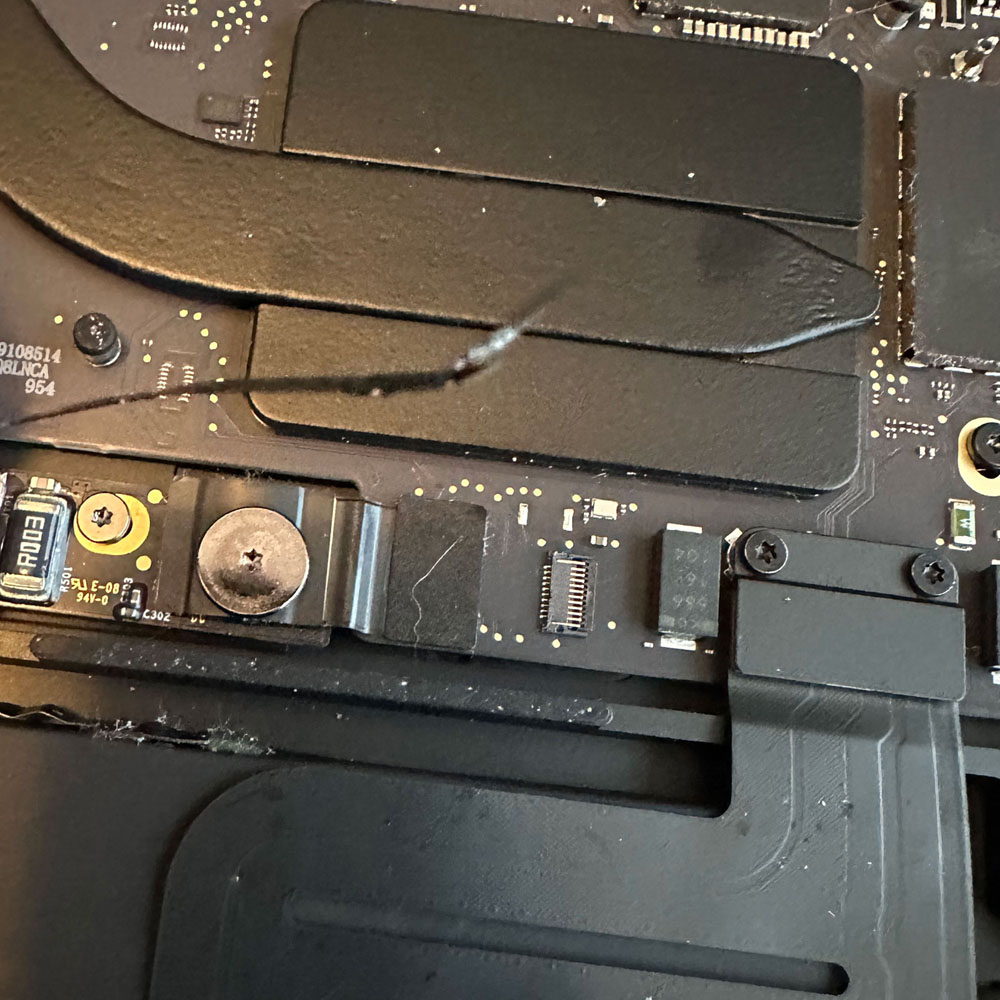
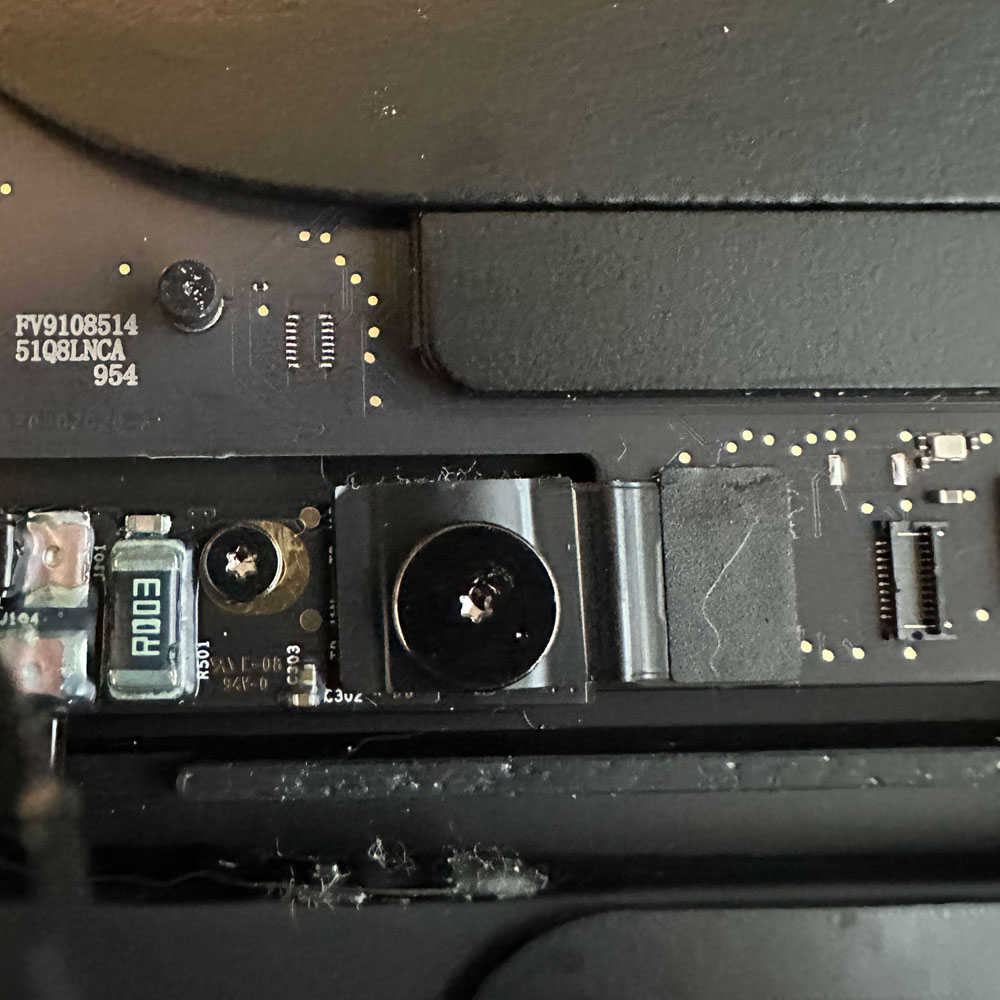
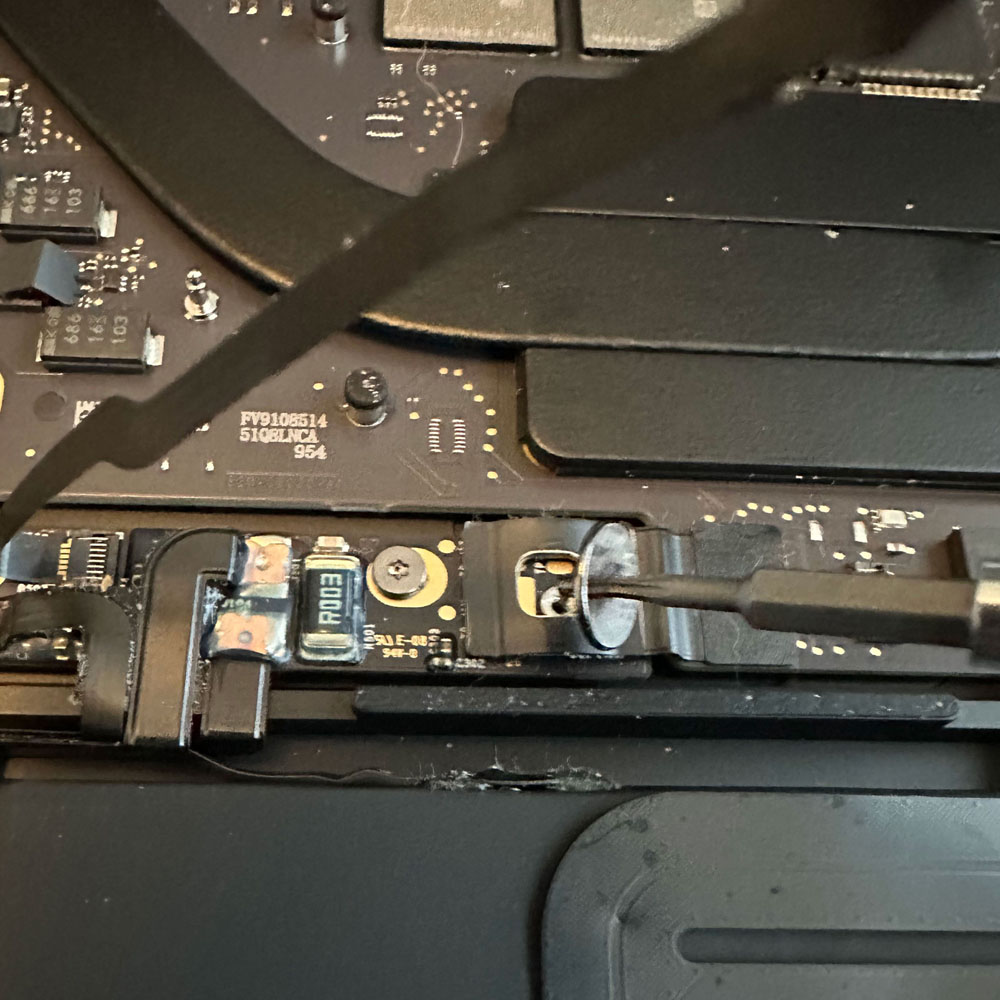
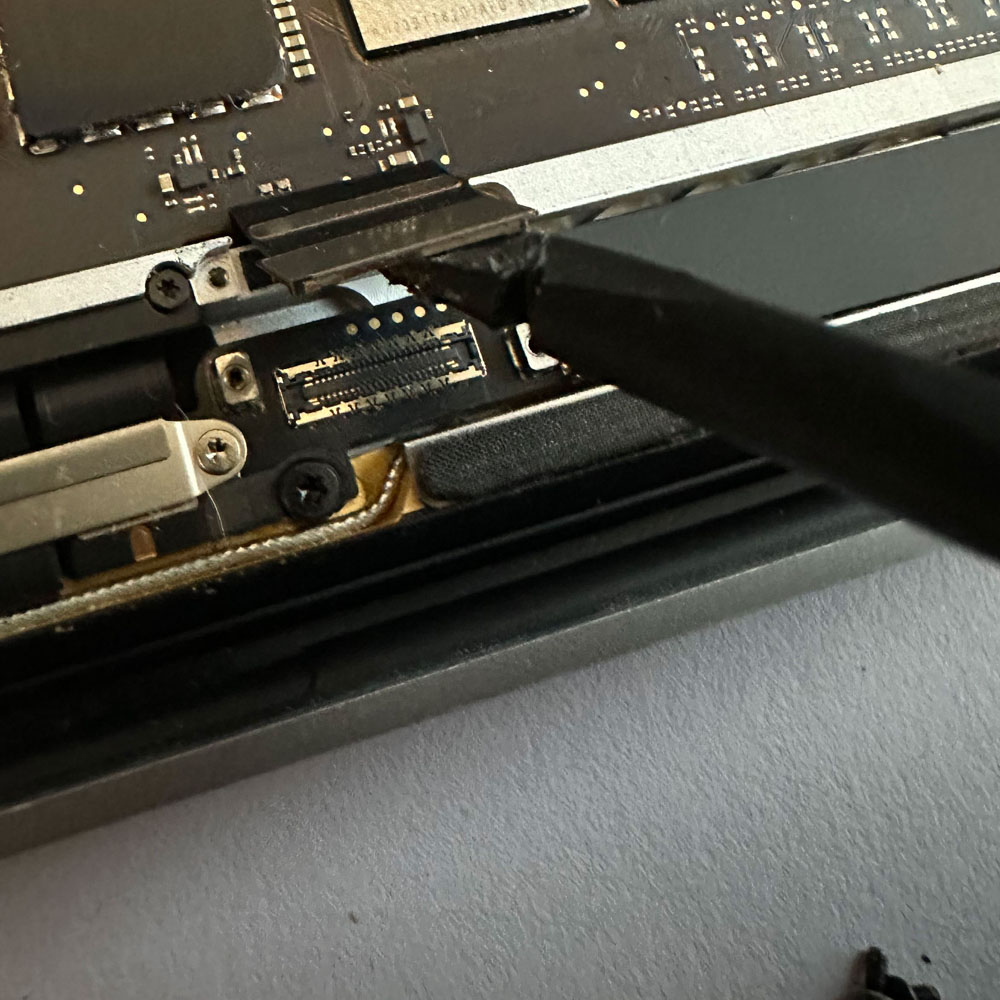
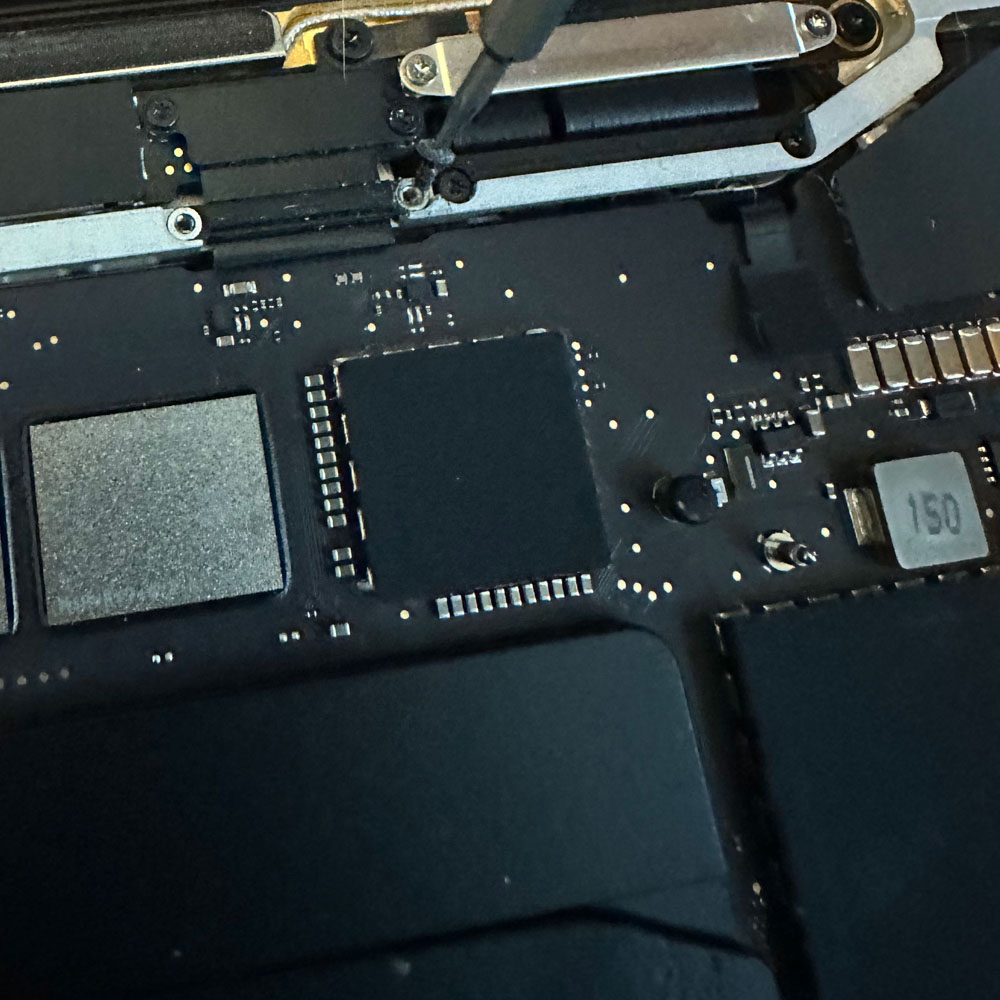
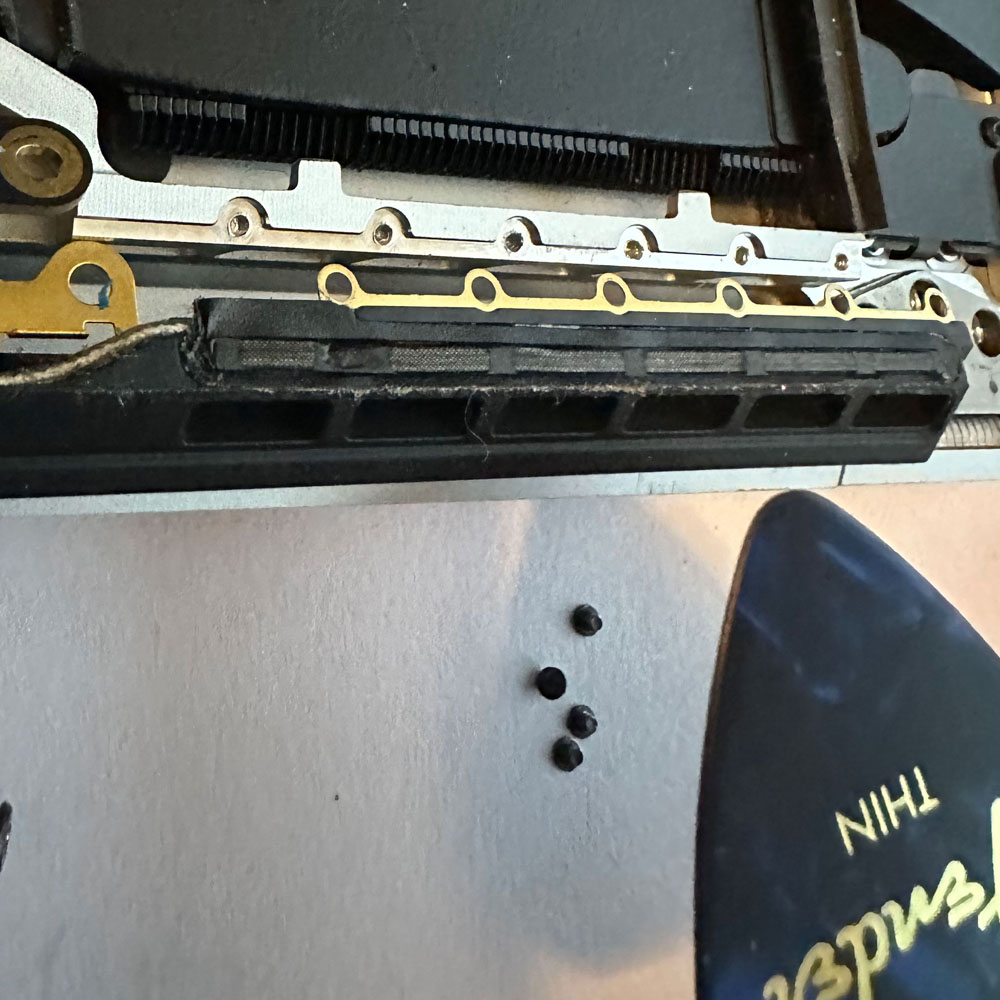
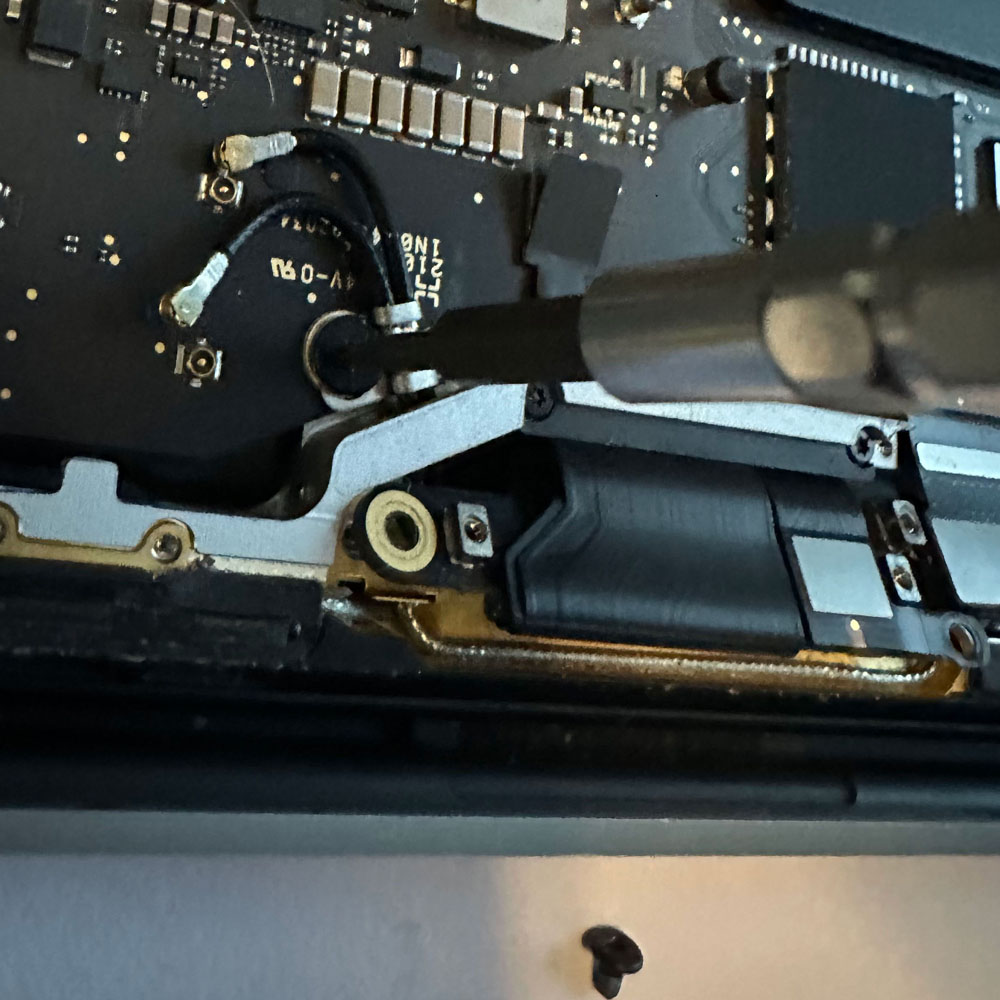
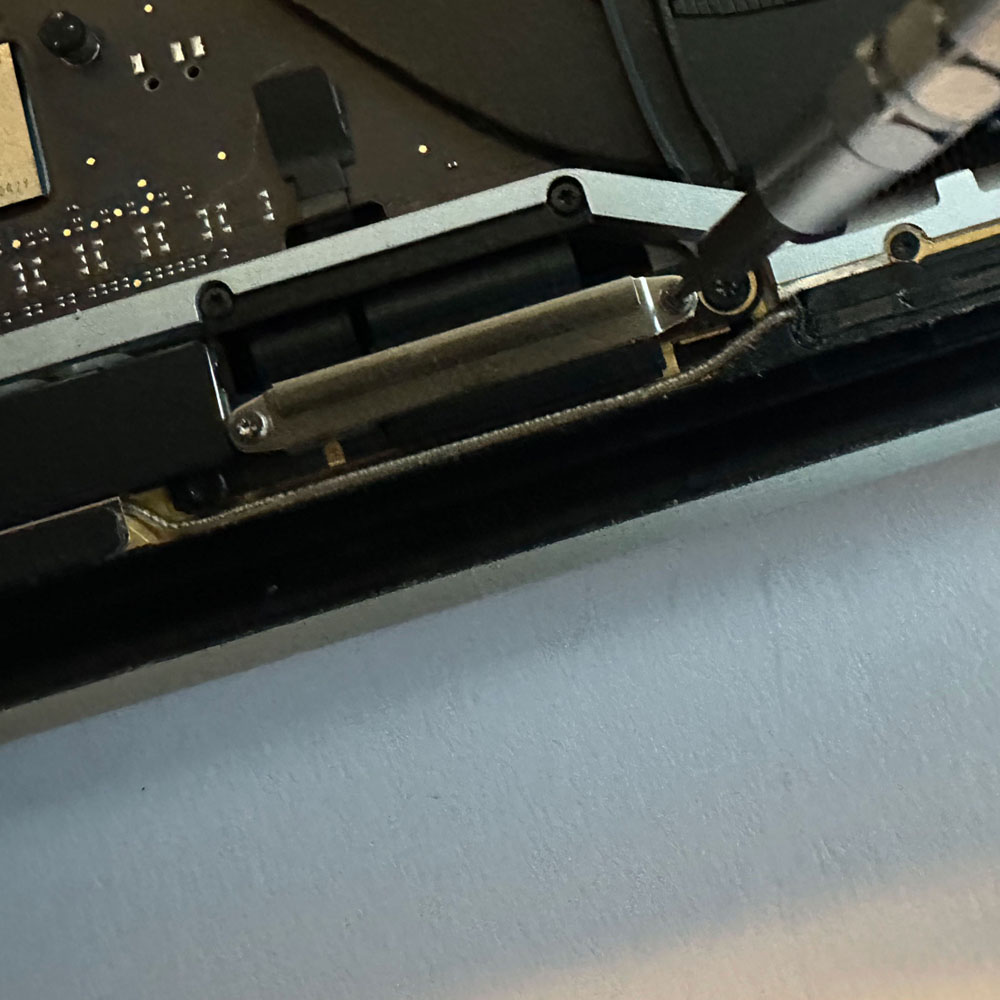
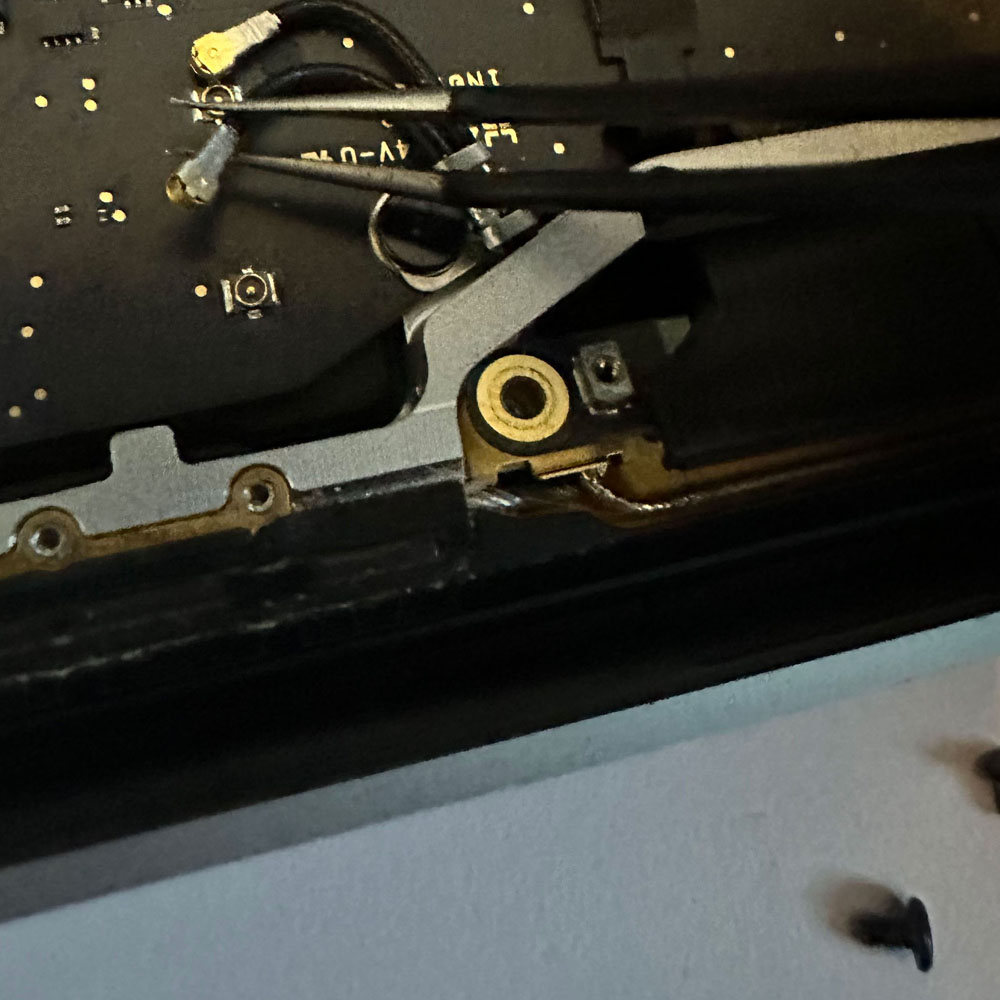
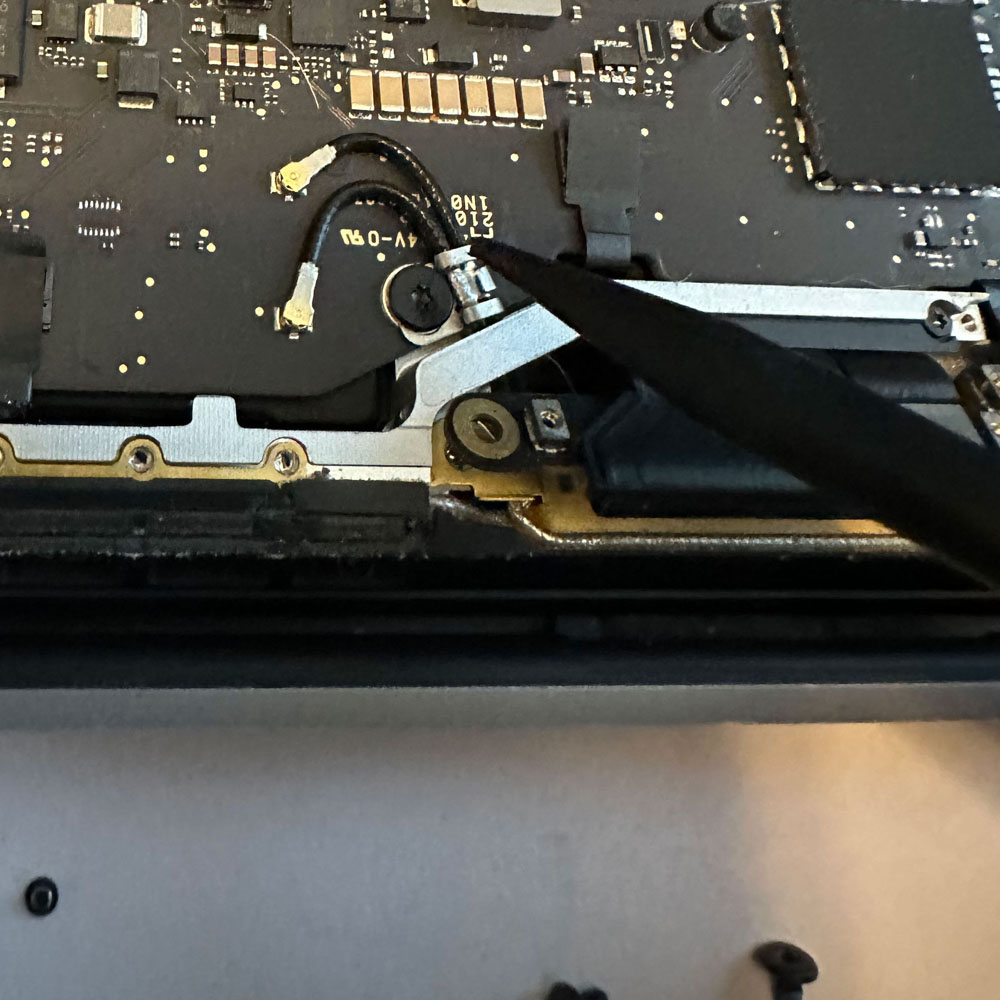
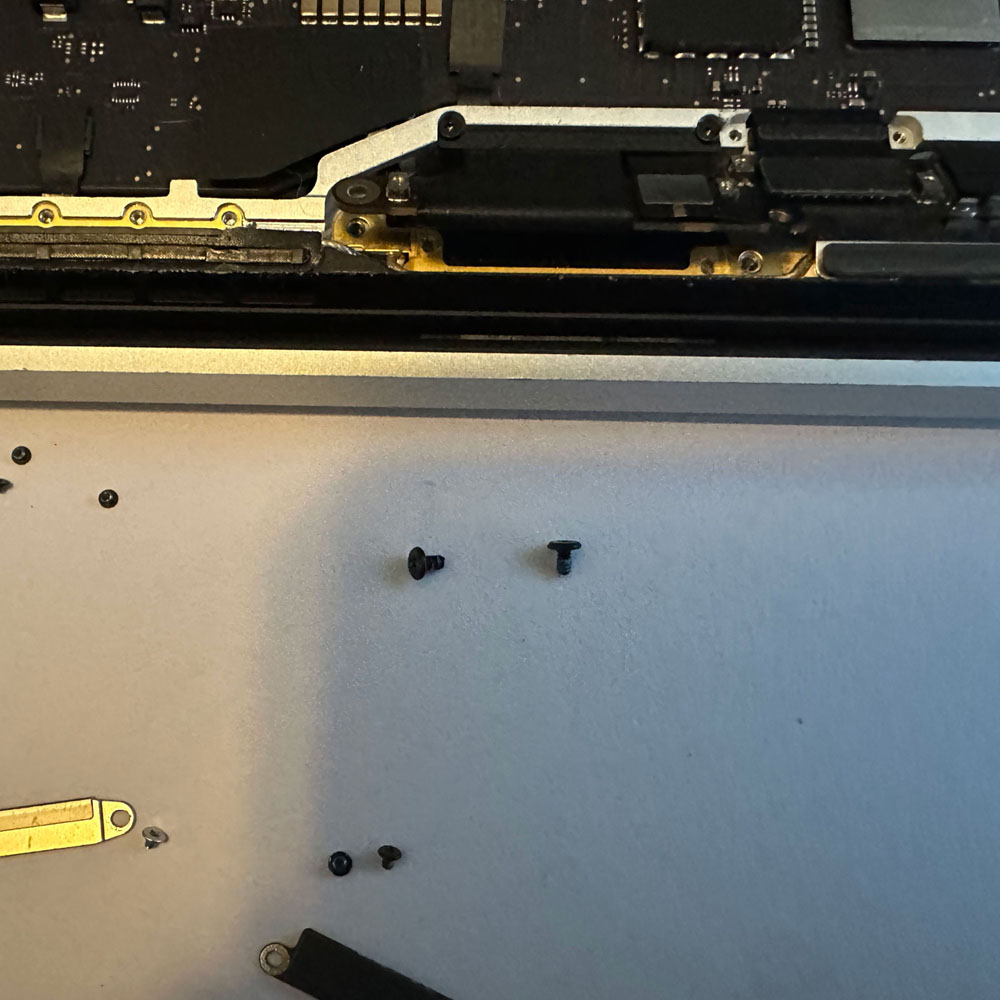
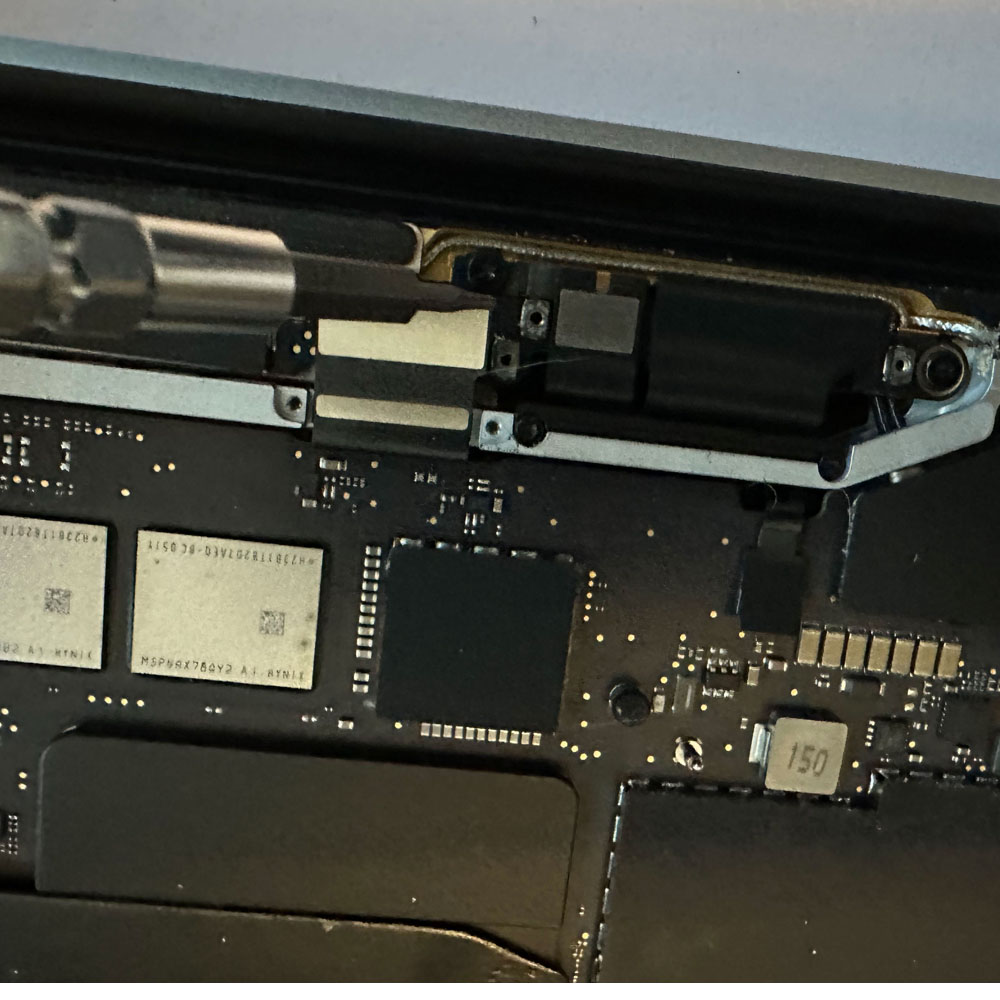
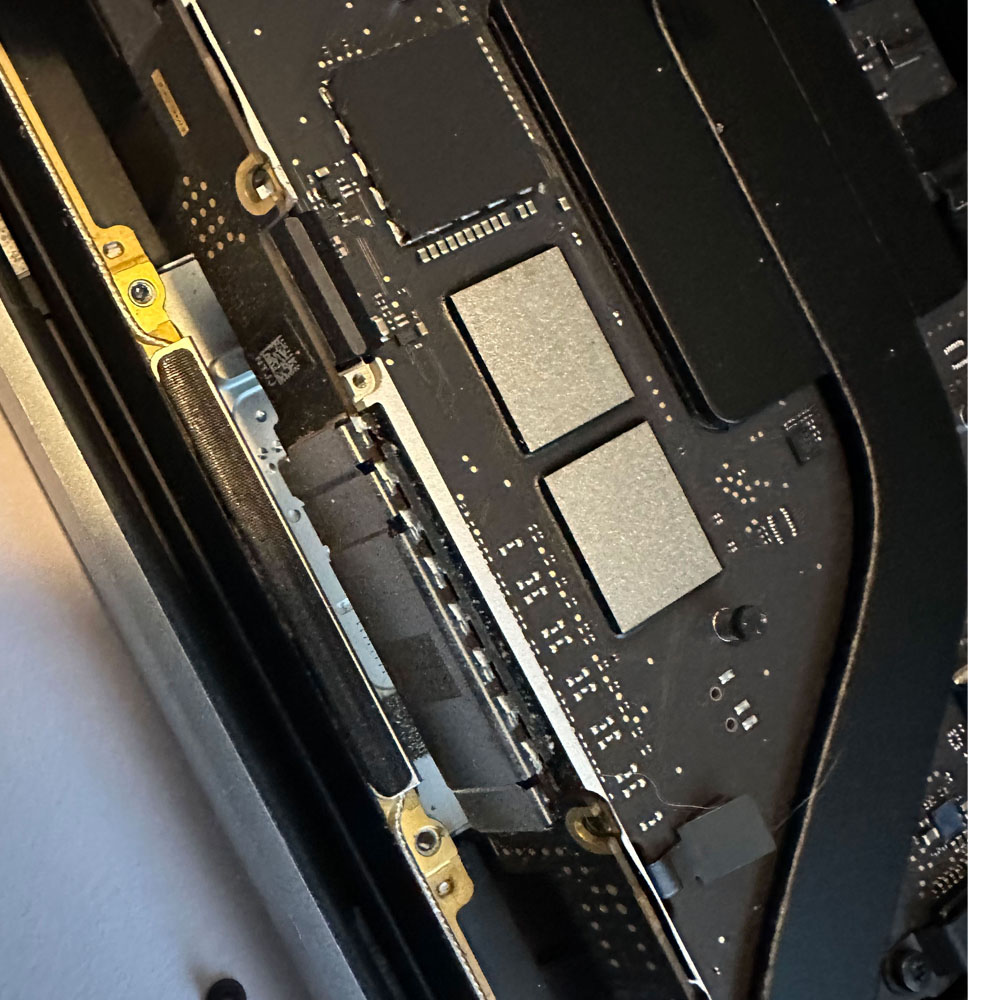
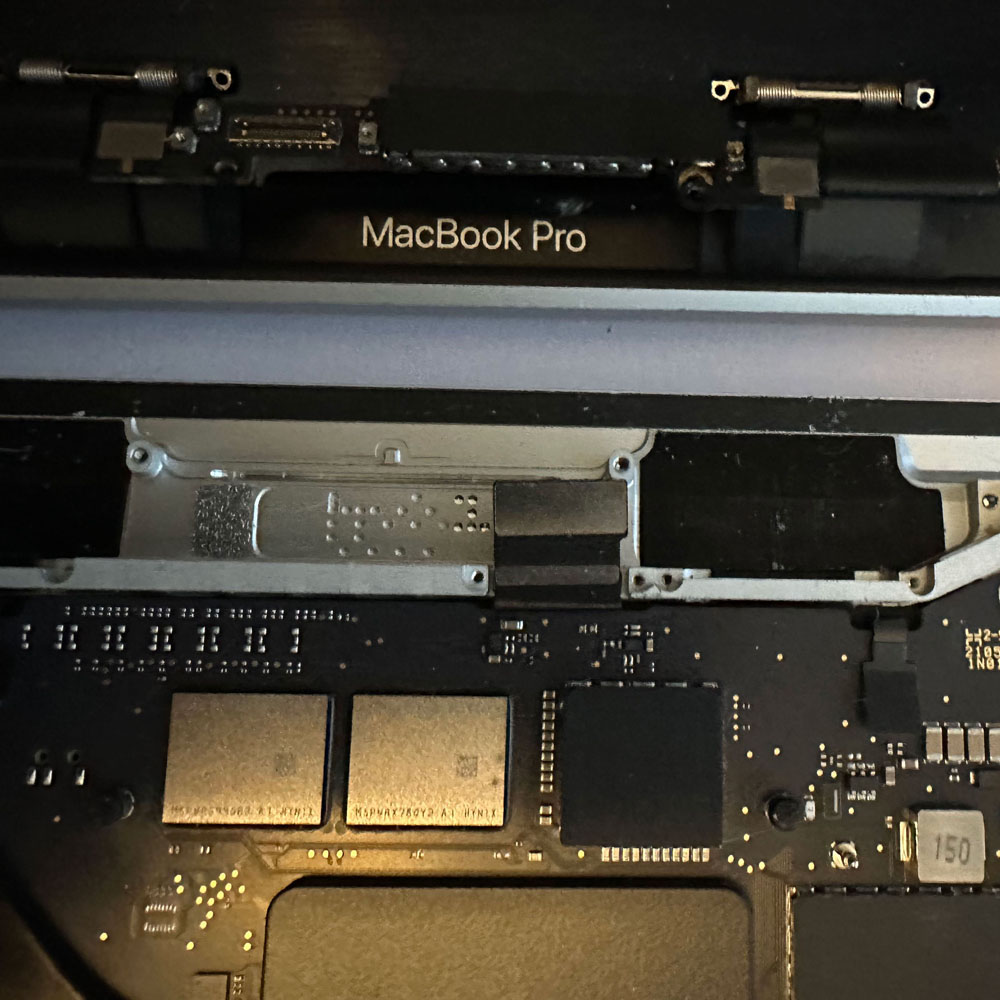
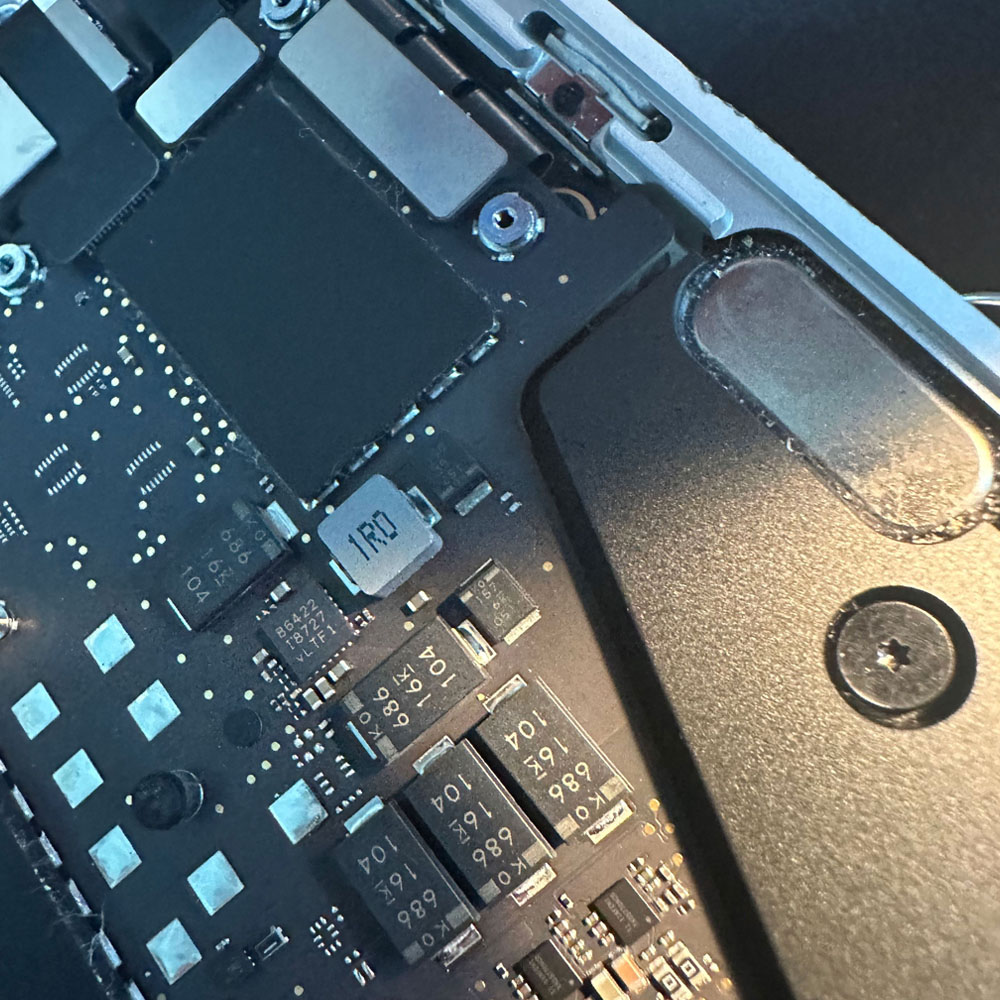
Starting here with the upper disassembled, we have the main logic board, power brackets, cable brackets, where we need to disconnect – trackpad, speakers, logic board flex screws and cables. This is where we can start the touch bar assembly replacement. It’s all bundled up, with covers and varing screws and electronic tape etc. Really you need to have your replacement handy, once you’ve removed the main board, speakers and trackpad… this is where it gets hairy!
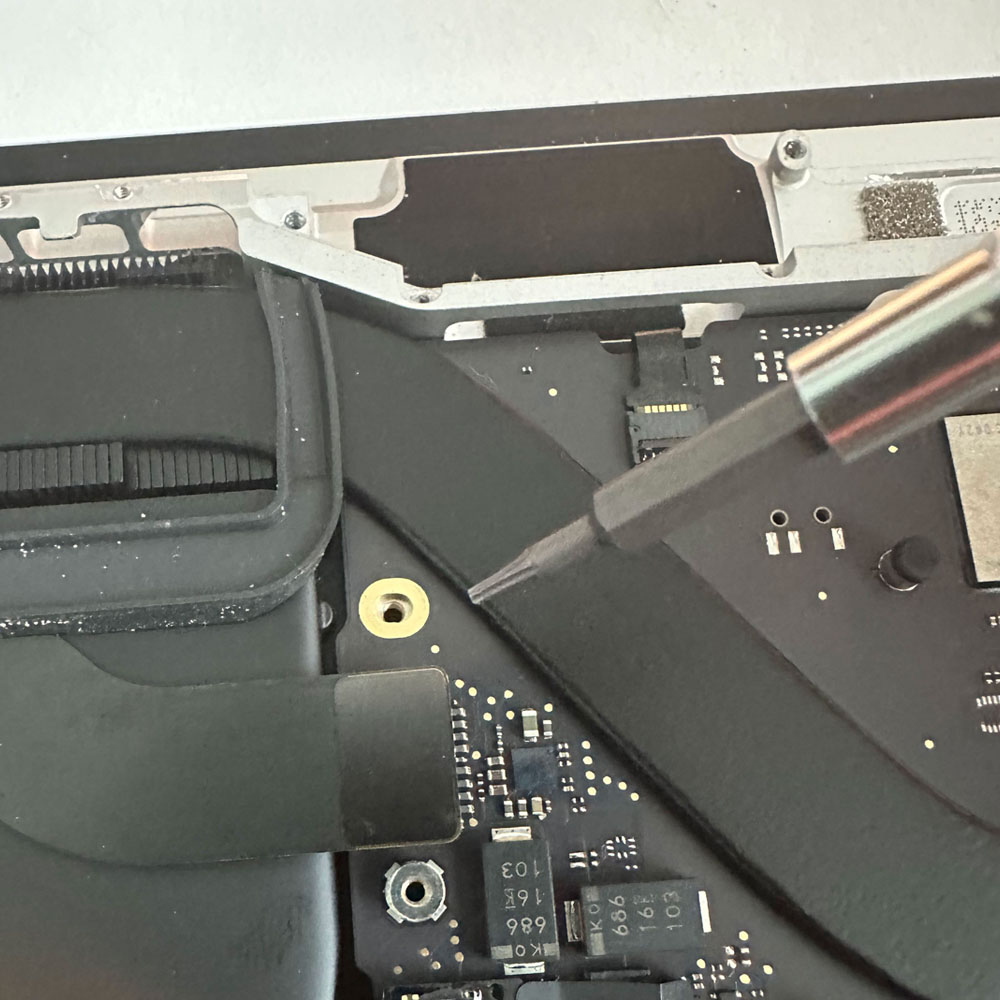
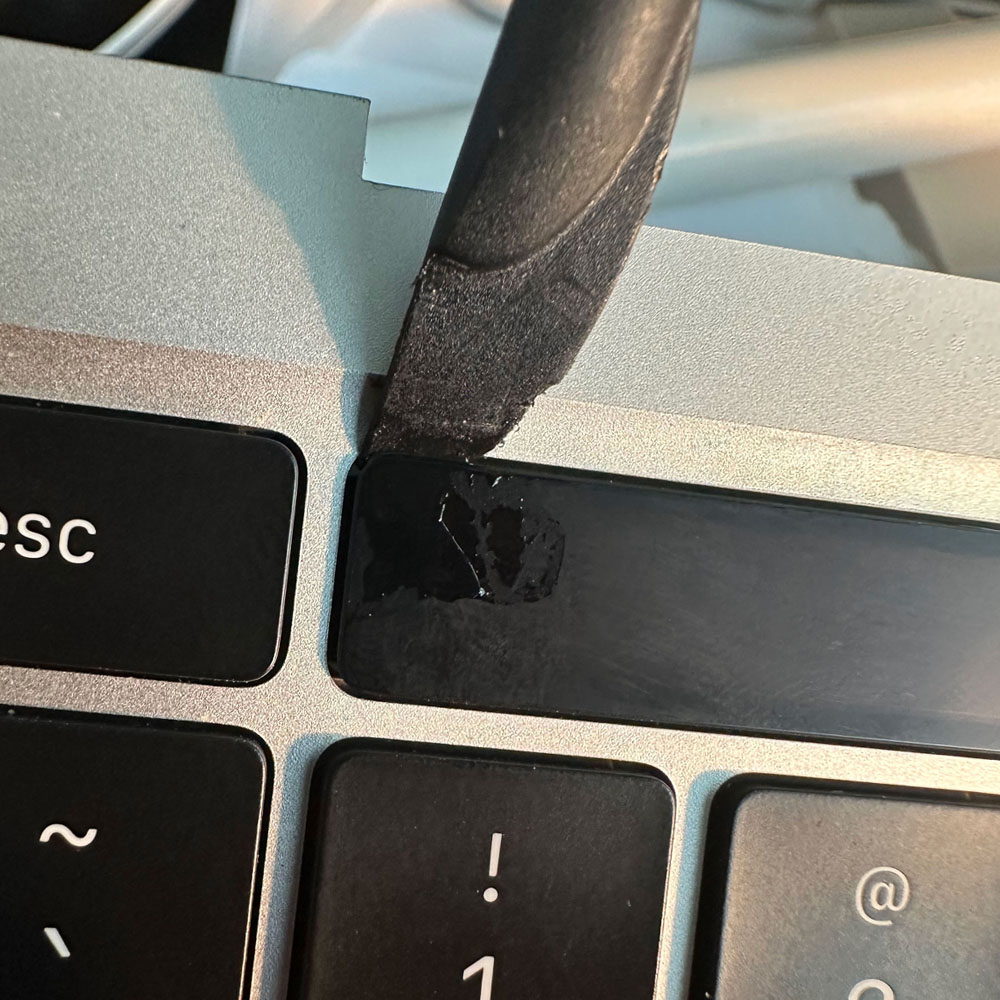
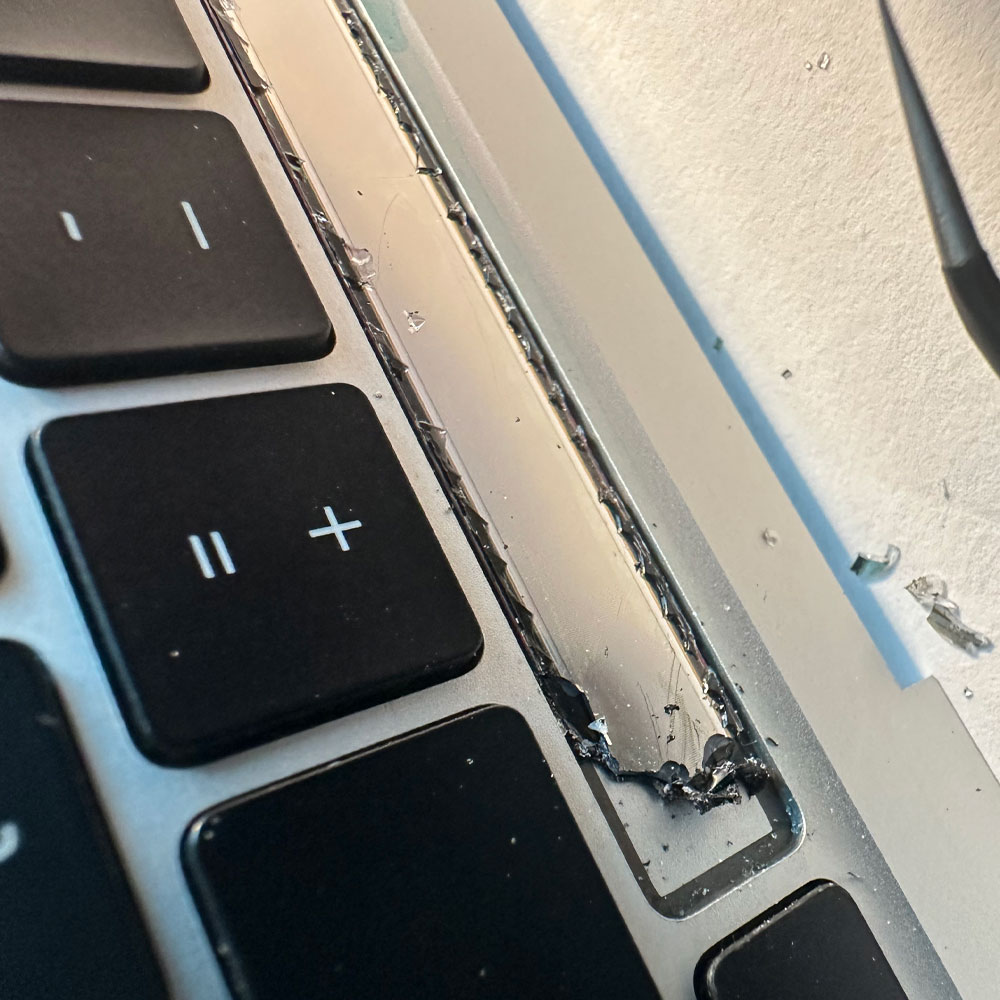
Handy to have your tool kit out, if not, again, give Amazon a quick call… or pull up iFixit a scroll… you’re going to need adhesive remover, some gloves, glasses, you know the essentials when working with glass, chemicals on small electronics. We will start with the flat pry bar, on the front (assuming all touch bar parts have been dismantled or ‘torn down’). We will slowly pry and spray our adhesive remover down behind the touch bar glass and the metal upper. Fun times, easier if you have more adhesive remover than what we had during the refurb process. Not much left after the mobile device teardowns a few months back.
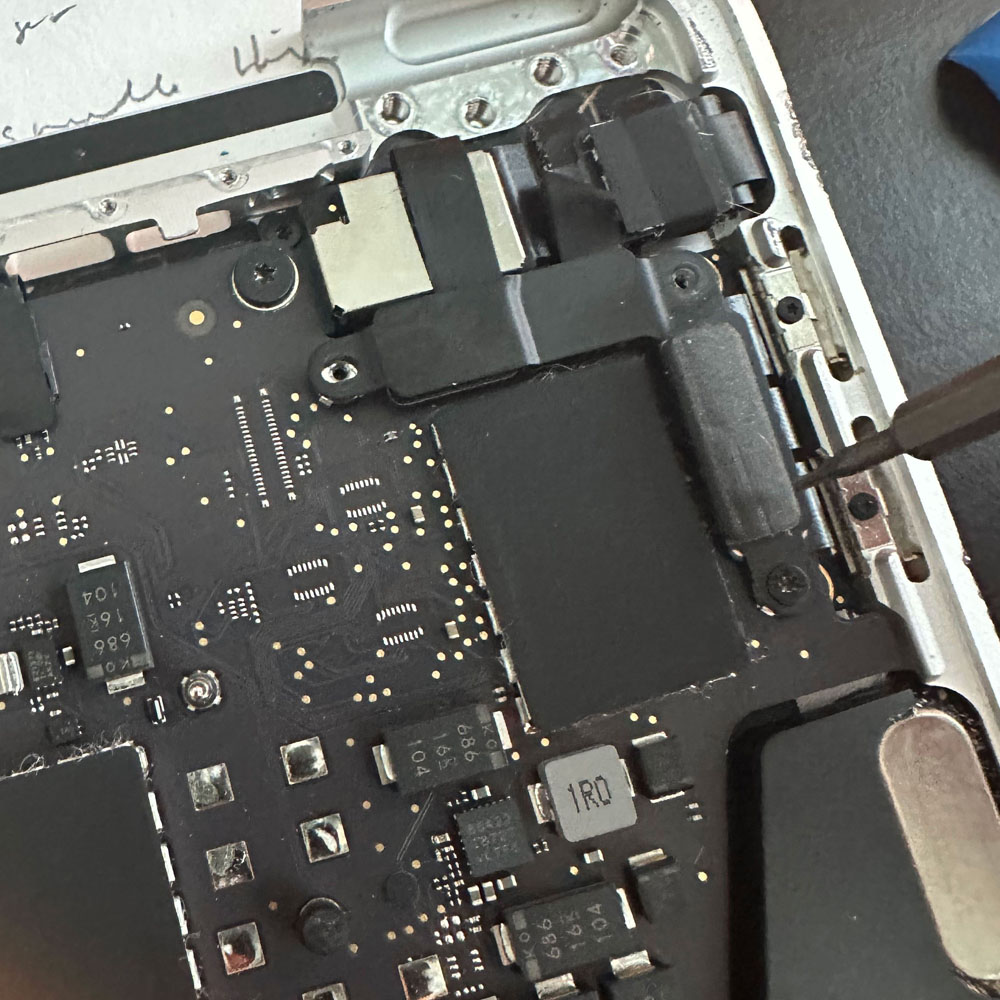
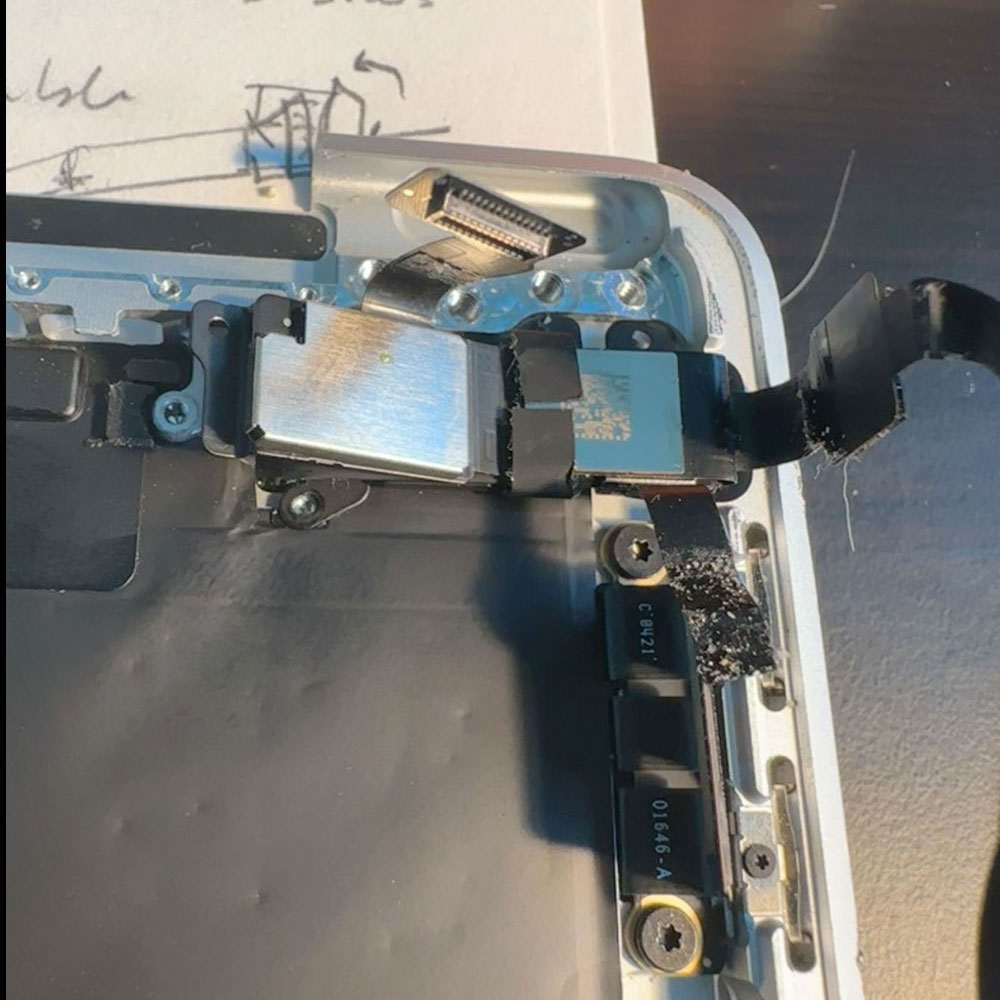
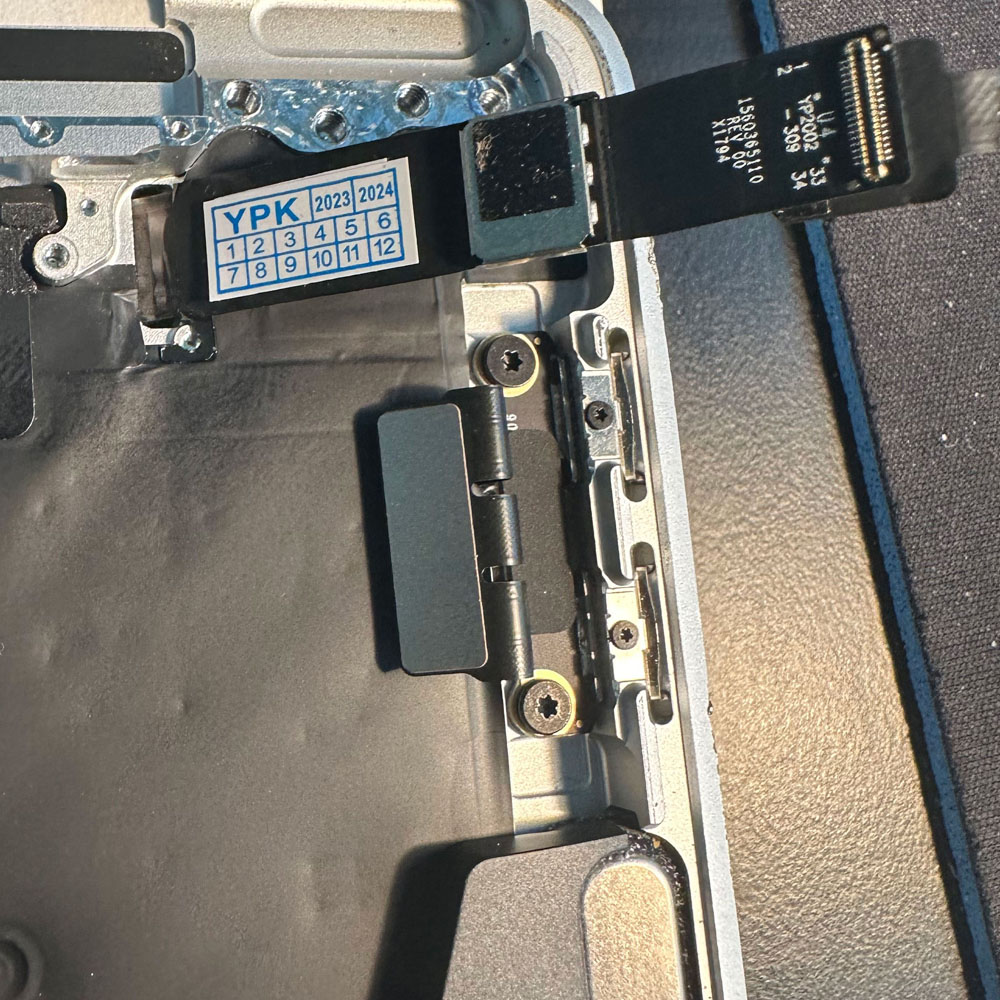
Ok, so we remove the glue, glass, and ultimately the touch bar on the front through the back upper. From here, easy peasy, we replace touch bar, careful to remove the backing which will adhere the touch bar to the upper case, flex cable in hand through the upper or touch bar bracketry and reassemble the touch bar cables and housing. We left the screen protector film on while we replaced all parts, as we continued the the rebuild process. Those images can be found below, there are a number of images; proceed with caution!
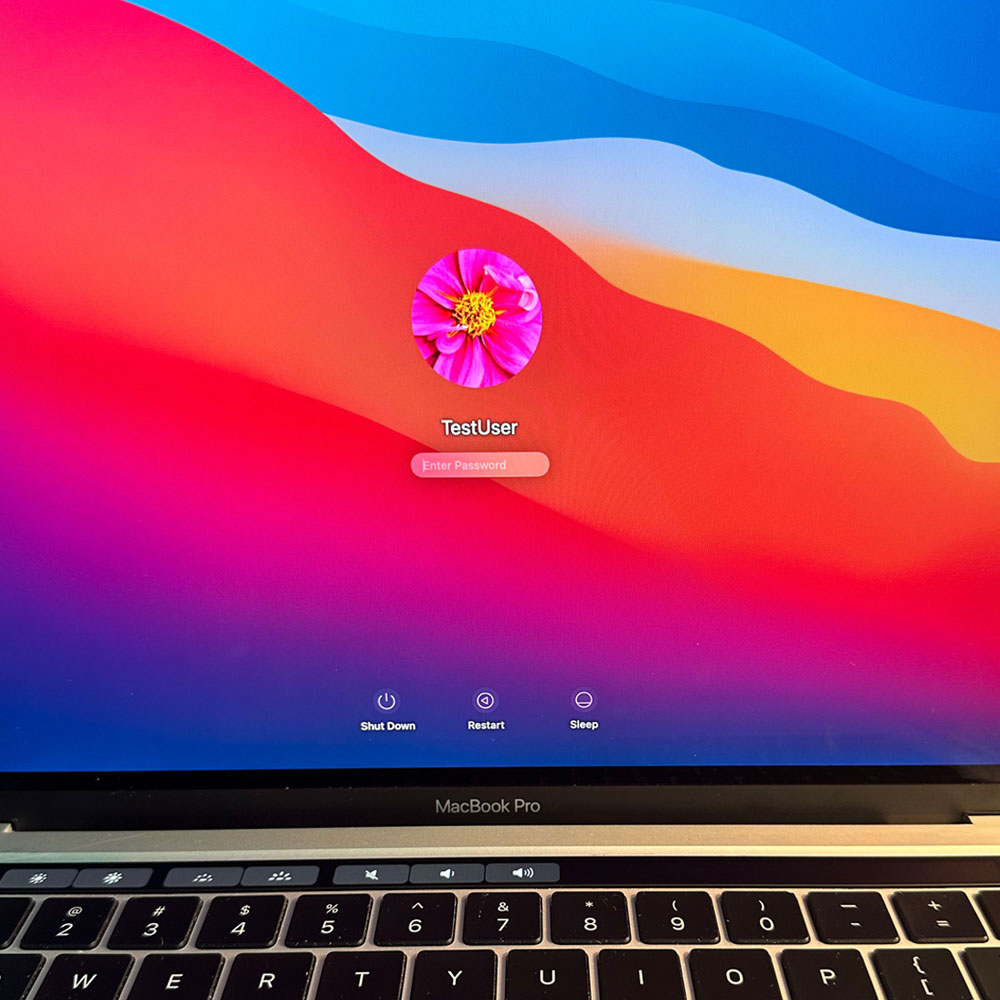
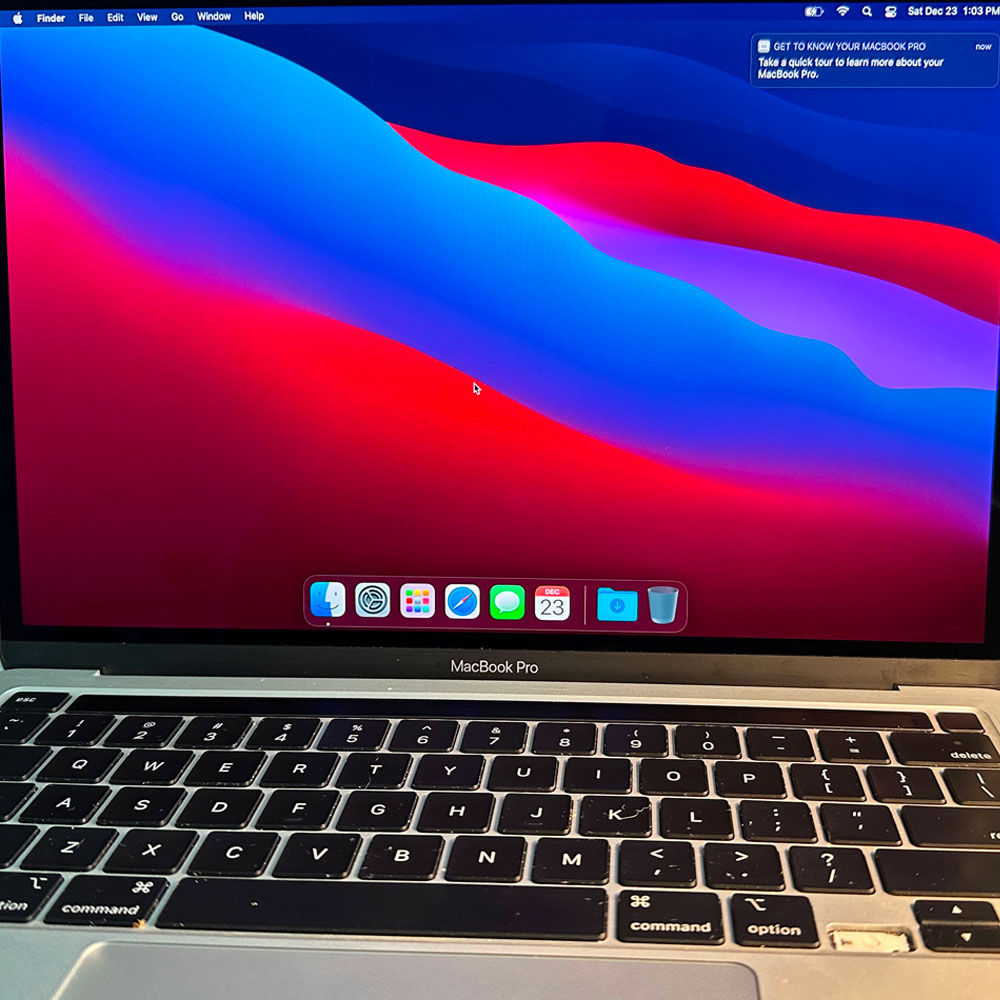
Phew, touch bar in, all parts, reassembled… let’s cover the conclusion. Once the machine is back together, a quick test is needed. We run the machine services mode, working with the drive, what’s on the drive etc. Wipe main drive, rename, rebuild and reinstall. Some quick terminal snippets and reboot. Once reinstalled. Remove any all software (bloat) we can, and we are off to the races. This laptop will be used at some point to run ham radio software if I can, hoping to install Linux on the main drive and use it as I do my previous machines. Well that concludes the refurb effort, if you have questions… send me an email, Cheers


M1 Screen & Keys
M1 Teardown – Screen & Keys
M1 Arrow Key, LCD
LCD and keys, can be tedious, be careful and be aware of the process; ‘teardown’ process.
The easiest part of the refurb are the keys. Keys, Screen/LCD and then the touch bar. Please note, the refurb process required two teardown(s) per say, I wanted to verify working parts and inspect the touch bar on it’s own. The process you can say is a 1 process job, however, I did this job in two parts for the sake of my own sanity. The key here, is this, I know if I could get the screen working, we would be in good shape. Cost aside, I was trying to avoid purchasing the M1 upper case which holds all parts associated with the computer. So, in other words, a no-brainer… Key, Screen, then touch bar.
Start Teardown bell! We’ve completed our inspection, and we start the easiest of the three R/R (remove and replace) parts in this teardown. Keys can be tricky, please see the video below, if keys are ‘an alien’ concept, we just need the left arrow key. There are a few online resources to check out, below, Snazzy does a nice job, walking through the process in video form, we breeze through the key change. If you need more information, check out Snazzy Labs, quick video on how to replace keys. Please note – there will be some differences between model(s), M1 specifically; hence the video! The takeaway, quick snap key are handy, can be bear if you don’t know how the scissor clips work. I pre-purchase new keys (up, down, left and right – be sure to purchase the ‘left arrow’, purchase the correct key “left” arrow) slide and click, easy as pie.
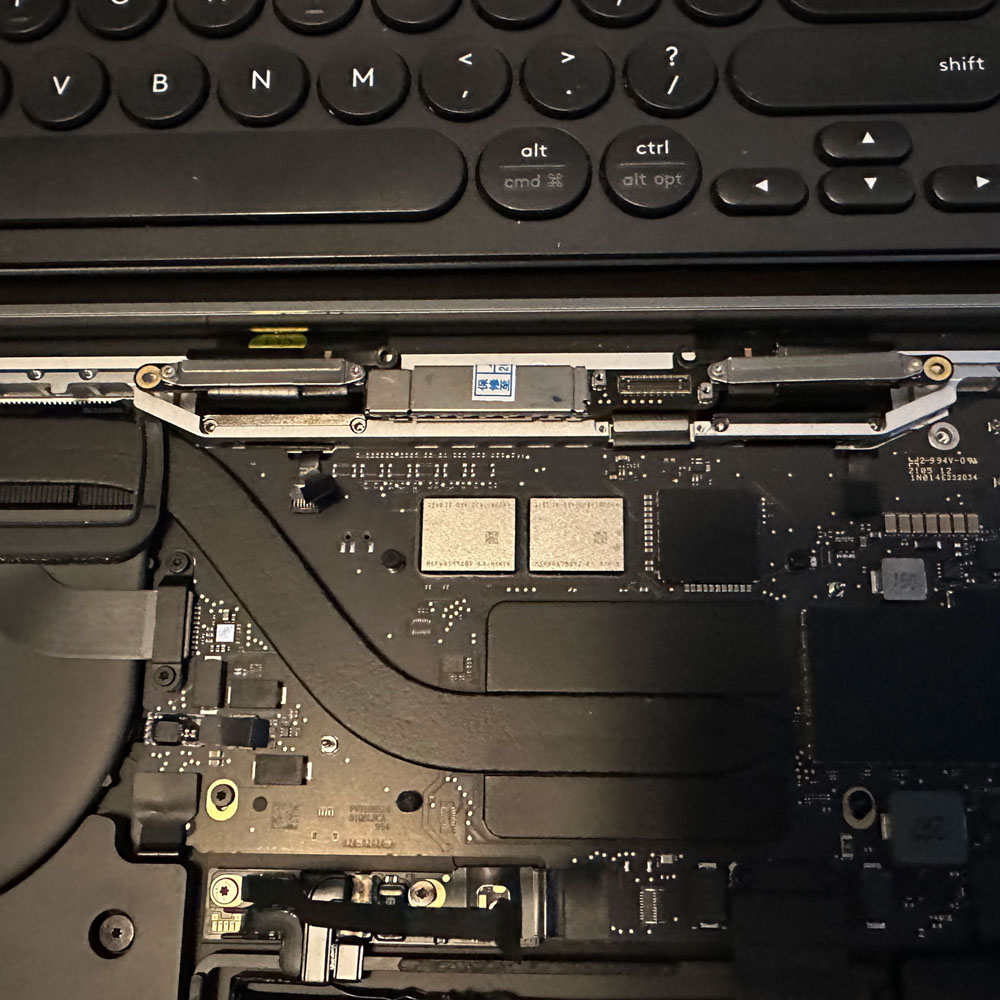
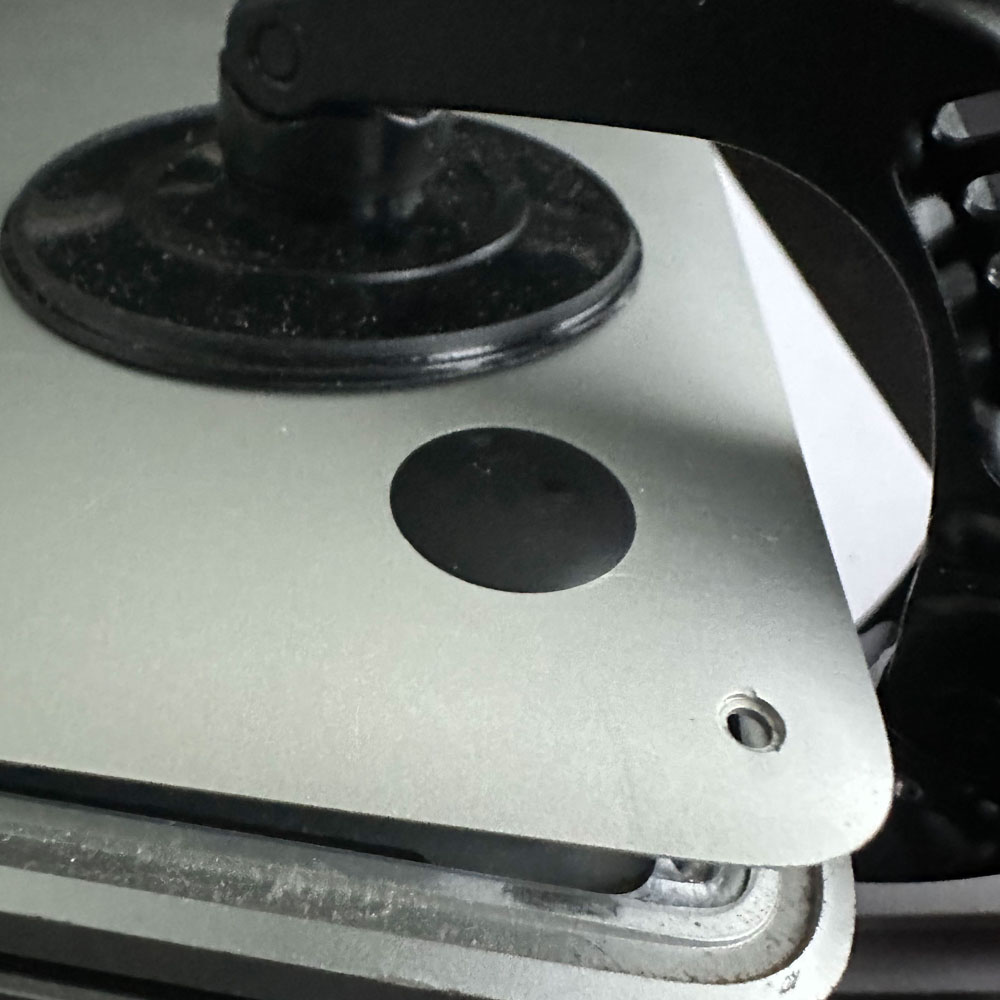
So, let’s pickup on the cracked screen… We get under the bottom case with a clamp tool and suction cups. Recommendation – iFixit has all kinds of ‘fix it’ stuff, from tools to parts etc. iFixit, we will come back to these folks here shortly, however, we’ve purchased a few items from them. You will need adhesive remover, can you guess where we got ours? This is not a paid advert, but there are some good tools there if you don’t have anything in the electric/technical toolbox.
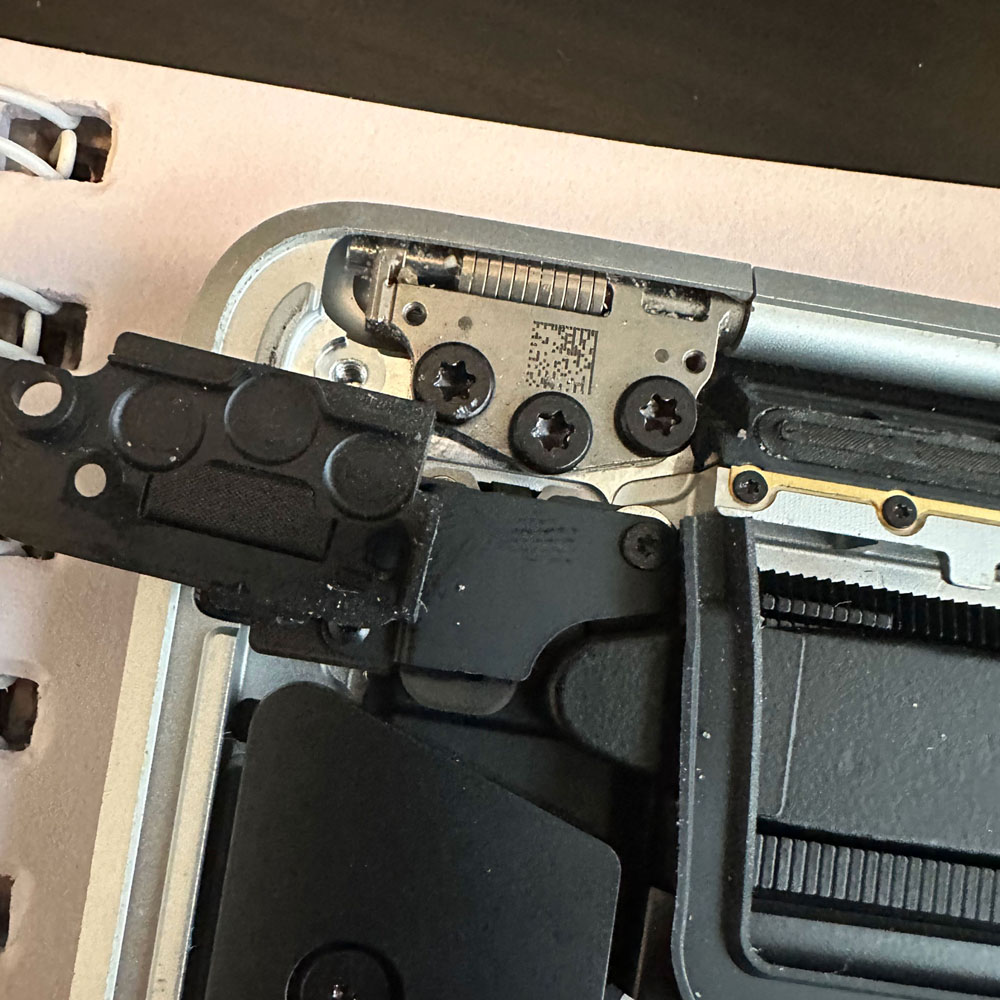
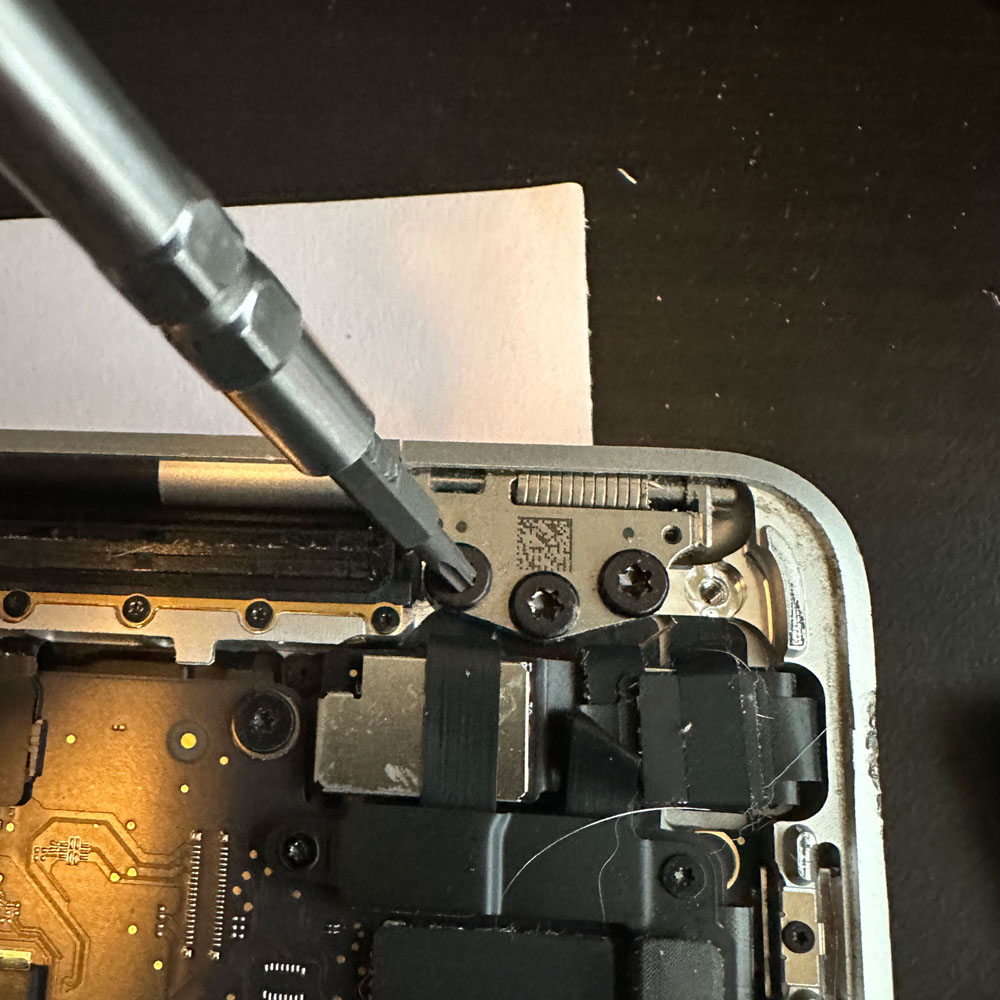
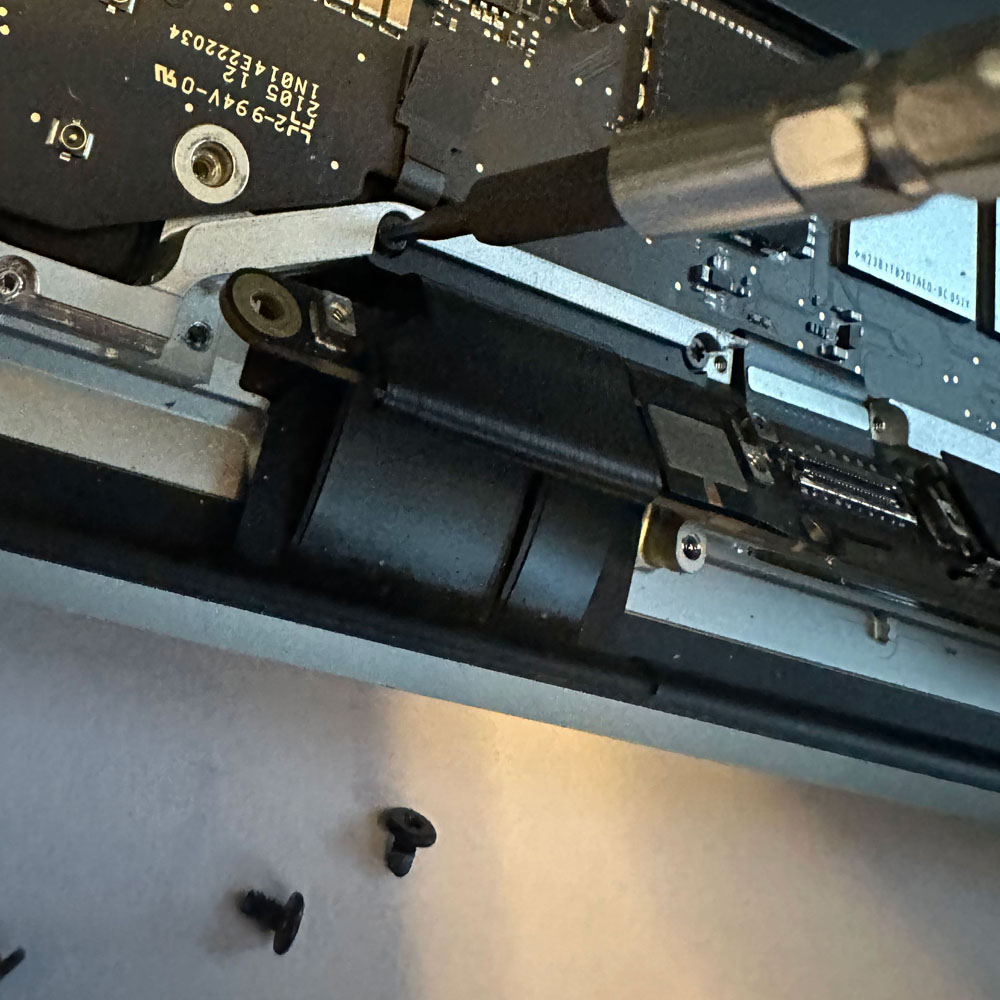
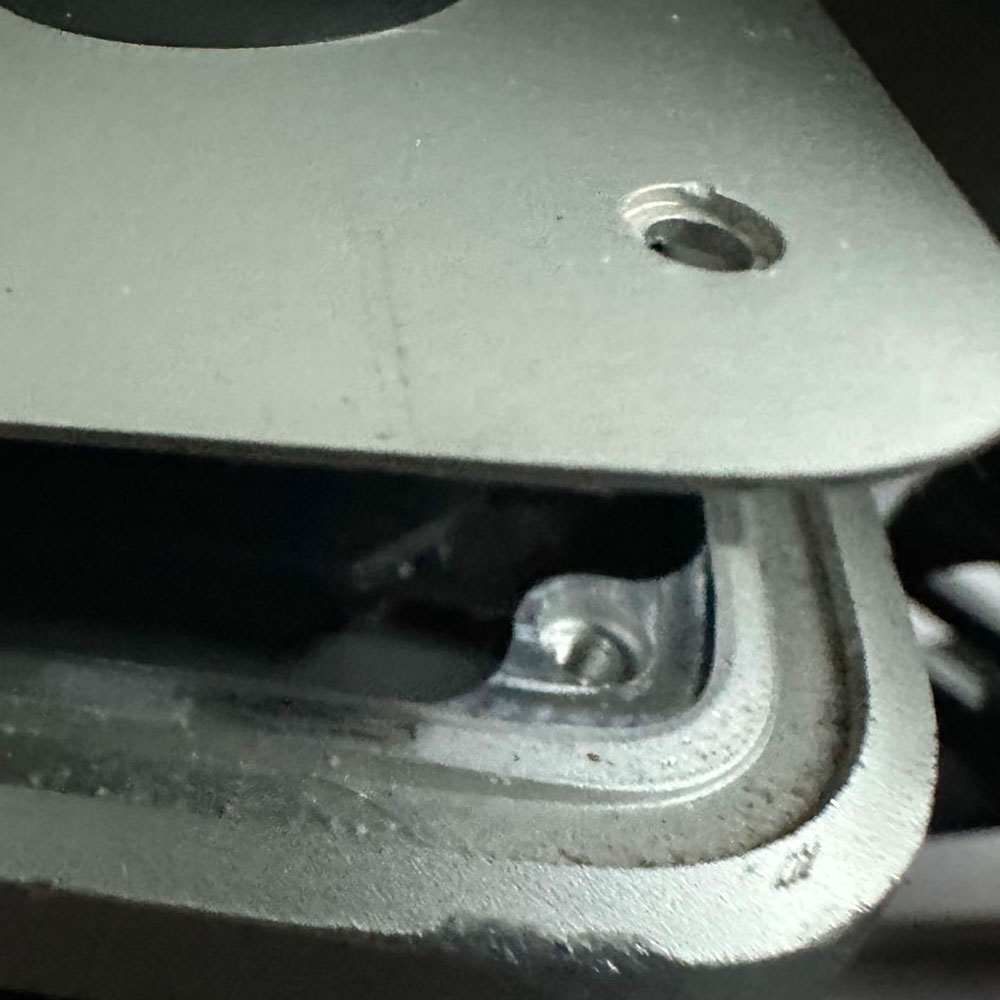
We pick up under the bottom case, starting with the battery cable, be aware, cables and parts are finicky and will break unless you are careful. So, cable cover, battery cable and screw. Honestly, the more nerve racking part are the variance in size, driver type and prying tools are needed to take on such a task (TORX, pryor(s), spudgers, tweezers etc). Anyhow, once batter cables and screws have been removed, we will unscrew hinge covers and start on the antennae. Good luck seeing the screws on the antennae!
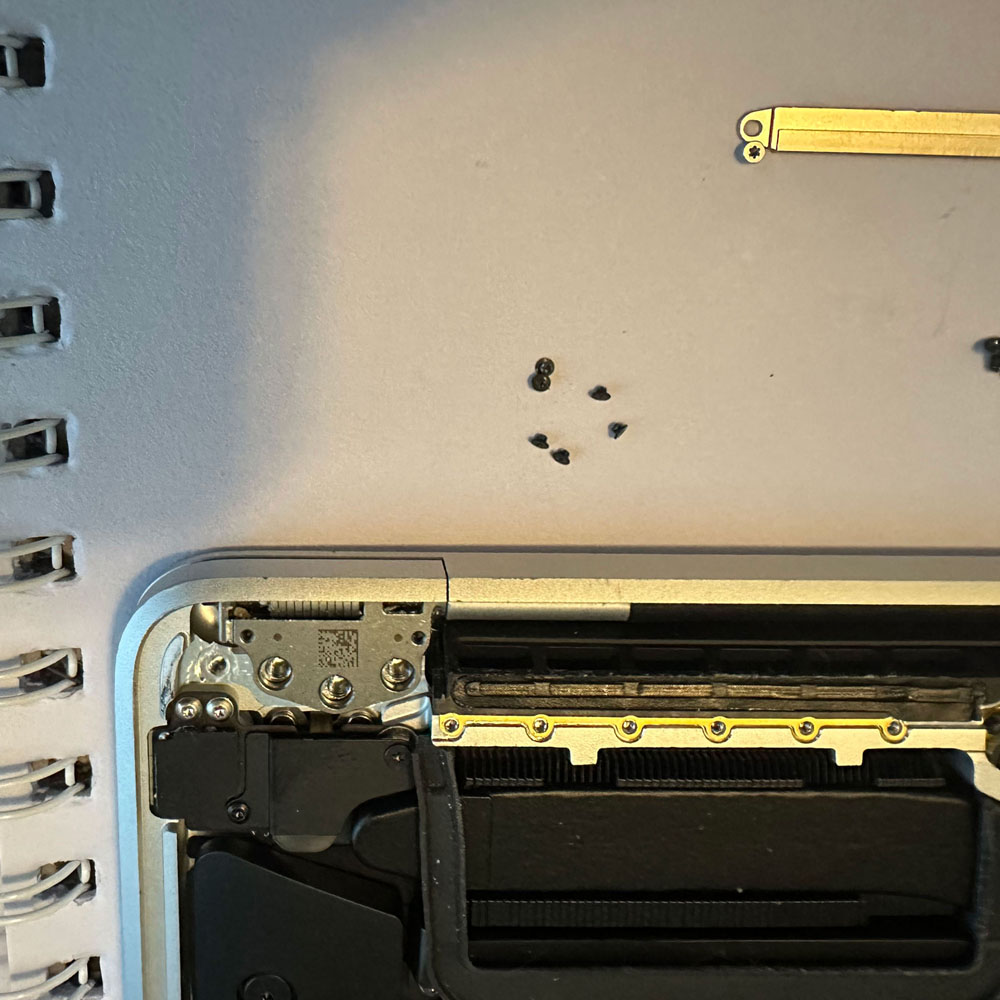
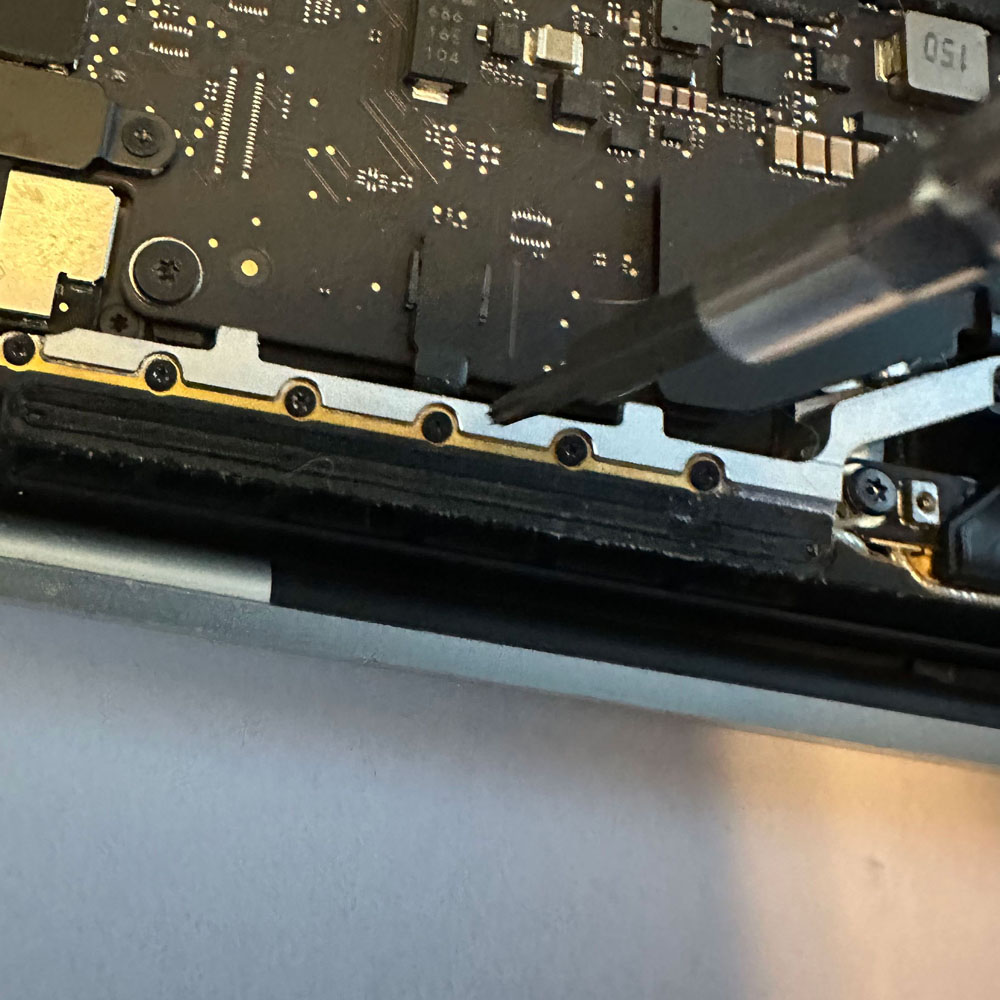
The antennae will require a few more cables, screws and bars. All leading down to the antennae and LCD springs. Once, through those items, we will again remove the antennae wire cover and remove those wires as well. Be aware, or a little bit of caution, we try and leave the piece we are working on in better condition than the way we found it. So, covers, try and peel those back ever so gently, keeping glued areas clean and debris free (or as much as you can, we had some glass bits that required our attention).
Once, the antennae bar is clear, LCD hinge screws will need to be removed, along with the springs and mounting hardware. Voila, LCD has been detached. Noted above, we will continue onto the touch bar, we backtracked, replaced all screws and cables to verify LCD swap and key do in fact work as expected and the touch bar was inoperable. We will pick up with the touch bar, verification, wipe and clean in the next post. Stay tuned.


M1 Visual Inspection, Teardown
M1 Inspection – Screen, Touch bar & Keys
M1 Inspection Report
Time will be relevant here, take your time, clean up as you go; we will be replacing several items, the screen, touch bar and keys on the M1 MBP.
Let’s start with the inspection? Shall we begin? We shall start with the physical inspection. Then compute and gather the relative information to start the refurb. So, what the physical damage? Does this damage impact the computers ability to function or compute? In turn, we want to where the damage is and how the damage might impact the machines performance, compute power, UI etc…
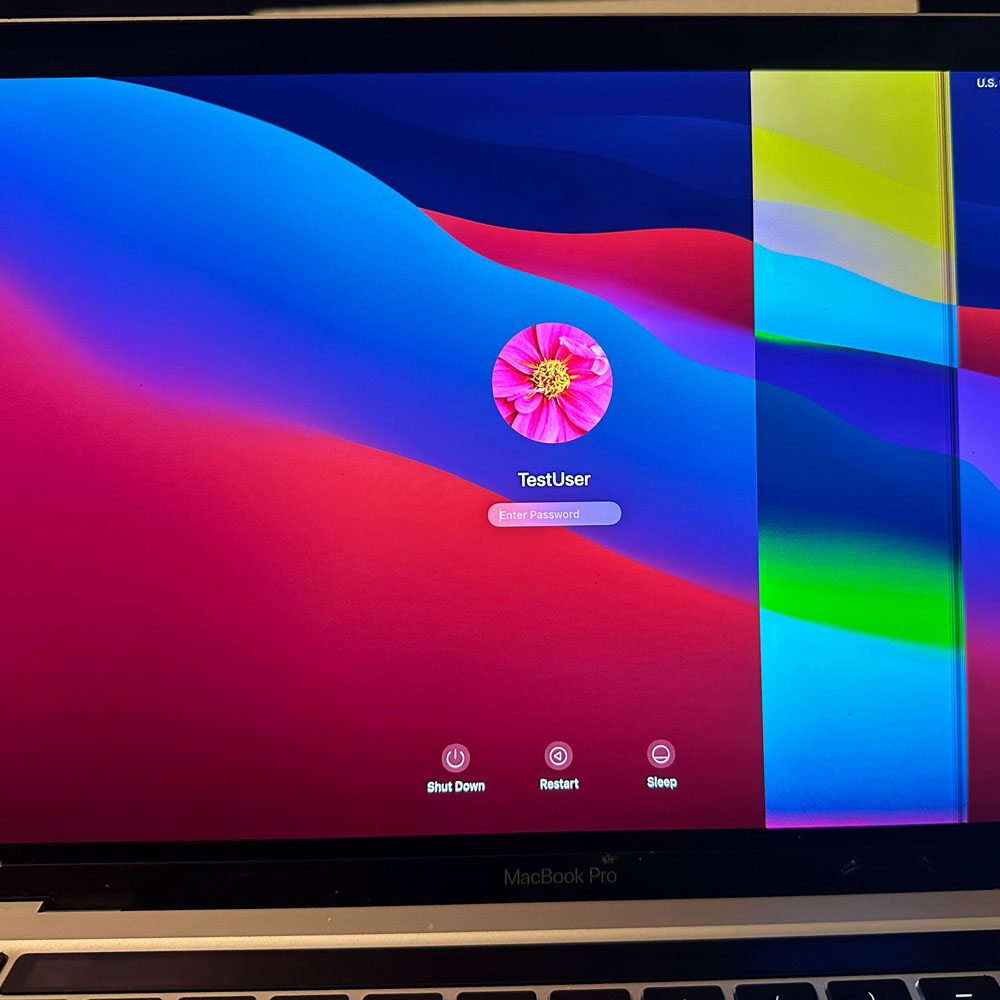
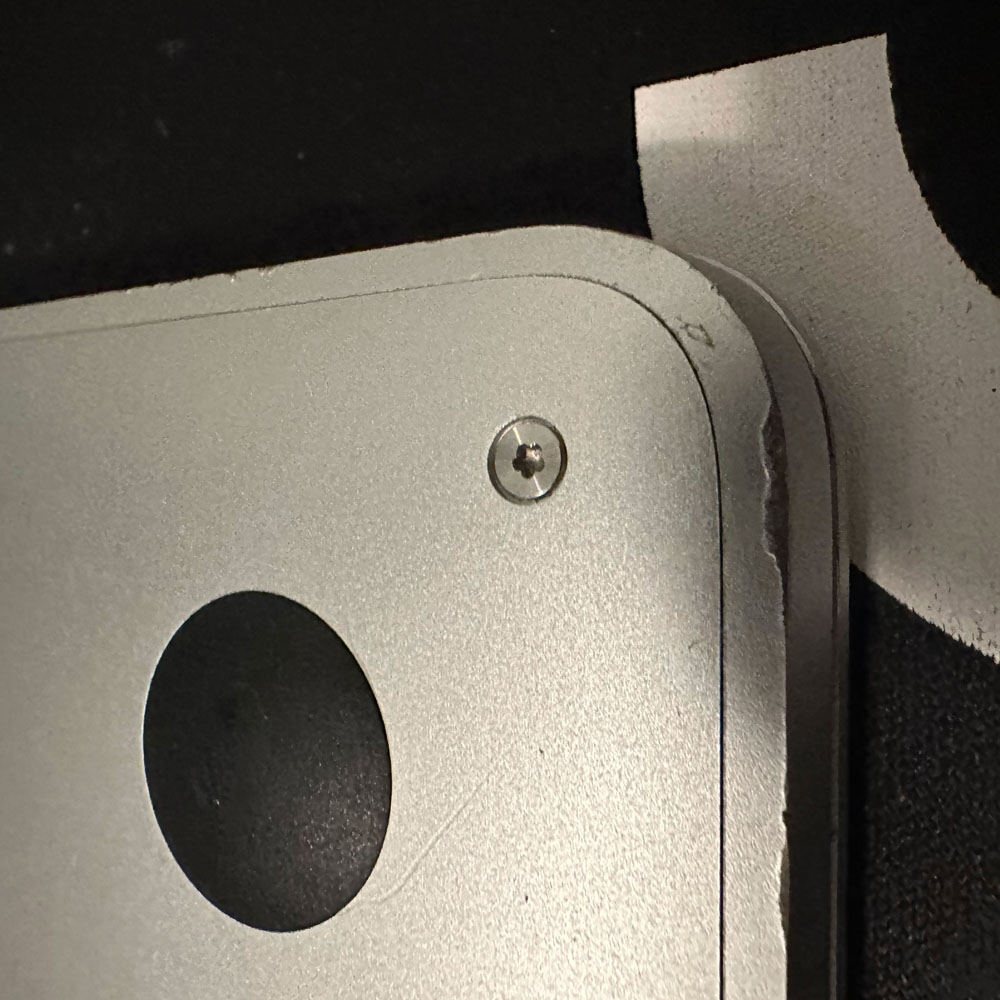
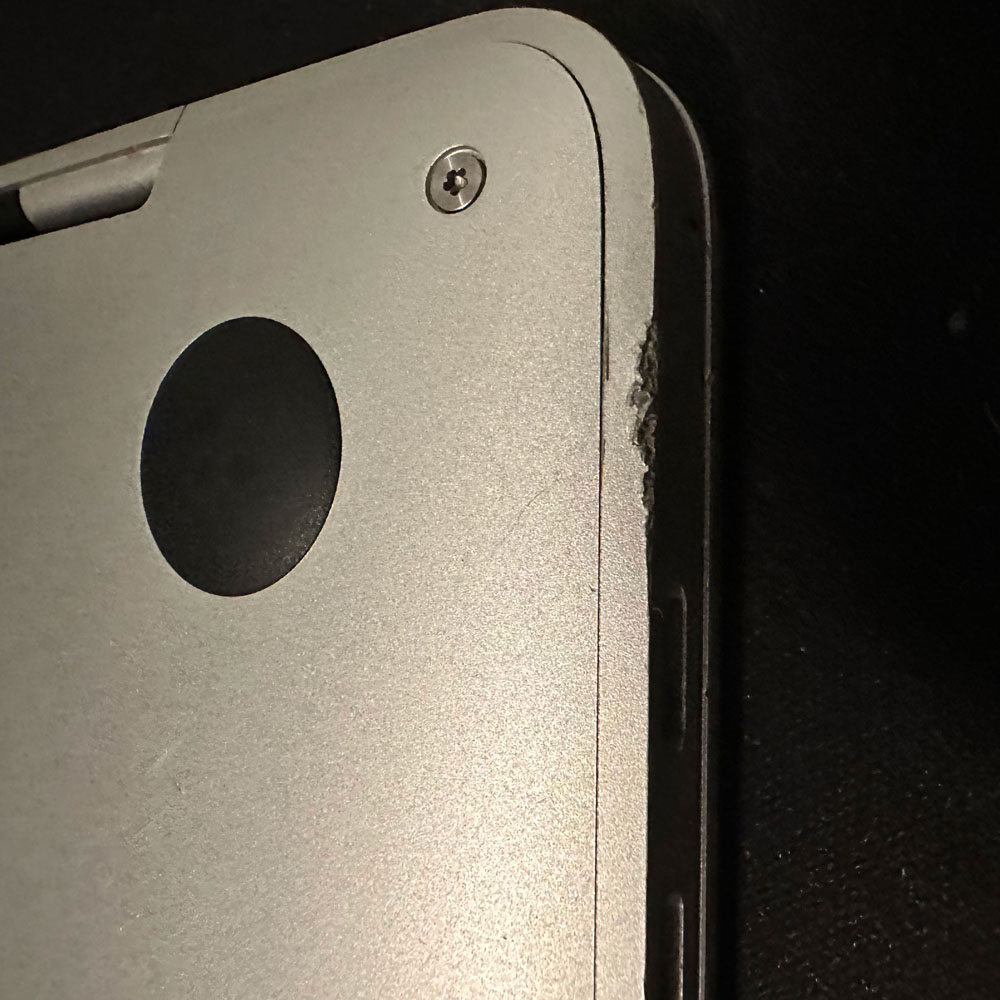
Next, we can see screen issues, or LCD issues where the screen is being manipulated by either glass that is broken or screen distortion that might otherwise not be there. Also, upon further inspection, there appears to be scratches and or broken/cracked glass in the black/sublayer of the LCD, at the bottom of the display, near the hinge and just above the touch bar. Perhaps some debris or object inside this key/screen area when the computer was closed. At least that is my hunch.
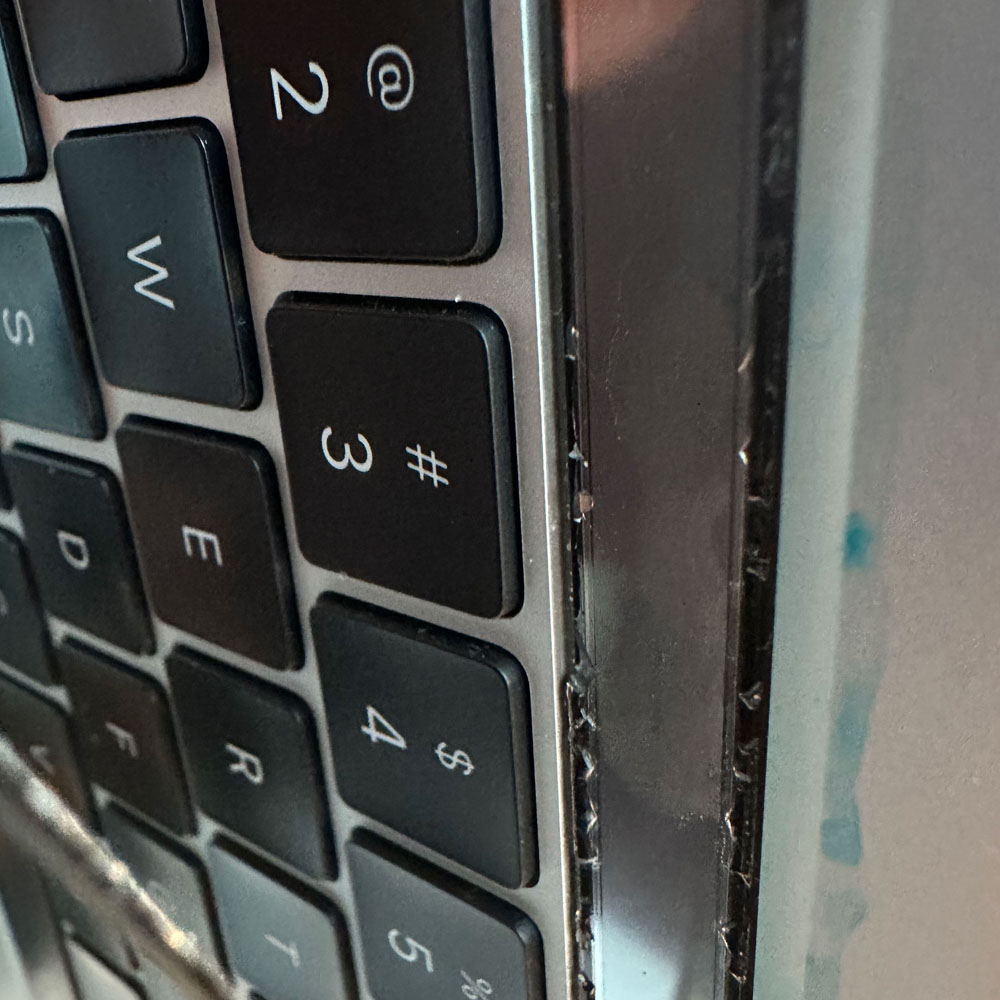
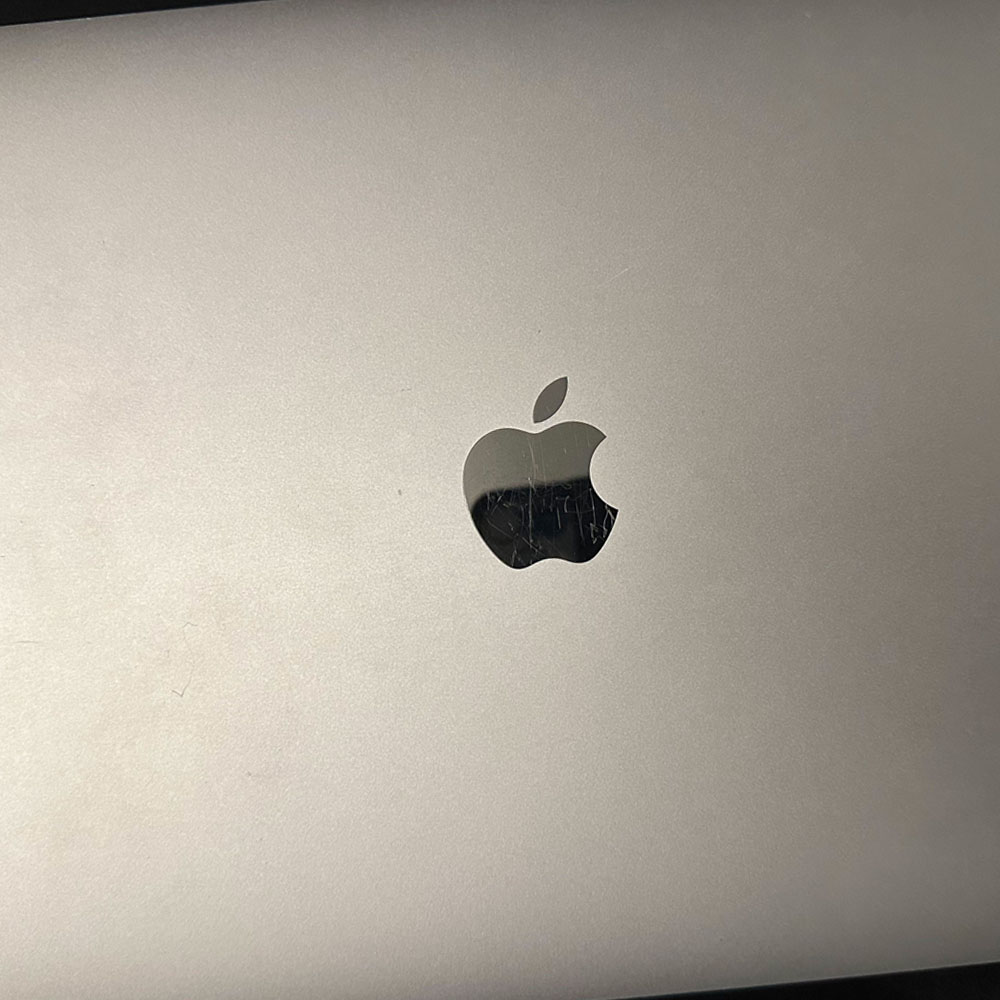
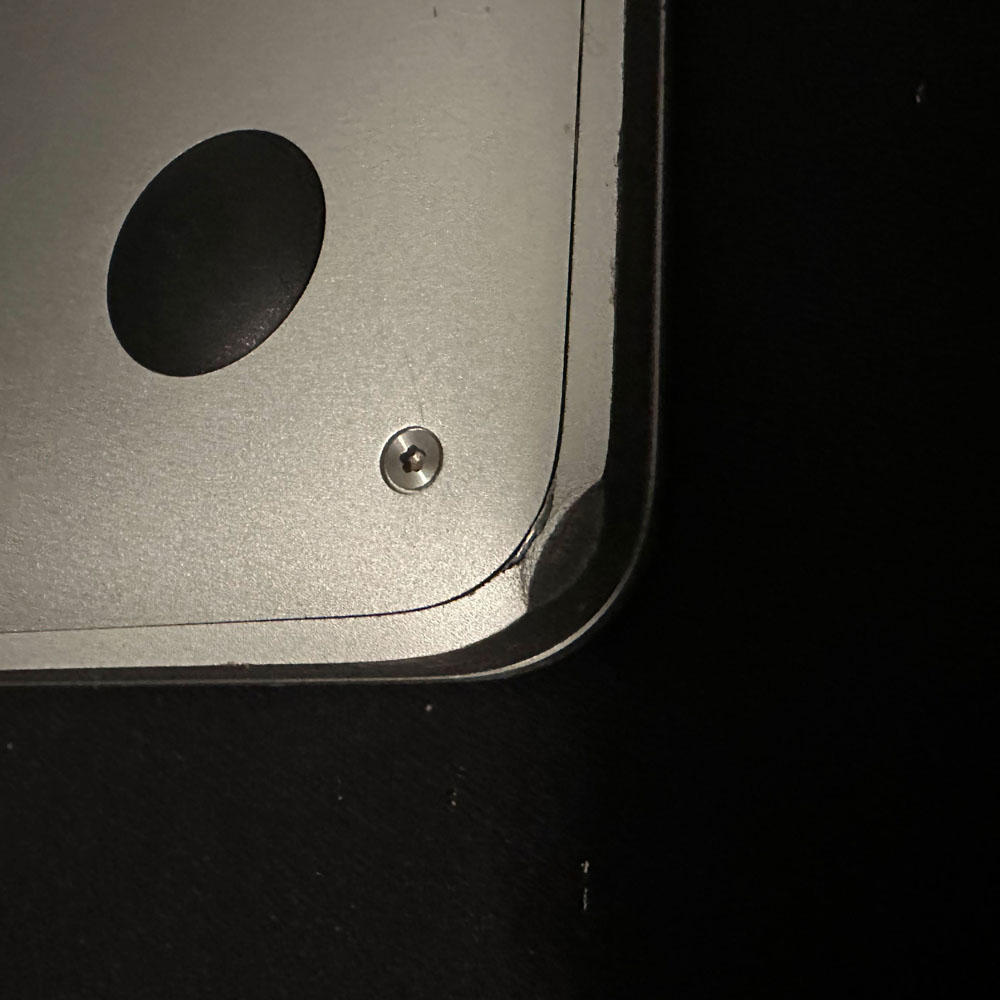
Now, the case, the metal case seems worn not out of the norm, all corners have some damage, scratches etc., seems ok (case did it’s job), nothing that might through a red flag (flag showing damage causing internal or computing issues).
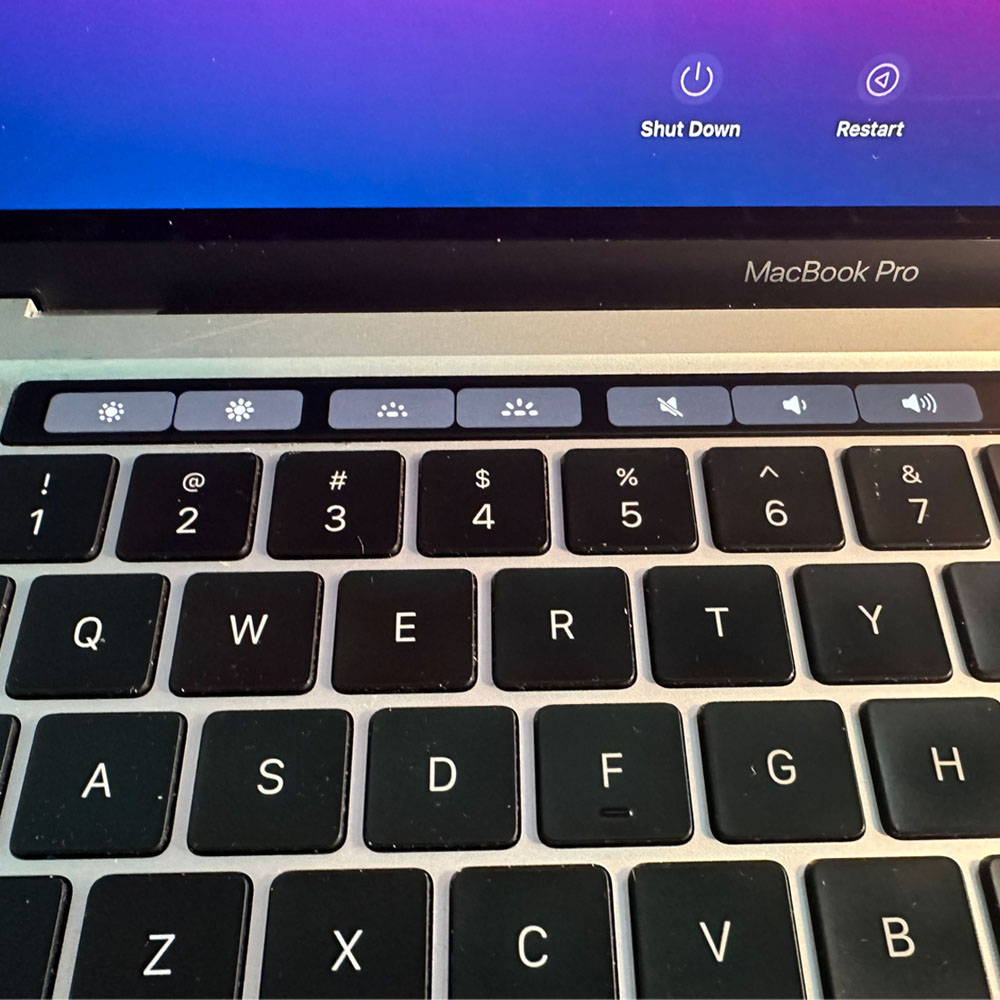
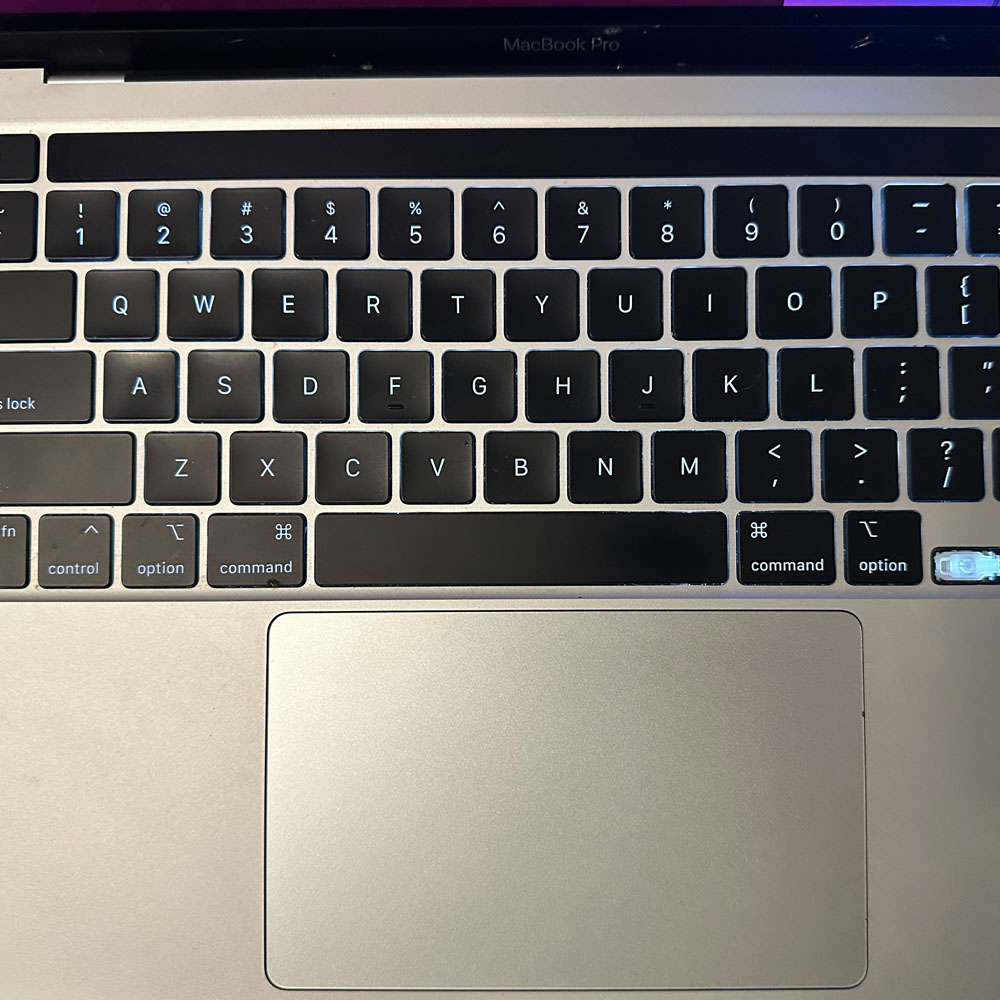
Next, let’s inspect the keyboard, directional arrow is missing and touch bar is no longer illuminating… I wonder if the key came off and damaged the screen some how? Not likely, but something appears to have been closed in the laptop. Where the touch bar and screen would meet upon closing the laptop. Third takeaway, the machine may need an overhaul, or new upper (upper case, which can be extremely expensive as it to will have all parts ). Again, parting this out, or fixing each piece, piece by piece, is not recommended. Now, the disclaimer – this is my own machine, typically items under warranty will be processed through Apple via Apple Care. Utilize Apple Care, Apple+ where you can, assuming you’ve purchased the warranty/insurance. If not, things get expensive; there are resources out there as you can imagine, hopefully posts like this and those following help to provide some guidance in dire straights.
Ok, now that we got that out, let’s get to the first fix; this left arrow key and LCD screen.


M1 Refurb
Refurb Update – Keys, Touchbar and Screen – Images being prepped
M1 Mid 2020 Refurb process – Keys, Touchbar and Screen
Not recommended, but if you’re in a pinch, there is a way! Without purchasing a new M1 upper and/or M1 full assembly.
I was going to post the refurb process in two posts, one showing the screen and keys, the other, the touch bar. Since, the touch bar is ‘invasive’ to say the least, it’s easier to cover the screen, and touch bar in one post. So, a length post it is…
Where is the post today, 25 plus images ‘in-process’, quick story line complete and a pre-post completed. I think there was some 50 steps to remove, replace and install the touchbar, so we will make it as streamline as we can. More to come, check back in a few days, as we should have the post ready to go.
M1 Self Service Repair
M1 Repair – Apple Documentation
M1 Repair – Self Repair Documentation, Websites etc
Those of you who are not certified, no longer certified or never certified by Apple; there are options. Do your research, and perhaps you might want to start here…
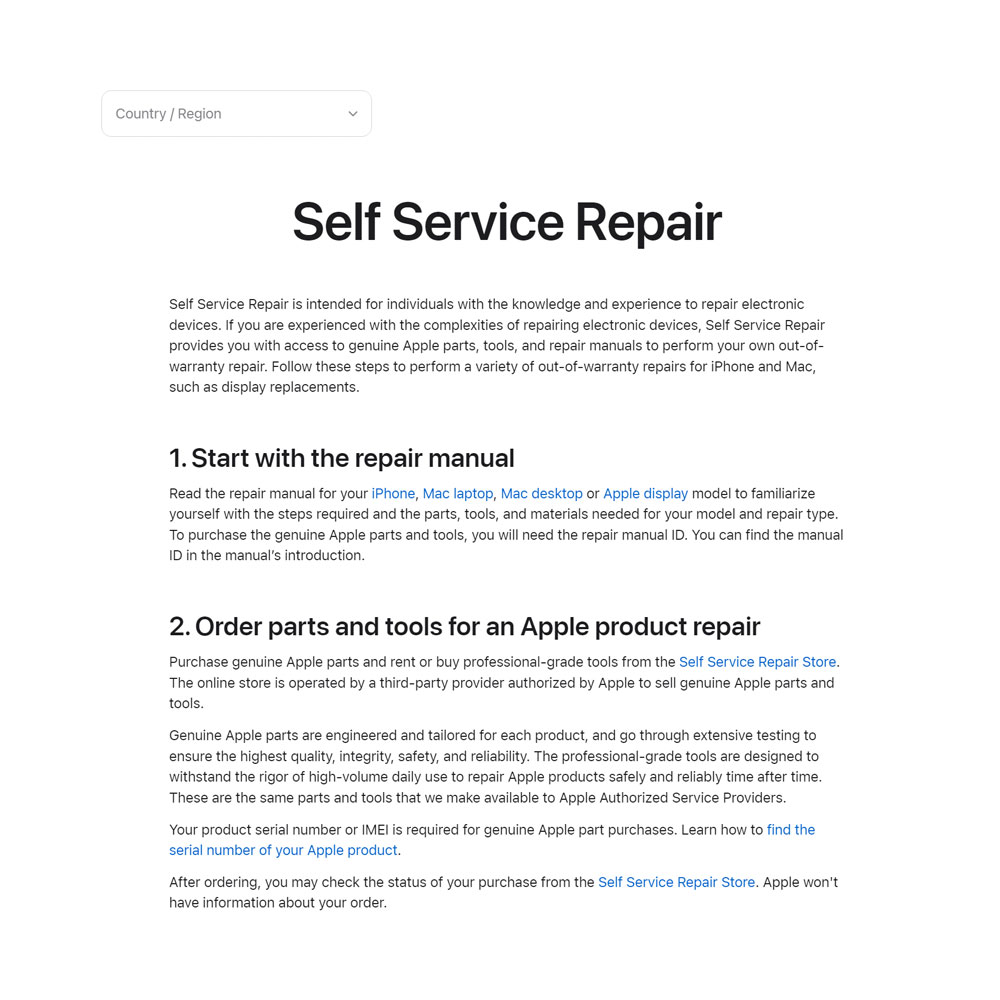
I’ll let Apple explain the ‘other repair options’ independent repair providers and self service repair. Avenues become limited as the warranty expires or those who can perform the fix on the go.
Let’s assume our options are limited for the M1 issues… the Apple Self Service Repair (resource website) will help with your repair; this assumes you know what you’re doing. Parts can be purchased as well,
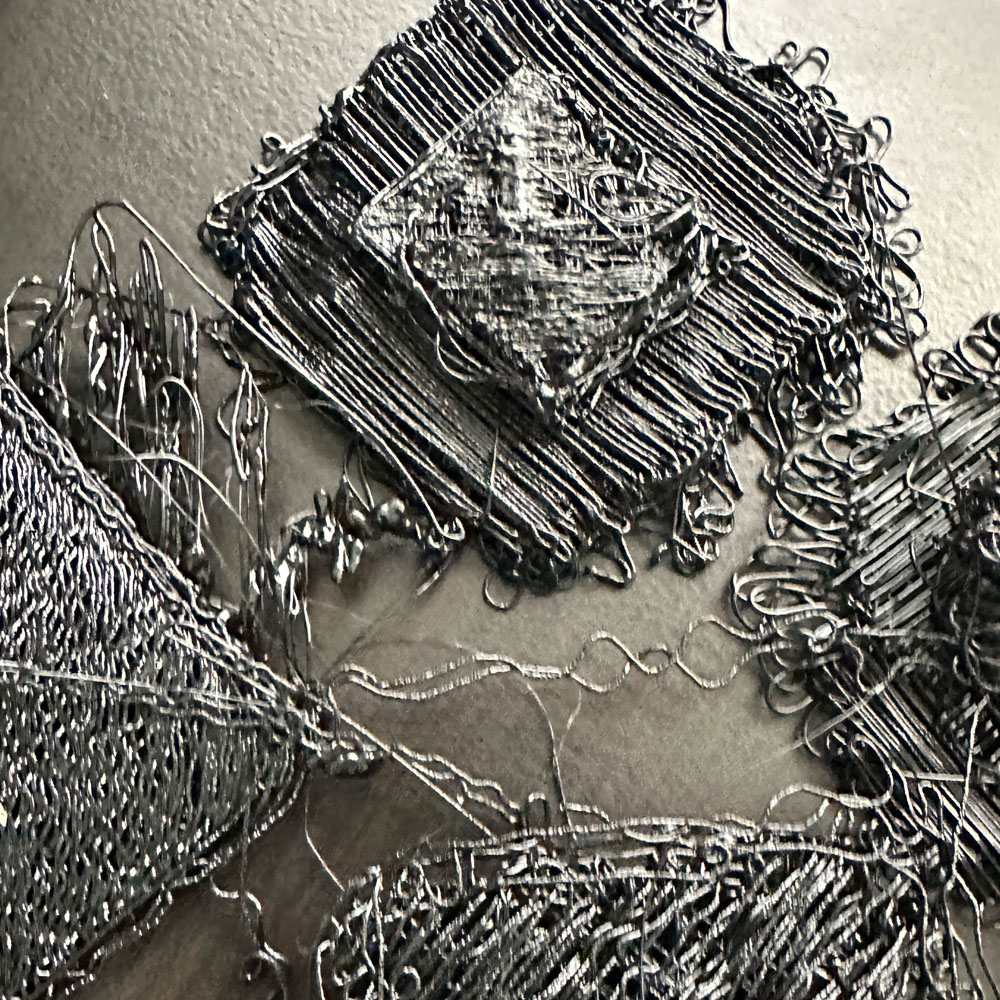
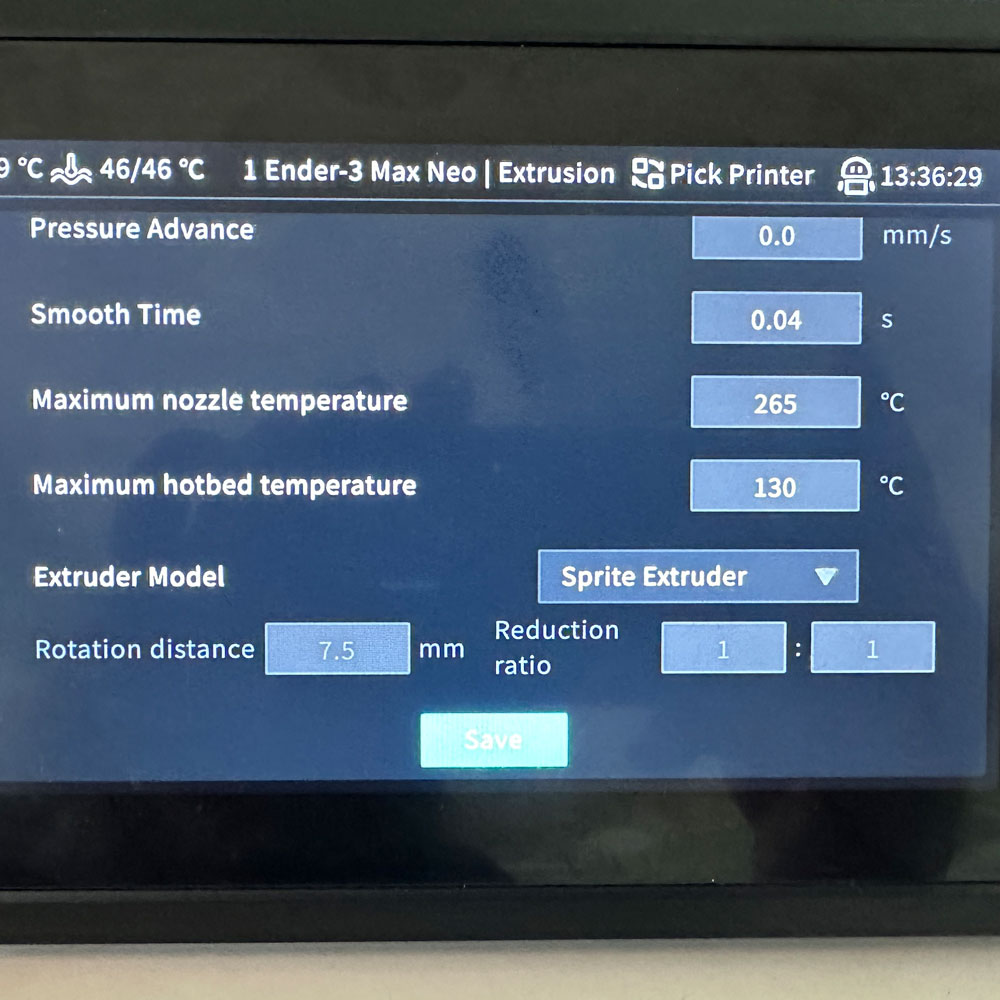
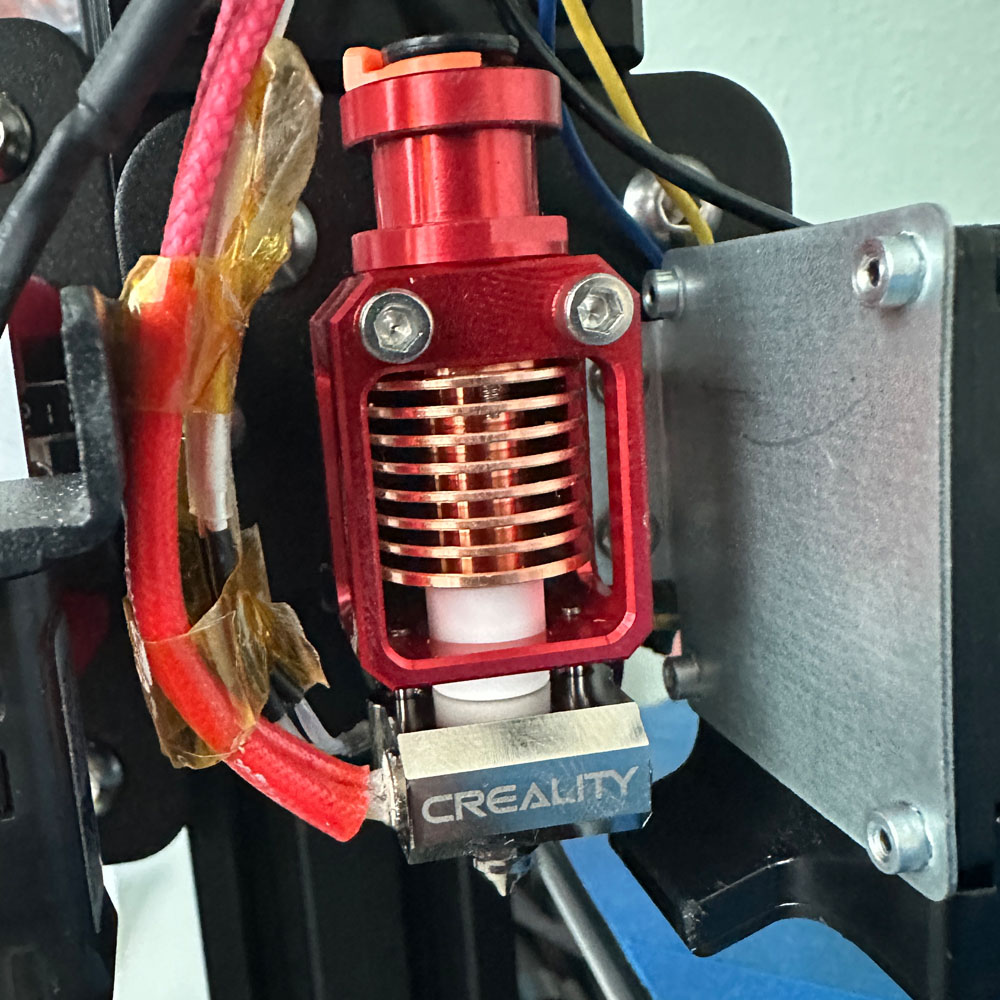
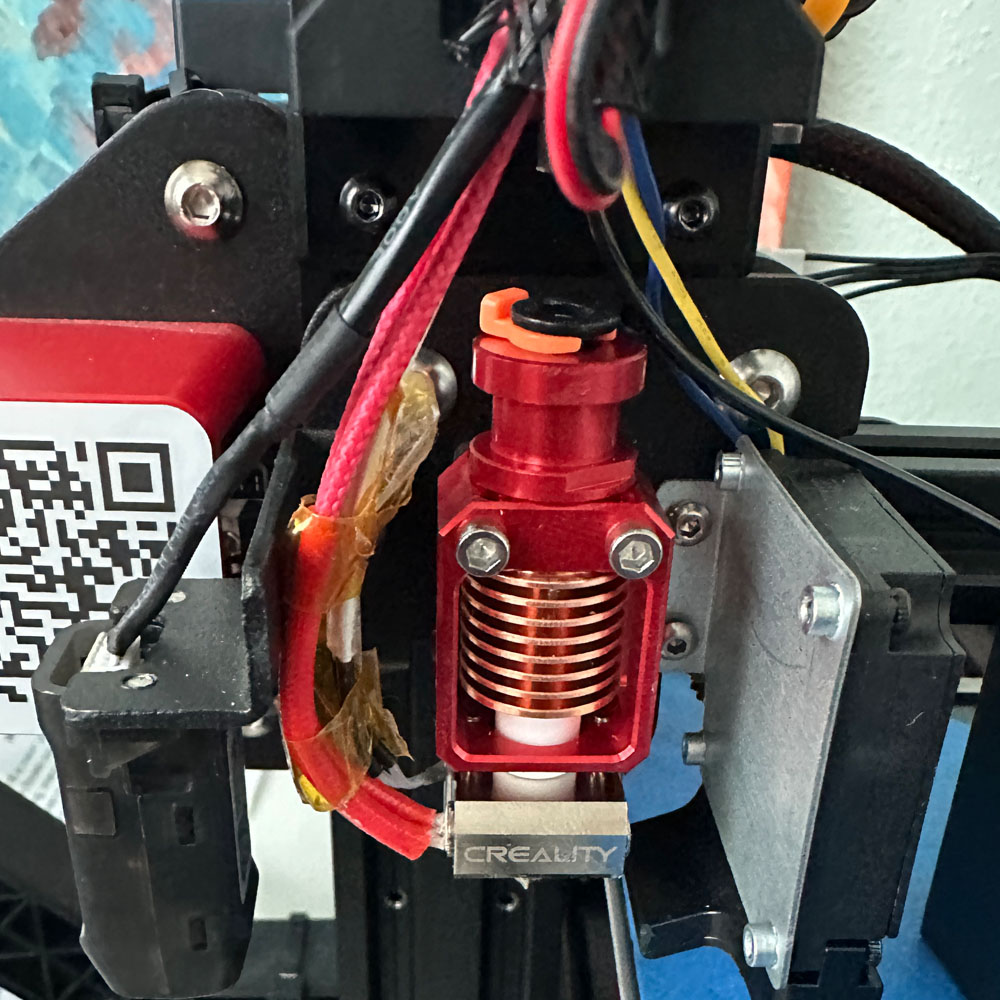
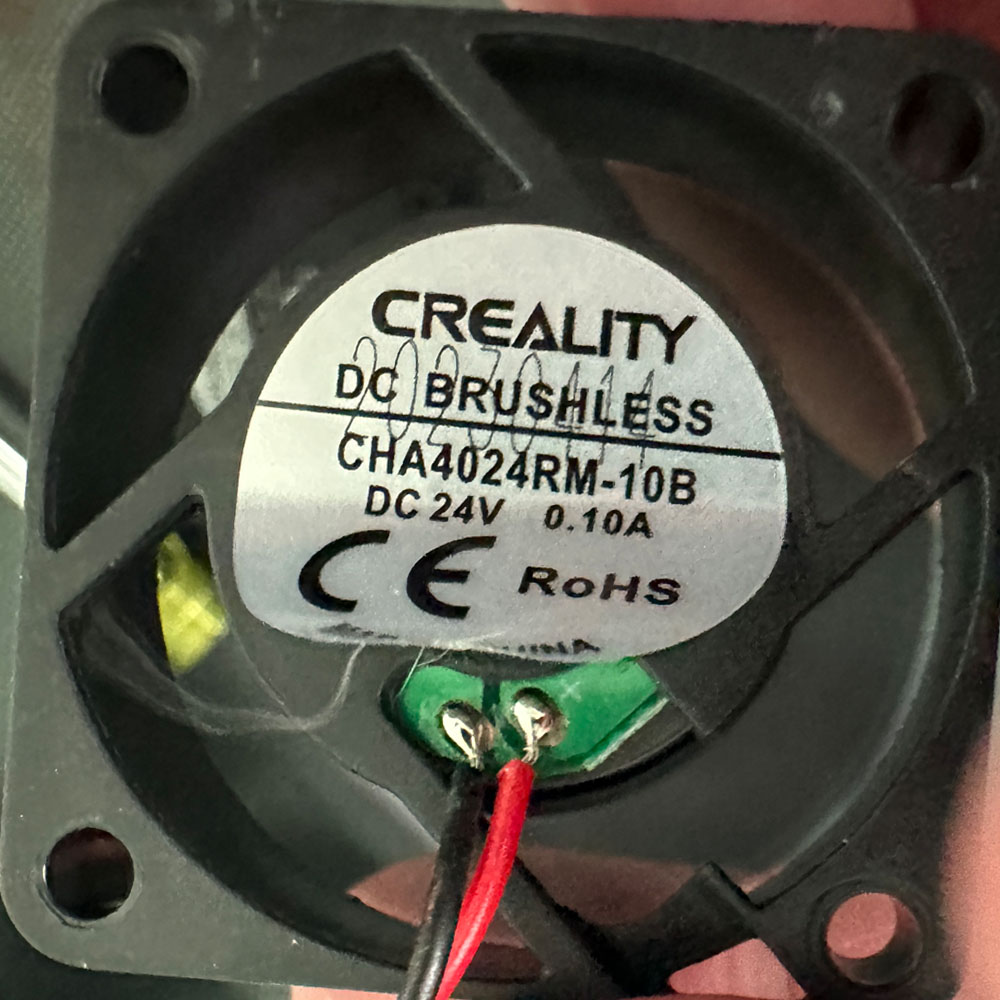
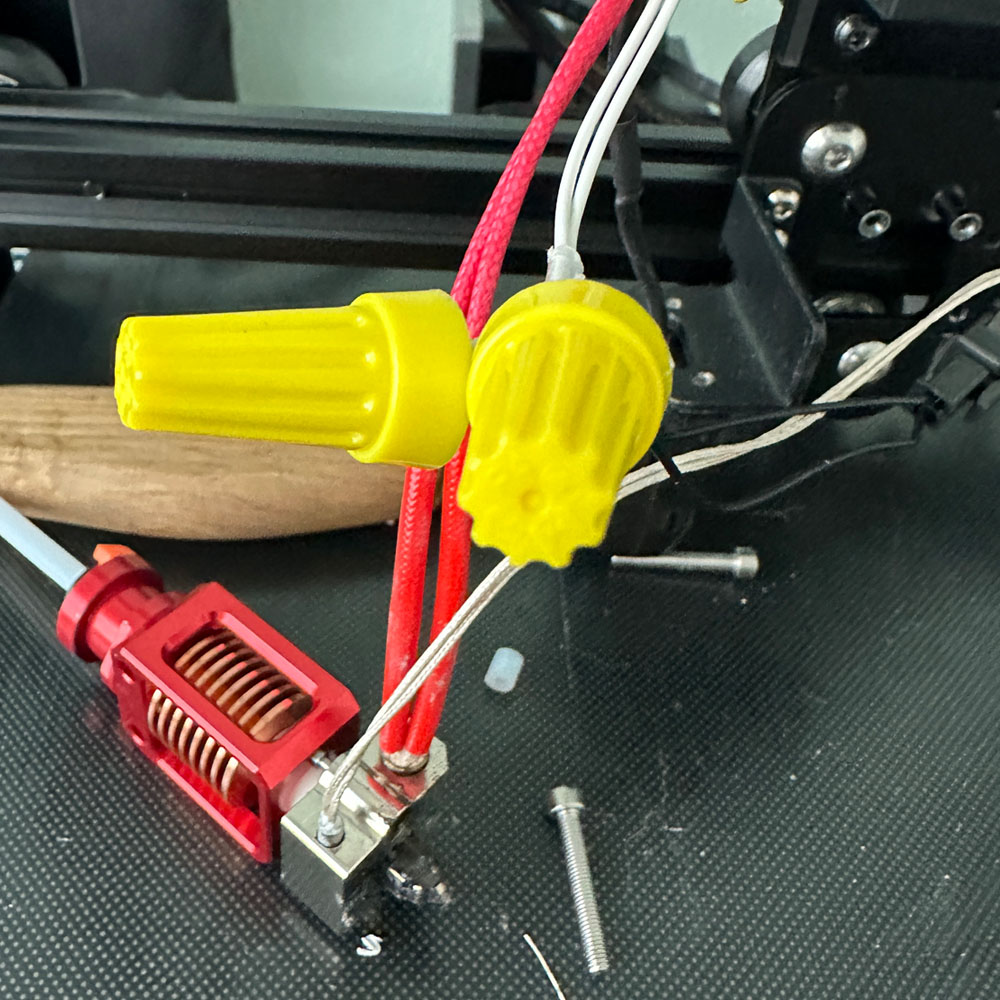
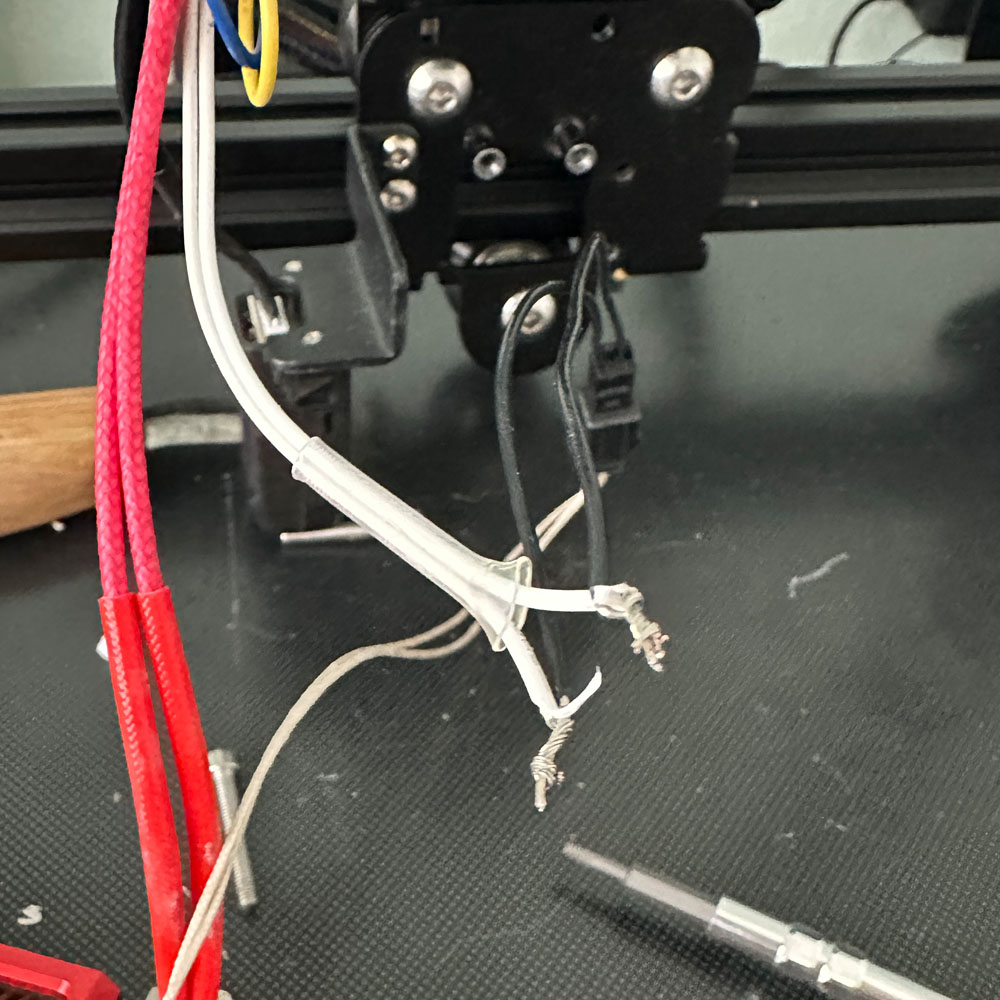
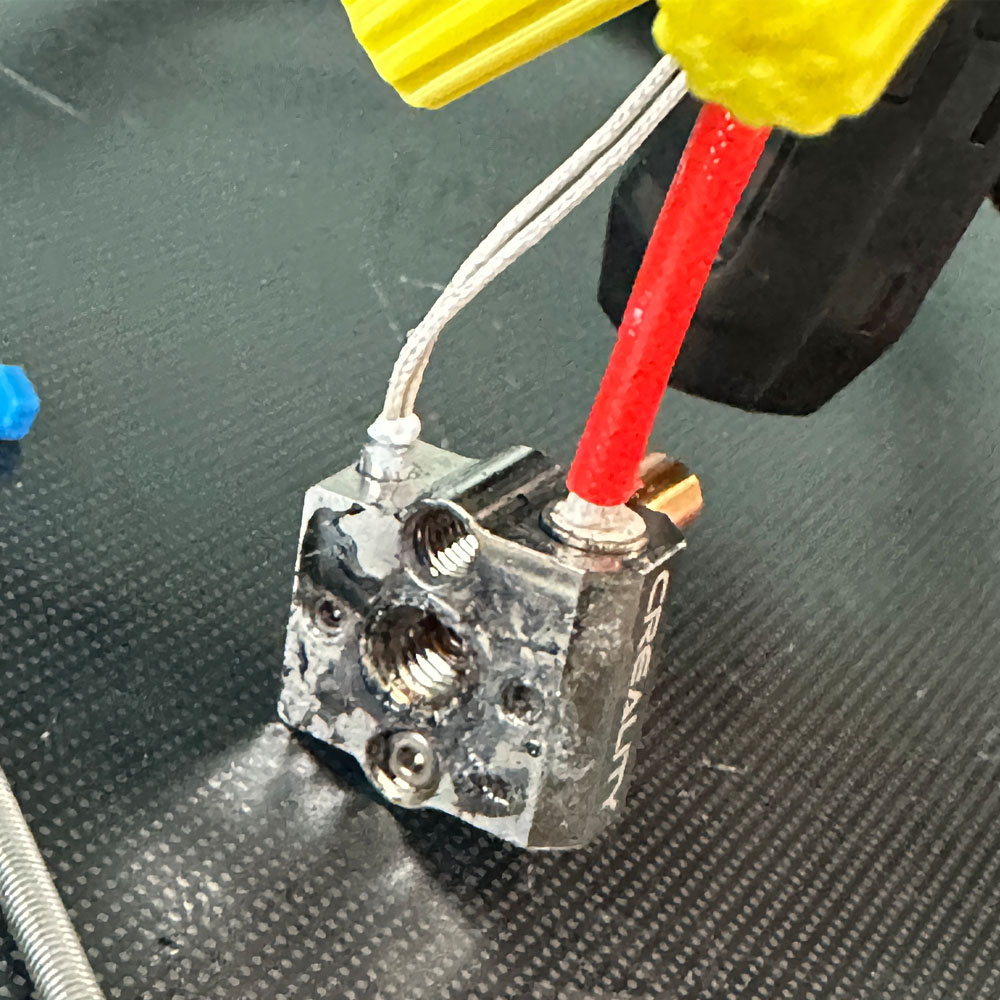
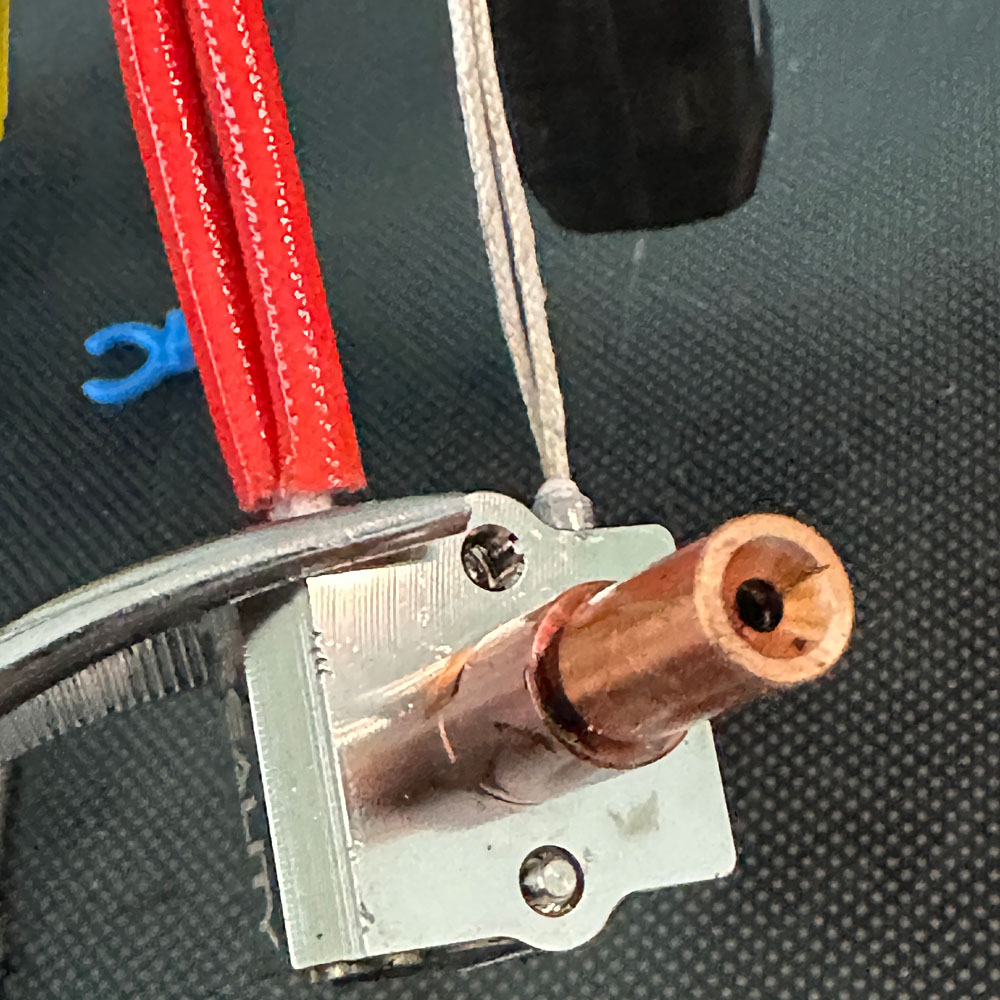
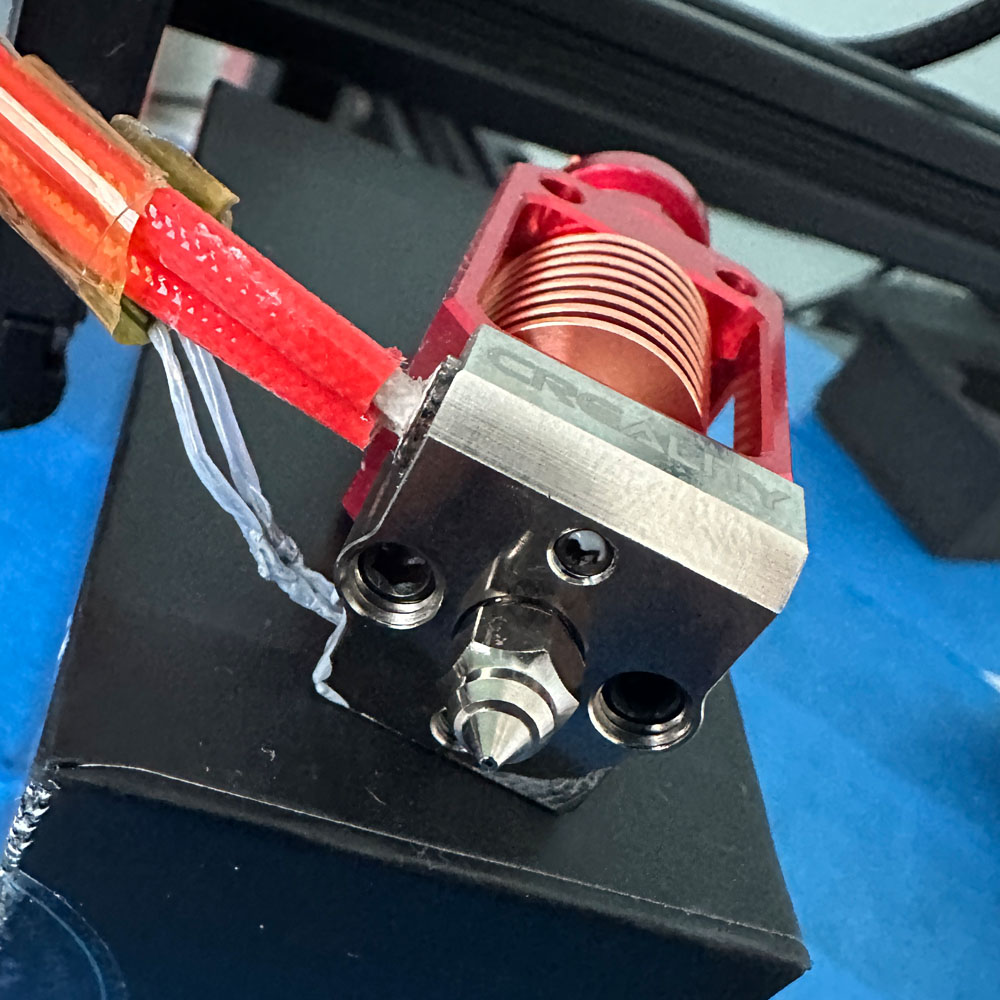
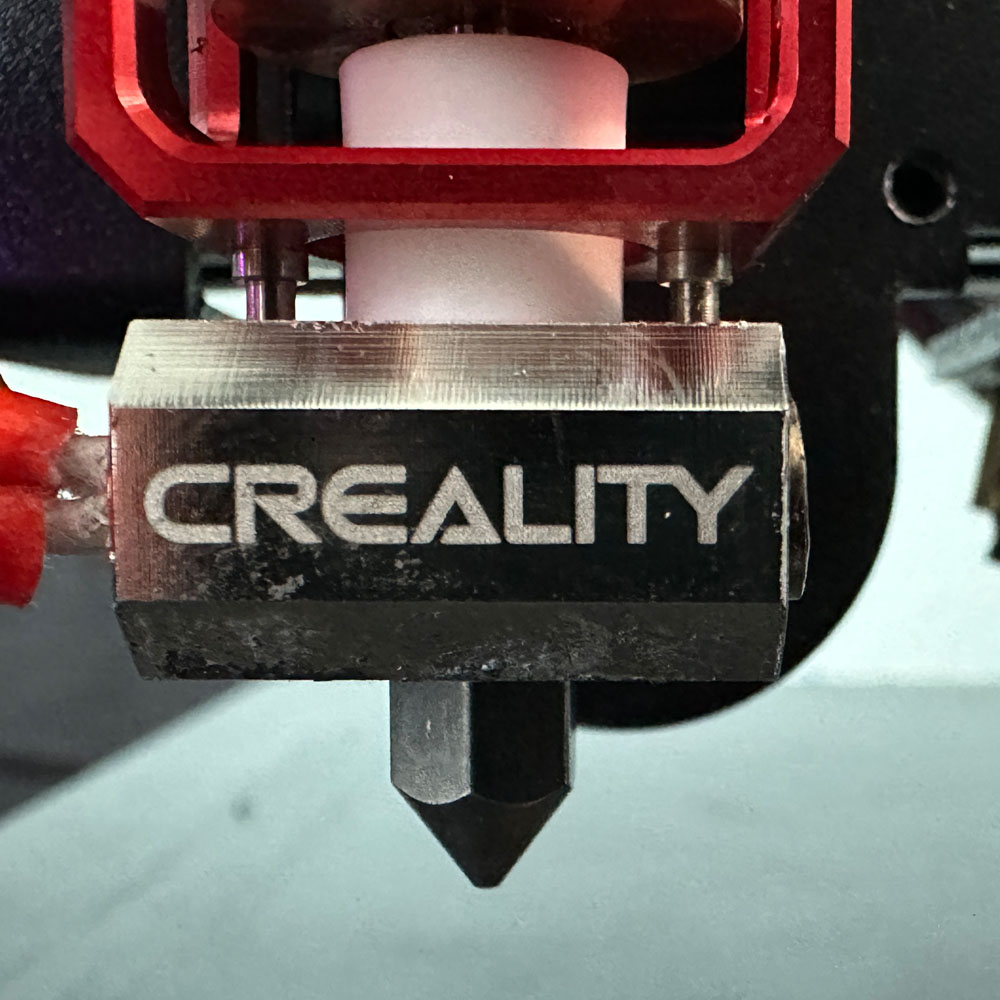
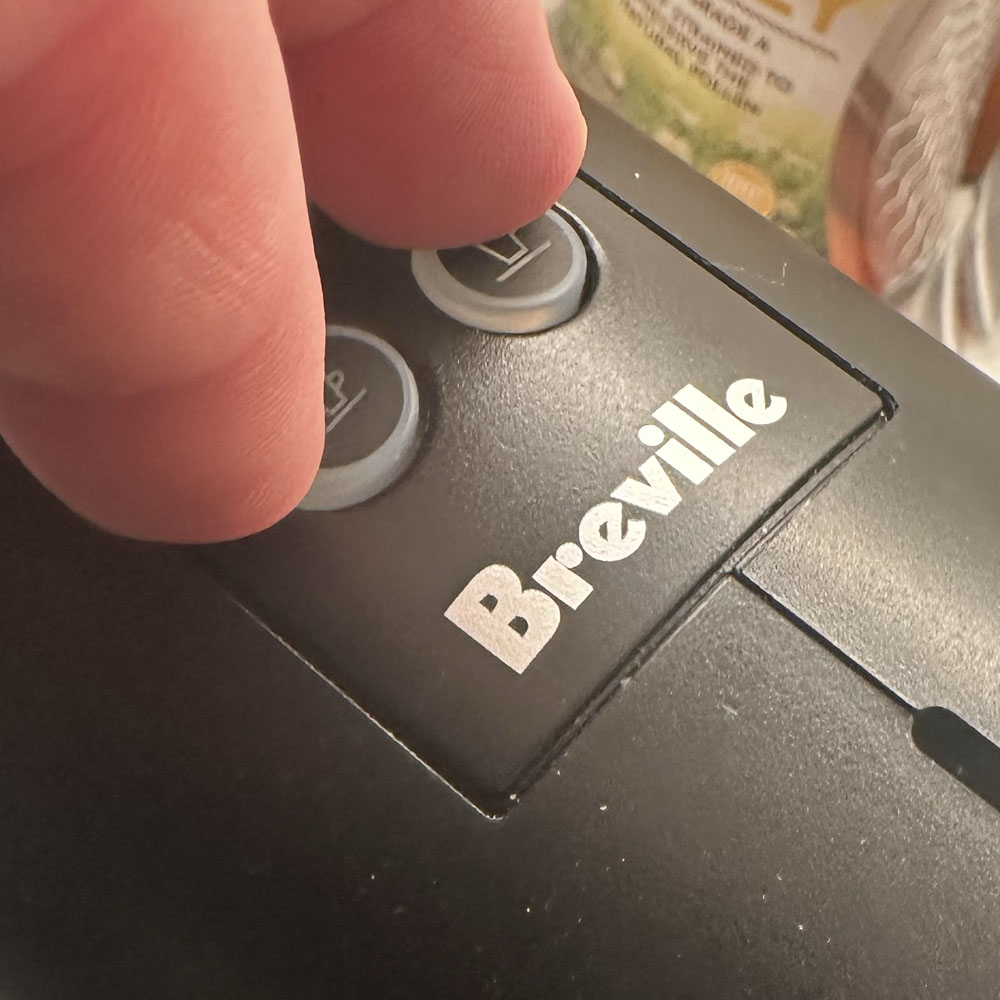
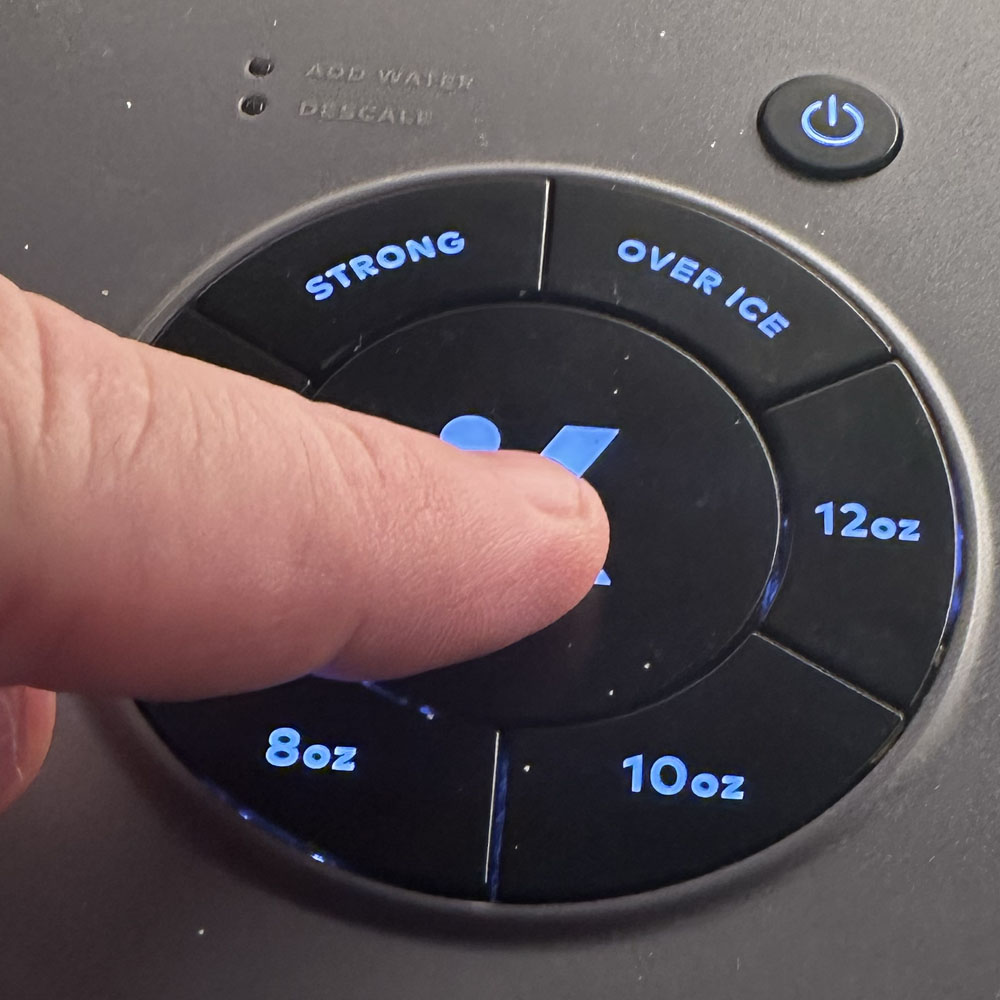
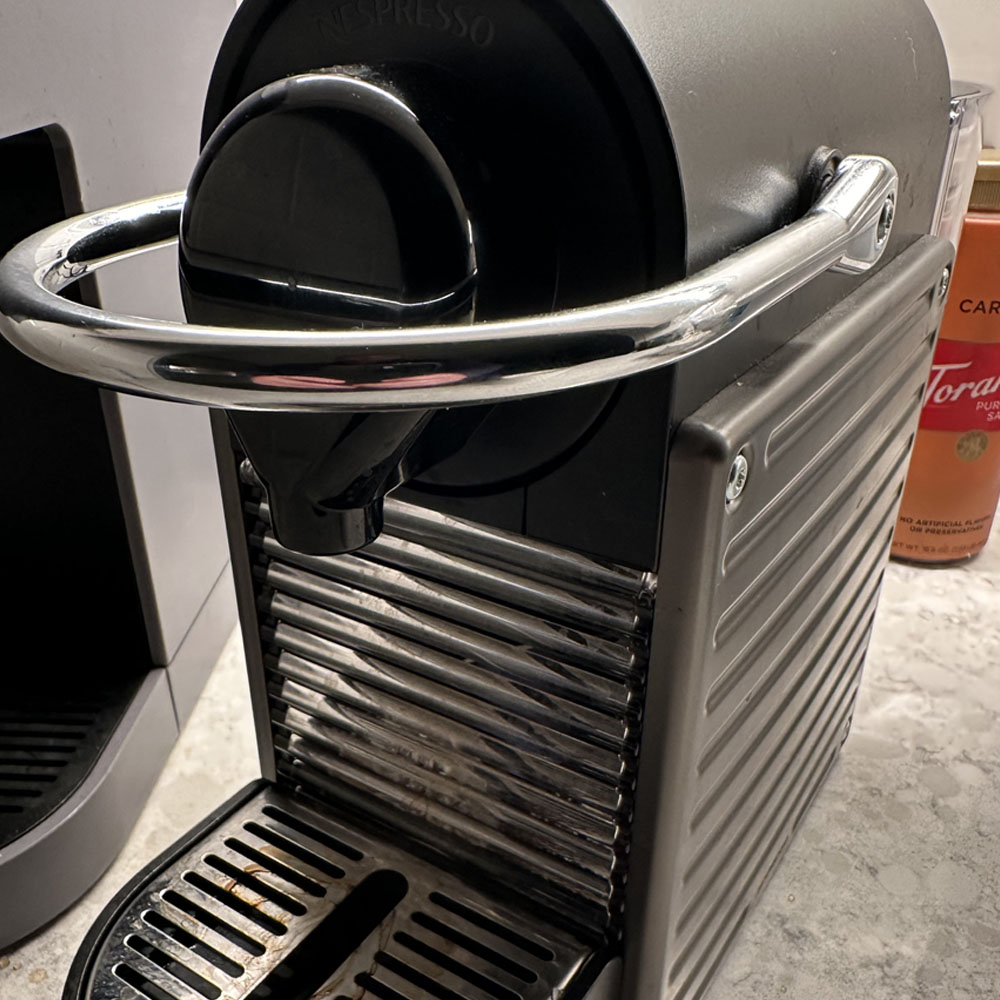
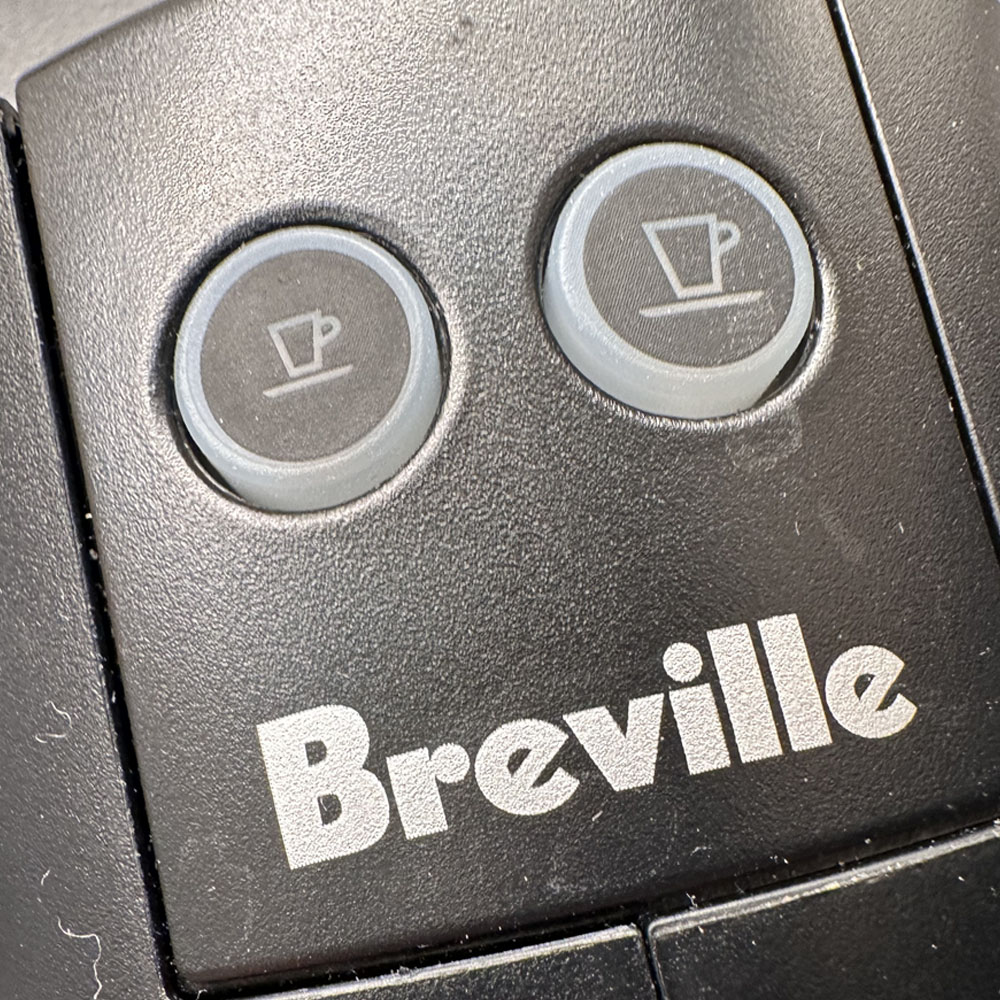
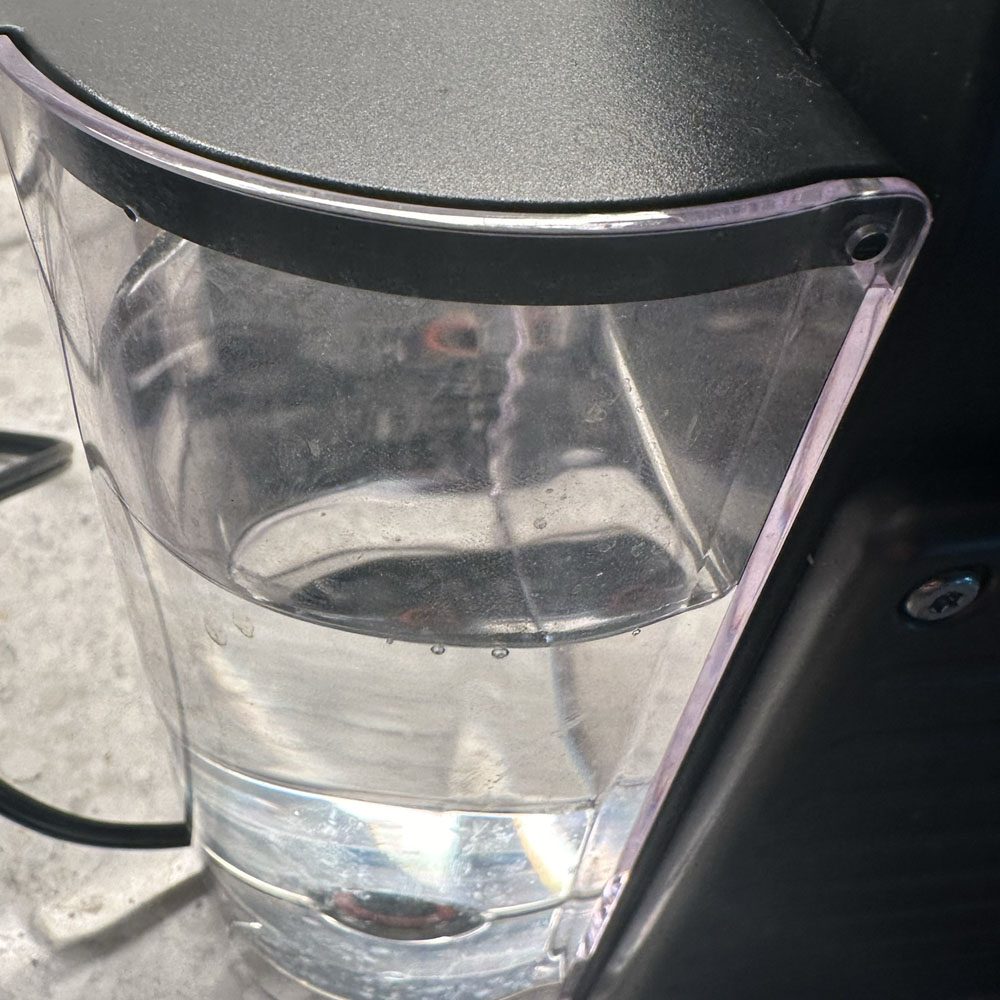
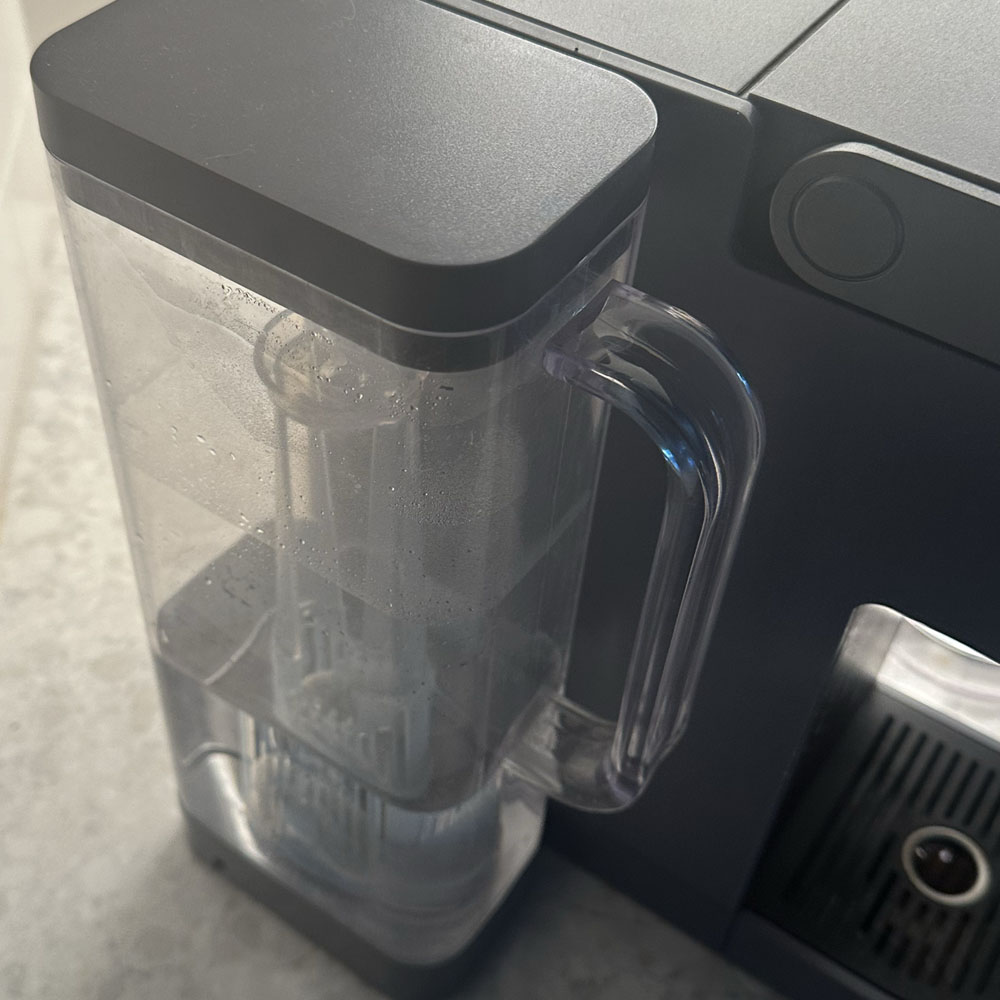
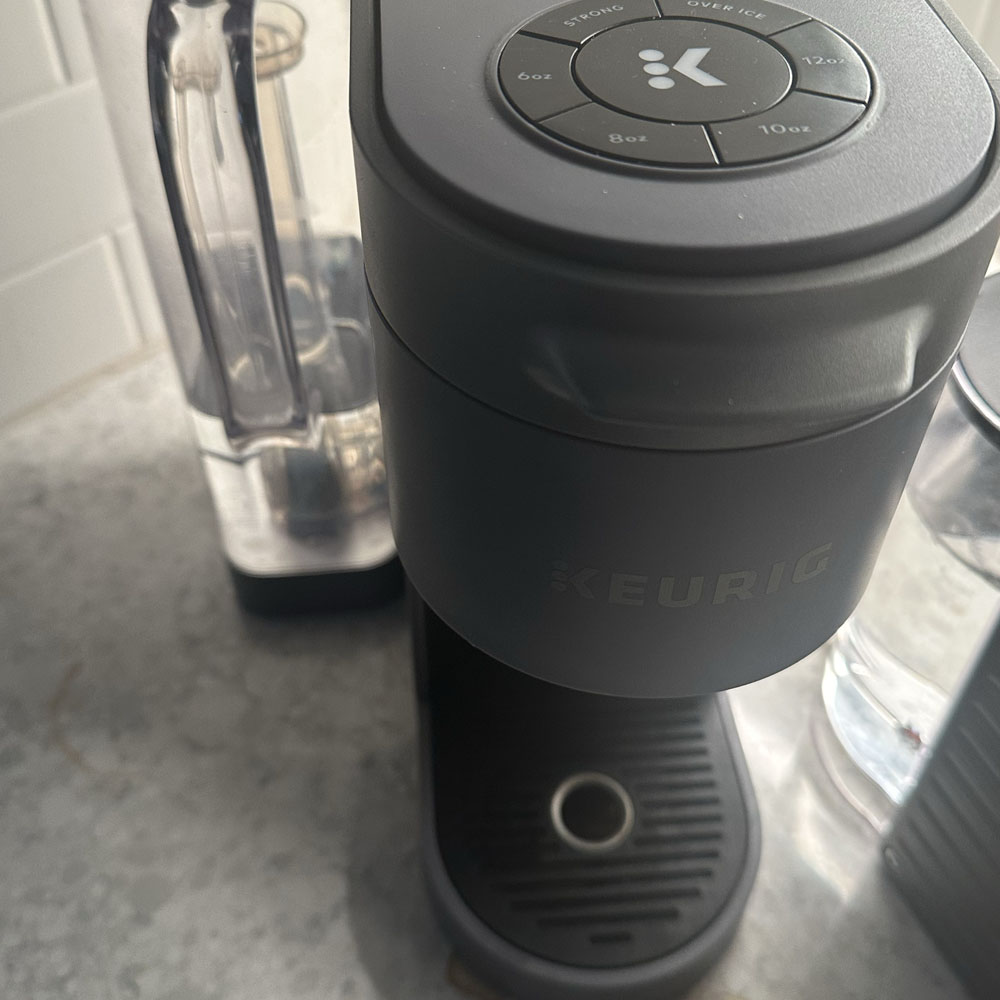
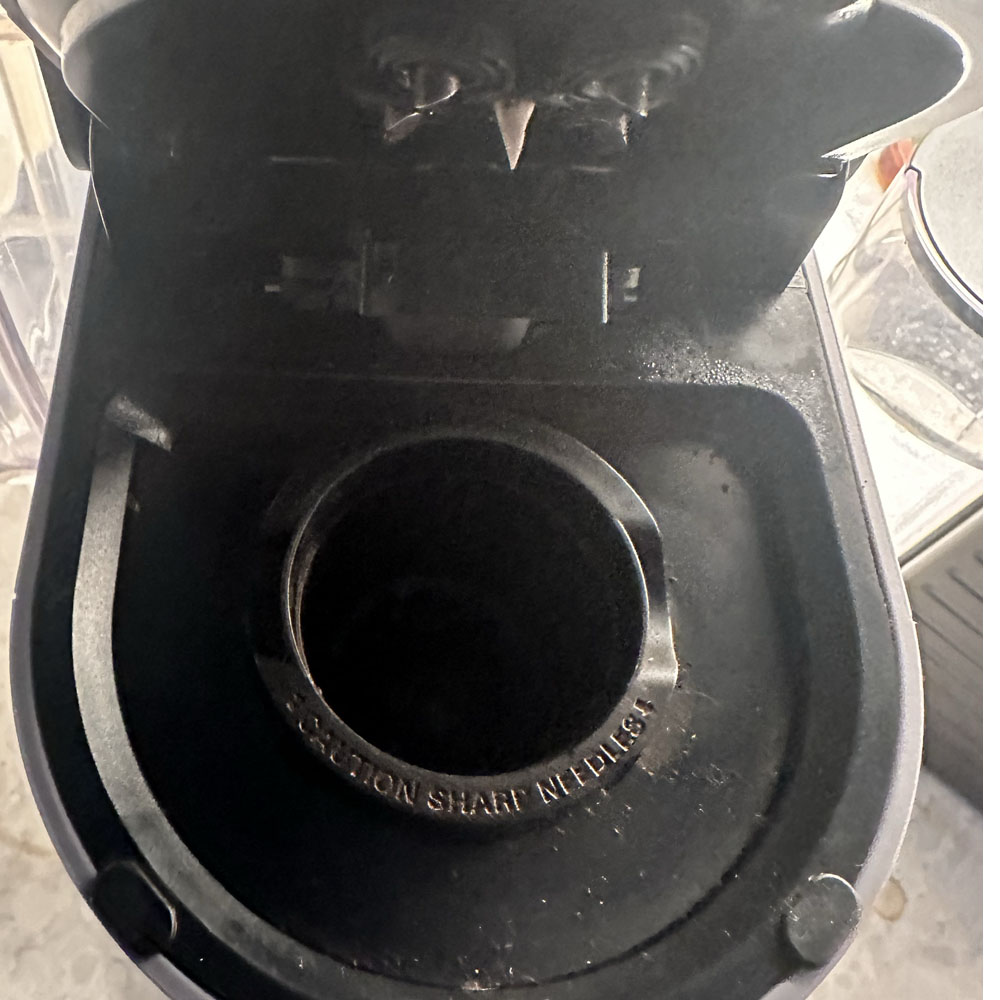
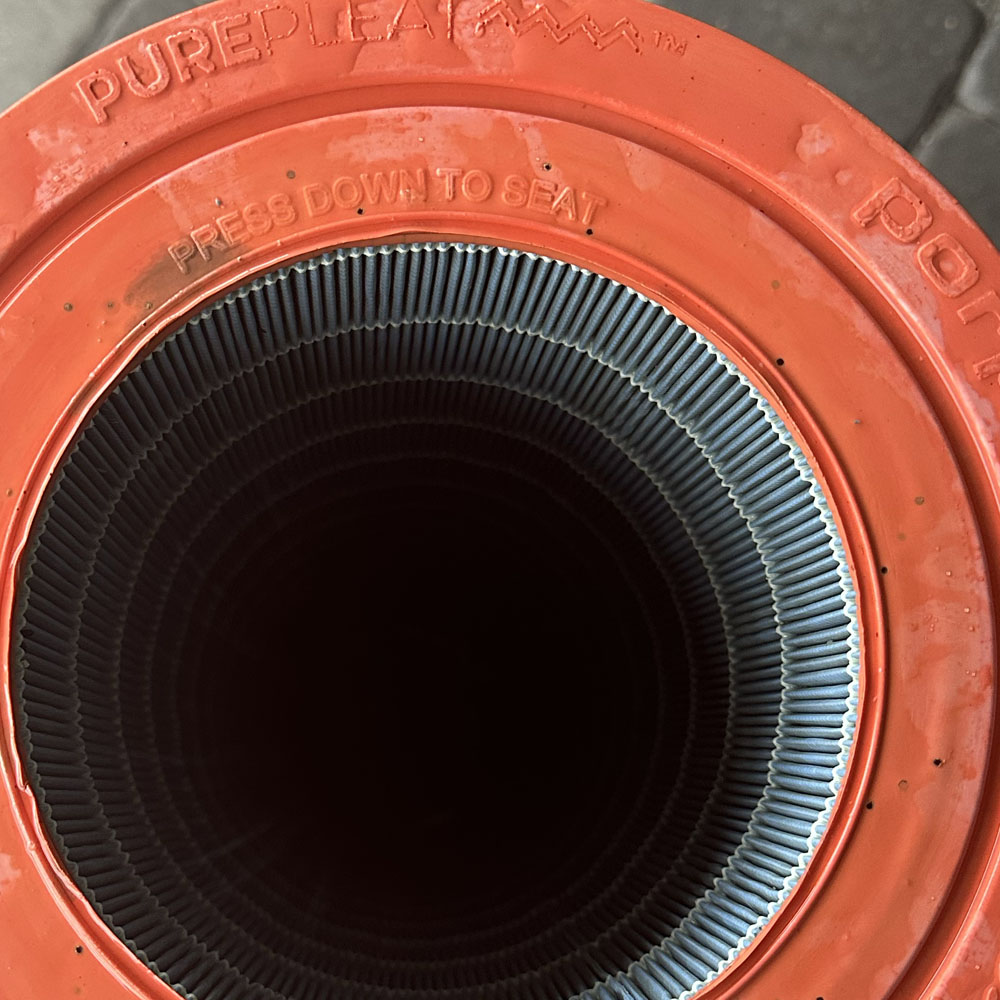
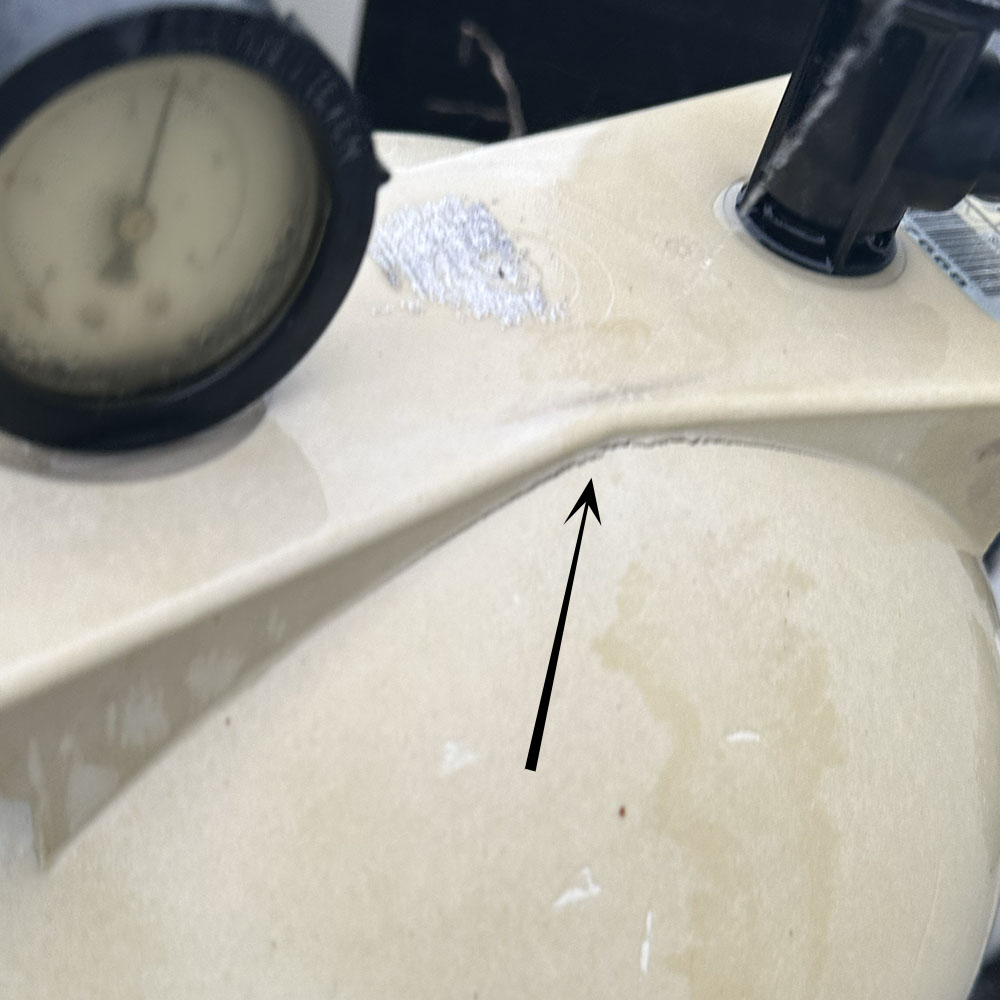
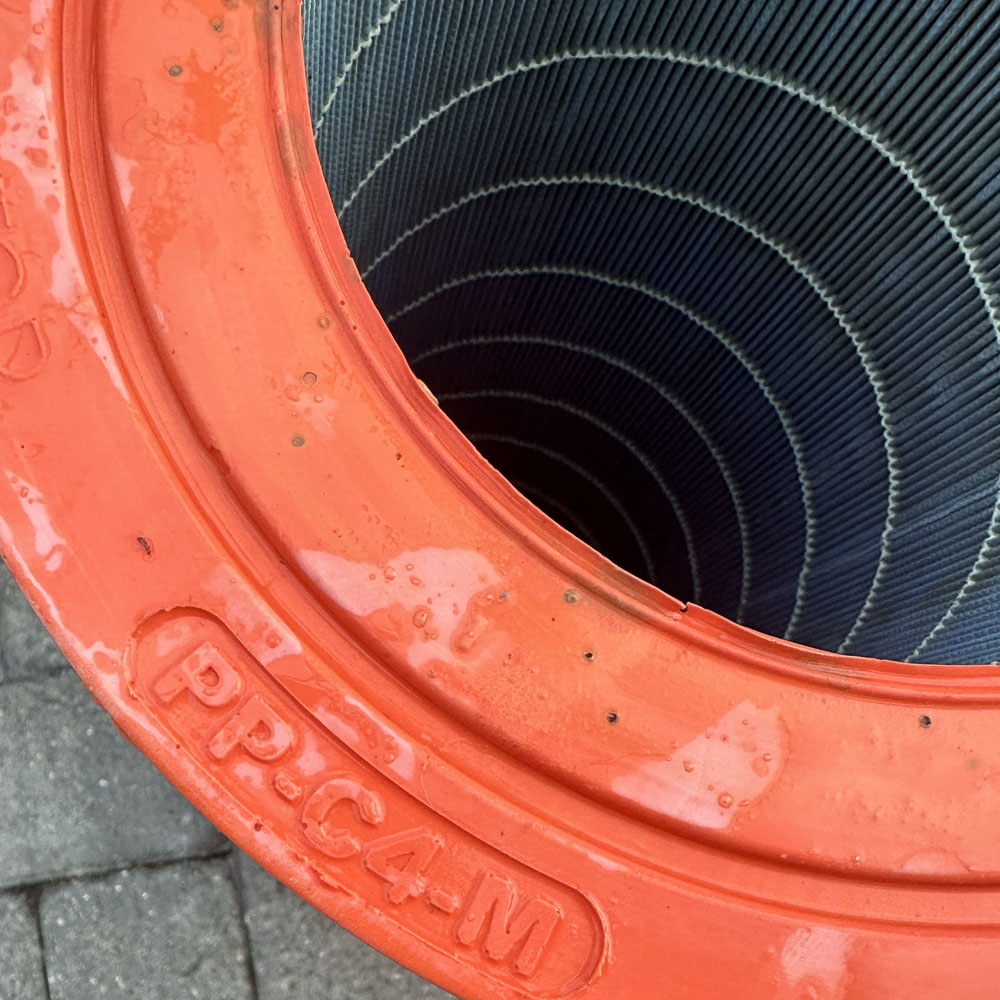
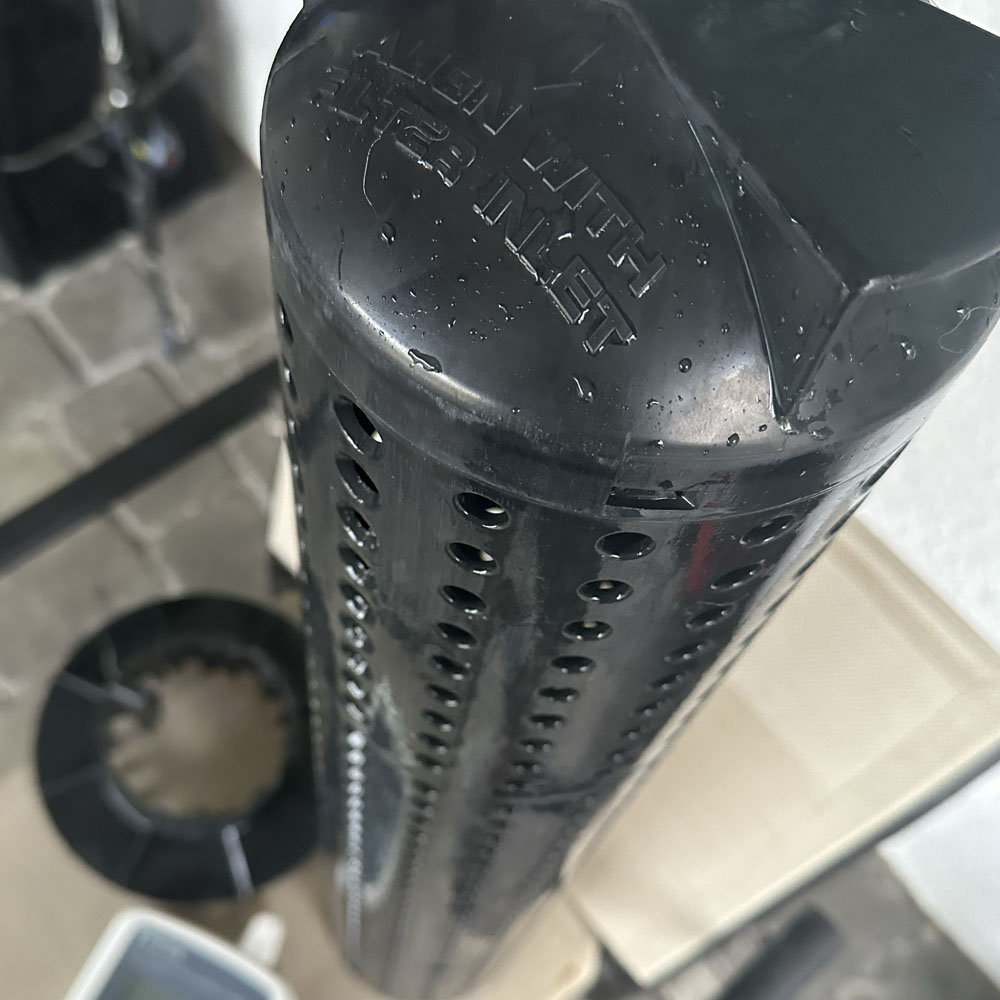
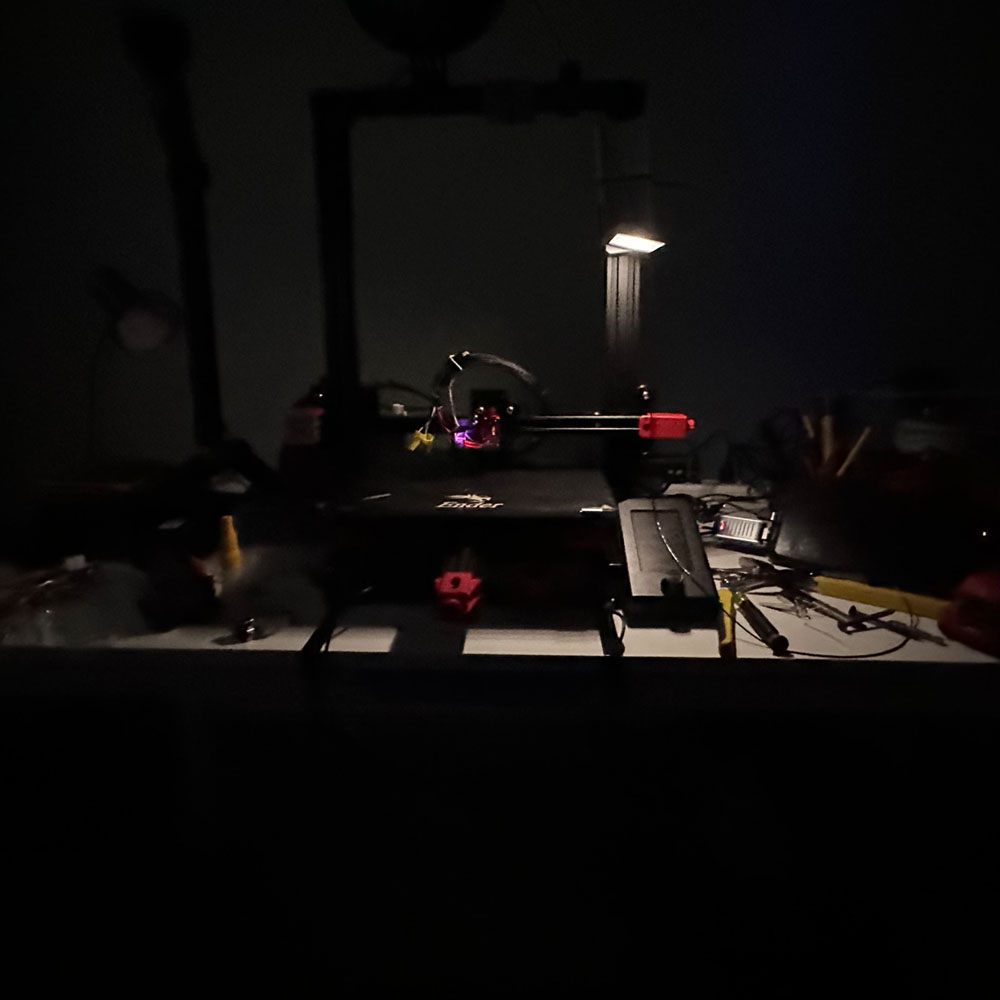
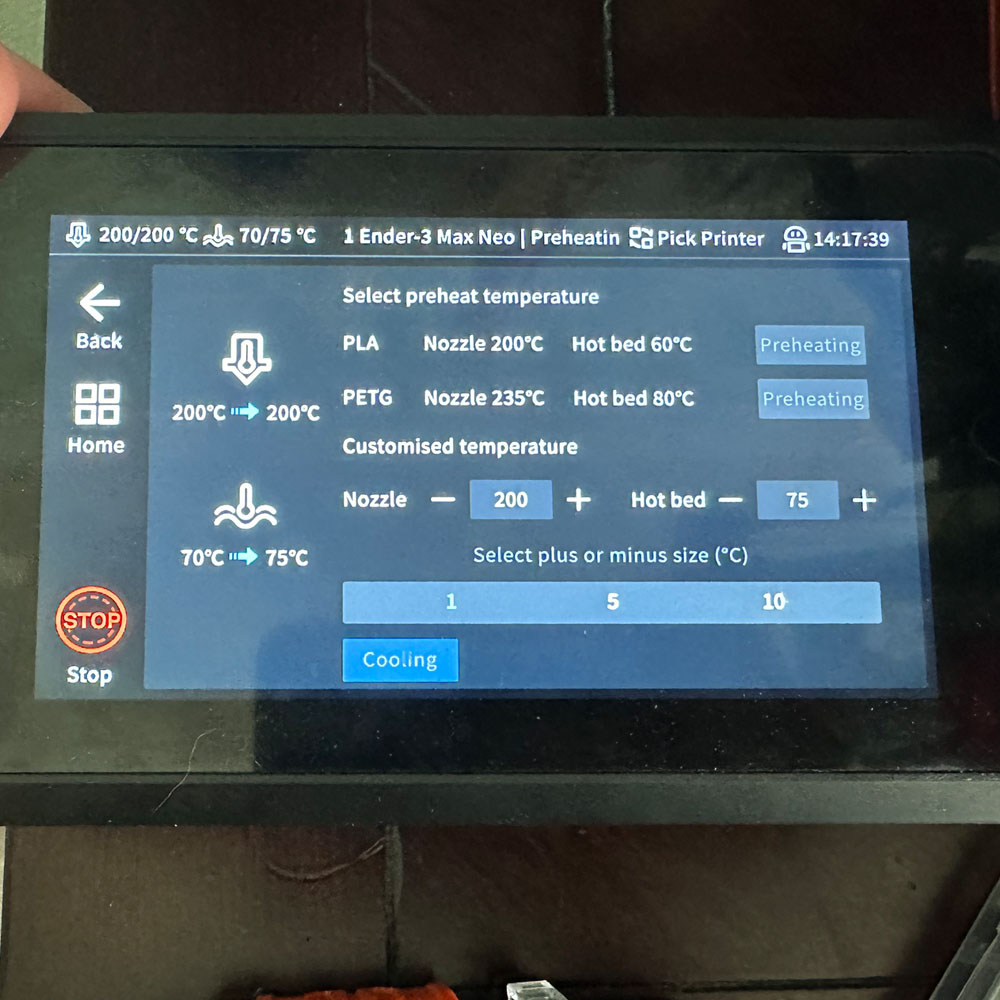
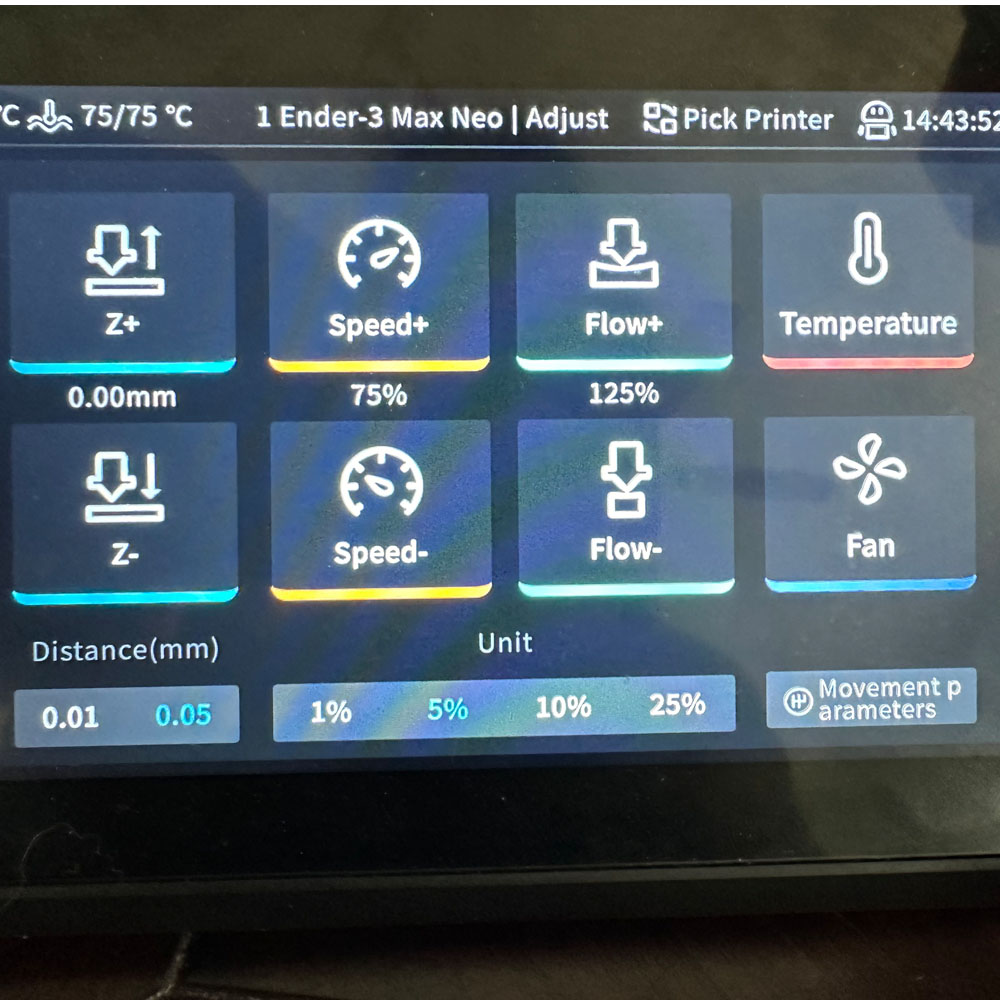
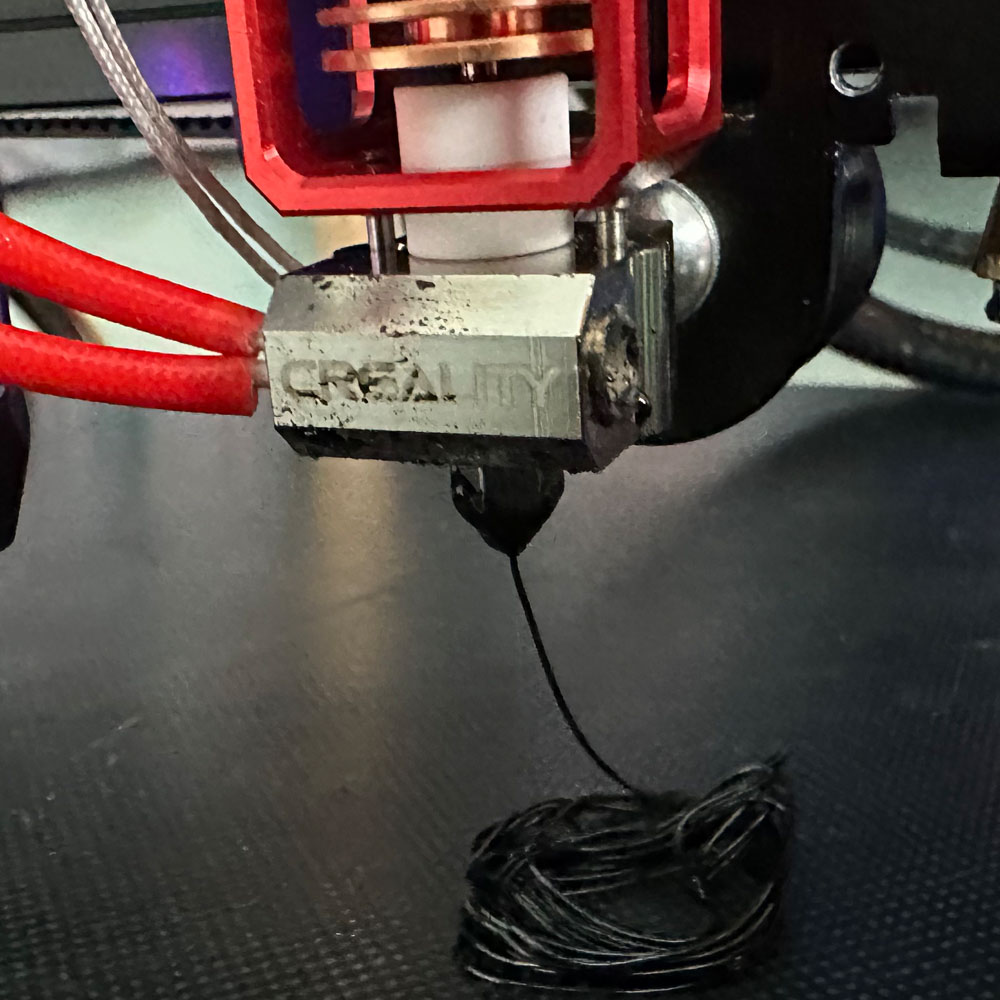
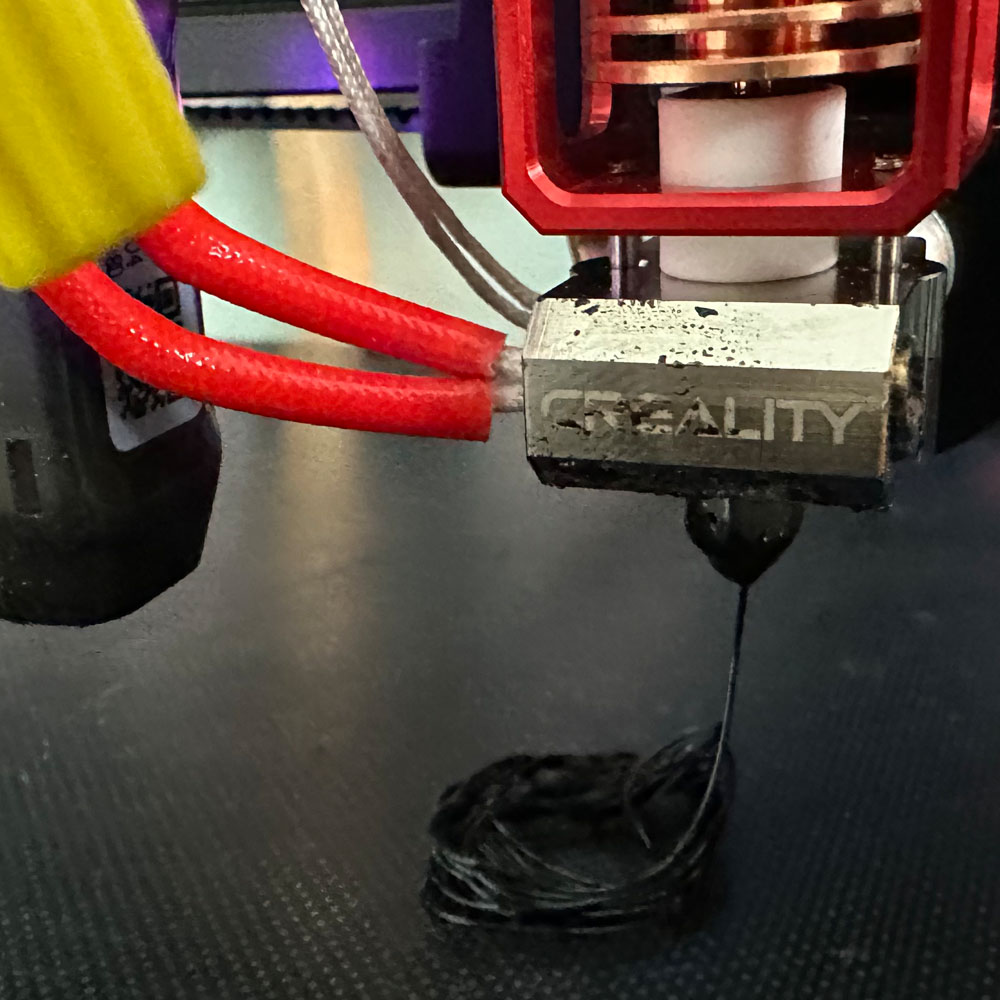
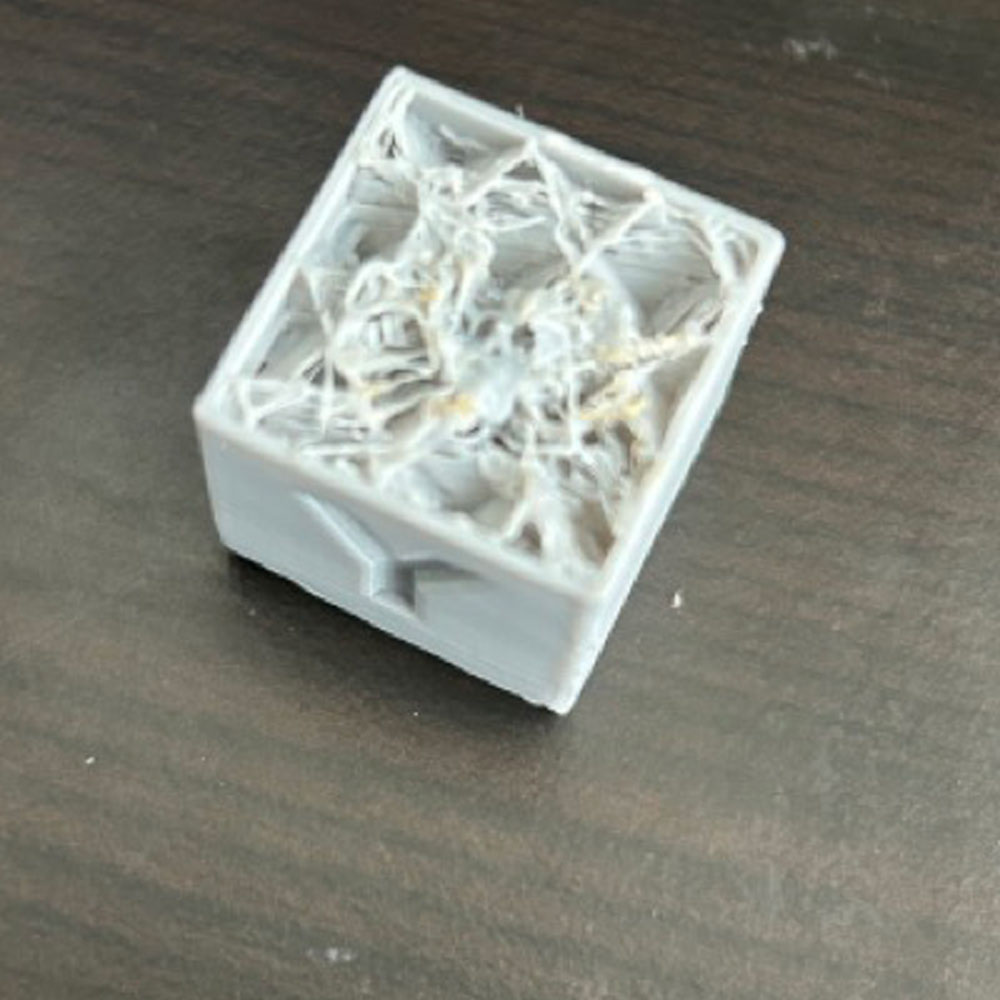
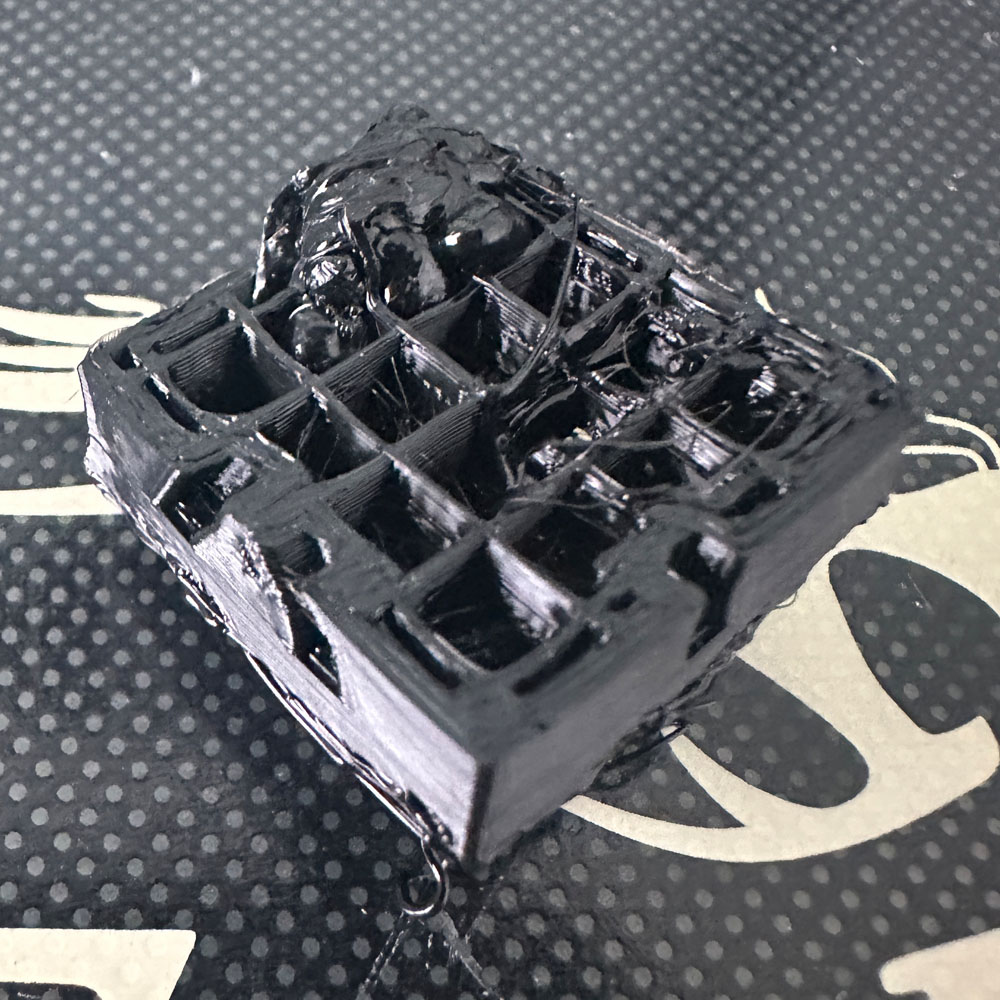
Get yourself some gear now in stock; we’ve got Sallee Technology gear featuring The Game, Zippo, Yeti, Columbia, Champion, Flex-fit and more. And now offering, new golf umbrellas, Richardson Performance Trucker hats and T’s. More “swag”/gear for your liking… we’ve just added a few new items that we’ve not carried before, i.e. Nike Zip Hoodie and Richardson Trucker Hats. Email me, we will get sizes and gear out as soon as we can. Also to note, we have Yeti’s and other sweatshirts in stock – Reebok Zip Hoodies, Zippo Lighters, and Yeti drink ware as noted. We’ll be kicking out some quarter zips, and maybe some full zip sans hood. I think those will look nice and compliment the Columbia zip (med. weight) jackets. Those of you in the cooler climates, might want to look into those, warm, durable Columbia full zip jackets. On the other hand, those in the warmer climates, T’s and sweatshirts might just be your thing. Posting in reverse order, from the current offerings, current stock – White vinegar or apple cider works, either one will do. The goal is to ‘descale’ the pipes and water reservoir on a modern coffee machine. Machine or camp pot, the vinegar will do the job. For hard to scrub coffee stains on pots, use a little baking soda for extra scrubbing power. Below, we have two machines, a. generic Keurig brand coffee machine and b. generic Breville brand espresso machine. Simple monthly cleanings will go along way. On the Keurig generic, depending on which machine you have, pour in some vinegar and water in the reservoir, select a cup size (place selected cup size below the spout) and start the machine. Water and vinegar will do the trick, run the machine until the water solution is gone. Replace the reservoir with just water on the subsequent passes. Typically, I’ll run three full cycles – 1. Water with vinegar, 2. water and 3. water. The goal is to make sure all the vinegar is out of the machine, including the small reservoir within the machine. Remember, run the machine as many times as needed to clear out the vinegar, a minor or small amount of apple cider wouldn’t hurt (assuming no allergies, parts per volume; we’re talking trace amounts. Disclaimer, I’m not a health professional, nor representing apple cider vinegar or vinegar in any manor which conveys a health benefit(s) etc, the vinegar is the cleaning agent, replacing store bought chemicals). Same process for the Breville generic espresso (Nespresso cup) machine, caveat, holding the two ‘size’ buttons on the top of the machine. This will turn the machine and run until the water reservoir is empty. I’ve found it easier to just unplug the machine, once the machine has run it’s course. Not saying that is the correct way, just the way I clean the machine. Ok, moving along, rinse and repeat, similar cycle named above – 1. water with vinegar, 2. water, 3. water. 2 or 3 cycles and your machine should be good to go. A fourth or fifth cycle might be used if the ‘descale’ indicator light is illuminated. Time to clean if the light has been triggered. Schedule is monthly, sometimes ever two months depending on usage. If we use either machine less, it gets the vinegar solution more often to maintain tubes, bungs, diaphragms and fluid mechanical pieces etc. Let’s leave it at that, some machines will require a k cup to remain in the machine in order for the machine to run, just use a ‘spent’ cup, no harm. I will typically make a cup to drink while I clean the machines, that way I’ve got a fresh cup if need be. Obviously, if you have one of the new machines, a k-cup with qr code will not be necessary. The level of frustration on the first series, required a k-cup with the stamp. Finally, if you have a camp coffee pot or peculator, similar cycles, with vinegar and backing soda. The key is to remove the coffee stains, burnt coffee, coffee grind oil/debris/residue. The backing soda helps as a scrubbing ‘booster’ or mass, while the vinegar’s acid breaks down those hard to clean coffee spots. Same could be used on pots and pans, but, I’ll that on another post; holiday time seems to be an appropriate time and place. On an ongoing basis it’s helpful to keep an eye on the filter housing gauge. The one we are looking at today is a Pentair filter, generic pressure gauge and blow off valve. Keep an eye out for spiking pressures, look for common ‘foe’ when ensuring proper water flow. Along with the filter gauge, proper filter cleaning is necessary, keeping the pool clean and free of debris is one thing; keeping the debris and ‘gunk’ out of the system is another. Let’s focus in on the main drain(s), pump filter, filter, filter housing and the return. Chemicals aside, simple maintenance is key, keeping the main clear, the pump filter and filter cleaned and free of debris (simple, right). Not to often, but when it does, focusing in on the filter housing gauge, pressure can build when the filter is not along said recommended ‘flow’ back to the pool via the return. The blow off valve there, assume a generic housing, will help eliminate pressure when needing to power down the pump unit to clean the pump filter and clean, remove or replace filter. Let’s jump ahead to the filter housing issue… unfortunately, this filter housing top gave way, sun, water, contaminates all play a role in the housing filter top degradation. Luckily, this didn’t turn into a lost top, or some other wild ‘cartoon-like’ scenario where the filter top ends up in a neighbors yard. After a brief conversation with the pool folks, indeed, this is common, common point of failure and can be temporarily patched via epoxy (but not recommended for this application). In a pinch maintain what you can, but most of the time, it’s time for a new top. We replace the gauges as well (those are not due for another day or two, as we choose to purchase replacements online). Back to the filter, solving problems along the way will help you better maintain the equipment you have. At least that has been our approach to working on electronics, tech for 20+ years. Once you’ve learned your lesson, typically speaking, you may not want to learn that lesson again. So, filters, buy the correct filter for your system, prices will vary as you all know. Check the filter core, the gauges, blow off valve, filter screen (if you have one, this system does), and filter. Something is gumming up our filter, looks like algaecide or some leftover water coloring solution. It is washable, but for the sake of time, it’s time to replace the filter. This is not brain surgery, but it has to be inspected, cleaned/removed and replaced as the filter and parts degrade over time. Anyhow, quick overview, we check all the pieces and parts of the pool pump, visual inspection, clean what can be cleaned, baskets, filter, filter core, filter bottom (housing bottom) and check the water. Then add chemicals to balance out the water where applicable, drop the pool robot and off we go. Remove debris, brush, vacuum and maintain pool clarity with Maytronics Dolphin. Once a day, the Dolphin Nautilus robot powers on, traverses the pool, cleans and maintains bouyaunce (upon completion). It comes at a price, chose wisely! We were given a recommendation by our pool guy, great, sound advice… the goal is to reduce water evaporation, maintain water/chemical balance, minimal chemical correction and keeping the system clean. Now, lawn equipment ‘spray’ including dirt, grass clipping, environmental debris, pet fur, screens with holes, etc. all play a roll in ‘kicking up debris’ into the air, which ultimately might make it’s way into your pool. For us, sand from the brick pad seems to reek havoc on our pools ‘clarity’. So, the sand and debris from lawn equipment, small bugs… The Nautilus is a great product, not terribly expensive (when looking or comparing all devices in the space). We choose this one specifically because of the lack of ‘tech’ onboard. We wanted something that could live in the water, clean, run on a cleaning cycle and have an easy storable cart for when swimmers are in and around the pool; people are splashing around, stirring up the water. The universal cart does wonders, again, can be pricey for some, but it makes bending down, lifting, storing etc. a breeze. Cost, cost/cleaning time… the machine is easy to clean, power down the machine, pull up the robot, two doors, pull out the filters, four clicks to unlock the filters and start the wash. Cleaning and maintaining the screens is much easier by volume comparing the cost/cleaning time of the entire pool to a quick run under the faucet to clean away the debris. Back to the robot, snap filters in the filters housing, replace filters on the machine, submerge the robot and power it on… No app for us, again, we wanted the manual version (corded, non-wifi enabled), keeps the cost down. It works for us as we do not keep the pool covered, once or twice a day, the robot makes it’s way around the pool and we are done. Low maintenance, low ‘frill’ pool cleaning robot. If I had my choice, the pool would be covered at night to maintain heat and reduce water evaporation. Another day! Not a paid advert, this came to me via a recommendation from our pool service, thank you! New King books on the ‘actively reading’ list, Different Seasons, 1922 and 11.22.63. 6 King Books to add to your reading list… Sure beats investment books, BDU’s and tech talks. For context, I just wrapped up Different Seasons by Stephen King. Different Seasons features 4 books – Hope Springs Eternal, Summer of Corruption, The Body and A Winter’s Tale. Keep in mind, these books are tied together by season or for some, a King twist; highlighting the change of the seasons, each book in the series will have you eagerly waiting more King horror and suspense. ‘The Body’ stood out among the others for me, more nostalgia I guess, reminicent of the days past. Days of old, a simplier life, sun up to sun down, doing kid stuff. Give Hope Spring Eternal a go as well… it’s been awhile since my last run in with Shawshank. For a couple of bucks or Amazon credits, you can pick up the Audible version, narrated by Frank Muller. Next on the list there, we’ll start with 1922 and then 11.22.63. There are a few others, as part of the Donald E. Westlake exploration, staying in that Hard Case Crime Book/pulp fiction… but, we will cover those another day. Enjoy. Elden Ring, Dark Souls… Dark Souls 3 play-through. Not much more you need to check out. If you have not checked out Elden Ring, at least checkout this play-through. Shout out to @FightinCowboy for the play-through, as I’m personally trying to get use to the multi-directional thumb-sticks, growing up in the 80’s we didn’t have to account for all the buttons, moves etc on the PS5. So, my compliments. For those of you who don’t know the Dark Souls games, this video will certainly provid what you’re looking for. Maybe like me, your looking into online gaming strategy or play-throughs for Elden Ring… and just learned about the Dark Souls games. Well, from what I’ve read, Dark Souls might be on the way out as Elden Ring gets refined and comes more into focus. Don’t get mad at the messenger, just trying to share more information on the Dark Souls games, specifically Dark Souls 3 before we shift to the Elden Ring ecosystem. Anyhow, as I mentioned above… Goldeneye was the last game I spent more than enough time trying to figure out what’s up and down, on these controllers. Counterstrike? Honestly not a fan, but that’s just my frustration with my own shortcomings(I guess in this case). Honestly, NHL ’24 has a hybrid controller setup, why can’t Dark Souls, Elden Ring, Rise of Ronin (hitting the market soon), Assassin’s Creed? I would personally like NOT to wait until the Elden Ring DLC or sequel shows up on the scene to learn the controller setup. This is where that shout out to @FightinCowboy comes in handy, cause I’m still struggling with the first enemy just above the start in Elden Ring. It’s awful, I know… But when the time presents itself, it’s NHL or bust. Now that we’ve added God of War: Ragnarok, Hogwart’s, and Elden Ring… It might be time to grind out/through the controller setup to further familiarize myself with the controls. Cause the gaming world is not going back to Frogger and Pong (maybe, more like God of War 1 or Streetfighter 3). Anyhow, check out the play-through, check out Dark Souls, Elden Ring and/or anything Hidetaka Miyazaki for that matter. Cheers Start with the possibilities the water ‘filling’ the toilet, continues to run… water not turning off (float), flap broken down, deteriorating or debris (such as toilet cleaner puck/tablet)? Quickly, I wanted to share two things you can do to stop the toilet from leaking/running. First, the flap, check the flap, is it the right size? Has it become discolored, degraded beyond ‘it’s use’? If so, make note of the size, remove and replace. Easy. Adjust the flap ‘sinker’, replace chain on the handle. Done. Next, the float. The float might be a little ‘fishy’, check to see if the float is in fact floating, which turns the water off, once the water fills the volume of the tank to said set float height. Nuance, you’ve got to check water height, water pressure etc. but the quick fix… turn off the water, drain the tank, vacuum out any/remaining water (dont forget a bucket of some sort as it’s helpful in tight spaces). Loosen plastic nut(most are plastic these days) connecting tank to water spout. Same for the float nut, it will be the other connection point under the tank, assuming a modern toilet. Once, hose has been removed and float unscrewed, remove float assembly, and hose connecting the ‘out flow’ pipe; which might be a secondary leak point. Lastly, replace what was removed to apply the new materials, and turn the water on. Quick fix for a running toilet. Not technical, but everyone’s got one, and from time-to-time our appliances and fixtures breakdown. Keep this handy fix for the next time you sense a leaky toilet. These days, it’s getting tougher by the min, all the 3, 4, 5, 6 and some 7 letter combination domains are all gone (purchased). Now, what do I do? A new year, a new you (business you). Keep it simple, short… Questions, It’s time to create a new domain or find a new domain, find an alternative? What’s a domain broker? Whatever the reason, the strategy might be more difficult than you think. Loads of questions, it’s time for a domain buying strategy. More and more our domain strategy is put to the test, rankings, rage clicks, drops and more… all play a role in our evolving domain buying strategy. Keep ICANN handy, ICANN – Internet Corporation for Assigned Names and Numbers; on second thought, get to know ICANN and namecheap. These days it might be just spelling out the business name, a service provided or an area of expertise… all not problem just a few years ago. Let’s start with domain brokers, we’ve used them, they are what they are ‘at a price’. Guess who wins in that transaction? Again, unless your trying to purchase an existing stable domain, coming out of pocket might be your best bet. Tip, when trying to evaluate your next move – find a registrar, start with a few words that you might feel represent your brand or influence… try different domain sub-categories, partial and combined alpha-numeric characters etc., country codes and more. We tend to stay away from the .org’s, .co’s, and others like .net. More of a preference things, might even be more of a slight age thing, nostalgic may harkening the early dot.com days? Above all else, try and find something you can own (for a year). All joking aside, all domains are an annual expense, like it or not. It’s not the 20(teens) or early 2000’s; or earlier for that matter. It’s twitter handles and IG accounts, TikTok, ChatGPT and AI algo’s. Find something that sticks, a D.B.A. might be in order for some(not a lawyer, so consult where applicable) while others, might be content with a domain that is just catchy when available. Domains are pricey, finding the right one is not easy for that matter; just find something you can work with. Try it out, have a go! The ICANN reference above, ICANN can do a lot of the leg work while doing your own domain research, domain brokers like Namecheap (more of a domain registrar), but there are thousands who do the same thing, domain sales… we try and find domain at the best price, what makes the most advantageous sense as well. Error on the side of caution, some owner don’t want to be found, i.e. private domain listings… be patient, make the right decision for your business or brand. Elden Ring… PS5 was a late add in 2023, since, we’ve added a few games… F1, NHL ’24, Grinch and Hogwarts… And, since @theRadBrad has the play-through, thought we should take a look at what kind of trouble we might get into before we gave it the ‘ole college’ try. For those of you who don’t know the Dark Souls games, Elden Ring; Elden Ring is very difficult, for an old school game fan (not a gamer by any stretch). Streetfighter, Mechwarrior, Baseball (Nintendo) and Donkey Kong were of my era. I’d like to get into ‘Rust’ but not until I can spend more time on Elden Ring. So, for a game like Elden Ring, I’m very much someone on the periphery looking in. And it doesn’t get any tougher than Elden Ring, or the Dark Souls games. For context, it’s been quite awhile since owning a stand alone gaming console, most online. PS2? Dare I say? Was the last game console I owned outright. Since, we’ve used dedicated computers, emulators and such to stay informed; certainly not in the gaming world. So, as you might come to understand, it’s a tough area to restart. I’ll save the controller issues for a later post, the setup is just ‘a lot’. Just for the sake of the story, I’m starting to think it might be easier to fly a drone, FPV with googles, with the same setup; as I mentioned for me, it’s the character focus or lock-on mechanics I need to master. Anyhow, @theRadBrad’s got this game locked in, check out some of his other videos… he’s been online for along time, 13 some odd years, for other games that you might be interested in, early content and full play-through’s Rust might be one of the easiest games to watch ‘passively’ when you’ve got content creators like @willjum online and cranking out content. For sake of memorizing all these YouTube channels or creators, ‘willy j’ is how I remember @willjum’s primary YouTube channel. There are others (lots), however, I’d like to highlight @willjum’s in-game experience/play-through, gaming skills, easy listening narration style and pure play-through content; makes for easy watching. Why willy j? For some it might be classical music, jazz, soul… r&b, audiobooks or just a quiet room; pure silence. Pure silence works for some folks, certainly works for me from time to time! These days, I can’t do the ‘silent treatment’… these days, when working I look to the ‘gamer-verse’ or ‘law-tube’ to help fill in noise, helps keep the daily distractions to a minimum. A must in a work from home situation, sometimes you just need to power through your work, and need a an alternative solution… Rust? Try Rust yet? @Willjum might just be the winning ticket. A little background, @willjum is a pro-gamer, youtube content creator… 1M+ subs, 280+ videos, my Rust go to. He and his group take on personal challenges, solos and crew PVP; something new everyday. It helps to be good at the game, which I’m not, so yeah, in a pinch (or not, just looking for things that might calm you down and ‘get to work’, @willjum. It’s that time of year, 4th Quarter, we celebrate the end of the year, holiday cheer with friends and family. It’s a special time of year to share, share with one another… A time to reflect and start a new. 4th quarter, year end; new creations, new fixes and cool tech coming in the new year. As we look back on the year, some learning lessons… we look for solid ground, new paths and progression forward. Remembering our goals from last year, we will continue to grow, improve our relationships with others, foster new relations, and continue with our projects inflight; ‘what’s on the bench’. New goals, new challenges, New Year; I want to thank you, my customers and those who help support the business. Here’s to a great holiday season, wishing you a happy, healthy, Merry Christmas and a wonderful New Year. Looking to start the new year of right? Let’s start on the right ‘foot’ this year! Give us a call, we are currently working our first and second quarter backlogs, looking forward to the new year. Happy to help, reach out via email, phone or Connect via online form. Get yourself some gear; Sallee Technology gear featuring The Game, Zippo, Yeti, Columbia, Champion, Flex-fit and more. Our new Golf Umbrellas in and the Richardson Performance Trucker hats are headed to production soon. Goal is to have the new hats in before the holiday, targeting week before the holiday! I’m very thankful for the new relationship we’ve developed with a local print shop. They’ve been great to us, extremely helpful and willing to work with high level concepts. Great to have them on board! A full list will be posted shortly, gear type, sizes, colors etc. However, a sneak peak may serve its weight in gold here… All navy Richardson Performance truckers… great products, great marketing gear. Give us a shout if you would like to purchase something… We are bringing back the polos 1st/2nd quarter next year. Let us know what you think about the merch, or if your looking for something special, a one off print, or a special order. Small orders, large orders, don’t care – Happy to accommodate where applicable… just let us know what your thinking. Let’s chat, either connect with us via phone or email, happy to work with you and find what it is your looking for. Needs must be had, time for a new Weller Soldering iron… with that in mind, the Weller 70w Solder Kit did just the trick. The Weller 70w Solider Kit. What’s in the Kit? Kit includes the soldering iron, power unit, cord, tips, sponge and iron holder. It is a handy soldering kit/unit to have in and around the office. More recently, the need for more consistent power, temps and more specifically – a better all-around unit when comparing the unit to the original soldering iron/wood burning kit around the shop. Although the Weller 30w Kit purchased many years ago has been helpful, its woodburning capabilities have not been need. Again, for a hobby kit, woodburning and soldering, useful tool to have around… Most recently, ‘more power’ and ‘precision temps’ have been needed for a few items around the shop, for those of you who follow the 3d printer build, the Weller 70w was put to the test – rewiring and replacing thermistor wires, fan wires and hot end… I did again, test the Weller 70w unit on an old hack, the 9v cell battery hack and some car audio system wire for good measure. We will be soldering new wires into the guitar rebuild as well, new wires, connectors and more. Stay tuned for the guitar rebuild. First impressions on the Weller 70w; immediate heat, responsive, handy housing and a few spare tips for smaller jobs. You’ve got to like the responsiveness… the tips are easy to clean, a handy sponge, a simple digitized interface for precise soldering temps and a clever housing coil to protect the heating element. An easy to use configuration to get what you need soldered; soldered. Next, when comparing the kits I’ve used, Weller has been the brand of choice, again… I’ve not needed the soldering iron as much as you might think, but, when I do… Weller is the brand. The original Weller 30W Wood Burning or Hobby Soldering Kit has been all I’ve needed. From vintage train parts, drone boards/fans, home audio/home audio speakers, car audio wires e.g. battery wire, guitar wires, head unit power (blue wire), remote (yellow wire), hot and ground wires etc. Not sure that Weller 30w hobby kit was up for the job. Again, the 30w hobby unit got the job done, in a pinch. Finally, a moment to enjoy, a moment to enjoy success, what we’ve all been waiting for… a full print – Ender 3 Max Neo, Sonic Pad, Creality TPU. Full print, sans a dreaded motherboard upgrade. No motherboard upgrade needed at this time! Just need some more time to print and tweak; print and tweak. Success! A fresh print, an end-to-end cube test print… just look at the ironing, ‘it’s alive, it’s alive’. Perhaps some perspective, a small win, yes but it’s a win. The config/console looks correct, no supruses, I’m looking into a few more tweaks in the end. Let’s point out a few things, I wanted to get an update up on the site specifcally celebrating the print test win. After a very early start this morning (the pictures are included below) we’ve got the Ender 3 Max Neo kicking out TPU test prints with minimum blips/blurps, zits, stringing etc. All good things. Key takeaway, delta is extrusion settings… this controls the direct drive pressure on the filament, can be found -> advanced settings -> extrusion settings. Reminder, we are using the Creality Sonic Pad interface, those of you using the onboard interface, you’ll need to look at something called – steps or look to control the stepper. Which in laymans terms is the ‘pressure in steps’ to again push filament throught he extruder. Two, while we highlight the exutrusion win, matching other minor tweaks such as heat at the tip, bed for adhesion, speed etc. in the effort to match the Sprite Extrusion settings. A few print temps do work, and we wil work through those 220 – 240 C, depending on filament type – Duramic or Creality TPU. A few other hightlights, we did increase the flow an additional 25%, bringing the flow rate to 125%, and knocked down the speed 25%, to ~75%. So -> 220C – 240C Nozzle – 75C Bed – 75% Speed – 125% Flow Rate – Sprite Extrusion Settings Enabled. At the moment, a few more tweaks are being applied to movement settings, the Z height seems to need a few n/mm’s here and there, no idea why. Might be start layers vs those layers that follow the starting layers. 3d printers allow controls to be manipulated over three phases of print – start, middle and end. One other item to note, I failed to mention this in my previous post, Part 4… bed adhesion remains an issue, could be the dark horse of issues in the mix, bed adhesion quick fix… For now, alcohol and paper towels to keep that adhesion plate clear and clean! Really get after it, scrub away any and all oil residue, filament, blips, dust, stringing, dog hair (Zeus), all the left-behind filament and whatever else might collect on the build plate in an average office environment. I don’t recall that it made a difference to keep the plate clean, cleaning the bed per say, but we’ve tried a few things – a clean bed, a taped bed (Blue Painters Tape), sprayed adhesive bed, all in the name of finding an alternative solution for prints shifting this way and that on the bed surface plate. We will post a few of build plate tests as well, working toward spray adhesives next. Might that be the answer? A few tweaks of the Hex (Allen) keys, reset the rail wheels and we’ve got gold! In hindsight, not sure the build plate needed a scrub down in between PLA prints. I’ll have you notice in the picture, if you can, the Creality Sonic Pad is up and running as intended. Honestly, not sure I would have stuck with the generic screen that comes with the machine. Wifi, Cloud Printing/Slicing, direct printing and settings all main reasons to stick with the Sonic Pad. One item to note, on the flip-side, we have yet to get the Wifi Box 2.0 to work in the upgraded sandbox. More over, for now atleast, we will skip the Wifi Box 2.0 and keep that item aside until we can gain some clarity on the optimal print settings and adhesion consistency. Positivity, all within target, as we move to spin up a few larger format prints, including a few Tinkercad projects for a true test. Also of note, we moved the printer off the ‘bench’, the work ‘bench’/tabletop doesn’t provide the needed stability, ideally the shaking, vibration and the back-and-forth motions of the printer assembly. All in all, it’s a win today, for the week/weeks we’ve had the printer on the bench. Upswing, new parts, new break-fix settings, slicing settings and a new place-setting for the 3d printer to live and work. For those of you who are interested in the what’s to come (next prints), I’ve got a backlog of TPU Max Neo parts – specifically a TPU threader, some technology ‘covers’, and one-off locking mechanism for a cooler/fish well, more on that later. Fine tuning, break-fix, and reprints. Yes, break-fix steps continue, fine tuning/recalibration, config adjustments, steppers, test prints and more. Largely, considered a failure so far… Failures, not to worry! We will get this fixed, upgrades and all. A couple cycles now, including – what I will call the ‘teardown-and-rebuild’ cycle – removal of most external upgrades such as the Creality Sonic Pad, Wifi Box 2.0, direct drive extruder, tubes and hot end… the key is to isolate issues with teardown and rebuild cycle, building up with neutral or known issues. Please note, the Sonic Pad interface, under the ‘advanced settings’, extrusion settings… the default extrusion type must be changed/modified to include the ‘sprite extruder’, this accounts for the upgrades and the most significant step forward. Please note, there are four default settings – default, sprite, MK8 and manual or custom… although we quickly tested each extrusion type, here, we focused in on the sprite extruder settings. Also of note, we’ve not had a clean TPU print. The TPU prints have been bad to say the least, as you will see in the test photos, bad to worse in some cases. In addition to miss prints, under-printing has been a major factor (due to extrusion steps as mentioned above, check the Sonic Pad Settings -> Advanced Settings -> Custom Extrusion Settings – Spite Extrusion vs Onboard Interface ramping up eSteps ~ 500mm). Before we move on, we’ve had globules (just large drops of melted TPU, simiular in shape/size as the end of a q-tip) miss-prints, gummed up nozzles and so on. Beyond this point, I’ve looked at a board swap, which will also be something to consider until the print issues can be ironed out. Yes, that would be mean an effort in futility, meaning a full swap which would be considered moot.. for those that might not understand, this would leave only the base hardware/structure unchanged, changing out all components; which is not the goal. If a required motherboard change is confirmed- Creality motherboard v 4.2.7 specifically, a new printer specifically used for TPU might be the answer. Not ideal, but necessary. Below, you will find new images have been posted, thought it would help to highlight the removal of the fans, changing out heating element and sensor and Sonic Pad configs. Furthermore, I feel we are close to a successful print. Before I forget, the PLA prints run with little error, printing test cubes with minor blips or over printing… Beware, slicer/printer controllers do vary, Utlimaker Cura, Creality Slicers etc have varing results, some no result at all as the print is shown outside the consoles ‘known print’ area. More on that later, we can share a few posts on slicer sucesses (failures in our case). Next, let’s cover some of the activities taking place during the rebuild: So, what’s next you ask? Nozzles, needles, upgraded plate screws, leveling, Capricorn tube, Spider 2.0/3.0 Pro hot end… motherboard? We will have a full swap on our hands shortly! Ugh. Listen, it might sound like a lot of work, it is… but that is part of 3d printing, don’t let that bog you down. The challenge, the challenge or build problem ‘is what I gravitate to’ the most, a good problem, finding solutions, and working around said challenges… testing, and failing. In this case, may be to many times. I’ll sure video at some point, but for now, pictures and commentary will have to do the job for now. Moving on, I mentioned a few items on the ‘pending’ list, nozzles, I think something is going awry with the heating element, thermistor and nozzle – space issue, wrong temperature etc. Globules of filament collect on the heating element, nozzle and many times fail to find the build surface. E-Stepper will help with this, I’ve read 424.9 is the ideal. However for our build, it has yet to be determined as the hot-end and thermistor might be the culprit. We need to eliminate those as build factors first, more to come on that front. Next, we need to have a few needles around to keep the direct-drive and assembly filament path clear, the collection of burnt filament doesn’t help the situation. So that to will be addressed this week. Motherboard upgrades, we’ll skip the motherboard update for now, as that would as I mentioned be a full swap with a new sprite/extruder assembly to bypass the extruder and sprtie upgrade purchased at the start of this build. If the printer would require a motherboard update – 4.2.7 specifically, again, not the happy path per say. We will stick to items above, new screws, metal tension knobs, cushions, tubing and hot end are next. Ideally, the win will come from a level and consistent bed/build plate temperature, a clean adhesion plate, consistent hot end temperatures to reduce ‘leaking’ and hot end ‘heat creep’ and a quality filament… hardware problems might recede, or at least that is the intention. Now, assuming the hardware and upgrade components work, software will be the final challenge… TPU seems to be more about testing and failing tests, more so than first expected. I was able to print a clean print with a filament swap using the old Bowden drive and PLA settings. This was a full step back, to make sure the base product still prints as expected. Honestly, the speed-to-market issue comes into play here (this assumes you are looking to print commerically or in some professional fashion), as we are down both the ability to print PLA, cost per print and TPU. We will get the problem solved here shortly, more to come. Part of this process is just keeping a positive outlook, even when balls of filament build up on the hot end and nozzle for the ~40th test. I know we are close per say, but, as we eliminate or mitigate more pieces and parts, the solution is there. Honestly, I might just need a few more mins to find the right combination of parts and software. Frankly speaking, TPU has been a bit of a bear. TPU is not all that hard on newer machines, but we need to find a solution for the Ender platform… on the cheaper end, wallet friendly for some (or may be not) when comparing to other very expensive printers which provide an out-of-the-box solution for many types of fulfillment needs. I will say this, for those looking for an easy, out of the box 3d printer (crickets, crickets), time/budget will be major factors, if not the defining factor; make or break. More in part 5…Reminder: New Merch
Holiday Gear Update – Richardson Performance Trucker, T’s, Umbrellas and more

Gear – Hats, Nike Zip, T’s, and More
a. Current offering below in this post – Hats, Sweatshirts, T’s and Umbrella’s
b. Original Series Yeti, Jackets, Hats
c. Second Series Yeti’s, Hats and Zippo


Quick Tip: Descale
Descale Modern Coffee Machines
Descale with Apple Cider Vinegar


Quick Fix: Pool
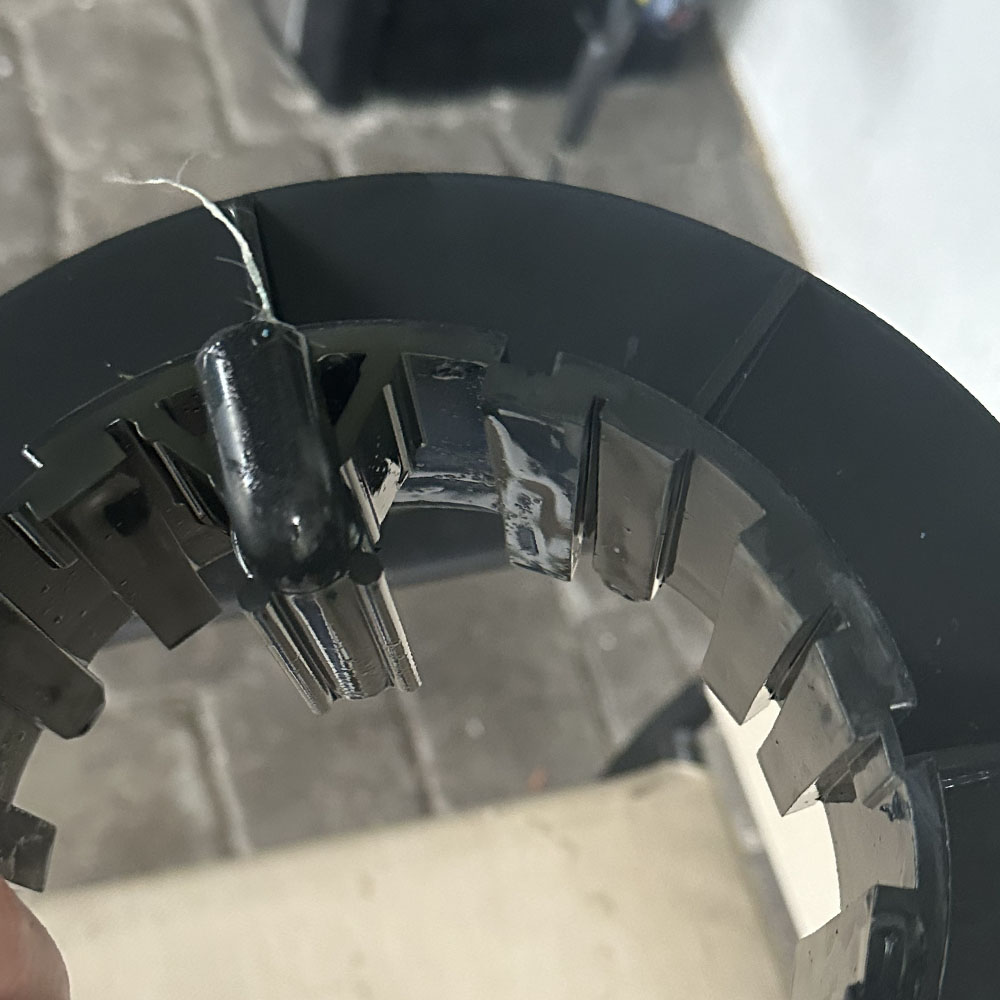
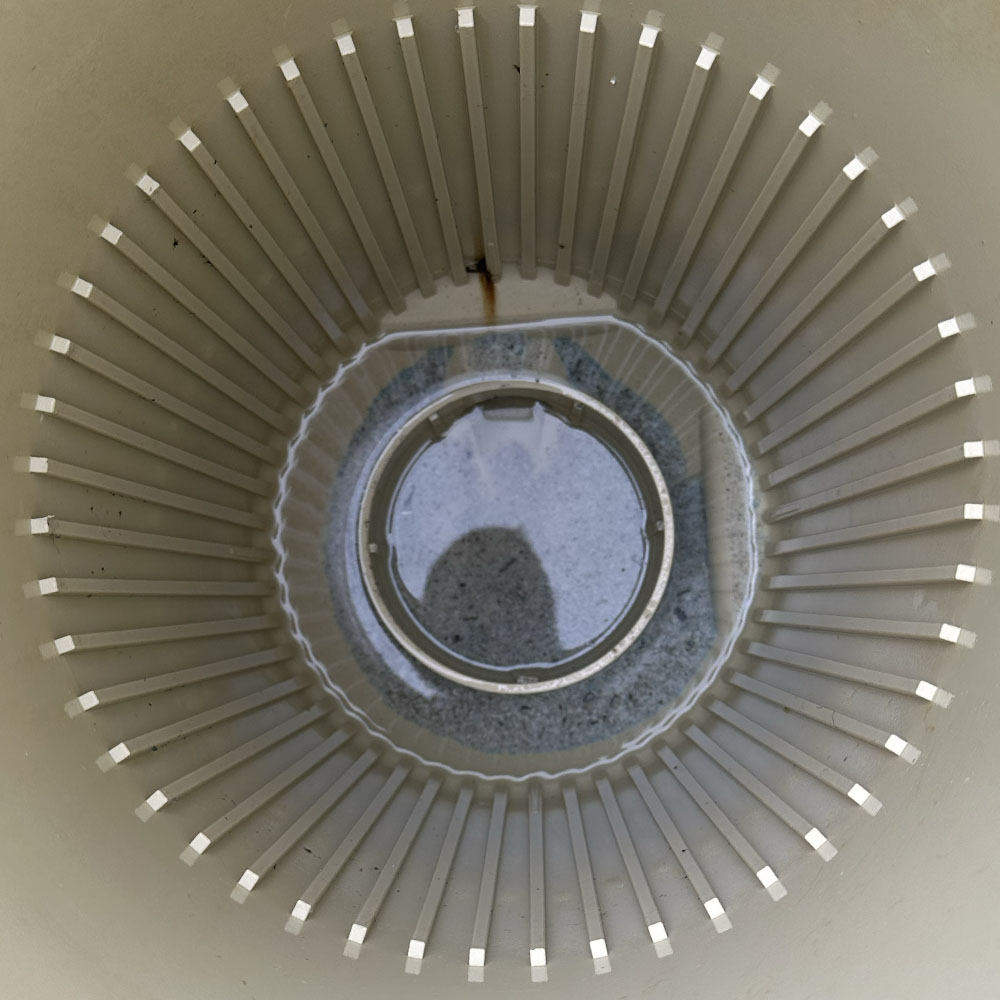
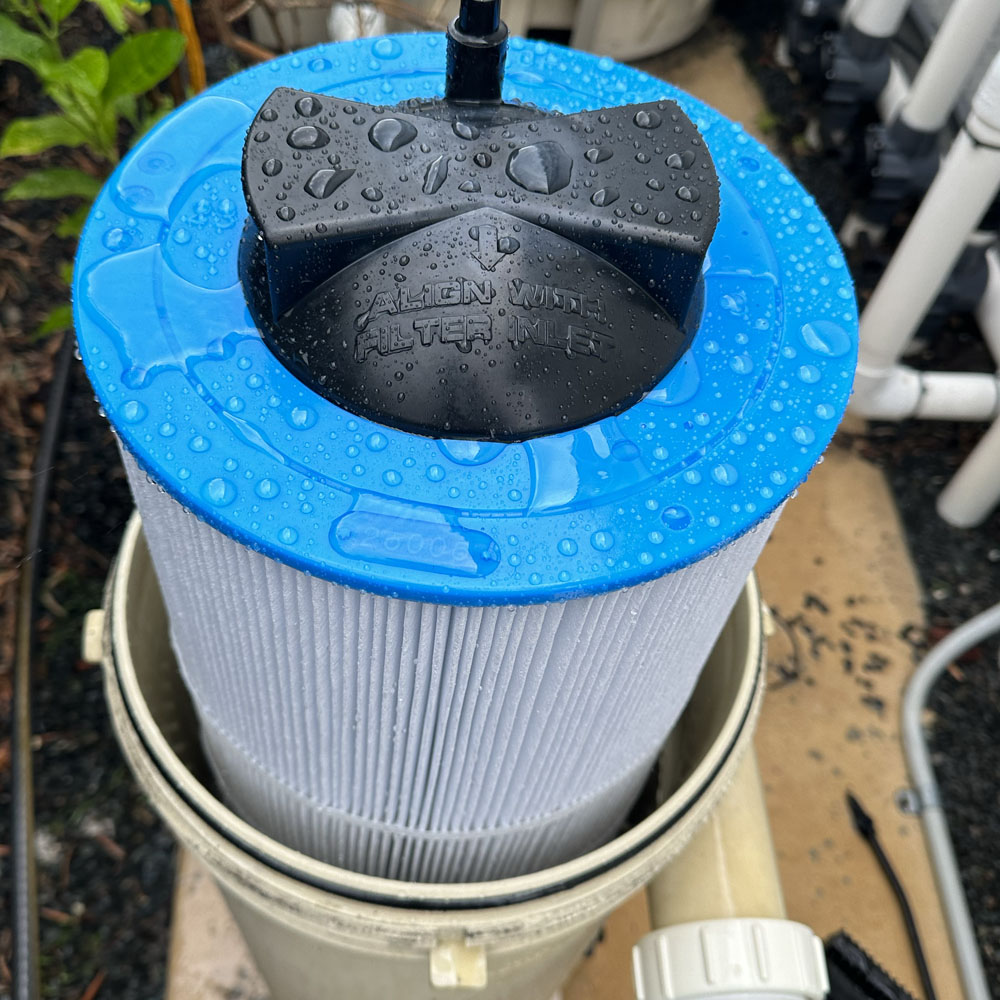
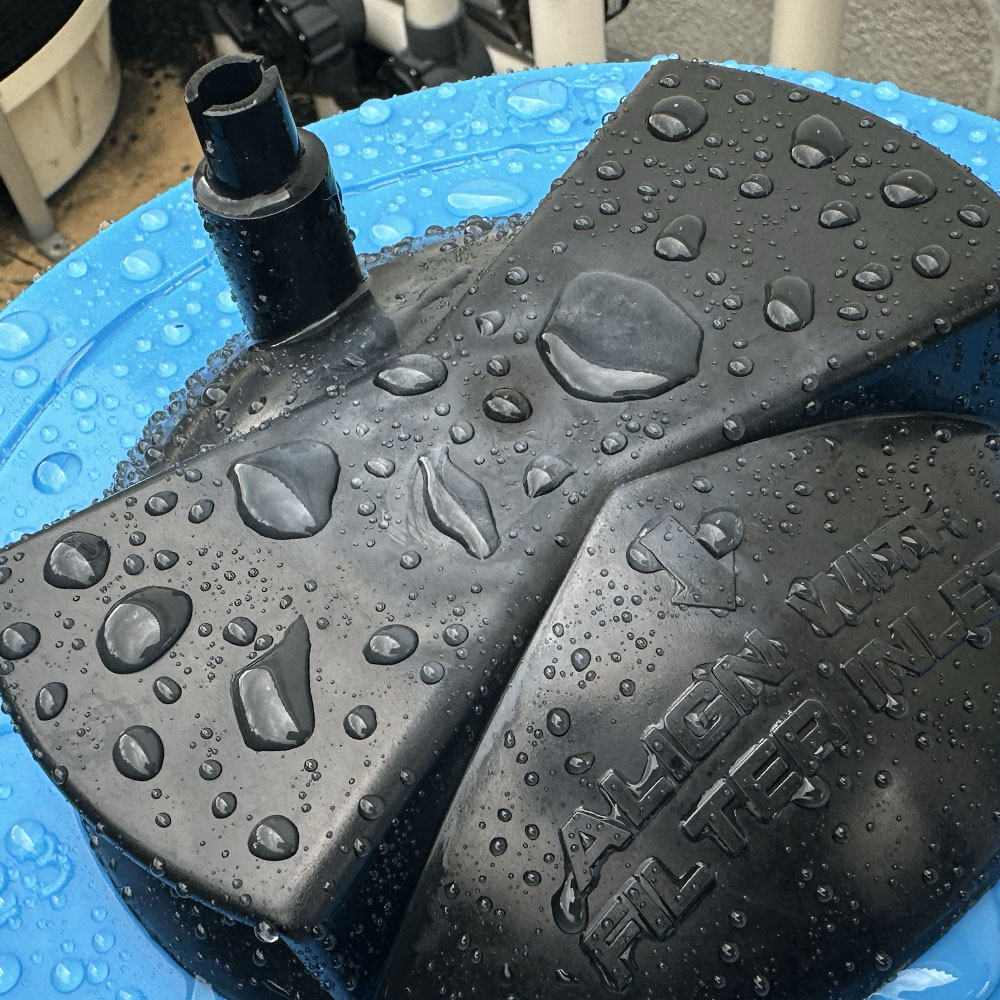
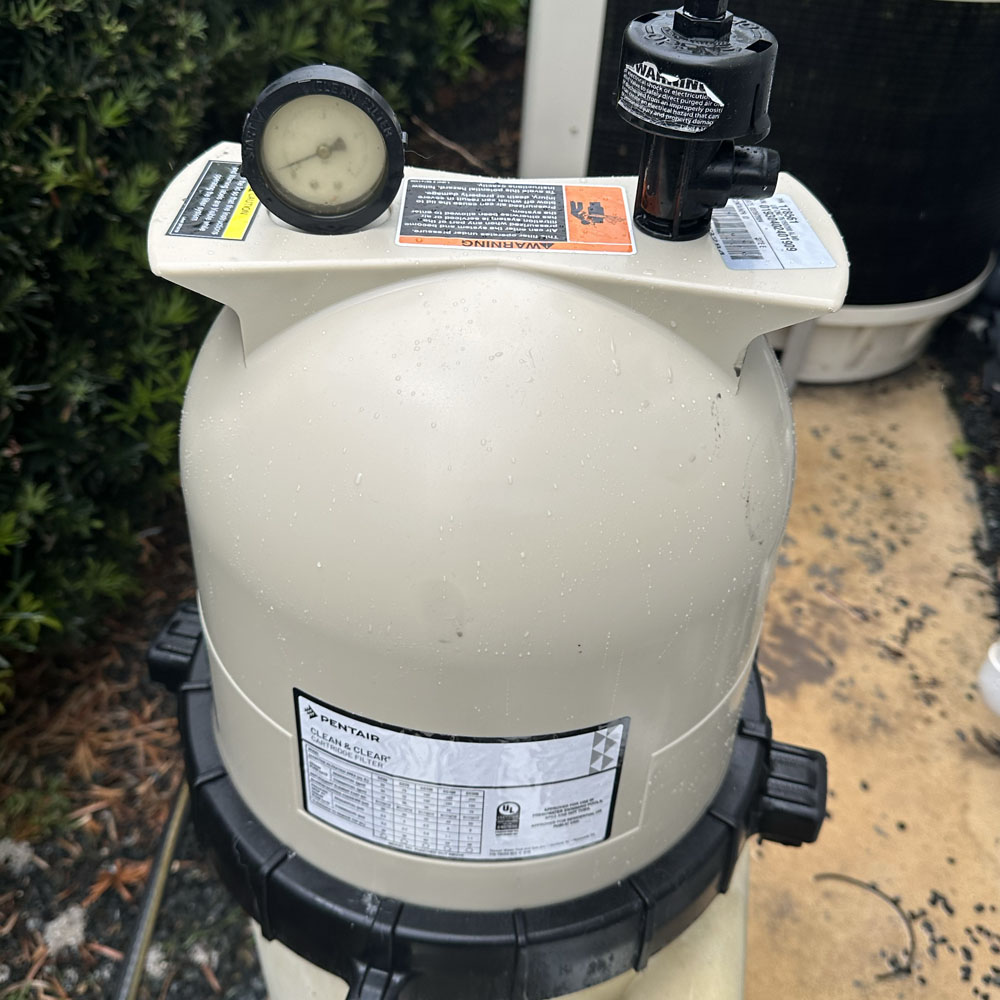
Dealing with Water Pressure (Spiking) – Filter, Pump/Pump Filter etc.
Filters, Filter Housing, Pump – water cycle ecosystem

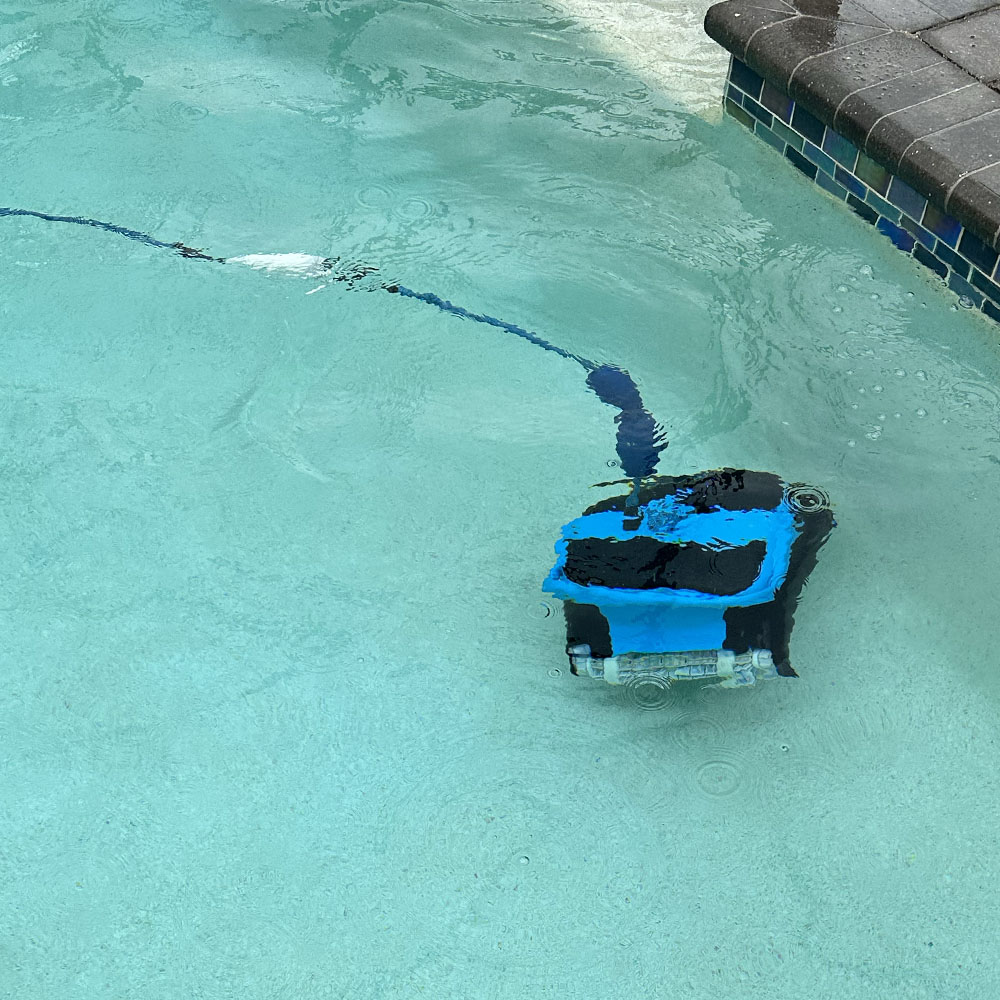
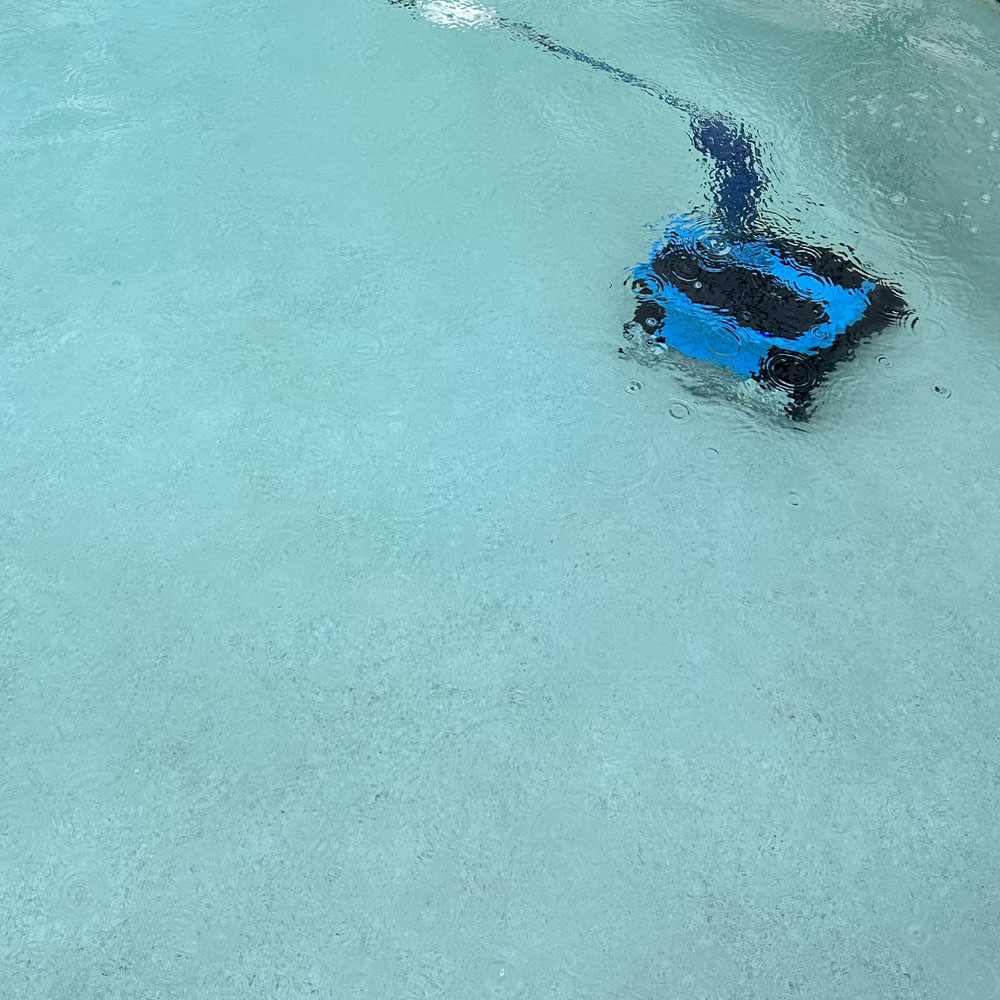
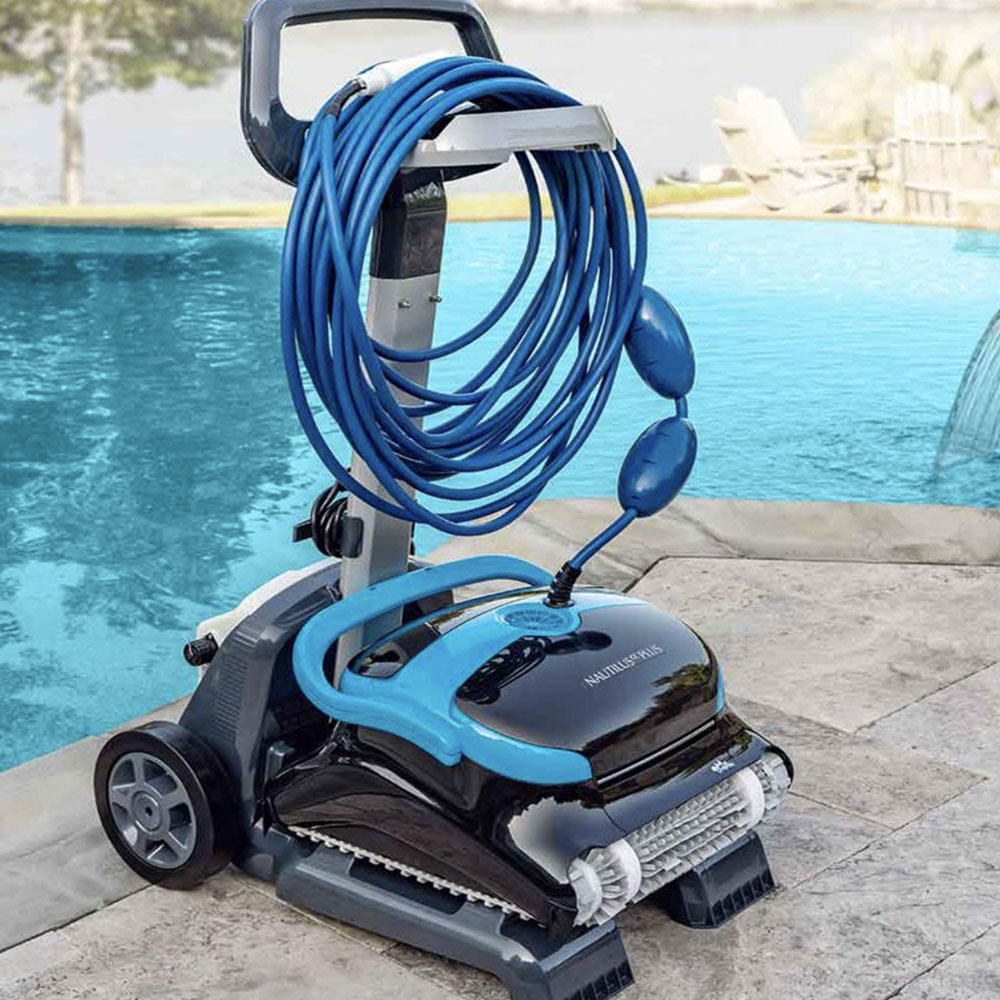
Dolphin Nautilus
Pool Robots by Maytronics

Dolphin Nautilus CC


King Audio Books
Different Seasons, 1922 and 11.22.63

King Books
Dark Souls 3
Dark Souls 3
Lab Work – Dark Souls 3, Elden Ring and Hidetaka Miyazaki
Quick Tip: Float
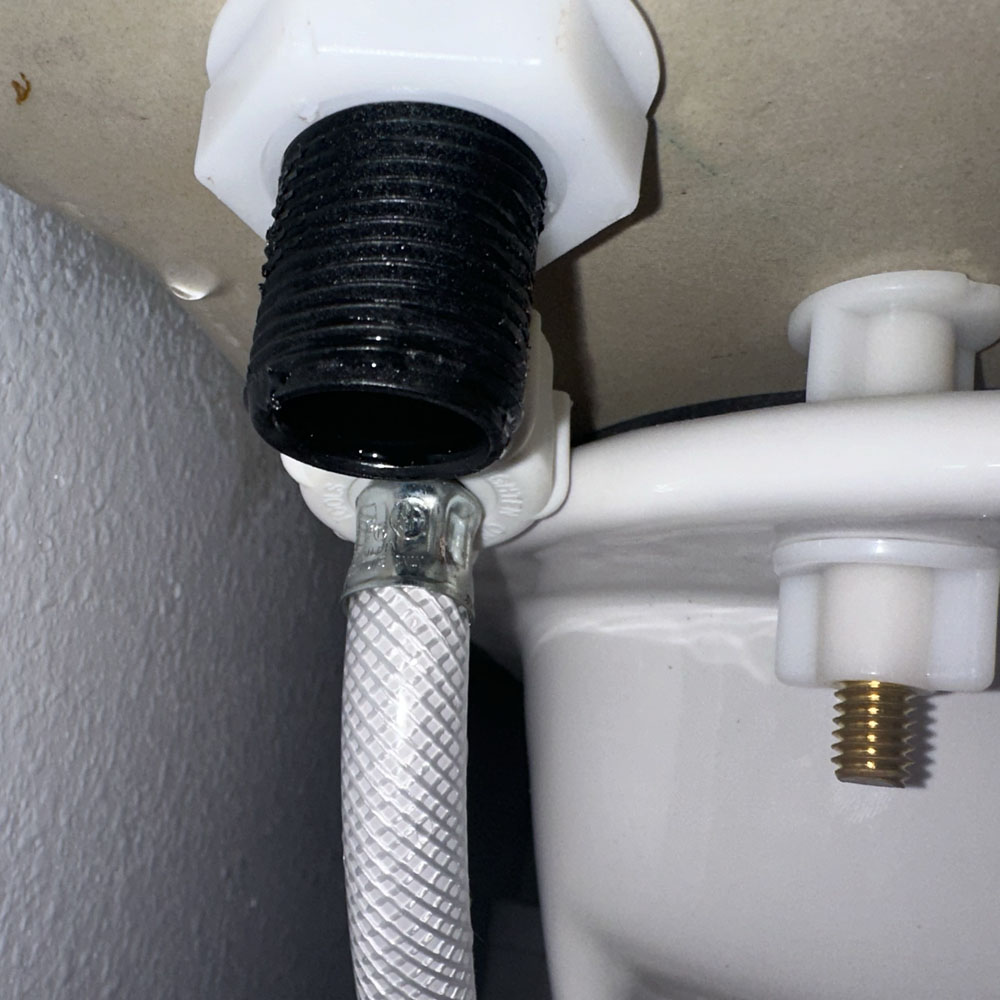
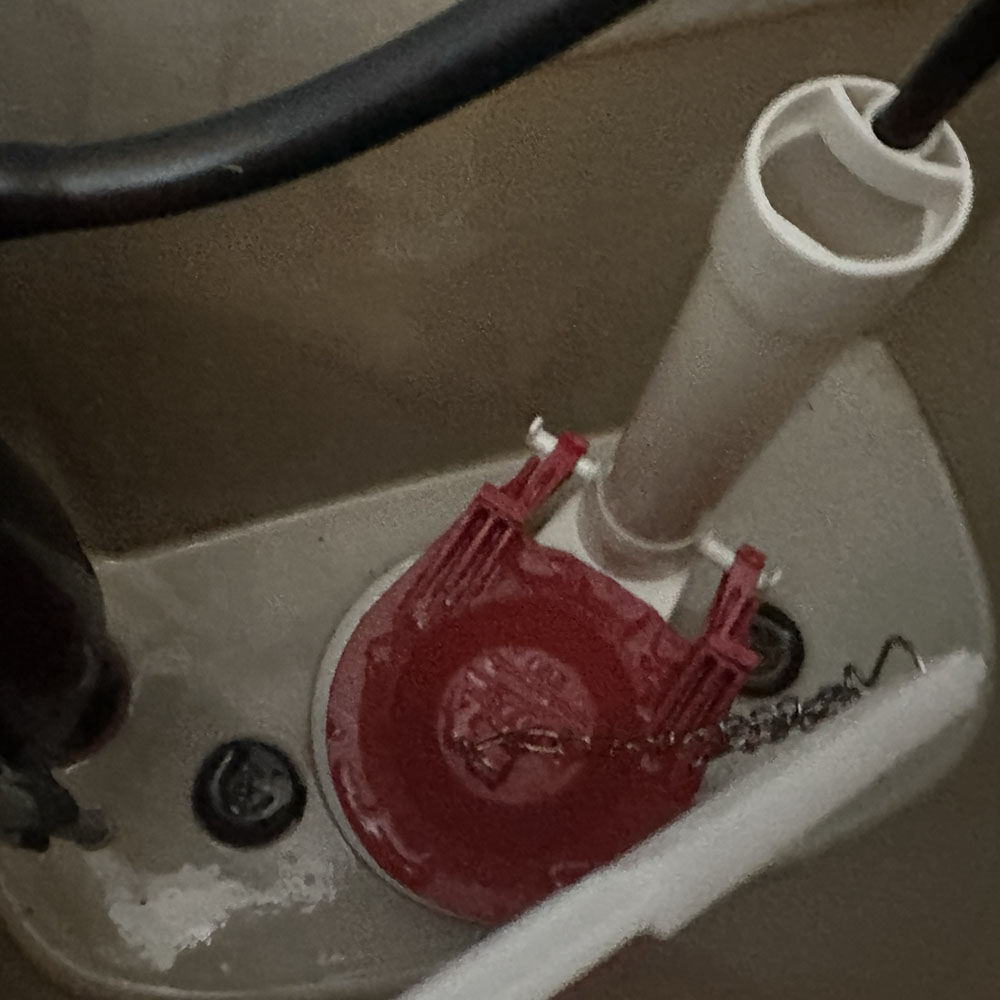
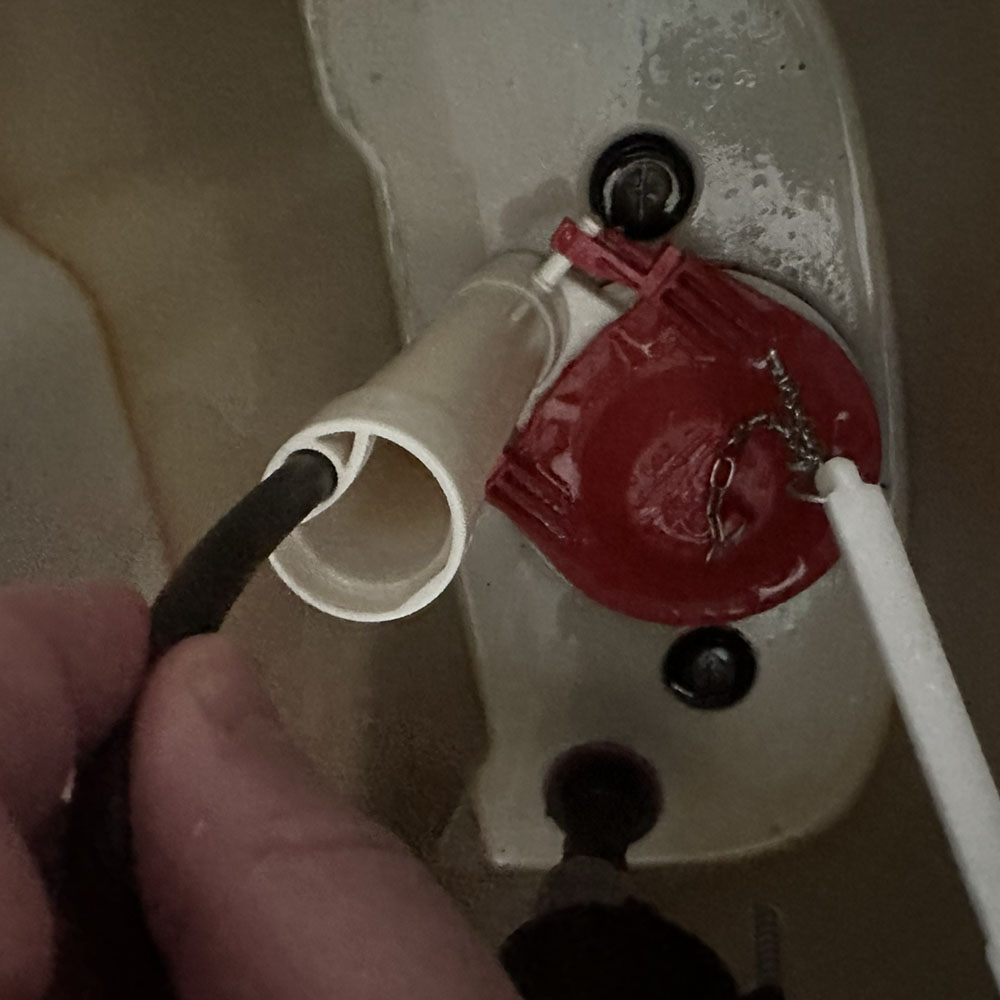
Pesky Toilet – Running Water, Float and the Flap
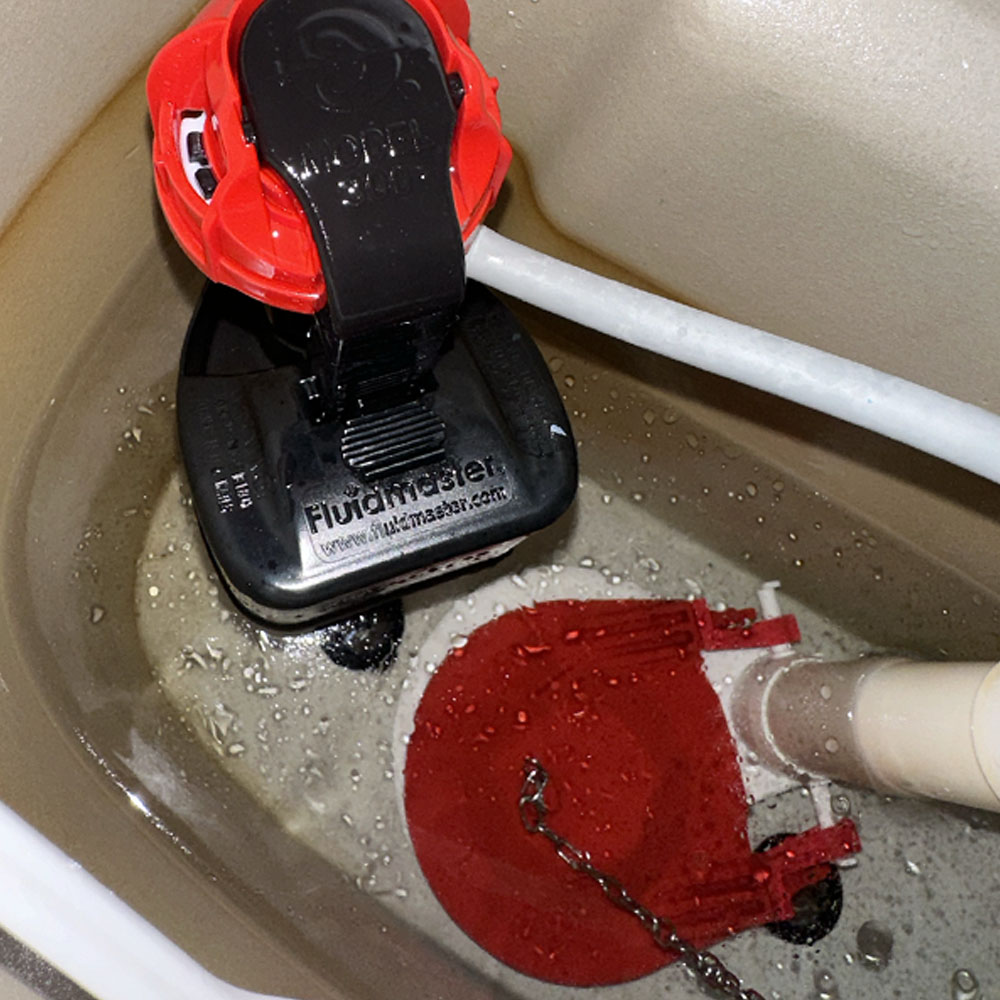
Toilet running (water)? Check the float, the flap, water level and water flow.


Alpha-Numeric Domain Salad
Domain Soup
Finding the right domain name
Elden Ring
Elden Ring
Lab Work – Elden Ring with @RadBrad
Rust @Willjum
Rust
Lab Work – Rust with @Willjum
Holiday ’23
Happy Holiday

Marketing – Year End ’23
Holiday Merchandise
Holiday Gear Update – Richardson Performance Trucker, T’s, Umbrellas and more

Gear – Hats, Nike & Reebok Zips, Polos, T’s, and More
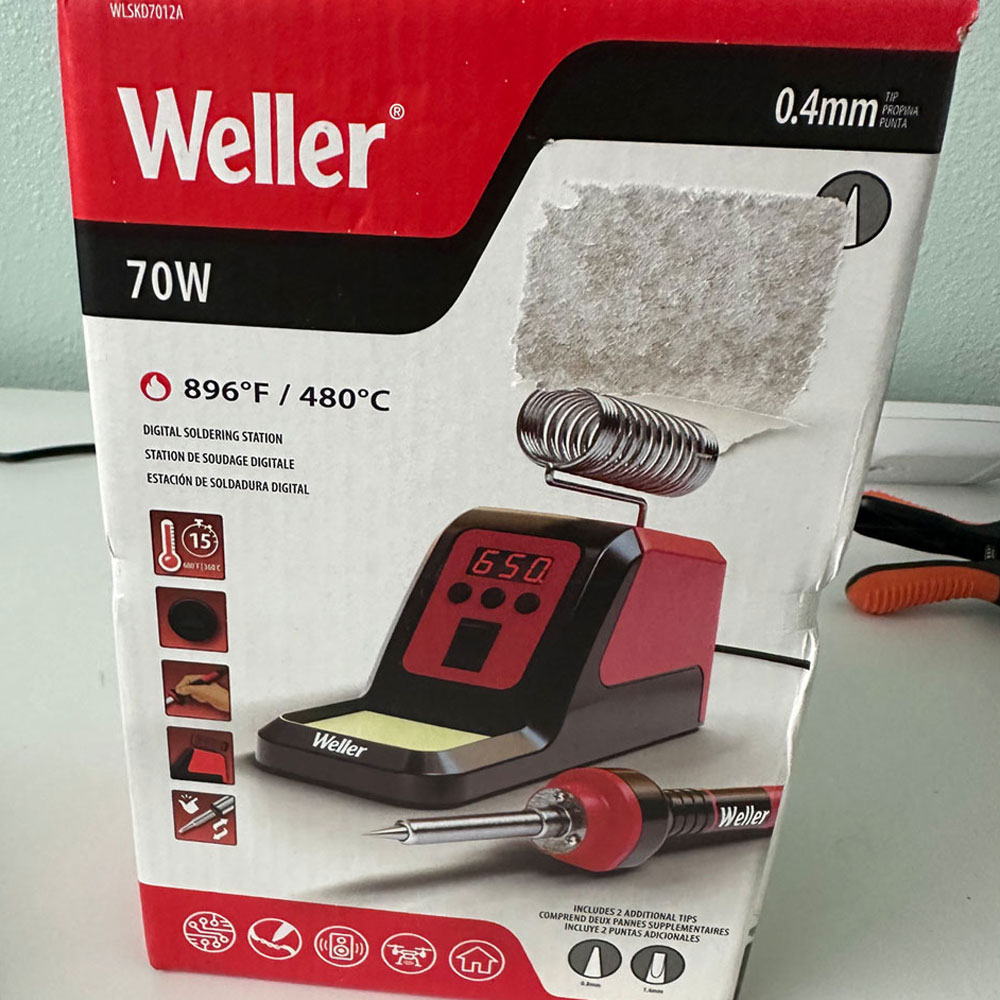
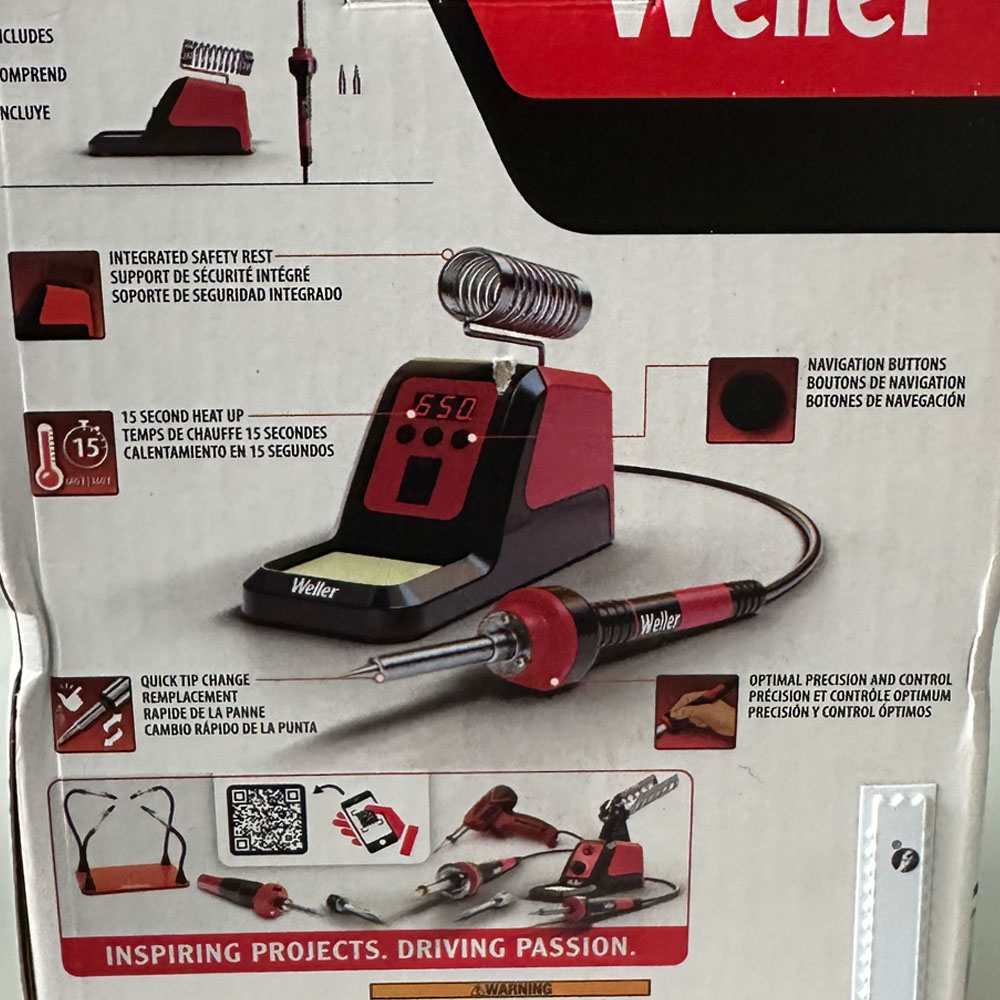
Weller 70w
Weller 70w Solder Kit

Weller Tools


Part 5
Rebuild(s), Sonic Pad Adjustments, Assembly, Part 5
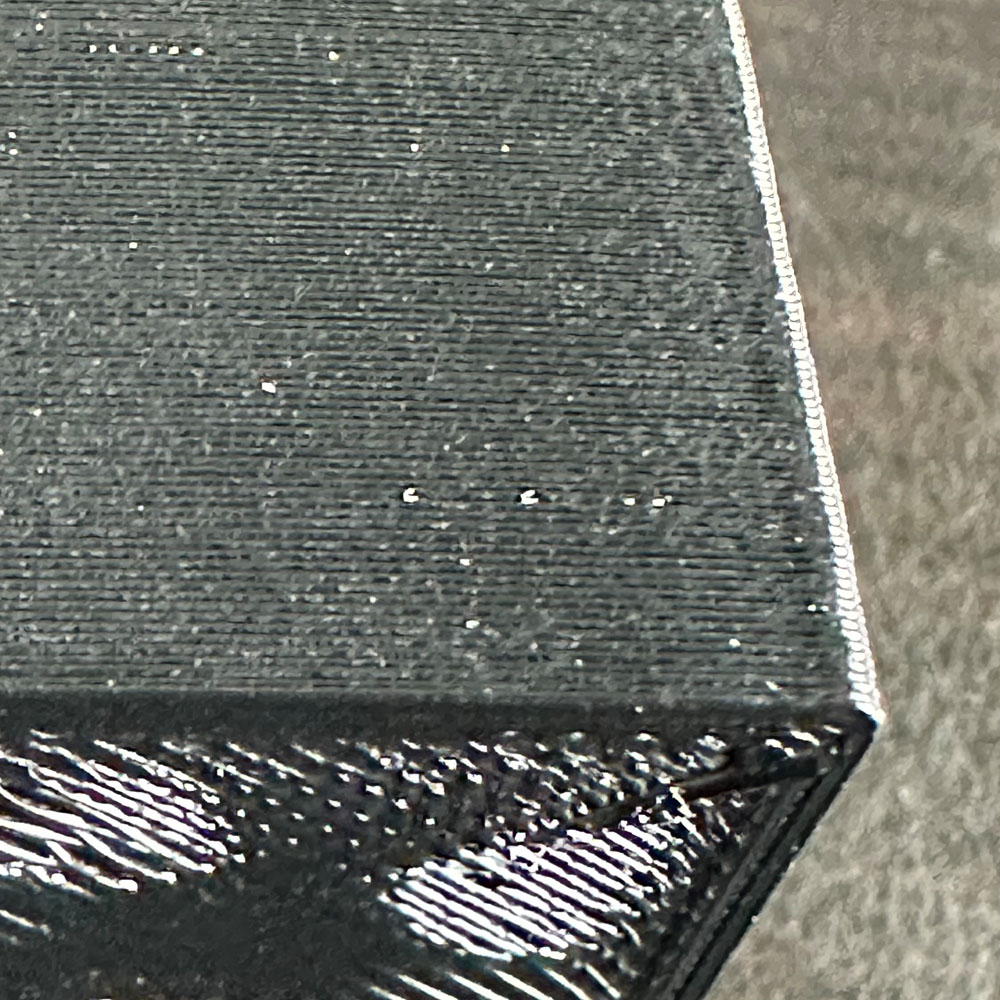
Labwork – Upgrade Part 5

Rebuild Part 4
Miss-Prints, eSteps/Stepper, Filaments and More Rebuild, 4
Labwork – Rebuild Part 4